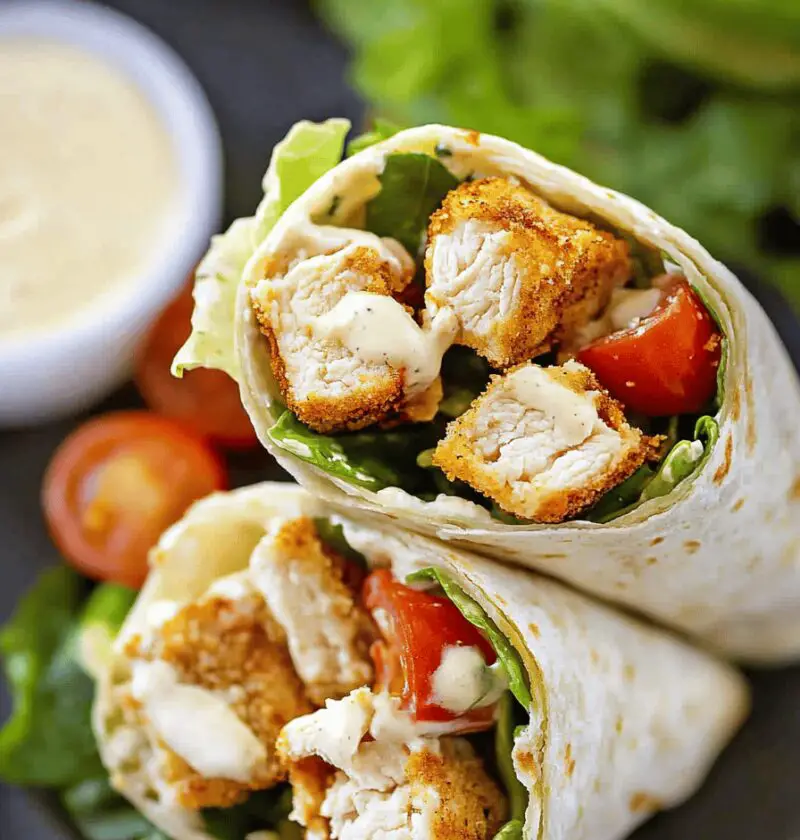
My Chicken Caesar Wrap Epiphany
You know those days when you’re racing home from work, dropping kids off at soccer practice, and realize your stomach is growling louder than a thunderstorm? That was me last Tuesday. I had about five minutes to throw something together before my son’s game (and, let’s be real, my own meltdown). Enter these Chicken Caesar Wraps—my latest obsession and a total lifesaver. They’re cozy enough to feel like a hug in tortilla form, yet light enough that I don’t crash into a food coma right before bedtime.
What’s wonderful about these wraps is how they balance everyday pantry staples with big, craveable flavors. I’m talking tender chicken kissed with tangy Caesar, bright lemony zing, and just enough Parmesan to make you swoon. Whether I’m using leftover rotisserie chicken (my not-so-secret convenience) or quickly searing fresh breasts in a skillet, these wraps come together in about 20 minutes flat. Trust me, once you try them, you’ll want to make a double batch and invite everyone over—or at least have extras for lunch tomorrow (yes, really!).

Why You’ll Love These Chicken Caesar Wraps
- Ready in under 20 minutes—perfect for those “I’m starving NOW” moments.
- Uses simple ingredients you probably already have (hello, rotisserie chicken!).
- No oven required—just a quick skillet or even cold chicken, if you like.
- A healthy twist with Greek yogurt–based Caesar options (lighter but still creamy!).
- Customizable with crunchy bacon bits, croutons, or avocado slices.
- Great for meal prep—assemble fresh or pack components separately to avoid soggy lettuce.
- Versatile for lunchboxes, picnics, or a fuss-free weeknight dinner.
- Bright enough for summer days, hearty enough for chilly evenings.
Ingredient Notes & Casual Tips
Here’s the lowdown on what you’ll need and little swaps that keep things fun:
- Cooked chicken (about 2 cups, shredded or diced) – I usually grab a rotisserie bird from the store. It’s the ultimate shortcut, and the meat’s already perfectly seasoned. If fresh chicken is more your thing, just season breasts with salt and pepper, sear in olive oil until cooked through, then shred.
- Large flour tortillas (4, 10-inch) – Go whole wheat or spinach wraps for extra color and nutrients. You can even try collard greens if you’re feeling grain-free.
- Romaine lettuce (1 head, chopped) – Be sure to pat the leaves dry with paper towels—nobody likes a soggy wrap (ugh).
- Parmesan cheese (½ cup, shaved or grated) – Fresh-shaved adds a bit of elegance, but pre-grated works in a pinch.
- Caesar dressing (⅓ cup) – I’m a sucker for the Greek yogurt–based bottles; they give you that creamy vibe without the heaviness. Or, whisk up your own from mayo, olive oil, lemon juice, garlic, anchovy paste, and a handful of Parmesan.
- Lemon juice (1 tbsp) – Don’t skip this. That gentle citrus pop keeps everything bright and balanced.
- Olive oil (1 tbsp) – Helps marry the dressing ingredients and adds a silky mouthfeel.
- Salt & pepper – I’m talking about a half teaspoon of kosher salt and a quarter teaspoon of freshly ground black pepper. Season to taste.
- Fun add-ins (optional!) – Crushed garlic croutons for extra crunch, bacon bits for smokiness, sun-dried tomatoes for tang, or avocado slices for lush creaminess. (Feel free to mix and match—you do you!)
Step-by-Step Directions
- Whisk the dressing: In a medium bowl, whisk together your Caesar dressing, lemon juice, olive oil, salt, and pepper until everything’s beautifully smooth. If you like your sauce a little thinner, add water, one teaspoon at a time, until it’s just right.
- Marinate the chicken: Toss your shredded chicken with half of the dressing. This quick “marinade” isn’t fancy, but it softens the meat and infuses every bite with flavor. Let it hang out for a minute while you prep the lettuce.
- Toss the greens: Add chopped romaine to the bowl with the remaining dressing. Gently stir so each leaf is lightly coated—remember, we want crispness, not a lettuce soup.
- Build the wrap: Lay a tortilla flat on your workspace. Spoon on a quarter of the dressed chicken, then top with dressed lettuce and a good sprinkle of Parmesan. Pro tip: keep fillings toward the center so nothing falls out when you roll.
- Add your extras: If you’re going wild with croutons, bacon, sun-dried tomatoes, or avocado, now’s your moment. Scatter them on top of the lettuce for that extra layer of texture and flavor.
- Roll it up: Fold the bottom edge of the tortilla over the filling, then tuck in the sides and roll—think of it like swaddling a baby burrito. You want it snug but not bursting at the seams.
- Slice and serve: Cut each wrap diagonally for that picture-perfect look. It’s easier to eat and just… prettier, right?
- Chill or dive in: If you prefer a firmer wrap, let them rest in the fridge for 5–10 minutes. Otherwise, dig right in while everything’s soft and pillowy.
- Pack ‘em up: Wrapping each in parchment or wax paper keeps them from unraveling—ideal for lunchboxes, picnics, or a grab-and-go dinner.
Variations & Flavor Twists
If you want to mix things up (and I know you do), here are a few ideas to spark your creativity:
- Swap the chicken for grilled shrimp—hello, seafood Caesar vibes!
- Use collard green or iceberg lettuce leaves instead of tortillas for a low-carb, gluten-free option.
- Stir in chopped apples or pears for a sweet-crunch contrast that’s downright addictive.
- Mix Greek yogurt into the dressing for extra creaminess—bonus protein, too.
- Add a dash of smoked paprika or cayenne pepper if you like a little kick (I’m obsessed with mild spice).
- Swap romaine for baby spinach, kale, or even arugula for a peppery punch.
- Sprinkle in toasted nuts—pine nuts or sliced almonds add a delightful crunch.
Storage & Reheating Tips
I get it—life’s busy, and leftovers are a gift. Here’s how to keep your wraps tasting fresh:
- Store fully assembled wraps in an airtight container in the fridge for up to 24 hours—just know the lettuce will soften over time (still yum, but not as crisp).
- For longer keeping (up to 2 days), pack chicken and veggies separately. Assemble right before eating to preserve that signature crunch.
- If you’ve frozen cooked chicken or dressing (yes, you can!), thaw overnight in the fridge. Gently reheat chicken in the microwave or on the stovetop—don’t overdo it, or you’ll wilt your greens when you assemble.
- To revive any tortilla stiffness, wrap it in a damp paper towel and warm in the microwave for 10–15 seconds, or heat briefly in a dry skillet.
Let’s Chat!
Well, friend, that’s my take on these cozy Chicken Caesar Wraps—quick, craveable, and perfect for all the busy moments life throws our way. I hope you give them a whirl this week! If you have questions or nifty substitutions that I haven’t mentioned, please drop a comment below. I adore hearing how you make these recipes your own. Until next time, happy cooking and thanks for stopping by!

Chicken Caesar Wraps
Ingredients
- 2 cups cooked chicken breast shredded or diced Rotisserie chicken works like a charm.
- 4 large flour tortillas (10-inch)
- 1 head romaine lettuce washed, dried, and chopped Use crisp leaves—pat them dry to avoid sogginess.
- 1/3 cup Caesar dressing Greek yogurt–based bottle for a lighter touch
Instructions
- Whisk Caesar dressing, lemon juice, olive oil, salt, and pepper until smooth.
- Combine shredded chicken with half the dressing.
- Add chopped romaine to the remaining dressing.
- Lay a tortilla flat, spoon on a quarter of the dressed chicken, then top with dressed lettuce and Parmesan.
- If desired, add croutons, bacon, sun-dried tomatoes, or avocado.
- Fold, tuck in sides, and roll tightly.
- Cut each wrap in half diagonally.
- Pop in the fridge for 5–10 minutes for firmer wraps or enjoy immediately.