Vanilla Paste Recipe
If you’ve ever wished your bakes tasted just a little more “bakery-level,” this Vanilla Paste Recipe is your new secret weapon—rich, fragrant, speckled with real vanilla beans, and perfect for everything from simple sugar cookies to custards and ice cream.
I started making homemade vanilla paste a few years ago when the price of good vanilla bean paste went through the roof, and honestly, I haven’t looked back. This DIY vanilla paste is made with real vanilla beans, a touch of sugar, and glycerin (or alcohol) for a thick, glossy, spoonable “vanilla extract paste” that keeps for months and tastes like pure comfort. If you love baking with vanilla paste or you’ve always wondered how to make vanilla paste at home, you’re in exactly the right place.
Why You’ll Love This Vanilla Paste Recipe
Let’s get right to the good stuff—why this belongs in your kitchen:
- Huge flavor payoff: Way more intense and complex than regular vanilla extract, thanks to whole beans.
- Beautiful vanilla specks: Those tiny black flecks make every dessert look fancy with zero extra effort.
- Budget-friendly luxury: Homemade vanilla paste costs less per tablespoon than most store-bought brands.
- Simple ingredients: Just vanilla beans, sugar, and a liquid base you probably already have.
- Long shelf life: Keeps for months in the pantry or fridge, so you always have natural vanilla paste ready.
- Customizable strength: Make it mild or bold—you control how strong your vanilla paste for desserts is.
- Perfect for baking & cooking: Ideal for cakes, custards, ice cream, frostings, and even coffee.
- Great for gifting: A cute jar of pure vanilla paste recipe with a bow? Instant thoughtful homemade gift.
What Is Vanilla Paste, Really?
Think of vanilla paste as the cozy middle ground between vanilla extract and whole vanilla beans.
You get all the flavor and those gorgeous tiny black seeds you see in high-end ice creams, but you don’t have to fuss with scraping a bean every time you bake. The texture is like a loose gel or syrup—thicker than extract but still pourable or spoonable.
Most store-bought vanilla bean paste is made with:
- Ground vanilla beans
- Sugar or sweetener
- A liquid base (often glycerin or alcohol)
- Sometimes thickeners like xanthan gum
This homemade vanilla paste recipe keeps things simple and natural. You’ll still get concentrated flavor, plenty of vanilla specks, and that deep, warm aroma. I like using it when I want vanilla to be the star—think panna cotta, pastry cream, whipped cream, and simple butter cakes.
You know what’s funny? When I was younger, I thought “vanilla” meant “plain.” Now, at 50, vanilla to me means nostalgic, comforting, and honestly, just a little bit luxurious.
Ingredients
Below is the full ingredient list for this kitchen vanilla paste, with notes and options so you can tweak it to fit your pantry.
- 12–14 whole vanilla beans (Grade B is more economical, but Grade A will work beautifully)
- 1 cup (240 ml) food-grade vegetable glycerin
- OR 1 cup (240 ml) vodka (40% / 80-proof, unflavored) for an alcohol-based paste
- 1/2 cup (100 g) granulated sugar
- You can swap with cane sugar or light brown sugar for a slightly deeper, caramel note
- 2 tablespoons water, if needed (to adjust texture)
Optional but helpful:
- 1/2 teaspoon fine sea salt – just a pinch enhances the vanilla flavor.
- 1/2 teaspoon xanthan gum – if you prefer a thicker, more commercial-style vanilla extract paste.
A few quick ingredient tips:
- Vanilla beans: Look for beans that are plump, flexible, and fragrant. Dry and brittle beans still work since we’re grinding everything, but plump ones are easier to handle.
- Glycerin vs. vodka: Glycerin gives you alcohol-free, slightly sweet homemade vanilla paste. Vodka gives a more traditional extract-style paste and is great for serious bakers.
- Sugar: Don’t cut it out completely; it helps stabilize the paste and rounds the flavor. You can reduce it slightly if you like things less sweet.
Directions: How to Make Vanilla Paste
-
Prep the vanilla beans
Place your vanilla beans on a cutting board. Using a sharp knife, trim off the dried tips if needed. Split each bean lengthwise to reveal the seeds inside. No need to be too precious here; we’re using the whole bean. -
Chop the beans into smaller pieces
After splitting, cut each bean into 1–2 inch pieces. This makes them easier for a blender or food processor to handle and helps them break down faster. -
Add beans, sugar, and liquid to blender
Add the chopped beans, sugar, and glycerin (or vodka) to a high-speed blender or a small but powerful food processor. If your machine is older or a bit fussy, start with half the liquid and add more gradually. -
Blend until thick and speckled
Blend on medium to high speed for 2–4 minutes, stopping to scrape down the sides as needed. You’re aiming for a thick, grainy paste with visible specks—not a completely smooth purée. If it seems too thick to blend, add 1–2 tablespoons of water. -
Check the texture and taste
Carefully (it may be warm from blending) taste a tiny bit with a spoon. It should be very strong, slightly sweet, and pleasantly bitter from the vanilla. If it’s too strong, add a tablespoon or two more sugar or liquid and blend again. -
Optional: Thicken with xanthan gum
If you want a more gel-like commercial vanilla paste, sprinkle in 1/2 teaspoon xanthan gum and blend for another 30 seconds. It will thicken more as it sits. This step is totally optional; I often skip it for a more fluid, rustic paste. -
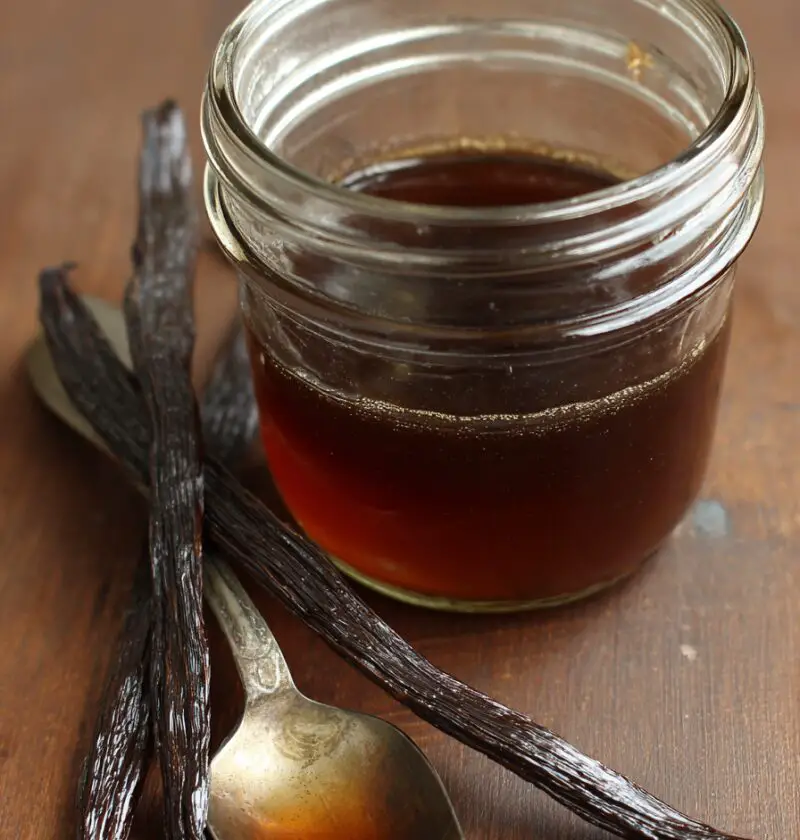
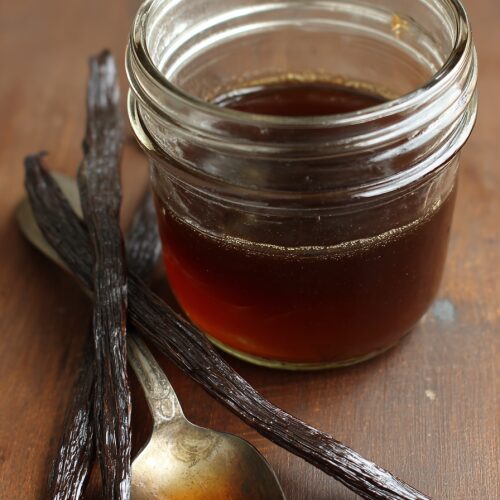
Transfer to a clean jar
Pour or spoon your homemade vanilla paste into a clean glass jar with a tight-fitting lid. Use a spatula to get every last bit; that stuff is liquid gold. Label the jar with the date and whether you used glycerin or alcohol. -
Let it rest for full flavor
You can technically use it right away, but if you let it sit at least 24–48 hours, the flavors mellow and deepen. Store the jar at room temperature (if made with alcohol) or in a cool, dark cupboard or the fridge (if made with glycerin).
Servings & Timing
- Yield: About 1 1/2 to 2 cups vanilla paste (roughly 24–32 tablespoons)
- Prep Time: 15–20 minutes
- Rest Time: At least 24 hours for best flavor (though you can taste it sooner)
- Total Time: About 24 hours (hands-on time is under 20 minutes; the rest is resting time)
As a quick usage guide: 1 tablespoon vanilla paste ≈ 1 tablespoon vanilla extract or 1 vanilla bean in many recipes.
Simple Variations to Try
Once you’ve got the basic vanilla paste recipe down, you can play a little:
- Bourbon Vanilla Paste: Swap vodka for bourbon for a warm, caramel-leaning flavor—amazing in brownies and pecan pie.
- Brown Sugar Vanilla Paste: Use all light brown sugar for a deeper, molasses-kissed vanilla paste for fall and holiday baking.
- Honey-Sweetened Vanilla Paste: Replace half the sugar with mild honey for a floral note in custards and yogurt.
- Extra-Strong Vanilla Paste: Add 4–6 more beans for an ultra-concentrated vanilla paste for professionals or frequent bakers.
- Citrus-Kissed Vanilla Paste: Add 1 teaspoon finely grated orange or lemon zest to the blender for a subtle, bright twist.
- Coffee Vanilla Paste: Blend in 1 tablespoon instant espresso powder for a mocha-style paste perfect for tiramisu or mocha frosting.
Storage & Make-Ahead Tips
Homemade vanilla paste keeps very well, which makes it perfect for planning ahead.
- Room temperature (alcohol-based): Store in a cool, dark place for 6–12 months. Shake occasionally.
- Fridge (glycerin-based): Store in the refrigerator for up to 6 months, possibly longer if it still smells and tastes fresh.
- Freezer: Not usually necessary, but you can freeze in small silicone molds or ice cube trays for long-term storage. Thaw cubes in the fridge.
A few practical notes:
- It’s normal for the paste to separate slightly over time—just stir or shake before using.
- If it thickens too much, stir in a teaspoon of glycerin or vodka to loosen it.
- For gifting, use small 4–oz glass jars and include a note: “1 tablespoon vanilla paste = 1 tablespoon vanilla extract.”
Reheating isn’t really a thing here, but if your paste gets very stiff in the fridge, let the jar sit at room temperature for 10–15 minutes before using.
Notes from My Kitchen (What I Learned Testing This)
- High-speed blender vs. food processor: My Vitamix gives the smoothest vanilla paste from beans, but a good mini food processor works just fine. If your machine struggles, blend in shorter bursts and add a splash of liquid.
- Don’t stress about perfect grinding: Some tiny fibrous bits from the vanilla pods are normal. They disappear in batters and custards. If you want it very smooth, you can strain through a fine mesh sieve, but you’ll lose some specks and flavor.
- Glycerin paste tastes sweeter: When I tested side-by-side, the glycerin version tasted rounder and sweeter, while the vodka version tasted cleaner and more “extract-like.” Both are lovely; it’s personal preference.
- Label your jar clearly: Ask me how I once added vanilla paste instead of balsamic glaze to a sauce because I was in a hurry and grabbed the wrong jar. Let’s just say the chicken was… interesting.
- Flavor builds with time: On day one, the flavor is strong but a bit sharp. By week two, it mellows and becomes deeper and more complex. So if your first spoonful tastes a little “raw,” give it time.
FAQs
1. How do I use vanilla paste in recipes that call for vanilla extract?
Use it 1:1—if a recipe calls for 1 teaspoon vanilla extract, use 1 teaspoon vanilla paste. You’ll get a stronger vanilla flavor and beautiful specks.
2. Can I make this vanilla bean paste recipe without alcohol?
Yes, absolutely. Use food-grade vegetable glycerin instead of vodka for a fully alcohol-free DIY vanilla paste.
3. What kind of vanilla beans are best?
I like Madagascar Bourbon vanilla beans for classic, warm flavor, but Tahitian beans are wonderful for a more floral note. Grade B beans are usually cheaper and perfect for this recipe.
4. Do I need to refrigerate homemade vanilla paste?
If you use vodka, room temperature is fine. With glycerin, I prefer the fridge to be safe, especially if your kitchen runs warm.
5. My paste seems grainy—did I do something wrong?
A slightly grainy texture is normal because you’re using the whole beans and sugar. It will soften a bit as it sits and once it’s mixed into batters or creams, you won’t notice.
6. Can I use a regular blender?
Yes, but you may need to blend longer and scrape the sides more often. If your blender struggles, chop the beans very small first and add a tablespoon or two of extra liquid.
7. Is this stronger than store-bought vanilla extract?
Generally, yes. This natural vanilla paste is more concentrated and has flavor from both the seeds and the pod itself, so start with the same amount and adjust up if you like more intensity.
8. Can I reduce the sugar?
You can, but don’t remove it entirely. Sugar helps balance bitterness and stabilize the paste. Try reducing to 1/3 cup if you prefer it less sweet and see how you like the flavor.
Cooking & Baking with Vanilla Paste
Once you make your own vanilla paste from beans, you’ll want to put it in everything—ask me how I know.
Here are a few favorite ways to use it:
- Stir a 1/2 teaspoon into your morning coffee or latte.
- Whisk into homemade whipped cream right at the end.
- Add to pancake or waffle batter for a weekend breakfast that tastes like a hotel buffet.
- Use it in cheesecakes, pound cakes, sugar cookies, and buttercream frosting.
- Swirl a spoonful into plain yogurt or oatmeal with berries.
If a recipe is very delicate—like a plain vanilla panna cotta or a classic crème brûlée—this is where cooking with vanilla paste really shines. The flavor doesn’t bake off the way some extracts can, and you get those pretty specks in every spoonful.
Conclusion
This Vanilla Paste Recipe is one of those small, quiet upgrades that changes the way your whole kitchen tastes. With a handful of simple ingredients and a blender, you can make a natural, pure vanilla paste recipe that’s rich, aromatic, and a joy to use in everyday cooking and baking.
If you give this homemade vanilla paste a try, I’d love to hear how you use it—cookies, cakes, coffee, all of the above? Leave a comment, share your favorite vanilla dessert, and if you’re curious, you can also explore other homemade staples like vanilla sugar or simple syrups to build out your baking pantry.
Vanilla Paste
Ingredients
- 12–14 whole vanilla beans Grade B preferred for economy, Grade A also works
- 1 cup food‑grade vegetable glycerin or 1 cup (240 ml) vodka (40% / 80‑proof, unflavored) for alcohol-based paste
- 1/2 cup granulated sugar can substitute cane sugar or light brown sugar
- 2 tablespoons water as needed to adjust texture
- 1/2 teaspoon fine sea salt optional, enhances vanilla flavor
- 1/2 teaspoon xanthan gum optional, for a thicker commercial-style paste
Instructions
- Place the vanilla beans on a cutting board. Using a sharp knife, trim off any very dry tips if needed. Split each bean lengthwise to reveal the seeds inside. You will use the entire bean, so no need to scrape the seeds out separately.12–14 whole vanilla beans
- After splitting, cut each vanilla bean into 1–2 inch (2.5–5 cm) pieces. This makes them easier for a blender or food processor to break down.12–14 whole vanilla beans
- Add the chopped vanilla beans, sugar, and vegetable glycerin (or vodka) to a high-speed blender or a small but powerful food processor. If your machine is weaker, start with about half of the liquid and add the rest gradually as it blends.12–14 whole vanilla beans, 1 cup food‑grade vegetable glycerin, 1/2 cup granulated sugar
- Blend on medium to high speed for 2–4 minutes, stopping to scrape down the sides as needed. Aim for a thick, grainy paste with visible vanilla specks, not a completely smooth purée. If the mixture is too thick to blend, add 1–2 tablespoons of water to loosen it.12–14 whole vanilla beans, 1 cup food‑grade vegetable glycerin, 1/2 cup granulated sugar, 2 tablespoons water
- Carefully taste a tiny amount; it may be slightly warm from blending. The paste should be very strong, slightly sweet, and pleasantly bitter from the vanilla. If it tastes too intense or thick, add a bit more sugar or liquid and blend again until you like the flavor and consistency.1 cup food‑grade vegetable glycerin, 1/2 cup granulated sugar, 2 tablespoons water
- For enhanced flavor, blend in the fine sea salt. For a thicker, gel-like commercial-style paste, sprinkle in the xanthan gum and blend for another 30 seconds. The paste will continue to thicken slightly as it rests.1/2 teaspoon fine sea salt, 1/2 teaspoon xanthan gum
- Spoon or pour the vanilla paste into a clean glass jar with a tight-fitting lid, using a spatula to scrape out every bit. Label the jar with the date and note whether you used glycerin or alcohol as the base.
- You can use the vanilla paste immediately, but for the best flavor let it rest for 24–48 hours. Store alcohol-based paste at room temperature in a cool, dark place. Store glycerin-based paste in a cool cupboard or in the refrigerator.
Notes
- Bourbon Vanilla Paste: Use bourbon instead of vodka for warm, caramel notes.
- Brown Sugar Vanilla Paste: Use all light brown sugar for a deeper, molasses-like flavor.
- Honey-Sweetened: Replace half the sugar with mild honey for a floral note.
- Extra-Strong: Add 4–6 additional vanilla beans for ultra-concentrated paste.
- Citrus-Kissed: Add 1 teaspoon finely grated orange or lemon zest to the blender.
- Coffee Vanilla Paste: Add 1 tablespoon instant espresso powder for mocha-style paste. Storage:
- Alcohol-based: Store at room temperature in a cool, dark place for 6–12 months; shake occasionally.
- Glycerin-based: Store in the refrigerator for up to 6 months or until it no longer smells or tastes fresh.
- Separation is normal; stir or shake before using. If it thickens too much, stir in a little glycerin or vodka to loosen. Serving ideas: Stir into coffee, whipped cream, yogurt, oatmeal, pancake or waffle batter, cakes, cookies, cheesecakes, custards, ice creams, and buttercreams.