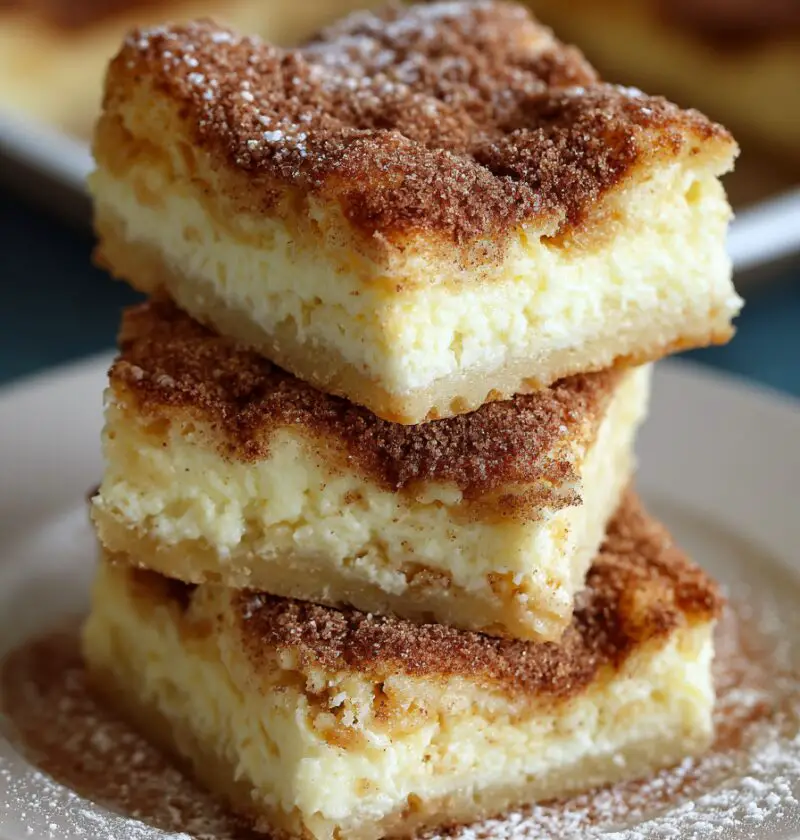
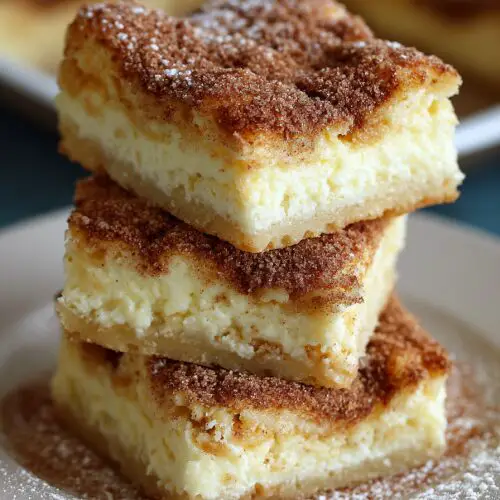
Sopapilla Cheesecake Bars Recipe
Warm, cinnamon-sugar crisp on top, creamy cheesecake in the middle, and an easy crescent roll crust on the bottom—this Sopapilla Cheesecake Bars Recipe is everything you love about a bakery-style dessert, baked in one simple pan for parties, potlucks, and busy weeknights.
I’m a 50-year-old mom who has carried pans of these sopapilla dessert bars to church socials, school events, and backyard cookouts for years, and they always disappear before anything else on the table. Think classic baked cheesecake bars meets Mexican-inspired dessert, with layers of buttery dough, sweet cream cheese filling, and a crackly cinnamon sugar topping that makes the whole house smell like a festival.
They’re not fussy, they’re not fancy, but they hit that sweet spot between comfort food and “wow, who brought those?”—and that’s exactly what I want from a crowd-pleasing dessert recipe.
Why You’ll Love This Sopapilla Cheesecake Bars Recipe
- Ridiculously easy – Uses refrigerated crescent roll dough and a simple cream cheese filling, so no special baking skills needed.
- Crowd-pleasing flavor – Tastes like a mash-up of churros, sopapillas, and cheesecake bars in one cozy, cinnamon-kissed bite.
- Perfect for potlucks and parties – Makes a big 9×13 pan you can slice into neat little dessert bars for a crowd.
- Make-ahead friendly – Even better after chilling, so you can bake the day before and relax when guests arrive.
- Simple pantry ingredients – Crescent roll crust, sugar, cream cheese, vanilla, butter, and cinnamon—nothing fancy or hard to find.
- Customizable – Easy to tweak into fruit-filled, chocolate-drizzled, or lighter versions without changing the base recipe.
- Great warm or chilled – Serve warm for a soft, gooey center or chilled for classic firm cheesecake bars.
- Travel-friendly – Bakes in one pan, no frosting to melt, and holds up well on a buffet table.
Ingredients for the Best Sopapilla Cheesecake Bars
You don’t need much for this Sopapilla Cheesecake Bars Recipe, but quality matters. Use full-fat cream cheese for the best texture and flavor—it really makes a difference.
For the Crescent Roll Crust & Topping
- 2 cans (8 oz each) refrigerated crescent roll dough
- Or 2 cans crescent roll “sheets” if you can find them—no seams to press together.
- 1/2 cup (1 stick / 113 g) unsalted butter, melted
- 1 cup (200 g) granulated sugar, divided (3/4 cup for cinnamon sugar, 1/4 cup for filling boost if you like it sweeter)
- 1 1/2 teaspoons ground cinnamon
- Pinch of kosher salt (helps balance all the sweetness)
For the Cream Cheese Filling
- 16 oz (2 blocks / 454 g) cream cheese, softened to room temperature
- 3/4 cup (150 g) granulated sugar
- 2 teaspoons pure vanilla extract (Mexican vanilla if you have it is lovely here)
- 1 tablespoon milk or heavy cream (for extra silky texture; optional)
Optional Garnishes
- Honey, for drizzling (a nod to traditional sopapillas)
- Fresh berries or sliced strawberries, for serving
- Powdered sugar, lightly dusted on top after cooling
A quick tip from years of testing: set your cream cheese out on the counter 45–60 minutes before baking. Soft cream cheese blends smoother, so your cheesecake layer bakes up creamy, not lumpy.

Step-by-Step Directions
-
Preheat the oven and prep the pan.
Preheat your oven to 350°F (175°C). Lightly grease a 9×13-inch baking dish or line it with parchment paper, leaving a bit of overhang on the long sides so you can lift the bars out later. This little parchment “sling” makes clean slicing much easier. -
Mix the cinnamon sugar topping.
In a small bowl, stir together 3/4 cup sugar, 1 1/2 teaspoons cinnamon, and a pinch of salt. Set aside. You’ll sprinkle this between the layers and on top for that iconic sweet cinnamon dessert crunch. -
Make the cream cheese filling.
In a medium or large mixing bowl, beat the softened cream cheese with a hand mixer (or stand mixer) on medium speed until smooth and fluffy, about 1–2 minutes. Add 3/4 cup sugar and continue mixing until well combined and creamy. Beat in the vanilla and the milk or cream (if using) until silky. Scrape the bowl as needed; no stubborn cream cheese bits hiding in the corners. -
Lay down the bottom crescent roll crust.
Open one can of crescent dough and gently unroll it. If you’re using regular crescent rolls, press the seams together with your fingers to make one solid sheet. Transfer the dough to the bottom of the prepared pan, stretching and patting it into an even layer all the way to the edges and corners. -
Spread on the cheesecake layer.
Pour the cream cheese filling over the crescent roll crust. Use an offset spatula or the back of a spoon to spread it into an even layer. Try not to dig into the dough underneath; think gentle, sweeping motions. -
Add a little cinnamon sugar in the middle (optional but delicious).
Sprinkle 2–3 tablespoons of the cinnamon-sugar mixture lightly over the cream cheese layer. This step isn’t mandatory, but it adds a lovely inner ribbon of warm spice that reminds me of cinnamon toast from my childhood. -
Top with the second crescent roll sheet.
Unroll the second can of crescent dough. Just like before, press the seams together if needed. Carefully place it over the cream cheese filling. If it tears, don’t panic—just patch it together with your fingers. It doesn’t have to look perfect; the cinnamon sugar topping will cover a lot. -
Pour on the butter and sprinkle the cinnamon sugar.
Slowly drizzle the melted butter over the top layer of crescent dough. Try to cover most of the surface. Then generously sprinkle all the remaining cinnamon sugar over the buttered top. You should have a thick, even blanket of cinnamon sugar. This is what gives you that sopapilla-style crackly crust. -
Bake until golden and bubbly.
Bake in the preheated oven for about 28–35 minutes, or until the top is deeply golden, the edges are bubbling slightly, and the center feels mostly set when you jiggle the pan. Every oven runs a little different, so start checking around 25 minutes. -
Cool, then chill for clean slices.
Let the pan cool on a wire rack until it’s close to room temperature, at least 45–60 minutes. For the neatest cheesecake bars, cover and chill for another 2–3 hours (or overnight) before cutting. If you like them warm and slightly gooey, you can cut sooner—just know the slices will be softer and more rustic. -
Slice and serve.
Use a sharp knife to cut the sopapilla cheesecake into 16–24 bars, depending on how big you like them. If you used parchment, lift the whole slab out first for tidier cuts. Drizzle with honey, sprinkle with powdered sugar, or serve as-is. They’re pretty irresistible either way.
Servings & Timing
- Yield: About 16–24 sopapilla cheesecake bars
- Prep Time: 15–20 minutes
- Bake Time: 28–35 minutes
- Chill Time (recommended): 2–3 hours
- Total Time: About 3–4 hours, mostly unattended cooling and chilling
If you’re making these for a gathering, I like to bake them the night before. They set up beautifully in the fridge, and there’s one less thing on your to-do list the day of the event.
Easy Variations & Fun Twists
You know what? Once you make this Sopapilla Cheesecake Bars Recipe once, you’ll probably start dreaming up your own versions. Here are some of my favorites:
- Fruit Swirl Sopapilla Cheesecake Bars – Gently swirl 1/2–3/4 cup seedless raspberry jam, strawberry preserves, or dulce de leche into the cream cheese filling before adding the top dough.
- Caramel Pecan Sopapilla Bars – Sprinkle 1/2 cup chopped toasted pecans over the cream cheese layer and drizzle with a few tablespoons of caramel sauce before topping with dough.
- Chocolate Chip Cheesecake Bars – Fold 1/2 cup mini chocolate chips into the cream cheese filling for a kid-approved twist.
- Lighter Version – Use reduced-fat cream cheese and cut the sugar back by 2–3 tablespoons; the texture stays pleasant, though not quite as rich.
- Spiced Holiday Sopapilla Bars – Add 1/4 teaspoon nutmeg and 1/4 teaspoon allspice to the cinnamon sugar for a cozier, wintery flavor.
- Honey-Lime Finish – Stir a teaspoon of lime zest into the cream cheese filling and drizzle the cooled bars with honey and a tiny squeeze of lime juice before serving.
Storage & Reheating Tips
-
Fridge:
Store leftover cheesecake bars covered in the refrigerator for up to 4–5 days. I usually keep them right in the baking pan covered tightly with foil or beeswax wrap, or in an airtight container. -
Freezer:
These crescent roll cheesecake bars freeze surprisingly well. Chill completely, then wrap individual bars in plastic wrap and place them in a freezer bag or container. Freeze for up to 2 months. -
Thawing:
For frozen bars, thaw in the fridge overnight or on the counter for 30–45 minutes. The cinnamon sugar topping softens slightly after freezing but still tastes wonderful. -
Reheating (if you like them warm):
While they’re usually served chilled or at room temperature, you can warm a bar in the microwave for 10–15 seconds for a softer, almost gooey texture. Just don’t overheat or the cream cheese can separate a bit. -
Make-Ahead:
This Sopapilla Cheesecake Bars Recipe is very make-ahead friendly. Bake a day in advance, chill overnight, and slice just before serving. The flavor actually deepens by the next day.
Notes from My Kitchen
-
Use full-fat cream cheese.
I’ve tried this with both light and full-fat cream cheese. The lighter versions work, but the texture is a little less creamy and more “spongy.” Full-fat gives you that classic baked cheesecake bar richness. -
Room temperature ingredients matter.
Cold cream cheese doesn’t blend as smoothly and can leave little lumps. If you forget to pull it out ahead of time, cut it into cubes and let it sit on the counter for 20–30 minutes, or warm it gently in the microwave at 10-second bursts. -
Don’t skimp on the cinnamon sugar.
That thick cinnamon sugar topping is what makes these taste like sopapilla dessert bars and not just regular cheesecake bars. You want a generous layer on top. -
Check doneness with your eyes, not just the clock.
Look for evenly golden-brown edges and a slightly puffed, set center. If the middle is very jiggly, give it a few more minutes. -
Let them cool. I know, it’s hard.
Warm bars taste amazing but can be messy to cut. If you’re serving for a party, chill them first, then let them sit at room temp for 10–15 minutes before serving. -
Add a honey drizzle right before serving.
If you love traditional sopapillas with honey, try a light drizzle across the sliced bars right before they go out on the table. It adds shine and that familiar flavor.
FAQs about Sopapilla Cheesecake Bars
Can I make sopapilla cheesecake bars without crescent roll dough?
Yes. You can use a sheet of puff pastry, rolled slightly to fit the pan, but the texture will be flakier and more pastry-like than classic crescent roll crust.
Do these cheesecake bars need to be refrigerated?
Yes. Because of the cream cheese filling, store them in the fridge once they’ve cooled. They can sit out for 2–3 hours while serving.
Can I cut the sugar in this recipe?
You can reduce the sugar in the filling by about 2–3 tablespoons and still keep good flavor. I don’t recommend cutting much from the cinnamon sugar topping, though, since that affects the signature crust.
How can I tell when the bars are baked through?
The top should be golden and slightly crisp, the edges will bubble a bit, and the center will jiggle just slightly but not look liquid.
Can I halve this Sopapilla Cheesecake Bars Recipe?
Absolutely. Bake it in an 8×8 or 9×9 pan and reduce the bake time by a few minutes, keeping an eye on color and texture.
What’s the best way to get clean slices?
Chill the pan thoroughly, then use a sharp knife and wipe the blade with a warm, damp cloth between cuts. If you lined with parchment, lift the whole slab out before slicing.
Can I add fresh fruit on top?
Yes, but add it right before serving so it doesn’t weep onto the cinnamon sugar topping. Strawberries, blueberries, or sliced peaches work beautifully.
Are these bars very rich?
Yes, they’re sweet and fairly rich—think smaller pieces for serving, especially if you’re putting them on a dessert table with other treats.
Conclusion: A Dessert That Always Gets Invited Back
This Sopapilla Cheesecake Bars Recipe brings together everything I love about a good dessert bar: simple ingredients, comforting flavors, and a bit of “wow” factor with that crackly cinnamon sugar topping and creamy center. It’s one of those recipes people ask for again and again, especially when they remember “the cheesecake bars with the cinnamon crust.”
Give these easy cheesecake bars a try for your next potluck, family gathering, or “just because” baking day. Then come back and tell me how they went—leave a comment, share your twist (fruit, chocolate, honey-lime—whatever you tried), and if you’re still in a Mexican-inspired dessert mood, look around the blog for my churro-style treats and creamy flan-inspired sweets.
Sopapilla Cheesecake Bars
Ingredients
- 2 cans (8 oz each) refrigerated crescent roll dough or crescent roll sheets, seams pressed together if needed
- 1/2 cup unsalted butter melted (1 stick / 113 g)
- 1 cup granulated sugar divided; 3/4 cup for cinnamon sugar, 1/4 cup optional for extra sweetness
- 1 1/2 teaspoons ground cinnamon
- 1 pinch kosher salt helps balance sweetness
- 16 oz cream cheese softened to room temperature (2 blocks / 454 g), preferably full-fat
- 3/4 cup granulated sugar for the cream cheese filling
- 2 teaspoons pure vanilla extract Mexican vanilla if available
- 1 tablespoon milk or heavy cream optional, for extra silky texture
- Honey optional, for drizzling when serving
- Fresh berries or sliced strawberries optional, for serving
- Powdered sugar optional, for light dusting after cooling
Instructions
- Preheat your oven to 350°F (175°C). Lightly grease a 9×13-inch baking dish or line it with parchment paper, leaving some overhang on the long sides to create a sling for easy removal and clean slicing.
- In a small bowl, stir together 3/4 cup granulated sugar, 1 1/2 teaspoons ground cinnamon, and a pinch of kosher salt. Set aside; this will be sprinkled between the layers and on top.1 cup granulated sugar, 1 1/2 teaspoons ground cinnamon, 1 pinch kosher salt
- In a mixing bowl, beat the softened cream cheese with a hand or stand mixer on medium speed until smooth and fluffy, about 1–2 minutes. Add 3/4 cup sugar and beat until creamy. Mix in the vanilla and milk or cream (if using) until the filling is silky and well combined, scraping the bowl as needed.16 oz cream cheese, 3/4 cup granulated sugar, 2 teaspoons pure vanilla extract, 1 tablespoon milk or heavy cream
- Open one can of crescent dough and gently unroll it. If using standard crescent rolls, press the seams together to form one solid sheet. Transfer the dough to the prepared pan and stretch or pat it into an even layer that covers the bottom and reaches all the edges and corners.2 cans (8 oz each) refrigerated crescent roll dough
- Pour or spoon the cream cheese filling over the bottom crescent roll crust. Use an offset spatula or the back of a spoon to gently spread it into an even layer without tearing the dough underneath.16 oz cream cheese, 3/4 cup granulated sugar, 2 teaspoons pure vanilla extract, 1 tablespoon milk or heavy cream
- Sprinkle 2–3 tablespoons of the cinnamon-sugar mixture evenly over the cream cheese layer for an inner ribbon of warm spice. This step is optional but highly recommended.1 cup granulated sugar, 1 1/2 teaspoons ground cinnamon, 1 pinch kosher salt
- Unroll the second can of crescent dough, pressing seams together if needed. Carefully place it over the cream cheese filling as a top crust. Patch any tears with your fingers; it doesn’t need to be perfect since it will be covered with cinnamon sugar.2 cans (8 oz each) refrigerated crescent roll dough
- Slowly drizzle the melted butter evenly over the top crescent roll layer. Generously sprinkle all of the remaining cinnamon-sugar mixture over the buttered surface, creating a thick, even coating that will bake into a crackly sopapilla-style crust.1/2 cup unsalted butter, 1 cup granulated sugar, 1 1/2 teaspoons ground cinnamon, 1 pinch kosher salt
- Bake in the preheated oven for 28–35 minutes, or until the top is deeply golden, the edges are bubbling slightly, and the center looks mostly set with just a slight jiggle when you gently move the pan. Start checking around 25 minutes, as ovens vary.
- Place the pan on a wire rack and let cool to near room temperature, about 45–60 minutes. For the neatest slices, cover and refrigerate for 2–3 hours or overnight to fully set. You can cut them sooner if you prefer them warm and slightly gooey, but the slices will be softer and more rustic.
- Use the parchment sling (if used) to lift the slab out of the pan, then cut into 16–24 bars with a sharp knife, wiping the blade between cuts for clean edges. Drizzle with honey, dust with powdered sugar, and/or serve with fresh berries if desired.Honey, Fresh berries or sliced strawberries, Powdered sugar
Notes
- Fruit Swirl: Swirl 1/2–3/4 cup seedless raspberry jam, strawberry preserves, or dulce de leche into the cream cheese filling before adding the top dough.
- Caramel Pecan: Sprinkle 1/2 cup chopped toasted pecans over the cream cheese layer and drizzle with a few tablespoons of caramel sauce before adding the top dough.
- Chocolate Chip: Fold 1/2 cup mini chocolate chips into the cream cheese filling.
- Lighter Version: Use reduced-fat cream cheese and reduce the sugar in the filling by 2–3 tablespoons.
- Spiced Holiday: Add 1/4 teaspoon nutmeg and 1/4 teaspoon allspice to the cinnamon sugar mixture.
- Honey-Lime Finish: Add 1 teaspoon lime zest to the filling and drizzle the cooled bars with honey and a tiny squeeze of lime juice before serving. Storage & Make-Ahead:
- Refrigerate covered for up to 4–5 days.
- Freeze fully cooled bars (wrapped individually, then in a freezer bag or container) for up to 2 months. Thaw in the fridge overnight or at room temperature 30–45 minutes.
- Reheat individual bars briefly in the microwave (10–15 seconds) if you like them warm. Bake a day ahead when serving for a party; they slice best after chilling overnight. Tips:
- Use full-fat, room-temperature cream cheese for the creamiest texture.
- Don’t skimp on the cinnamon sugar; it creates the signature sopapilla-style crust.
- Judge doneness by the golden color and mostly set center rather than time alone.