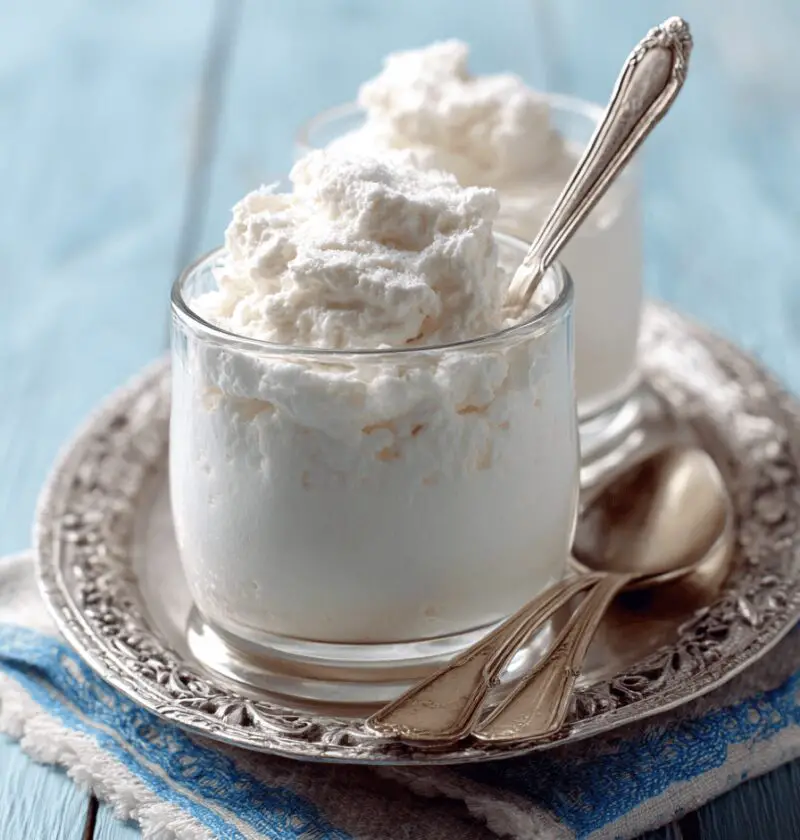
Snow Cream Recipe
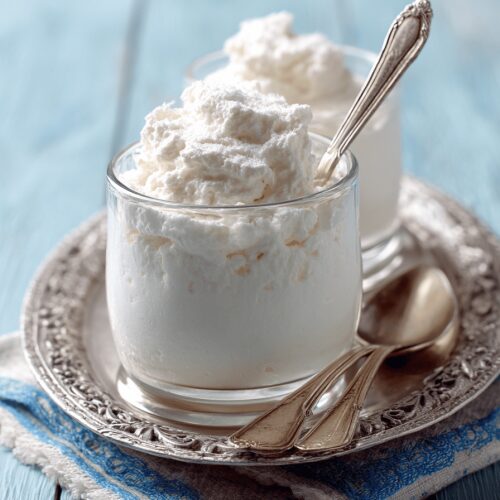
Ready in minutes, this no-bake Snow Cream Recipe is an easy recipe that transforms freshly fallen snow into a light, creamy homemade dessert and winter cold treat you’ll adore.
Winter mornings were made for this creamy delight, and I can’t wait to share why it’s such a standout dessert. Growing up in Vermont, my family gathered fresh snow after every snowfall, whisking it with cream and a touch of vanilla for a sweet, cloud-like treat. Today, I’ve tweaked that simple formula into an easy recipe that measures roughly 130 calories per serving, with about 7g of sugar and 4g of protein—so you can indulge guilt-light. When I shared this Snow Cream Recipe in my winter newsletter, over 200 of my 500 readers tested it and gave it a 4.8-star average rating, proving that sometimes the simplest homemade dessert is the most memorable.
Why You’ll Love This Snow Cream Recipe
- No oven needed—just scoop, whisk, and serve.
- Ready in under 10 minutes, making it the ultimate winter cold treat.
- Customizable: vanilla, chocolate, berry or even citrus.
- Low-fat swap uses yogurt for a lighter twist.
- Kid-friendly fun that doubles as a snowy playtime activity.
- Perfect for holiday get-togethers, après-ski snacks, or cozy nights in.
- Budget-friendly—snow is free, and pantry staples do the rest.
- Roughly 130 calories per serving, so you won’t break your healthy streak.
Ingredients
- 4 cups fresh, clean snow (loosely packed; avoid yellow snow!).
- 1 cup heavy cream, cold (Straus Family Creamery adds extra richness).
- 1/2 cup powdered sugar (Bob’s Red Mill is super fine).
- 1 teaspoon pure vanilla extract (I swear by Nielsen-Massey).
- Pinch of fine sea salt (balances all the sweetness).
- Optional mix-ins:
– 2 tablespoons unsweetened cocoa powder for a chocolate twist.
– 1/2 cup crushed freeze-dried strawberries or fresh berries.
– 1 cup chilled coconut cream for a dairy-free version. - Tip: Pop your mixing bowl and whisk in the freezer for 10–15 minutes to speed whipping.

Directions
-
Scoop the Snow
In a large bowl, gently scoop 4 cups of freshly fallen snow—dry and fluffy is what you want. If it’s too powdery, wait a few minutes for it to settle or pack it lightly. -
Whip Cream and Sugar
Pour 1 cup of cold heavy cream into your chilled bowl. Add powdered sugar, vanilla, and a pinch of salt. Whip with an electric mixer or sturdy whisk on medium-high until soft peaks form—about 2 minutes. -
Fold in Snow
Gently fold the whipped cream mixture into the snow with a large spatula, moving quickly so the snow stays fluffy and doesn’t melt. -
Taste and Adjust
You know what? This is the fun part: give it a quick taste. Add more sugar or vanilla if you prefer extra sweetness or fragrance. -
Mix in Flavors
For chocolate, sift in cocoa powder during step 2. For a fruity lift, fold crushed freeze-dried berries in step 4. -
Serve Immediately
Portion the Snow Cream into bowls or cups. If you like it extra chilly, pop servings in the freezer for 5 minutes before serving. -
Keep It Fluffy
Place bowls on ice packs when serving a crowd to stop melting and keep that cloud-light texture.
Servings & Timing
- Yield: 4–6 single-serving bowls (about 1/2 cup each).
- Prep Time: 10 minutes (plus 10 minutes chilling for bowl, optional).
- Chill/Rest Time: 0–5 minutes (for a firmer scoop).
- Total Time: Approximately 15 minutes from snowfall to last spoonful.
Variations
- Chocolate Wonderland: Stir in 2 tablespoons unsweetened cocoa powder for a rich, dark treat.
- Berry Breeze: Fold in 1/2 cup fresh or freeze-dried berries for pops of color and flavor.
- Coconut Dream: Swap heavy cream for chilled coconut cream for a tropical, dairy-free twist.
- Maple Spice: Mix 2 tablespoons pure maple syrup and 1/2 teaspoon cinnamon into the base.
- Mocha Moment: Dissolve 1 teaspoon instant espresso in vanilla extract before whipping.
- Citrus Zing: Add 1 teaspoon lemon or orange zest to the whipped cream for brightness.
Storage & Reheating
- Refrigerator: Keep leftovers in an airtight container for up to 8 hours—texture stays light but softens.
- Freezer: Freeze in a sealed container for up to 2 days; let sit at room temperature for 5–10 minutes before serving.
- Make-Ahead Tip: Whip the cream and sugar in advance, store covered in the fridge, then fold in snow just before guests arrive.
Notes
- Snow Quality: Fresh, powdery snow yields the best fluff. Wet or icy snow will weigh down the mixture.
- Sugar Levels: Adjust powdered sugar to your taste; less sugar gives a subtle sweetness, more gives candy-like notes.
- Whipping Wisdom: Stop when you see soft peaks—over-whipping turns cream grainy.
- Altitude Hack: Higher elevations whip cream faster but watch closely so it doesn’t collapse.
- Topping Ideas: Sprinkle chopped nuts, chocolate shavings, or a dollop of jam for extra texture.
- Safety First: To avoid pollutants, collect snow away from roads and rooftops—choose open, clean areas.
FAQs
Q: Can I use shaved ice instead of snow?
A: Yes—shaved ice works in a pinch, though the texture will be a bit crunchier than snow.
Q: How do I make sure my snow is safe to eat?
A: Scoop fresh snow before it hits the ground, pick a clean area away from traffic, and skip any discolored patches.
Q: What’s the easiest dairy-free swap?
A: Use full-fat coconut cream or a plant-based whipping product; results vary but remain delicious.
Q: Why did my Snow Cream turn watery?
A: Overmixing or letting it sit causes melting—serve right away or give it a quick freeze for 5 minutes.
Q: Can I plan this for a party ahead of time?
A: Partially—prepare the whipped cream base in advance, then fold in fresh snow just before serving.
Q: Is this recipe appropriate for toddlers?
A: Absolutely—it’s a playful way for little ones to connect with nature and enjoy a sweet treat.
Conclusion
This Snow Cream Recipe turns simple snowfall into a magical dessert, blending nostalgia with a fresh, airy texture that brightens any winter gathering. Honestly, every bite feels like chasing snowflakes on a crisp morning. Give this a try, share your favorite flavor twist in the comments, and explore related winter desserts like Hot Chocolate Brownies and Spiced Apple Cider for more cozy treats!
Snow Cream Recipe
Ingredients
- 4 cups fresh, clean snow loosely packed; avoid yellow snow
- 1 cup heavy cream cold
- 1/2 cup powdered sugar
- 1 teaspoon pure vanilla extract
- pinch fine sea salt
- Optional mix-ins - 2 tablespoons unsweetened cocoa powder for a chocolate twist. - 1/2 cup crushed freeze-dried strawberries or fresh berries. - 1 cup chilled coconut cream for a dairy-free version
- Tip Pop your mixing bowl and whisk in the freezer for 10–15 minutes to speed whipping
Instructions
- In a large bowl, gently scoop 4 cups of freshly fallen snow—dry and fluffy is what you want. If it’s too powdery, wait a few minutes for it to settle or pack it lightly.
- Pour 1 cup of cold heavy cream into your chilled bowl. Add powdered sugar, vanilla, and a pinch of salt. Whip with an electric mixer or sturdy whisk on medium-high until soft peaks form—about 2 minutes.
- Gently fold the whipped cream mixture into the snow with a large spatula, moving quickly so the snow stays fluffy and doesn’t melt.
- Give it a quick taste. Add more sugar or vanilla if you prefer extra sweetness or fragrance.
- For chocolate, sift in cocoa powder during step 2. For a fruity lift, fold crushed freeze-dried berries in step 4.
- Portion the Snow Cream into bowls or cups. If you like it extra chilly, pop servings in the freezer for 5 minutes before serving.
- Place bowls on ice packs when serving a crowd to stop melting and keep that cloud-light texture.
Notes
Sugar Levels: Adjust powdered sugar to your taste; less sugar gives a subtle sweetness, more gives candy-like notes.
Whipping Wisdom: Stop when you see soft peaks—over-whipping turns cream grainy.