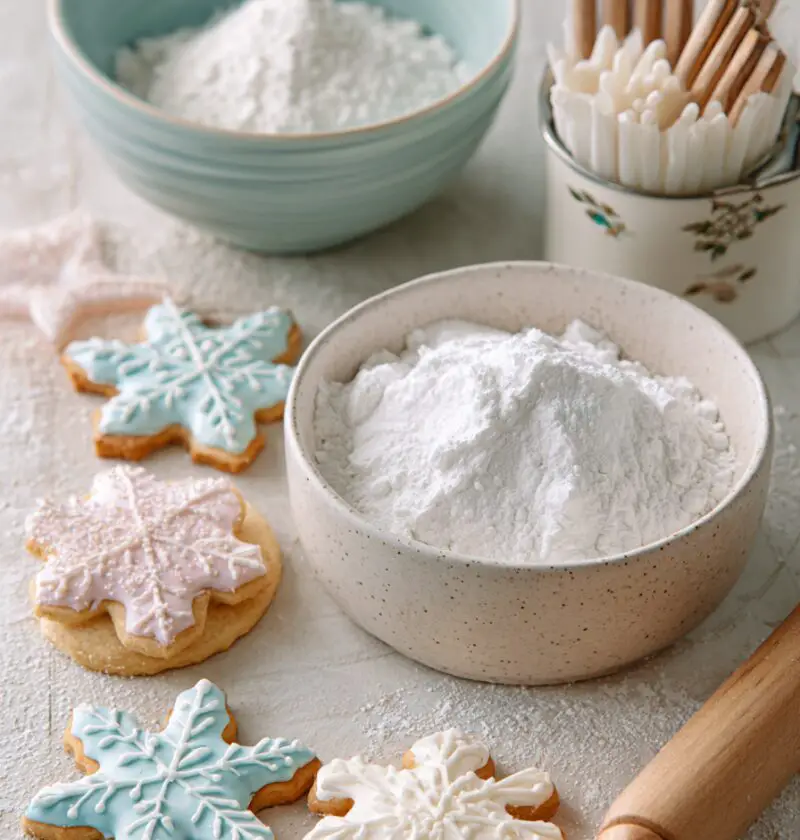
Royal Icing Recipe With Meringue Powder
If you’ve been hunting for a reliable, glossy, and easy Royal Icing Recipe With Meringue Powder that actually behaves on your cookies, you’ve just found your new kitchen workhorse. This royal icing is egg-free, safe for kids, perfect for cookie decorating, and flexible enough for stiff piping, flood consistency, and everything in between.
I’ve been decorating sugar cookies for holidays, baby showers, and “just because” afternoons for more than 25 years, and this is the royal icing recipe I reach for when I want consistent, pretty results without messing around with raw egg whites. Using meringue powder means no food safety worries, a longer shelf life, and a much more predictable texture—especially helpful if you’re new to royal icing or only pull out the piping bags at Christmas.
You can use this royal icing with meringue powder for sugar cookies, gingerbread houses, delicate piping on cakes, or quick drizzle designs when you’re low on time but still want that polished bakery look. Think of it as your cookie-decorating insurance policy: glossy, smooth, and dependable.
Why You’ll Love This Royal Icing Recipe With Meringue Powder
- Egg-free and kid-friendly – This meringue powder royal icing skips raw egg whites, which makes it safer for little decorators and for mailing cookies.
- Beginner-friendly – Clear mixing cues and consistency tips make this an easy royal icing recipe even if you’ve never decorated a cookie in your life.
- Versatile consistencies – Use it as a stiff royal icing recipe for piping details or thin it out for flood consistency royal icing to fill in cookie designs.
- Perfect for sugar cookies and gingerbread – Ideal icing for sugar cookies, gingerbread cookies, and even royal icing for gingerbread houses that need to actually stand up.
- Longer working time – Meringue powder gives you a more forgiving “open time” before the icing crusts, so you’re not racing the clock.
- Great for gift boxes and shipping – This royal icing dries firm and stackable, which is exactly what you want for holiday cookie gift boxes or mailed treats.
- Customizable flavor – Swap extracts, add citrus zest, or use flavored emulsions for a royal icing that doesn’t just look good but tastes special too.
- Easy to scale – Halve it for a small weekend project or double it for a cookie-decorating party with the neighbors.
Ingredients
This Royal Icing Recipe With Meringue Powder makes enough icing to decorate about 24–30 medium sugar cookies, depending on how heavily you decorate.
-
4 cups (1 lb / 454 g) powdered sugar, sifted
- (Also called confectioners’ sugar; I like Domino or C&H because they’re consistently fine and not gritty.)
-
3 tablespoons meringue powder
- Brands like Wilton, CK, or Americolor work well; check that it’s fresh and not clumpy—it loses strength over time.
-
6–8 tablespoons warm water, plus more as needed
- Start with 6; you’ll adjust based on the consistency you want (stiff, piping, or flood).
-
1 teaspoon pure vanilla extract
- Clear vanilla keeps the icing bright white; brown vanilla will tint it slightly cream-colored, which is lovely for rustic designs.
-
1/4–1/2 teaspoon almond extract (optional but wonderful)
- Gives that classic “bakery” sugar cookie flavor; avoid if you’re serving anyone with nut allergies.
-
1/4 teaspoon cream of tartar (optional but helpful)
- Adds a touch of stability and helps the icing whip up with a little more volume.
-
Gel food coloring, as needed
- Americolor, Chefmaster, or Wilton gel colors are ideal—no extra liquid to throw off the consistency.
A quick tip: Always sift your powdered sugar. I know, I know—it’s tempting to skip. But those little lumps will clog your piping tips and make you crazy when you’re trying to outline tiny shapes.
Directions
-
Prep your tools and ingredients
Add the sifted powdered sugar and meringue powder to the bowl of a stand mixer fitted with the paddle attachment (or use a large bowl and electric hand mixer). Have your warm water, extracts, and cream of tartar (if using) measured and ready—royal icing comes together fast once you start mixing. -
Combine dry ingredients
On low speed, mix the powdered sugar and meringue powder (and cream of tartar, if using) for about 15–30 seconds. This helps distribute the meringue powder evenly so you don’t get pockets of unhydrated powder later. -
Add flavor and some water
Pour in the vanilla extract, almond extract (if using), and 6 tablespoons of warm water. Start on low speed so you don’t send a powdered sugar cloud all over your kitchen—learned that one the sticky way. -
Beat to stiff-peak “base” consistency
Increase the mixer speed to medium-high and beat for 4–5 minutes, scraping down the sides once or twice. The icing should become thick, glossy, and hold stiff peaks that don’t collapse when you lift the beater. This is your stiff royal icing base.- If it’s crumbly or too thick to mix, add water 1 teaspoon at a time.
- If it looks runny and won’t hold peaks, add a bit more powdered sugar, 1–2 tablespoons at a time.
-
Adjust to piping consistency
For outlining cookies or basic piping work, you want a piping consistency royal icing—think toothpaste or soft cream cheese.- Transfer a portion of the stiff icing to a separate bowl.
- Add water 1/2 teaspoon at a time, stirring by hand, until it falls off the spoon in a thick ribbon that slowly melts back into itself in about 10–15 seconds.
-
Adjust to flood consistency
For filling in larger areas of cookies (flooding), you’ll thin the icing a bit more. This is your flood consistency royal icing.- Take another portion of the stiff icing in a clean bowl.
- Add water a few drops at a time, stirring well, until the icing smooths out on the surface in about 8–10 seconds when you drizzle it back into the bowl.
- Do a quick “wiggle test”: drag a toothpick through; it should leave a line that disappears in a few seconds but not immediately.
-
Color your icing
Divide the icing into small bowls for each color you plan to use. Add gel food coloring a tiny bit at a time using a toothpick or the tip of a skewer. Stir well, then wait a minute before adding more color—the shades deepen as they sit.- For deep reds and blacks, color the icing a few hours ahead; the hue intensifies and you can use less gel.
-
Prepare piping bags
Add your icing to piping bags fitted with small round tips (Wilton #1–#3 works well for outlines and detail). For flood consistency, you can use bags or small squeeze bottles—whatever feels more comfortable. Don’t overfill the bags; about 1/3–1/2 full is easier on your hands. -
Decorate cookies
Outline your cooled sugar cookies with piping consistency royal icing. Let the outlines set for 5–10 minutes, then fill (flood) with your thinner icing. Use a toothpick or scribe tool to nudge the icing into corners and pop any air bubbles. Set cookies aside to dry at room temperature until the icing crusts over, then let it dry fully. -
Drying time
Royal icing for cookies typically takes 8–12 hours to dry completely, depending on humidity. I often decorate in the evening and let them dry overnight on baking sheets, uncovered, on the counter. Once fully dry, the surface should feel firm, not tacky.
Servings & Timing
- Yield: Enough royal icing to decorate about 24–30 medium sugar cookies
- Prep Time: 15 minutes
- Mixing & Coloring Time: 10–15 minutes
- Total Active Time: About 25–30 minutes
- Drying Time: 8–12 hours at room temperature, depending on thickness and humidity
Variations (Because One Royal Icing Is Never Enough)
- Lemon Royal Icing – Replace the almond extract with 1/2–1 teaspoon lemon extract and add a touch of fresh lemon zest for a bright, tangy icing that’s perfect for spring cookies.
- Vanilla-Bean Royal Icing – Use vanilla bean paste instead of extract for pretty specks and a deeper vanilla flavor (just know it’ll tint the icing slightly off-white).
- Spiced Holiday Royal Icing – Add 1/4 teaspoon ground cinnamon and a pinch of nutmeg for icing that pairs beautifully with gingerbread and warm, spiced cookies.
- Dairy-Free (Still Egg-Free) Royal Icing – This recipe is already egg free royal icing; just double-check that your meringue powder and colors are dairy-free if needed.
- Chocolate Royal Icing – Whisk in 2–3 tablespoons unsweetened cocoa powder and add a little extra water to balance the dry cocoa—amazing on chocolate sugar cookies.
- Royal Icing for Cake Decorating – Keep it on the stiffer side and use for delicate lace, writing, and borders on cakes—pipe onto parchment, let dry, and transfer to frosted cakes.
Storage & Make-Ahead Tips
One of my favorite things about this Royal Icing Recipe With Meringue Powder is how well it stores. It’s a real time-saver during cookie season.
-
Short-term storage (same day or next day)
Keep the icing in an airtight container with plastic wrap pressed directly on the surface to prevent crusting. Store at room temperature for up to 24 hours. Stir well before using; if it thickens, add a few drops of warm water. -
Longer storage (3–5 days)
Store in an airtight container in the refrigerator. When you’re ready to decorate, let it come to room temperature, then stir gently to smooth it out. Add a tiny splash of water if it feels too thick. -
Freezing royal icing
Yes, you can freeze it. Place icing in freezer-safe containers or even in piping bags (well-sealed), and freeze for up to 1 month. Thaw overnight in the fridge, then bring to room temperature and stir well. The texture might need a little extra mixing, but it usually comes right back. -
Storing decorated cookies
Once your royal icing for cookies is fully dry, store the cookies in an airtight container at room temperature for up to 7–10 days. Separate layers with parchment paper if stacking.
No reheating needed—just gentle stirring and a tiny bit of water can freshen up the texture if it’s been sitting.
Notes From My Kitchen (And A Few Lessons Learned)
-
Humidity is your frenemy
On very humid days, royal icing can take forever to dry. A small fan on the lowest setting, pointed near but not directly at the cookies, can help. Avoid decorating outside if it’s muggy—you’ll be waiting till next Tuesday for them to firm up. -
Consistency is everything
Honestly, the biggest “secret” isn’t the exact royal icing recipe—it’s learning to recognize consistencies. Keep a small bowl of extra stiff icing handy so you can thicken any batch that gets too runny. -
Color deepens over time
Especially for dark colors like red, navy, or black. Make those shades a few hours (or even a day) ahead. They’ll mellow flavor-wise and deepen in color, so you can use less gel and avoid any bitter aftertaste. -
Don’t overmix after thinning
Once you have your base icing whipped, try to stir gently when you’re adjusting consistencies. Over-beating at that point can add air bubbles that pop on your cookies as they dry. -
Use a lazy Susan or turntable
Spinning your cookie while you pipe details makes it easier to control your lines. It’s a small thing that makes you feel oddly professional. -
Practice on parchment first
If you’re nervous about piping, “practice cookies” on parchment paper are your friend. Same royal icing, zero stakes—you can scrape, re-use, and try again.
FAQs About Royal Icing With Meringue Powder
1. Can I make this royal icing without meringue powder?
You can, but then it’s a different recipe—usually using egg whites or pasteurized egg whites. This specific royal icing recipe is designed for meringue powder.
2. How long does royal icing with meringue powder take to dry?
Plan on 8–12 hours at room temperature for a full dry, and up to 24 hours for very thick areas or humid conditions.
3. Why is my royal icing dull and not shiny?
Overmixing, too much air, or very low humidity can cause a matte finish. A slightly thinner flood consistency and gentle mixing usually help keep a nice soft sheen.
4. My icing is full of bubbles—what did I do wrong?
It’s usually from whipping at very high speed or stirring too aggressively. After mixing, let the icing sit for 10–15 minutes, then gently stir and pop surface bubbles with a toothpick.
5. Can I flavor royal icing with anything besides vanilla?
Yes—use oil-free extracts like almond, lemon, orange, or peppermint. Avoid extracts with oil (like some “natural” citrus oils) because they can weaken the structure.
6. Is this royal icing safe for people with egg allergies?
Most meringue powders contain egg whites that have been dried and pasteurized, so they’re not suitable for people with egg allergies. Always check labels and consult with your guests.
7. How do I get bright white icing?
Use clear vanilla, a bright white gel food color if needed, and avoid butter or cream. Some bakers add a tiny touch of violet gel color to cancel any yellow tint.
8. Can I use this royal icing for gingerbread houses?
Yes—just keep it on the stiffer side. This royal icing for gingerbread is strong enough to be your “edible glue” for walls, roofs, and candy decor.
Conclusion
This Royal Icing Recipe With Meringue Powder has seen me through more holidays, bake sales, and last-minute school events than I can count. It’s reliable, flexible, egg-free, and perfect for everything from simple sugar cookie icing with meringue powder to detailed piping and gingerbread house construction.
If you try this recipe, I’d truly love to hear how it went—tell me in the comments what you decorated, what flavors you used, or any little tweaks that made it “yours.” And if you’re in a cookie-decorating mood, your next stop should be a classic cut-out sugar cookie recipe or a cozy gingerbread cookie to show off that beautiful royal icing work.
Royal Icing With Meringue Powder
Ingredients
- 4 cups powdered sugar 1 lb / 454 g, sifted (confectioners’ sugar)
- 3 tablespoons meringue powder such as Wilton, CK, or Americolor; make sure it’s fresh
- 6-8 tablespoons warm water start with 6 tablespoons, add more as needed for desired consistency
- 1 teaspoon pure vanilla extract use clear vanilla for bright white icing
- 1/4-1/2 teaspoon almond extract optional; gives classic bakery flavor, avoid for nut allergies
- 1/4 teaspoon cream of tartar optional; adds stability and volume
- gel food coloring as needed; use gel colors so you don’t thin the icing
Instructions
- Add the sifted powdered sugar and meringue powder to the bowl of a stand mixer fitted with the paddle attachment (or use a large bowl and electric hand mixer). Measure out the warm water, vanilla, almond extract (if using), and cream of tartar (if using) so they are ready to add.
- On low speed, mix the powdered sugar, meringue powder, and cream of tartar (if using) for 15–30 seconds to distribute the meringue powder evenly.
- With the mixer on low, add the vanilla extract, almond extract (if using), and 6 tablespoons of warm water. Mix on low speed at first so the powdered sugar doesn’t fly out of the bowl.
- Increase the mixer speed to medium-high and beat for 4–5 minutes, scraping down the sides once or twice, until the icing is thick, glossy, and holds stiff peaks that do not collapse when you lift the beater. If the mixture is crumbly or too thick, add water 1 teaspoon at a time. If it is too thin and doesn’t hold peaks, add powdered sugar 1–2 tablespoons at a time. This is your stiff royal icing base.
- Transfer a portion of the stiff icing to a separate bowl. Add warm water 1/2 teaspoon at a time, stirring gently by hand, until the icing falls off the spoon in a thick ribbon that slowly melts back into itself in about 10–15 seconds. Use this for outlining cookies and basic piping work.
- Transfer another portion of the stiff icing to a clean bowl. Add warm water a few drops at a time, stirring gently, until the icing smooths out on the surface in about 8–10 seconds when you drizzle it back into the bowl. A toothpick dragged through the surface should leave a line that disappears after a few seconds, but not immediately. Use this for flooding and filling in larger areas.
- Divide the icing into small bowls for each color. Add gel food coloring a tiny amount at a time using a toothpick or skewer tip. Stir well and let the icing sit for a minute before adjusting, as colors deepen over time. For deep reds and blacks, color a few hours ahead so the shades can develop.
- Transfer icing to piping bags fitted with small round tips (Wilton #1–#3) for outlines and detail work. Use separate bags or squeeze bottles for flood consistency icing. Fill bags only 1/3–1/2 full so they are easier to handle.
- Outline completely cooled cookies with piping-consistency icing and let the outlines set for 5–10 minutes. Fill (flood) inside the outlines with flood-consistency icing. Use a toothpick or scribe tool to nudge icing into corners and pop any air bubbles.
- Allow decorated cookies to dry at room temperature until the icing is fully set. Depending on thickness and humidity, this usually takes 8–12 hours, and up to 24 hours for very thick areas. The surface should feel firm and not tacky before stacking or packaging.