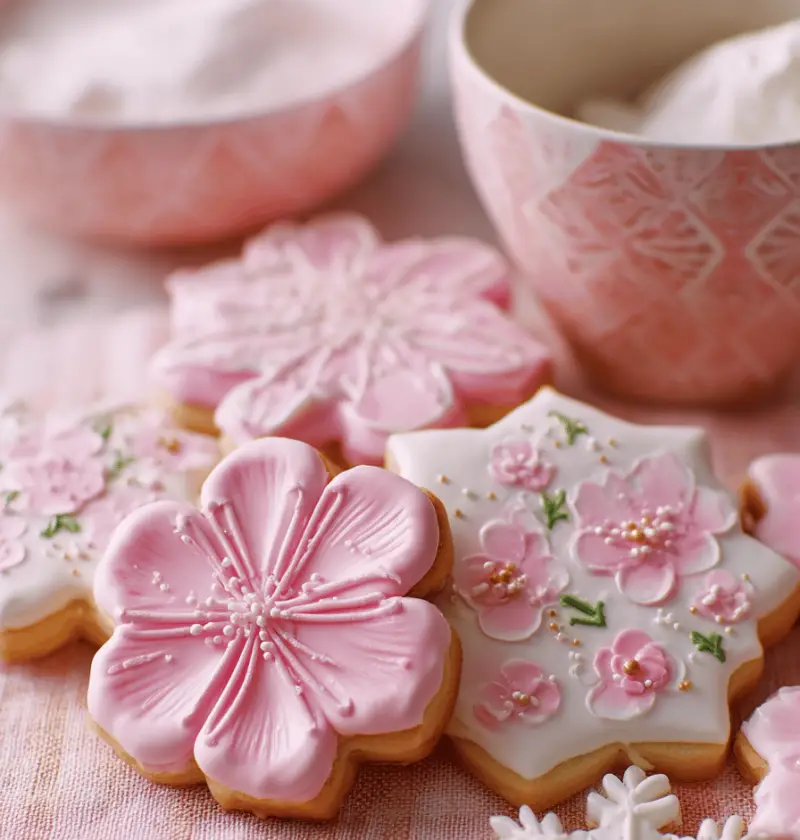
Royal Icing Recipe
This Royal Icing Recipe creates a dreamy, no-bake, sugar-based frosting that dries hard enough for intricate cookie decorating yet stays smooth for gorgeous cake decoration.
Full Recipe Introduction
If you’ve ever swooned over those beautifully iced sugar cookies at holiday bake sales or admired delicate piped flowers on wedding cakes, you know the magic of royal icing. Made from simple pantry staples—sugar, egg white (or meringue powder), and a dash of vanilla—this frosting transforms your baked treats into edible art. What makes it special is that hard, glossy finish: perfect for outlining details, flooding large areas, or adding crisp lettering. And since it’s no-bake and gluten-free, it’s a favorite for folks with dietary sensitivities or those looking to skip another oven cycle in the holiday rush. Personally, I reach for this recipe every December when I’m sipping hot cocoa by the fireplace, listening to Bing Crosby and dreaming up gingerbread men with plaid scarves. According to Google Trends, searches for “cookie decorating” spike by over 150% from Thanksgiving through Christmas, and I’m here to share the secret to icing that holds color, dries fast, and pipes like a dream.
Why You’ll Love This Recipe
• No oven needed—perfect for last-minute decorating sessions
• Dries rock-hard in under an hour, so your designs stay pristine
• Customizable consistency for outlining, flooding, or sculpting
• Works with both fresh egg whites or meringue powder (vegan option!)
• Holds vibrant food coloring without bleeding or cracking
• Ideal for cookie decorating, cake decoration, and gingerbread houses
• Makes up to 2 cups of frosting—enough for dozens of cookies
• Foolproof enough for beginners, flexible enough for pros
Ingredients
• 3 cups (360g) powdered sugar, sifted (King Arthur or Domino)
• 2 large egg whites at room temperature* (or 4 tablespoons meringue powder + 6 tablespoons warm water)
• ½ teaspoon cream of tartar (stabilizes and prevents sugar crystallization)
• 1 teaspoon pure vanilla extract (or almond extract for a nutty twist)
• 2–3 tablespoons warm water, as needed for piping consistency
• Gel food coloring (Americolor or Wilton) for tinting
*Tip: If you’re uneasy about raw egg whites, meringue powder is a shelf-stable alternative used by professional bakers. Always choose pasteurized eggs when possible for safety.
Directions
1. In the bowl of a stand mixer fitted with the whisk attachment, combine egg whites (or meringue powder mixture) and cream of tartar. Start on low speed to foam up the whites gently.
2. Gradually add sifted powdered sugar one cup at a time, mixing on low until sugar is absorbed—stop and scrape sides with a spatula to ensure even blending.
3. Increase speed to medium-high and whip for 4–5 minutes until glossy stiff peaks form. You’ll know it’s ready when the frosting holds its shape like a firm marshmallow.
4. Add vanilla extract and mix on low for 30 seconds, then test consistency by dragging a spoon through the icing—aim for a slightly wet ribbon that disappears in 10–15 seconds. Adjust with water or extra sugar as needed.
5. Divide icing into small bowls and tint with gel food coloring, stirring until fully blended. For deep hues, add color drop by drop.
6. Transfer icing to piping bags fitted with #2 or #3 round tips for outlines; flood areas can go straight from the bowl into a bag with the tip snipped off.
7. Pipe outlines first, let them crust (5–10 minutes), then flood the center. Use a toothpick to coax icing into corners or remove air bubbles.
8. Let decorated cookies sit undisturbed on parchment or a silicone mat for at least 1 hour to dry. For thick designs, overnight is best.
Servings & Timing
Makes about 2 cups of royal icing—enough to decorate 24–30 standard sugar cookies
Prep Time: 15 minutes
Rest/Crust Time: 1 hour (up to overnight for intricate designs)
Total Time: 1 hour 15 minutes (plus drying)
Variations
• Lemon Zest Icing: Swap vanilla for 1 teaspoon lemon extract and stir in 1 teaspoon finely grated zest.
• Chocolate Royal Icing: Fold in 2 tablespoons unsweetened cocoa powder before whipping.
• Vegan-Friendly: Use aquafaba (chickpea brine) instead of egg whites, whipped to stiff peaks.
• Peppermint Twist: Add ½ teaspoon peppermint extract and crush a candy cane for garnish.
• Pastel Palette: Mix white chocolate melts into a portion of icing for off-white, creamy hues.
• Spiced Holiday Icing: Stir in ¼ teaspoon ground cinnamon or pumpkin pie spice for warmth.
Storage & Reheating
Store leftover royal icing in an airtight container at room temperature for up to 7 days—no fridge needed. If it thickens, stir in a teaspoon of warm water at a time until smooth. For longer storage, freeze unfrosted, tinted bags (sealed) up to 3 months; thaw in the fridge overnight and whip lightly before use. Make-ahead tip: Prepare the base icing and refrigerate; just before decorating, bring to room temperature and re-whip ten seconds to restore shine.
Notes
• Egg Whites vs. Meringue Powder: I learned that fresh egg whites give a slightly softer sheen, while meringue powder yields a rigid structure—pick based on project needs.
• Humidity Matters: If your kitchen is humid, add an extra pinch of powdered sugar to prevent soft icing.
• Consistency Check: “10-second rule” is my go-to—if icing ribbon disappears in 10 seconds, you’ve nailed flooding consistency.
• Tools I Love: My trusty Wilton piping bags never fail, and a small offset spatula is my secret for smoothing flooded areas.
• Color Bleed: To keep colors from running, let outlines crust fully before flooding—they act as little dams.
FAQs
Q: Can I use pasteurized egg whites from a carton?
A: Absolutely—you’ll skip the raw-egg worry, just check the label for no additives.
Q: Why is my royal icing grainy?
A: Graininess often means powdered sugar wasn’t sifted; give it a fine sieve for silky-smooth results.
Q: How do I fix royal icing that’s too runny?
A: Add 1 tablespoon of powdered sugar at a time, whisking until you hit that 10-second ribbon stage.
Q: Can I color royal icing with liquid coloring?
A: Gel colors are best for vivid hues; liquid can thin the icing and affect piping consistency.
Q: How long does royal icing keep on cookies?
A: Properly dried, cookies last up to a week in an airtight tin at room temp—they almost become collectibles!
Q: My icing cracks after drying. Help!
A: That usually means it was too stiff when piped; next time, add a teaspoon of water to soften the mix.
Q: Can I layer designs without bleeding colors?
A: Yes—just let each layer crust for at least 15 minutes before adding the next color.
Q: Is royal icing gluten-free?
A: Yes, the basic mix of sugar and egg whites is naturally gluten-free—just double-check any added flavorings.
Conclusion
With this foolproof Royal Icing Recipe in your back pocket, you’ll breeze through cookie decorating sessions, wow friends with edible art, and enjoy a bit of sweet therapy—no oven required. Give it a whirl and let me know in the comments how your designs turned out; I can’t wait to see your colorful creations!

Royal Icing Recipe
Ingredients
- 3 cups powdered sugar sifted (King Arthur or Domino)
- 2 large egg whites at room temperature* (or 4 tablespoons meringue powder + 6 tablespoons warm water)
- 1/2 teaspoon cream of tartar stabilizes and prevents sugar crystallization
- 1 teaspoon pure vanilla extract (or almond extract for a nutty twist)
- 2-3 tablespoons warm water as needed for piping consistency
- Gel food coloring (Americolor or Wilton) for tinting
Instructions
- In the bowl of a stand mixer fitted with the whisk attachment, combine egg whites (or meringue powder mixture) and cream of tartar. Start on low speed to foam up the whites gently.
- Gradually add sifted powdered sugar one cup at a time, mixing on low until sugar is absorbed—stop and scrape sides with a spatula to ensure even blending.
- Increase speed to medium-high and whip for 4–5 minutes until glossy stiff peaks form. You’ll know it’s ready when the frosting holds its shape like a firm marshmallow.
- Add vanilla extract and mix on low for 30 seconds, then test consistency by dragging a spoon through the icing—aim for a slightly wet ribbon that disappears in 10–15 seconds. Adjust with water or extra sugar as needed.
- Divide icing into small bowls and tint with gel food coloring, stirring until fully blended. For deep hues, add color drop by drop. Transfer icing to piping bags for decorating.