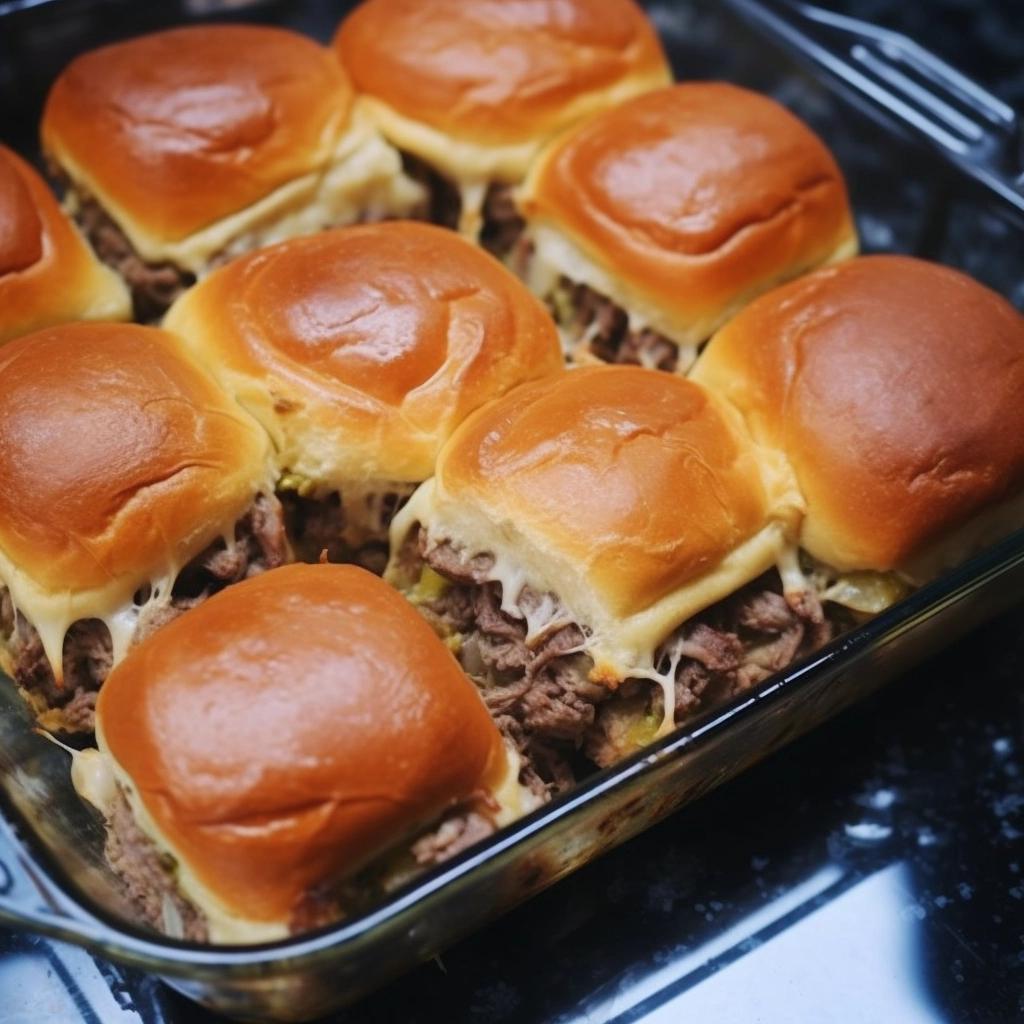
Craving that melty, savory rush of a Philly cheesesteak but tired of giant rolls and napkin juggling? Enter sliders—miniature sammies that pack thinly sliced ribeye, sweet onions, and gooey cheese into soft, bite-size buns.
You can have them on the table in about forty minutes, start to finish. That timing makes them ideal for a midweek pick-me-up, an impromptu game-night snack, or a casual weekend hang. And here’s the fun part: you’re the chef, so toss in mushrooms, jalapeños, or experiment with different cheeses to match your mood.
Why You’ll Love It
– One-handed bliss: No more cradling giant hoagies and hunting for a napkin.
– Fast turnaround: Prep, cook, broil—about 40 minutes total.
– Party starter: These vanish faster than you can say “pass the plate.”
– Endless twists: Pepper jack heat, mushroom depth, or vegan cheese—you’re in charge.
– Great leftovers: Filling freezes beautifully for a quick lunch or midnight snack.
Seriously, when these sliders hit the table, the room goes silent—everyone’s busy pulling cheese and savoring that beefy aroma. They bring back memories of college hangouts and sports bars, but with a homemade touch that says, “I’ve got this.”
Timing and Servings
From chopping board to first bite, set aside roughly 40 minutes. You’ll spend about 10 minutes slicing meat and veggies, 15 minutes on the stove, and 5 minutes under the broiler. This batch yields eight sliders—perfect as an appetizer for four to six, or a main course for two or three ravenous eaters. Hosting a bigger crowd? Double everything, spread the sliders on a rimmed baking sheet, and broil in batches. No chef’s hat required.
Ingredients
– 1½ lbs thinly sliced ribeye or fondue beef, at room temperature
– 2 tbsp olive oil, divided
– 8 oz white mushrooms, thinly sliced
– 1 large yellow onion, cut into thin strips
– ¼ cup chicken broth (Campbell’s or Swanson)
– 2 tbsp Worcestershire sauce (Lea & Perrins is our go-to)
– 1 cup shredded provolone or mozzarella
– 4 mini submarine rolls (5–6 inches each), split
– Shredded iceberg lettuce (optional)
– Sea salt and freshly ground black pepper, to taste
Feel free to swap chicken broth for beef broth if you want a darker flavor, or use turkey rolls for a lighter twist.
Directions
1. Preheat your broiler, sliding a rack about six inches from the heat. Lay the split rolls, cut-side up, on a baking sheet.
2. Heat 1 tbsp oil in a heavy skillet (a Lodge cast iron works wonders) over high heat. Season beef with salt and pepper. Add to the pan in a single layer and stir constantly for 2–3 minutes until each strip browns. Transfer meat to a plate.
3. Reduce heat to medium-high and drizzle in the remaining oil. Add mushrooms and onions, seasoning lightly. Stir every minute until onions soften and everything turns golden—about five minutes.
4. Return beef to the skillet. Pour in broth and Worcestershire sauce, scraping up browned bits; that’s where the magic lives.
5. Scatter cheese over the meat-veggie mix. Cover the pan for about two minutes so the cheese melts into every crevice.
6. Broil the buns for 1–2 minutes until golden at the edges—watch closely to avoid burning.
7. If you want a crunch, layer shredded lettuce on each bun base. Spoon the cheesy beef mixture on top, making sure to include those tasty juices.
8. Serve immediately and savor the ooey-gooey goodness.
Variations
– Vegetarian spin: Swap beef for thick portobello slices or plant-based strips.
– Spicy upgrade: Toss in diced jalapeños or drizzle sriracha before stacking.
– Cheese adventure: Try pepper jack, Swiss, or crumbled blue cheese for a bold bite.
– Hawaiian rolls: A sweet-savory twist that everyone will talk about.
– Garlic boost: Spread garlic aioli or roasted garlic butter on buns pre-broil.
– Southwest style: Top with avocado slices, cilantro, and a chipotle mayo smear.
Storage & Reheating Tips
– Refrigerate: Store filling and buns separately in airtight containers up to three days. Keep lettuce aside to avoid sogginess.
– Oven revive: Preheat to 350°F. Wrap assembled sliders in foil and heat for 8–10 minutes, then open for 2 minutes to crisp.
– Air fryer or toaster oven: 350°F for 3–4 minutes brings back that fresh-off-the-grill vibe.
– Microwave hack: Zap for 30–45 seconds, then finish under the broiler for 10 seconds to crisp the tops.
– Freezing: Cool the filling, freeze in flat freezer bags for up to a month. Thaw in the fridge overnight and reheat as above. Buns freeze well too—just toast before assembling.
FAQs
Can I use flank steak instead of ribeye?
Absolutely. Freeze the steak for 15 minutes first to make paper-thin slicing easier.
How do I stop the buns from getting soggy?
A light toast under the broiler seals the surface. A thin smear of butter or oil helps too.
Is it okay to prep this ahead?
Yes—cook the filling, cool, and refrigerate up to two days before serving. Assemble and broil just before guests arrive.
Can I make these on the grill?
Sure—use a cast iron pan on the grate or wrap filling in foil. Toast buns directly over heat for a little char.
What’s the trick for super-melted cheese?
Cover the skillet or tent the baking sheet with foil under the broiler. Trapped heat equals gooey perfection.
Any ideas for a low-carb version?
Serve the filling on lettuce wraps or scoop it over mashed cauliflower for a carb-friendly spin.
Conclusion
There you have it—a homey, no-fuss riff on the classic Philly cheesesteak that’s as fun to make as it is to eat. Pair these sliders with crispy fries, a zesty slaw, or a crisp craft beer, and watch them vanish. Whether you’re feeding a crowd or indulging solo, these bite-size wonders bring big smiles and even bigger flavors. Enjoy every last cheesy, juicy morsel!

