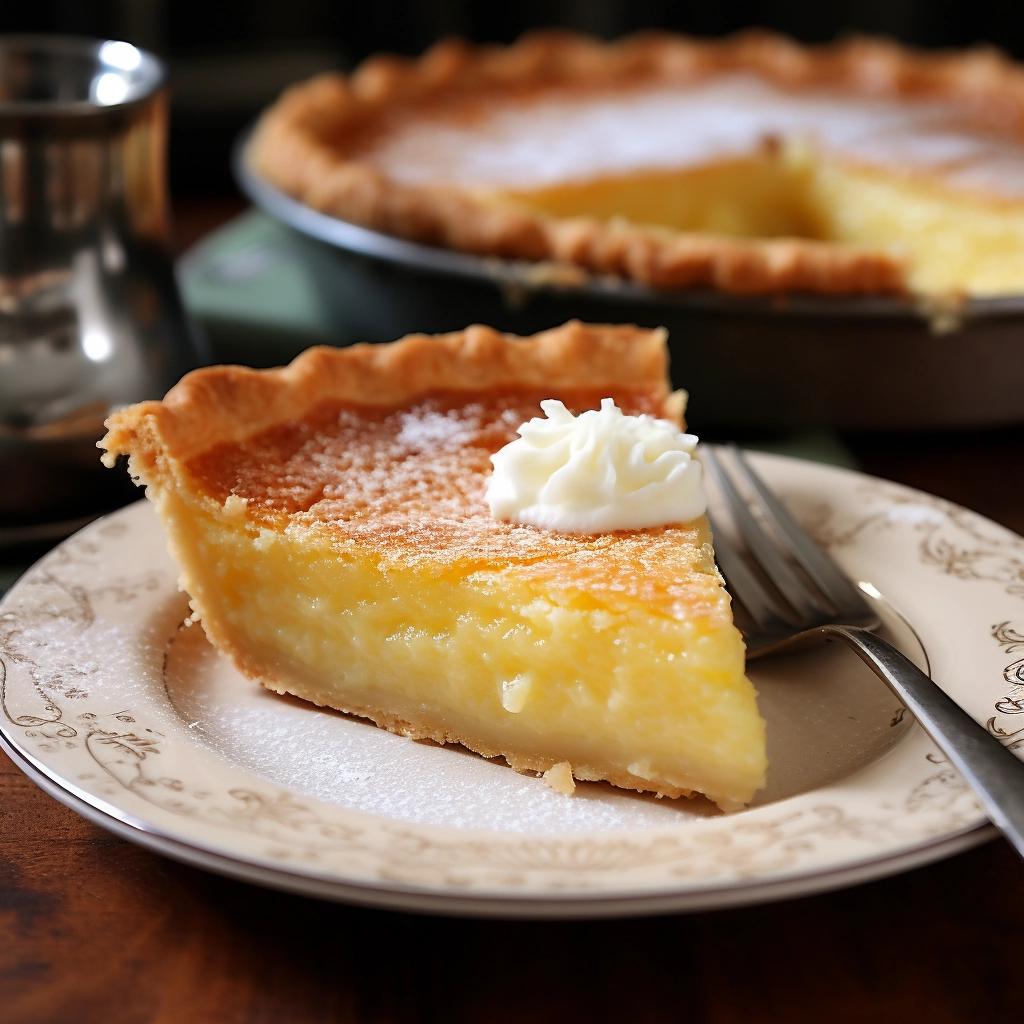
There’s something special about pulling a warm pie from the oven, its golden edges glistening as the steam curls into the air. One bite of old-fashioned buttermilk pie, and you’re instantly transported to cozy kitchens, faded aprons, and heartfelt conversations over dessert. No fancy gadgets required—just a few simple ingredients and a little patience, and you’ll have a custardy treat that’s both nostalgic and downright comforting.
Why You’ll Love It
- Silky-smooth custard that practically melts on your tongue.
- Minimal pantry ingredients—most are kitchen staples.
- A gentle tang from buttermilk keeps sweetness in check.
- Flaky crust that stays crisp, even under a wet filling.
- Effortless enough for beginners, yet impressive for guests.
- Easy to jazz up with spices, citrus zest, or chocolate chips.
- Perfect for holiday gatherings, potlucks, or unexpected drop-ins.
- Lasts for days in the fridge or freezer—snacking satisfaction secured.
Timing and Servings
Makes: 8 generous slices
Prep Time: 15 minutes
Bake Time: 45–50 minutes
Cool/Chill Time: 1–2 hours (for neat slices)
Total Time: about 2 hours
Ingredients

- 1½ cups granulated sugar (regular or turbinado for a hint of caramel flavor)
- ¼ cup unsalted butter, melted and slightly cooled (Land O’Lakes or similar)
- 3 large eggs, room temperature (helps achieve a silky texture)
- 1 tbsp all-purpose flour (King Arthur or a 1:1 gluten-free blend)
- 1 cup full-fat buttermilk (shake well to blend)
- 1 tsp pure vanilla extract (avoid imitation for best depth)
- 1 unbaked 9-inch pie crust, chilled (homemade or store-bought)
Tip: Let the eggs and buttermilk sit at room temperature for about 30 minutes. This prevents the filling from curdling when mixed.
Directions
- Preheat your oven to 350°F (175°C) and position a rack in the center for even baking.
- In a mixing bowl, whisk the melted butter into the sugar until you see a sandy, pale mixture—this breaks down sugar lumps faster.
- Beat the eggs lightly in a separate bowl, then add them one at a time to the sugar-butter blend, stirring gently after each addition to keep the custard smooth.
- Sift the flour over the batter and fold it in with a silicone spatula. No streaks should remain—it keeps the filling lump-free.
- Pour in the buttermilk while whisking slowly from the center outward, creating little ribbons of air for a lighter bite. Stir in the vanilla last.
- Transfer the filling into the chilled crust. Give the pie a gentle tap on the countertop to release air bubbles—think of it as settling the custard before it bakes.
- Bake for 45–50 minutes, turning the pie halfway if your oven has hot spots. The edges should look set, and the center will jiggle just a bit when nudged.
- Cool on a wire rack for one hour. If you can wait, pop it into the fridge for another hour—clean slices are totally worth it. Otherwise, serve warm with a dollop of whipped cream.
Variations
- Lemon Zest Lift: Stir in 1 tsp lemon zest for a bright, citrusy note.
- Spiced Comfort: Add ½ tsp cinnamon or freshly grated nutmeg to the batter.
- Chocolate Chip Twist: Fold in ¼ cup mini chocolate chips before baking.
- Bourbon Raisin: Soak ¼ cup raisins in bourbon for 15 minutes, drain, then mix in.
- Coconut-Lime Fusion: Swap half the buttermilk for coconut milk and add 1 tsp lime zest.
- Vegan Version: Use dairy-free buttermilk and vegan butter in place of the originals.
Storage & Reheating Tips
Fridge: Cover loosely with plastic wrap or an airtight lid. Keeps for up to four days—though it rarely lasts that long. Crust might soften a bit over time.
Freezer: Wrap individual slices in foil or store in an airtight container for up to one month. Thaw overnight in the fridge for best texture.
Reheat: Warm a slice at 300°F for 5–7 minutes to bring back crispness, or zap in 10-second microwave bursts if you’re in a hurry.
Make-Ahead: Mix the filling and refrigerate for a few hours, then pour into the crust and bake when guests arrive.
FAQs
- Can I use low-fat buttermilk? Yes, but the pie won’t be as rich; a tablespoon of heavy cream helps mimic full-fat texture.
- Why did my pie crack? Overbaking or chilling too quickly can cause cracks; remove when the center still wiggles and let it cool gradually.
- Is blind-baking the crust necessary? It’s optional—bake the empty crust for 10 minutes at 350°F, then fill and finish baking to avoid a soggy bottom.
- How do I fix a runny filling? Check your flour measurement and sift it in thoroughly; bake a few extra minutes at a lower temp if needed.
- Can I make it gluten-free? Absolutely—use a certified gluten-free crust and a 1:1 flour blend with xanthan gum.
- Why did the center sink? That usually means underbaking or too much liquid; aim for a slight wobble and don’t open the oven door early.
- Can I add fresh fruit? Berries or thin apple slices work, but drain any excess moisture so the filling stays firm.
- How do I keep crust edges from browning too fast? Shield the edges with foil or a pie shield after 20 minutes of baking.
Conclusion
Old-fashioned buttermilk pie is proof that simple ingredients can create something truly memorable—a flaky shell holding a sweet-tangy custard that feels like home. Give it a try, and let each forkful whisk you back to warm kitchens and happy chatter. If you bake one, come back and share your favorite twist!