Ever stood in front of the fridge with nothing but a half-squeezed lime and some sad-looking lettuce? Those nights call for a little culinary rescue.
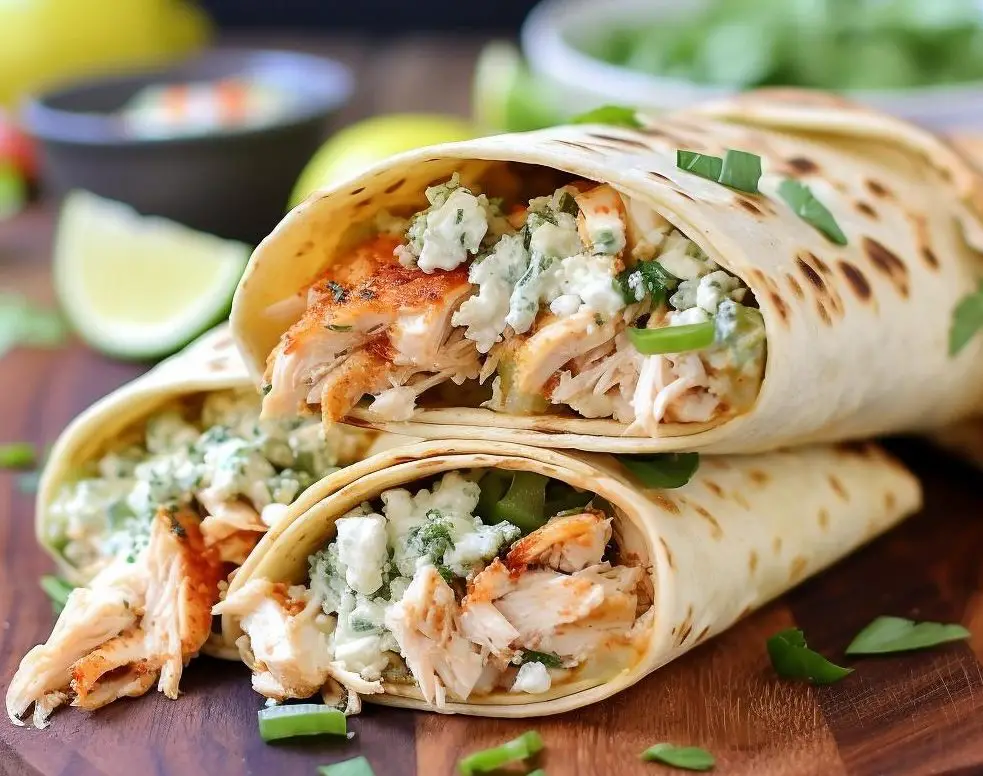
Picture this: silky cream cheese swirling together with shredded chicken and melting cheddar, all piled into a corn tortilla that’s crisped just enough to sing. It’s like comfort food got a fun twist—no fancy gadgets required, just a skillet and a baking dish.
Why You’ll Love It
Biting into these tacos feels like channeling your inner taco truck chef. The shell gives a satisfying crunch, yet the inside stays pillowy soft, thanks to that creamy chicken filling. You get a balanced hit of tang from the cream cheese, a mellow zing from the garlic, and that final cheddar note that ties it all together. Think of it as your favorite grilled cheese meeting your go-to chicken enchiladas—only this time it’s handheld, and way more playful.
Who doesn’t appreciate a recipe that looks fancy but plays nice with busy schedules? These tacos come together in under 45 minutes, which means you spend more time laughing around the table and less time stuck at the stove. Plus, there’s room to wander off-script: toss in bell peppers, black beans, or even a handful of corn kernels. It’s kind of like having a blank canvas—only tastier. And let’s be honest: there’s something almost therapeutic about folding those tortillas and lining them up in a dish—it feels like a mini kitchen ritual.
Timing and Servings
Prep Time: 15 minutes
Cook Time: 20 minutes
Total Time: 35 minutes
Serves: 4–5 people (Easily doubles or triples for group gatherings)
This setup is designed for flexibility. If you’re hosting a casual game night, double the recipe and line up two pans. For a cozy family dinner, stick to the base version and serve with a side salad. Meal-prep fans, take note: you can make the filling hours—or even a day—before you plan to serve. Simply store the mixture in the fridge, then warm it gently while you fry and bake the shells.
Ingredients
8 oz (1 package) cream cheese, softened
2 cups shredded cooked chicken (rotisserie or tasty leftovers)
2 cloves garlic, minced (or use a small garlic press if you like convenience)
1 bunch green onions, thinly sliced (white and green parts welcome)
1 teaspoon salt (or to taste)
½ teaspoon black pepper
1 cup shredded cheddar cheese (grab a block and shred it yourself for the best melt)
10 corn tortillas (look for fresh, pliable ones at the market)
Oil for frying (canola, vegetable, or sunflower)
Optional mix-ins: ½ cup diced bell peppers, corn kernels, or black beans for extra color and texture
Tip: Let the cream cheese rest at room temperature for about 15 minutes—this makes for a silkier sauce. And if your tortillas feel brittle, wrap them in a damp kitchen towel and microwave for 20 seconds to soften.
Directions
- Preheat your oven to 425°F (220°C). Place a rack in the middle—this gives you that golden-crisp finish without overbrowning.
- Pour about ¼ inch of oil into a medium skillet. Heat over medium until a small piece of tortilla sizzles on contact—no popping oil means it’s not hot enough.
- Fry each tortilla for 10–15 seconds per side. Keep them moving; a few light golden spots are perfect. Think of this step as giving each shell its own personal tan.
- Drain the tortillas on a paper-towel–lined plate. This removes excess oil and keeps them from getting soggy.
- In a small saucepan over low heat, place the softened cream cheese. Stir often with a heat-proof spatula so it melts evenly—nobody likes clumps.
- Once it’s velvety smooth, fold in the shredded chicken, garlic, green onions, salt, and pepper. Stir until everything looks well-mixed.
- Add cheddar cheese and any optional veggies. Continue stirring for 1–2 minutes so the cheese melts and ingredients become one cohesive filling.
- Transfer the filling to a bowl and use a spoon to load about 2–3 tablespoons into each tortilla. Don’t overfill—sneaky spills happen fast.
- Arrange the filled tortillas seam-side down in a 9×13 baking dish. This hack lets them stand tall and prevents filling from oozing out.
- Bake for 8–10 minutes until the edges of the shells turn crisp and the filling is heated through. Keep an eye on them—ovens vary!
- Remove from the oven and let the tacos rest for at least 2 minutes. This helps the cheese settle so you can actually pick them up without losing half the filling.
- Serve straight away, garnished with salsa, sour cream, freshly chopped cilantro, or avocado slices. Each add-on brings its own flair.
Variations
• Vegetarian style: Swap chicken for seasoned black beans, corn, and sautéed bell peppers.
• Spicy twist: Mix in diced jalapeños or a sprinkle of chili powder into the cheese base.
• Cheese experiment: Try pepper jack for heat, a Mexican blend for variety, or Monterey Jack for a mellow taste.
• Tortilla alternatives: Flour tortillas offer a softer, foldable option—great if you’re feeding kids.
• Herbaceous boost: Stir chopped cilantro and a squeeze of lime into the filling or sprinkle on top just before serving.
• Fall twist: Roast cubed poblano peppers and drizzle with pumpkin seed oil for a seasonal spin.
Feel like a flavor adventurer? Add chopped pineapple for a hint of sweetness or crushed tortilla chips inside for extra crunch.
Storage & Reheating Tips
Leftovers here are practically gifts—and reheating is a breeze.
• Refrigeration: Place tacos in an airtight container for up to 3 days. The filling stays creamy, and you can crisp the shells later.
• Oven revival: Arrange tacos on a baking sheet at 375°F (190°C) for 5–7 minutes. Perfect crisp-factor restored.
• Freezing filling: Scoop the filling into a freezer bag, press flat to defrost evenly, and freeze up to 1 month. Thaw in the fridge overnight, then warm in a skillet.
• Microwave shortcut: Heat the filling on low for 1–2 minutes, stir, then assemble fresh shells. This works well when you’re in a genuine hurry.
• Shell recovery: If tortillas lose their crunch, warm them for 30 seconds in a dry skillet over medium heat. Instant revival.
• Dip option: Warm leftover filling, set it out with tortilla chips or crackers, and watch it vanish at snack time.
FAQs
Q: Can I use low-fat cream cheese?
A: Yes. The texture will be slightly lighter and a bit less silky, but still plenty tasty.
Q: Are corn tortillas automatically gluten-free?
A: Not always. Look for certified gluten-free labels if you’re sensitive. Some brands add flour.
Q: What’s the best way to shred a whole chicken?
A: Use two forks or your clean hands. Pull along the grain for rustic, bite-size strands.
Q: Can I make these ahead for a party?
A: Prep the filling a day before and fry the tortillas an hour ahead. Assemble and bake right before guests arrive.
Q: How can I make these keto-friendly?
A: Swap corn tortillas for lettuce wraps or low-carb tortillas. The filling stays the same!
Q: What sides should I serve?
A: Spanish rice, charro beans, a bright slaw, or a simple green salad. Plantain chips or elote complement perfectly.
Q: Can I bake the tortillas instead of frying them?
A: Absolutely. Lightly brush each tortilla with oil, then bake at 400°F (200°C) for 5 minutes per side—or until crisp.
Q: What’s a quick way to add fresh color?
A: Top tacos with diced tomatoes, shredded cabbage, or pickled onions. Bright hues add both crunch and picnic-ready appeal.
Conclusion
There you have it: a recipe that feels pulled together but doesn’t stress you out. Cream Cheese Chicken Tacos bring the best of everyday ingredients—cream cheese, leftover chicken, and tortillas—into a dish that’s bold, comforting, and endlessly tweakable. Whether you’re making dinner for two or feeding a rowdy bunch, these tacos have got your back. Next time the fridge looks less than inspiring, remember this little formula: cream cheese, shredded chicken, cheddar, quick fry, and bake. Gather the family, pour the drinks, and let taco night shine brighter than ever. Feel free to riff with seasonal produce—from summer heirloom tomatoes to winter squash—this taco template is a blank, delicious slate. Enjoy!