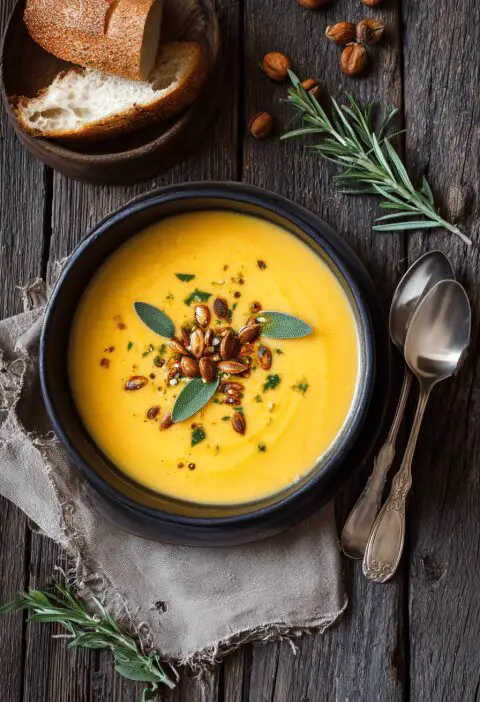
Blackberry Jelly Recipe
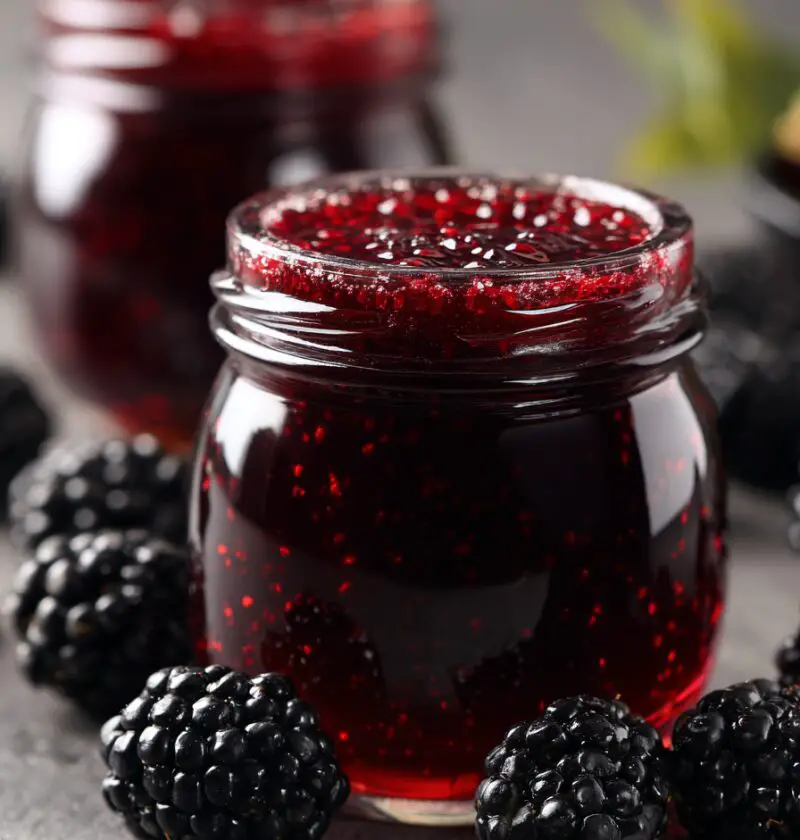
If you’re craving a taste of late summer sunshine, this Blackberry Jelly Recipe is sweet, jewel-toned, and wonderfully old-fashioned—perfect for canning, gifting, or simply spreading on warm toast on a chilly morning.
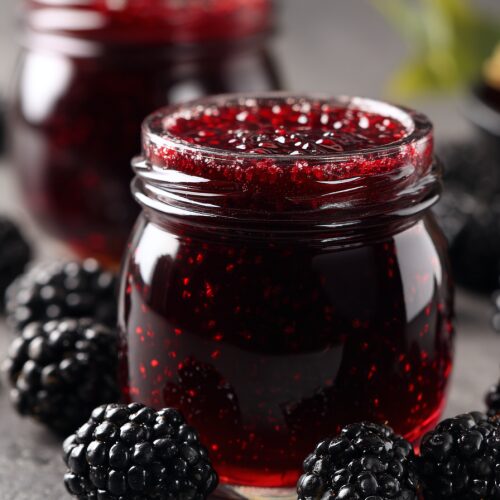
Blackberry jelly has always felt like a little time capsule to me. It’s that classic pantry staple your grandmother probably kept lined up on her shelves—clear, glossy, and packed with berry flavor. This homemade blackberry jelly skips the seeds, celebrates fresh (or frozen) berries, and gives you a reliable, easy method for blackberry jelly canning at home. Whether you’re new to canning or you’ve been “putting up” fruit for years, I’ll walk you through exactly how to make blackberry jelly, step by step.
And yes, you can absolutely make a small batch blackberry jelly if you’re working with a modest haul from the farmers’ market, your backyard brambles, or that generous neighbor down the road.
Why You’ll Love This Blackberry Jelly Recipe
Let’s talk about why this one’s worth pulling out the big pot for:
-
No seeds—just silky, clear jelly
This is a blackberry jelly without seeds, which means kids and picky eaters happily say yes, and your toast doesn’t feel like it’s fighting back. -
Classic, old-fashioned flavor
It tastes like those traditional blackberry jelly jars you remember from childhood—bright, deep berry flavor with a balanced sweetness. -
Perfect for canning & gifting
This recipe is written with blackberry jelly canning in mind, so you can stock your pantry or make thoughtful homemade gifts. -
Works with fresh or frozen berries
Didn’t pick berries this year? No problem. You can use frozen blackberries and still get gorgeous results. -
Small batch friendly
Makes about 4 half-pint jars—enough to feel accomplished without needing to rearrange your whole kitchen. -
Clear, no-stress directions
The step-by-step blackberry jelly instructions are designed for beginners, with canning notes tucked right into the process. -
Naturally dairy-free & gluten-free
Great for folks with dietary restrictions—no fancy swaps needed. -
Versatile and pantry-stable
From PB&J to glazes for pork or chicken, this blackberry jelly preservation recipe gives you a multitasking jar of flavor.
Ingredients
For this Blackberry Jelly Recipe, you’ll want to measure carefully—jelly can be a little fussy, but once you know the ratios, it’s easy and reliable.
-
4 cups blackberry juice
(From about 3–3 ½ quarts fresh blackberries or 4–5 pounds; you can also use frozen blackberries, thawed. Choose berries that are fully ripe, dark, and fragrant for the best flavor.) -
5 cups granulated sugar
(Regular white sugar; I don’t recommend cutting it down for this old fashioned blackberry jelly—it helps the jelly set and preserves it.) -
1 (1.75 oz) box powdered fruit pectin
(Such as Sure-Jell or Ball. Use a standard box of regular pectin, not low-sugar.) -
1 tablespoon bottled lemon juice
(Bottled is better here because the acidity is consistent—important for safe canning.) -
½ teaspoon unsalted butter (optional)
(Helps reduce foam as the jelly boils; you can skip it, but it makes skimming easier.)
Equipment (highly recommended):
- Large heavy-bottomed pot or jam pan
- Jelly bag, nut milk bag, or fine mesh strainer + several layers of cheesecloth
- Potato masher or large spoon
- Canning funnel (for less mess)
- 4–5 sterilized half-pint jars with lids and bands
- Water bath canner or a deep stockpot with a rack
- Instant-read thermometer (optional but handy)
Directions
We’ll start by extracting the blackberry juice and then move into cooking and canning. Don’t worry—I’ll walk you through it like we’re standing in the kitchen together.
1. Prepare your jars and equipment
- Wash your jars, lids, and bands in hot, soapy water. Rinse well.
- Place jars in a canner or deep stockpot, cover with water, and bring to a gentle simmer. Keep them hot (not boiling hard) while you make the jelly.
- Place the lids in warm (not boiling) water according to manufacturer instructions.
This step sets you up for safe blackberry jelly preservation and ensures your jars don’t crack when you fill them with hot jelly.
2. Extract the blackberry juice
- Rinse your blackberries gently in cool water and let them drain.
- Add berries to a large pot, lightly crushing them with a potato masher or the back of a ladle.
- Add just enough water to barely cover the bottom of the pot (about ½ cup). This helps prevent scorching.
- Bring to a simmer over medium heat, stirring occasionally. Cook 10–15 minutes, mashing now and then, until the berries are very soft and juicy.
Now, strain for that smooth blackberry jelly without seeds:
- Line a fine mesh strainer with two to three layers of cheesecloth, or use a jelly bag over a large bowl.
- Pour the cooked berries and juice into the strainer or bag.
- Let the juice drip through for at least 30–60 minutes. For the clearest traditional blackberry jelly, avoid pressing hard; if you don’t mind a tiny bit of cloudiness, you can gently press to extract more juice.
Measure out 4 cups of juice. If you’re a little short, you can add a splash of water or apple juice to reach 4 cups, but don’t add too much or you’ll dilute the flavor.
3. Set up for cooking the jelly
- Pour the 4 cups of blackberry juice into a large, wide pot (a wider pot helps the jelly cook and set faster).
- Stir in the powdered pectin and lemon juice, whisking to dissolve any clumps.
- Add the butter, if using, to help cut down on foam.
You want plenty of room in the pot because the jelly will bubble up quite a bit once it reaches a full boil.
4. Bring to a full rolling boil
- Over medium-high heat, bring the mixture to a full rolling boil—this means the boil does not stir down when you move your spoon through it.
- Stir frequently so nothing sticks; this is when jelly loves to scorch on the bottom if you ignore it.
This is the part where it smells so good you’ll want to spoon it straight from the pot. Don’t. It’s like lava—ask me how I know.
5. Add the sugar and boil hard
- Once you’ve reached a full rolling boil, add all 5 cups of sugar at once. Stir constantly until the sugar is completely dissolved.
- Return the mixture to a full rolling boil.
- Boil hard for about 1 minute, stirring constantly. If you’re using a thermometer, you’re looking for around 220°F at sea level (adjust a bit lower if you’re at high altitude).
After the 1-minute hard boil, turn off the heat. If there’s foam on top, skim it off with a spoon—this keeps your homemade blackberry jelly looking clear and pretty in the jars.
6. Test the set (optional but helpful)
If you like, you can do a quick wrinkle test:
- Keep a small plate in the freezer while you cook.
- When the jelly finishes its hard boil, drop a spoonful onto the cold plate.
- Let it sit for 30 seconds, then push the edge with your finger. If it wrinkles slightly and doesn’t rush back, you’ve hit the jelly stage.
If it’s still very runny, you can bring it back to a boil for another 30–60 seconds. Just don’t overcook, or it can get rubbery.
7. Fill the jars
- Remove hot jars from the canner with a jar lifter and set them on a towel-lined counter.
- Using a ladle and canning funnel, fill each jar with hot blackberry jelly, leaving ¼-inch headspace at the top.
- Run a clean, damp spatula or plastic knife around the inside edge to remove air bubbles.
- Wipe jar rims with a clean damp cloth to ensure a good seal.
- Place lids on jars and screw on the bands until fingertip-tight (snug but not cranked down).
8. Process the jars (water bath canning)
- Carefully place filled jars back into the canner. Make sure they’re covered by at least 1–2 inches of water.
- Bring to a steady boil, then process (boil) for 10 minutes for half-pint jars at sea level.
- If you live at higher altitude, check the Ball or USDA canning guidelines for added time.
- When the time is up, turn off the heat, remove the lid, and let jars sit in the hot water for 5 minutes.
Then:
- Lift jars out carefully and place on a towel, leaving space between them. Don’t tighten bands or press on the lids.
- Let them cool, undisturbed, for 12–24 hours. You’ll hear that happy little “ping” as they seal.
Servings & Timing
- Yield: About 4 half-pint (8-ounce) jars
- Prep Time: 30–40 minutes (washing, cooking berries, and extracting juice)
- Cook Time: 20–25 minutes (cooking jelly + canning)
- Total Time: About 1 ½ to 2 hours, plus 12–24 hours for full set and cooling
Once cooled, check the seals: lids should be flat or slightly concave and not flex when pressed. Any jars that didn’t seal? Just pop them in the fridge and use them as “first priority” jelly.
Variations
Here are a few fun twists if you’re feeling creative with this easy blackberry jelly:
- Blackberry-Lemon Jelly – Add 1 extra tablespoon lemon juice and 1 teaspoon finely grated lemon zest for a bright, tangy twist.
- Blackberry-Vanilla Jelly – Stir in 1–2 teaspoons pure vanilla extract after turning off the heat for a warm, dessert-like flavor.
- Spiced Blackberry Jelly – Add a pinch of cinnamon and a small pinch of ground cloves while boiling for cozy, fall vibes.
- Blackberry-Chili Jelly – Add 1–2 finely minced jalapeños (seeded for milder heat) to the juice as it comes to a boil, then strain before adding sugar for a sweet-heat glaze.
- Low-Sugar Style – Use a low-sugar pectin and follow package directions, adjusting sugar down for a less-sweet, more fruit-forward jelly.
Storage & Reheating
For a pantry-friendly blackberry jelly preservation plan, here’s what you need:
-
Room Temperature (Pantry):
Properly processed jars can be stored in a cool, dark place for 12–18 months. That said, the flavor is best within the first year. -
Refrigerator:
Once opened, a jar of homemade blackberry jelly keeps in the fridge for 3–4 weeks. Always use a clean spoon and keep the rim wiped to avoid stray crumbs. -
Freezer-Friendly Option:
If you prefer to skip canning, you can ladle hot jelly into clean jars or freezer-safe containers, leaving ½-inch headspace, cool, then freeze for up to 6 months. -
Reheating or Softening:
If your jelly is very firm straight from the fridge, let it sit at room temperature for 10–15 minutes before serving; it’ll loosen up a bit. You can very gently warm a spoonful in the microwave for 5–10 seconds if using it as a glaze. -
Make-Ahead Tip:
This is the ultimate make-ahead recipe—once canned, your traditional blackberry jelly is ready and waiting whenever you are.
Notes & Personal Tips
-
On clarity vs. yield:
If you don’t squeeze the jelly bag, you get a clearer, more “professional-looking” jelly but slightly less juice. If you’re not entering this in the county fair, it’s okay to press just a bit and accept a tiny haze for a little more volume. -
Sugar balance matters:
I’ve tested this old fashioned blackberry jelly with less sugar and it just didn’t set as well or keep as nicely. For classic texture and longer shelf life, stick with the ratios here, or switch to a low-sugar pectin designed for custom sugar levels. -
Foam control:
That ½ teaspoon of butter is a very old canner’s trick—my grandmother did it, and I still do. It doesn’t change the flavor, but it makes the surface much less foamy and easier to skim. -
Checking set the next day:
Jelly often looks a little looser when warm and will firm up over 24 hours. Don’t panic if it feels soft right away; give it a full day before you judge the set. -
If it doesn’t set:
You can call it blackberry syrup and it will be fantastic over pancakes, ice cream, or yogurt. Or you can re-cook it with a bit more pectin according to package “remake” instructions. -
Serving ideas beyond toast:
Try brushing it on grilled pork chops, whisking a spoonful into balsamic vinaigrette, or swirling into cheesecake batter. Jelly isn’t just for breakfast.
FAQs
1. Can I make this Blackberry Jelly Recipe with frozen blackberries?
Yes, frozen berries work beautifully—thaw them first, include the juices, and proceed exactly as you would with fresh berries.
2. How do I keep seeds out of my blackberry jelly?
You’ll strain the cooked berries through a jelly bag, cheesecloth-lined strainer, or nut milk bag; that gives you smooth blackberry jelly without seeds.
3. Why didn’t my jelly set properly?
Most often, the jelly either didn’t boil hard enough for long enough after adding sugar, or the measurements of juice, sugar, or pectin were off. The good news is you can often re-cook it with additional pectin.
4. Can I reduce the sugar in this recipe?
Not with regular pectin—reducing sugar can cause a loose or runny jelly and affect preservation. If you want less sugar, use a low-sugar or no-sugar pectin and follow the package directions for easy blackberry jelly with reduced sugar.
5. Do I really need to use bottled lemon juice?
For safe canning, yes. Bottled lemon juice has a consistent acidity that helps prevent spoilage; fresh lemons vary in acid content.
6. How long is blackberry jelly safe on the pantry shelf?
Properly processed and sealed jars stored in a cool, dark place are typically safe for 12–18 months. Always discard any jars with a broken seal, mold, or odd smells.
7. Can I double this Blackberry Jelly Recipe?
I don’t recommend it. Jelly sets more reliably in small batches—a small batch blackberry jelly cooks more evenly and reaches the right temperature and texture more predictably.
8. What’s the difference between blackberry jam and blackberry jelly?
Jam contains the crushed fruit (and often seeds with blackberries), while jelly is made from strained juice only—so this recipe gives you a smooth, spoonable spread without bits or seeds.
Conclusion
This Blackberry Jelly Recipe brings together everything I love about home cooking: simple ingredients, clear steps, and a beautiful payoff you can tuck away on your pantry shelf. It’s a little project, yes—but one that rewards you for months with bright, berry-sweet spoons of sunshine.
If you make this homemade blackberry jelly, come back and let me know how it turned out. Leave a comment, share your own twists or family traditions, and then maybe peek at other seasonal preserves—because once you see how easy it is, one batch of jelly is rarely enough.
Blackberry Jelly
Ingredients
- 4 cups blackberry juice from about 3–3 1/2 quarts fresh blackberries or 4–5 lb; fresh or frozen, thawed
- 5 cups granulated sugar
- 1 box powdered fruit pectin 1.75 oz, regular (not low-sugar), such as Sure-Jell or Ball
- 1 tablespoon bottled lemon juice
- 1/2 teaspoon unsalted butter optional, helps reduce foam
- water a splash (about 1/2 cup) to cover the pot bottom when cooking berries
- 4 to 5 half-pint canning jars with lids and bands sterilized
Instructions
- Wash jars, lids, and bands in hot, soapy water and rinse well. Place jars in a canner or deep stockpot, cover with water, and bring to a gentle simmer; keep them hot but not boiling hard. Place the lids in warm (not boiling) water according to manufacturer instructions while you make the jelly.
- Rinse the blackberries gently in cool water and drain. Add berries to a large pot, lightly crushing them with a potato masher or the back of a ladle. Add just enough water to barely cover the bottom of the pot (about 1/2 cup) to prevent scorching. Bring to a simmer over medium heat, stirring occasionally and mashing now and then, and cook 10–15 minutes until very soft and juicy.
- Line a fine mesh strainer with 2–3 layers of cheesecloth or set up a jelly bag over a large bowl. Pour the cooked berries and juice into the strainer or bag. Let the juice drip through for 30–60 minutes. For the clearest jelly, avoid pressing hard; for a slightly cloudier but higher-yield jelly, you may gently press. Measure 4 cups of juice, adding a small splash of water or apple juice only if needed to reach exactly 4 cups.
- Pour the 4 cups of blackberry juice into a large, wide pot. Stir in the powdered fruit pectin and bottled lemon juice, whisking well to dissolve any clumps. Add the butter, if using, to help reduce foam. Use a pot with plenty of room, as the jelly will bubble up during boiling.
- Over medium-high heat, bring the blackberry juice mixture to a full rolling boil that does not stop bubbling when stirred. Stir frequently to prevent sticking and scorching on the bottom of the pot.
- Once at a full rolling boil, add all of the sugar at once. Stir constantly until completely dissolved, then return the mixture to a full rolling boil. Boil hard for about 1 minute, stirring constantly. If using a thermometer, the mixture should reach around 220°F (at sea level). Turn off the heat. Skim off any foam from the surface with a spoon for a clearer jelly.
- For a wrinkle test, keep a small plate in the freezer while the jelly cooks. After the 1-minute hard boil, drop a spoonful of hot jelly onto the cold plate and let sit 30 seconds. Push the edge with your finger; if it wrinkles slightly and does not flow back quickly, it has reached the jelly stage. If it is still very runny, return the pot to the heat and boil another 30–60 seconds, taking care not to overcook.
- Using a jar lifter, remove hot jars from the canner and place them on a towel-lined counter. Using a ladle and canning funnel, fill each jar with hot blackberry jelly, leaving 1/4-inch headspace at the top. Run a clean, damp spatula or plastic knife around the inside of each jar to release air bubbles. Wipe jar rims with a clean damp cloth. Place lids on the jars and screw on bands until fingertip-tight—snug but not overly tight.
- Place the filled jars back into the canner, ensuring they are covered by 1–2 inches of water. Bring the water to a steady boil, then process (boil) for 10 minutes for half-pint jars at sea level, adjusting processing time as recommended for higher altitudes. When the time is up, turn off the heat, remove the canner lid, and let the jars sit in the hot water for 5 minutes.
- Lift jars out carefully and place them on a towel, leaving space between jars. Do not tighten the bands or press on the lids. Let cool, undisturbed, for 12–24 hours. Check seals: lids should be flat or slightly concave and not flex when pressed. Any unsealed jars should be refrigerated and used first. Properly sealed jars can be labeled and stored in a cool, dark place.