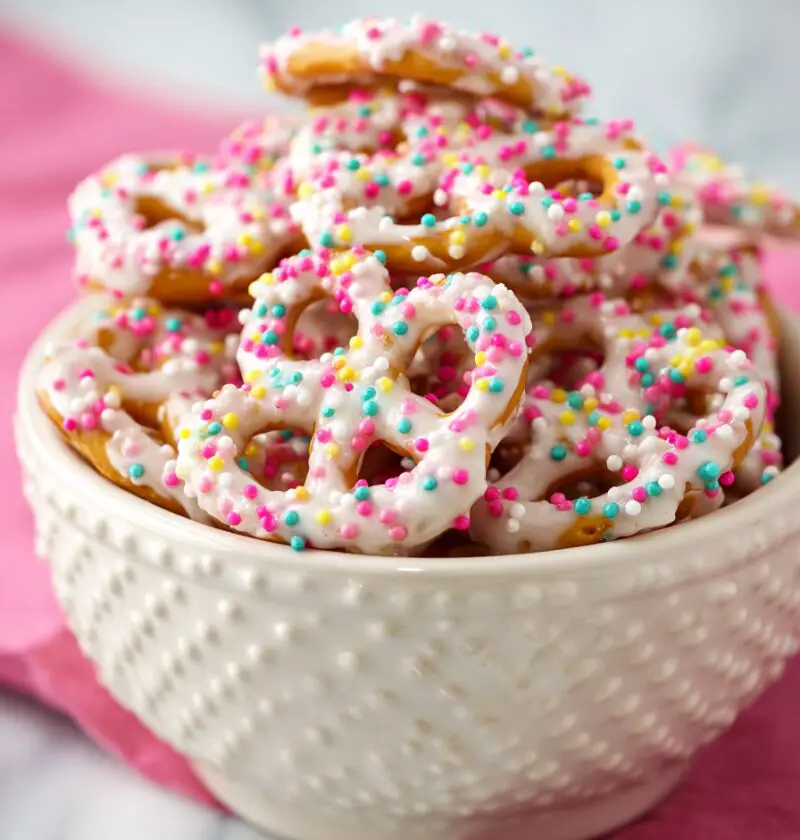
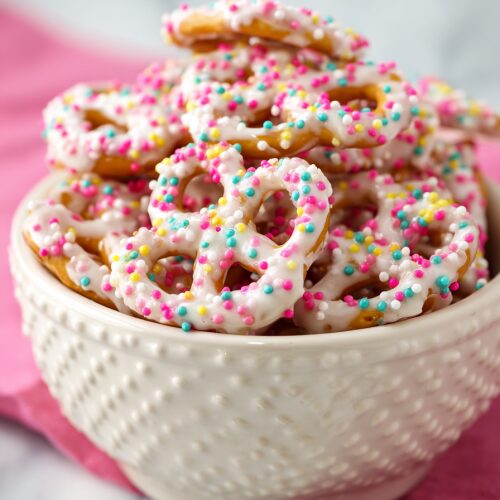
Yogurt Covered Pretzels Recipe
If you love a sweet-salty snack that looks like it came from a fancy candy shop but takes almost no effort, this Yogurt Covered Pretzels Recipe is going to be your new go-to treat.
These crunchy yogurt pretzels are everything I want in a snack food recipe as a busy 50-year-old mom (and now grandma!) who still loves hosting: they’re no bake, use simple pantry ingredients, and feel special enough for holidays, kids’ parties, and last-minute movie nights. This homemade yogurt pretzels recipe gives you that classic yogurt coated pretzels flavor—creamy vanilla yogurt coating on crispy pretzels—without the extra mystery ingredients you’ll find in a lot of store-bought bags.
You know what I love most? You can dress them up for Christmas with red and green sprinkles, keep them plain and elegant for baby showers, or pack them into lunchboxes as a fun surprise. They’re the kind of coated pretzel snack that disappears faster than I can refill the bowl.
Let me explain what we’re making here and why it’s a little special.
We’re taking mini pretzels (or rods—use what you have), tossing them in a lightly tangy vanilla yogurt coating, and chilling them so the coating sets into a sweet, slightly creamy shell. You get that beloved sweet salty snack combo: a little tang from the yogurt, sweetness from powdered sugar, and a big crunchy bite from the pretzels.
Now, a quick “real talk” moment: most commercial yogurt covered pretzels aren’t very yogurt-y. They’re usually made with sugar, oils, and just a tiny bit of yogurt powder. This version uses real Greek yogurt and a bit of coconut oil, so the coating actually tastes like vanilla yogurt. The trade-off is that they’re best kept chilled—but honestly, that’s a fair deal for a snack this good.
I like to make a big batch on Sunday, stash them in the fridge, and pull out a handful whenever someone wanders through the kitchen looking for “something snacky.” They’re also perfect as a simple party snack recipe when you don’t want to turn on the oven or fuss with baking.
Why You’ll Love This Yogurt Covered Pretzels Recipe
- No oven needed: This is a completely no bake pretzel recipe—great for hot days or busy weeknights.
- Sweet, salty, and crunchy: You get that candy-shop yogurt coated pretzel vibe with loads of texture.
- Real yogurt flavor: Uses real Greek yogurt plus vanilla for a truly creamy, tangy yogurt candy coating.
- Kid- and party-friendly: Perfect for birthday parties, school events, movie nights, and snack boards.
- Customizable: Change up colors, add sprinkles, or drizzle with chocolate for endless variations.
- Make-ahead friendly: The pretzels keep well in the fridge, so you can prep a batch days before a party.
- Simple ingredients: Nothing fancy—basic pantry and fridge staples you probably already have.
- Great for gifting: Fill treat bags, cookie tins, or jars for holidays, teachers, neighbors, or coworkers.
Ingredients
Here’s everything you need to make this crunchy yogurt pretzel recipe at home. I’ll add a few notes so you get the best possible texture and flavor.
- 4 cups mini pretzels (twists or small rods work best; use gluten-free pretzels if needed)
- 1 ½ cups whole milk Greek yogurt (plain or vanilla; whole milk gives a thicker, creamier coating)
- 3 cups powdered sugar, sifted (also called confectioners’ sugar; sifting helps avoid lumps)
- 2 tablespoons coconut oil or vegetable shortening, melted (helps the yogurt coating firm up and not feel sticky)
- 2 teaspoons pure vanilla extract (or 1 teaspoon vanilla + ½ teaspoon almond extract for a bakery-style flavor)
- Pinch of fine sea salt (just a pinch enhances the sweet-salty balance)
- Optional toppings:
- Colored sprinkles (for kids party snacks or holidays)
- Crushed freeze-dried strawberries or raspberries (for fruity yogurt coated pretzels)
- Melted white chocolate or dark chocolate for drizzling
Ingredient Tips:
- Yogurt: Use thick Greek yogurt, not regular yogurt, so your yogurt candy coating clings to the pretzels instead of sliding off. If your yogurt seems thin, strain it in a fine-mesh sieve lined with a coffee filter for 30–60 minutes.
- Coconut oil vs. shortening: Coconut oil adds a faint coconut aroma; shortening is neutral. Both help your vanilla yogurt coating set up more firmly in the fridge.
- Pretzel shape: Smaller pretzel twists give you more coating in each bite, but pretzel rods look fun in treat bags. Use what your family prefers.

Directions
Follow these simple steps for the perfect homemade yogurt pretzels. It goes quickly once you get into a rhythm, so have everything ready before you start coating.
-
Prep your pans.
Line 2 large baking sheets with parchment paper or silicone baking mats. This keeps the yogurt coated pretzels from sticking and makes cleanup so much easier. -
Make the yogurt coating.
In a medium mixing bowl, whisk together the Greek yogurt, melted coconut oil (or shortening), vanilla extract, and pinch of salt until smooth and glossy. Make sure the oil isn’t piping hot—warm is fine, but you don’t want it to curdle the yogurt. -
Add the powdered sugar in stages.
Add about 1 cup of powdered sugar at a time, whisking well after each addition. The mixture will go from thin to a thick, silky coating. You’re aiming for the consistency of a loose frosting or slightly thick pancake batter—thick enough to cling to the pretzels, but not so thick that it clumps. -
Adjust the thickness if needed.
If the yogurt coating seems too runny, whisk in another ¼ cup of powdered sugar at a time. If it gets too thick, add 1–2 teaspoons of yogurt to loosen it. This little adjustment makes a big difference in getting pretty, even yogurt coated pretzels. -
Coat the pretzels.
Add 1 cup of pretzels to the bowl of yogurt mixture. Use a fork or small tongs to gently toss and coat them, turning until every pretzel is covered. Working in small batches keeps them from clumping together. -
Shake off the excess.
Lift each pretzel out with a fork, letting the extra yogurt coating drip back into the bowl. You can lightly tap the fork on the side of the bowl to help—the less extra coating, the cleaner your finished pretzels will look. -
Arrange on the baking sheet.
Place each coated pretzel on the prepared baking sheet in a single layer, making sure they don’t touch. If you’re adding toppings like sprinkles or crushed freeze-dried fruit, sprinkle them on now while the coating is still wet. -
Repeat with remaining pretzels.
Continue coating the rest of the pretzels in small batches, refilling the bowl as needed. If the yogurt coating starts to thicken too much as it sits, whisk in a teaspoon of yogurt or a tiny splash of warm water to loosen it again. -
Chill to set.
Transfer the baking sheets to the refrigerator and chill for at least 30–45 minutes, or until the yogurt coating feels firm and dry to the touch. For an even firmer shell, pop the trays in the freezer for 20 minutes. -
Optional: Add a chocolate drizzle.
If you’d like white chocolate pretzels with a yogurt twist, melt a small handful of white chocolate chips or dark chocolate chips, then drizzle in thin zigzags over the chilled pretzels. Chill again briefly to set the chocolate.
Once set, gently peel the crunchy yogurt pretzels off the parchment and transfer them to an airtight container.
Servings & Timing
- Yield: About 8–10 servings (roughly 4 cups of yogurt covered pretzels)
- Prep Time: 20 minutes active time
- Chill Time: 30–45 minutes to set
- Total Time: About 50–65 minutes, most of it hands-off chilling
If you’re making these as a party snack recipe, you can easily double the batch. Just use two large bowls and an extra baking sheet, and you’re good to go.
Variations
Once you’ve got the basic yogurt pretzel recipe down, it’s fun to play a little. Here are some easy twists:
- Strawberry Yogurt Pretzels: Stir 2–3 tablespoons of crushed freeze-dried strawberries into the yogurt coating for a pretty pink color and fruity flavor.
- High-Protein Pretzels: Use high-protein Greek yogurt and add 2 tablespoons of unflavored whey or collagen powder to the coating, whisking until smooth.
- Chocolate-Dipped Bottoms: After chilling, dip just the bottom half of each pretzel in melted dark or milk chocolate for a fancier two-tone look.
- Holiday Sprinkle Pretzels: Use colorful sprinkles matching the season—orange and black for Halloween, red and green for Christmas, pastels for Easter.
- Lemon Yogurt Coating: Swap the vanilla for 1 ½ teaspoons lemon zest and 1 teaspoon lemon juice for a bright, tangy coating.
- “Cheater” Yogurt Pretzels: Mix melted white chocolate chips with just 2 tablespoons of Greek yogurt and a dash of vanilla; dip pretzels and chill for a firmer, more candy-like shell.
Storage & Reheating (Well, “Re-Chilling”)
Because this sweet salty snack is made with real yogurt, it behaves a little differently than shelf-stable candy.
- Fridge storage: Store your yogurt covered pretzels in an airtight container in the refrigerator for up to 5–6 days. They’ll stay snappy and the coating will stay firm.
- Freezer storage: For longer storage, freeze in a single layer on a baking sheet, then transfer to a freezer bag. Freeze for up to 2 months. They actually taste great straight from the freezer.
- Thawing: If frozen, thaw them in the fridge for 20–30 minutes. Avoid thawing at room temperature on a humid day; the coating can pick up moisture and turn a bit tacky.
- Make-ahead tips:
- For parties, make them 1–2 days ahead and keep them refrigerated in shallow containers.
- If you’re packing them as kids party snacks, keep the treat bags in the fridge until right before serving so the yogurt candy coating doesn’t soften.
No real “reheating” needed—just keep them chilled and enjoy.
Notes
A few things I’ve learned after making far too many batches of yogurt coated pretzels for school bake sales and family road trips:
- Thickness is everything. If your vanilla yogurt coating is too thin, it slides right off and you get sad, patchy pretzels. Too thick and it clumps. Take that extra minute to adjust with a little more powdered sugar or a spoonful of yogurt.
- Work in small batches. Tossing 1 cup of pretzels at a time keeps things manageable and helps you avoid giant clumps stuck together like a pretzel brick.
- Chill well. These are not “leave in a hot car” snacks. Because we’re using real yogurt, they’re happiest in the fridge. For parties, I keep them in the fridge and bring them out right before guests arrive.
- Flavor layering matters. That tiny pinch of salt in the coating really does make the sweet salty snack magic happen, especially if you’re using lower-salt pretzels.
- Kids can help. Let little helpers do the sprinkling or chocolate drizzling. Yes, it’s messier. Yes, it’s worth it.
- For extra crunch: If you’re worried about pretzels getting soft, start with very fresh pretzels and don’t let them sit in the coating too long. Toss, coat, shake off, and straight onto the tray.
Honestly, once you make these a couple of times, you’ll find your own favorite “sweet spot” for the coating thickness and chill time.
FAQs
Can I use regular (non-Greek) yogurt?
You can, but the coating will be much thinner and more likely to slide off. If you only have regular yogurt, strain it for at least 1 hour in the fridge through a coffee filter or cheesecloth to thicken it first.
Why is my yogurt coating not sticking to the pretzels?
Usually it’s either too thin or the pretzels are dusty or oily. Make sure the pretzels are fresh and dry, and whisk in more powdered sugar until the coating clings nicely.
My pretzels got soft—what happened?
If they sit out too long at room temperature or in a humid kitchen, the pretzels can absorb moisture from the yogurt coating. Keep them chilled, and don’t store them uncovered.
Can I make these dairy-free?
Yes—use a thick, dairy-free Greek-style yogurt and coconut oil, and just know the texture may be slightly softer. Store them in the coldest part of your fridge or the freezer.
Are these healthier than store-bought yogurt covered pretzels?
They’re still a sweet treat, but you’re using real Greek yogurt, can control the sugar, and skip preservatives and artificial flavors. For a lighter version, you can reduce the powdered sugar a bit and use plain yogurt.
Can I send these in school lunchboxes?
Yes, as long as your child’s lunchbox has an ice pack. The yogurt candy coating holds up best when kept cool, especially in warmer months.
Can I use this yogurt coating on other snacks?
Absolutely—try it on pretzel rods, strawberries, dried apricots, or even popcorn clusters. Just keep in mind it needs to be chilled to set.
How can I make them look more “store-bought”?
Aim for a very smooth, medium-thick coating, tap off the extra well, and chill until completely firm. A light drizzle of melted white chocolate on top also makes them look like they came straight from a gourmet shop.
Conclusion
This Yogurt Covered Pretzels Recipe gives you everything you love about classic yogurt coated pretzels—creamy vanilla yogurt coating, crunchy pretzel bite, that addictive sweet salty snack flavor—made right at home with real ingredients. They’re easy, no bake, and endlessly customizable for holidays, parties, or just a cozy night on the couch with a good movie.
Give them a try, play with your favorite toppings, and let me know how they turn out—leave a comment with your twists or tag your batch of crunchy yogurt pretzels so I can see them. And if you love easy dessert snacks like this, you’ll probably enjoy experimenting with chocolate bark or no-bake snack mixes next.
Yogurt Covered Pretzels
Ingredients
- 4 cups mini pretzels twists or small rods; use gluten-free if needed
- 1 1/2 cups whole milk Greek yogurt plain or vanilla; use thick Greek yogurt for best coating
- 3 cups powdered sugar sifted; also called confectioners’ sugar
- 2 tablespoons coconut oil or vegetable shortening melted
- 2 teaspoons pure vanilla extract or 1 teaspoon vanilla + 1/2 teaspoon almond extract for bakery-style flavor
- 1 pinch fine sea salt
- colored sprinkles optional, for topping
- crushed freeze-dried strawberries or raspberries optional, for fruity topping
- melted white or dark chocolate optional, for drizzling
Instructions
- Line 2 large baking sheets with parchment paper or silicone baking mats to prevent sticking and make cleanup easy.
- In a medium mixing bowl, whisk together the Greek yogurt, melted coconut oil or shortening, vanilla extract, and a pinch of fine sea salt until smooth and glossy. Make sure the oil is warm but not hot so it doesn’t curdle the yogurt.
- Add the powdered sugar about 1 cup at a time, whisking well after each addition. The mixture should thicken into a silky coating, similar to loose frosting or slightly thick pancake batter.
- If the yogurt coating is too runny and slides off a spoon, whisk in an additional 1/4 cup powdered sugar at a time. If it becomes too thick to flow, whisk in 1–2 teaspoons of yogurt at a time until it is thick enough to cling to pretzels without clumping.
- Add about 1 cup of mini pretzels to the bowl of yogurt coating. Use a fork or small tongs to gently toss and turn the pretzels until each piece is evenly coated. Working in small batches helps prevent clumping.
- Lift each coated pretzel out of the bowl with a fork, letting the excess yogurt mixture drip back into the bowl. Lightly tap the fork on the side of the bowl to remove extra coating for a cleaner look.
- Place the coated pretzels in a single layer on the prepared baking sheets, making sure they do not touch. If using toppings such as sprinkles or crushed freeze-dried fruit, sprinkle them over the pretzels while the coating is still wet.
- Continue coating the remaining pretzels in small batches, returning them to the bowl of yogurt mixture as needed. If the coating thickens as it sits, whisk in a teaspoon of yogurt or a small splash of warm water to loosen it slightly.
- Transfer the baking sheets to the refrigerator and chill for 30–45 minutes, or until the yogurt coating feels firm and dry to the touch. For a firmer shell, place the trays in the freezer for about 20 minutes.
- If desired, melt white chocolate or dark chocolate and drizzle it in thin zigzags over the chilled pretzels. Return the trays to the fridge briefly to set the chocolate.
- Once fully set, gently peel the yogurt covered pretzels off the parchment and transfer them to an airtight container. Store in the refrigerator until ready to serve.