Tiramisu Recipe
If you’ve been craving a no-bake, restaurant-worthy dessert that feels fancy but is secretly easy, this Tiramisu Recipe is about to become your new party trick.
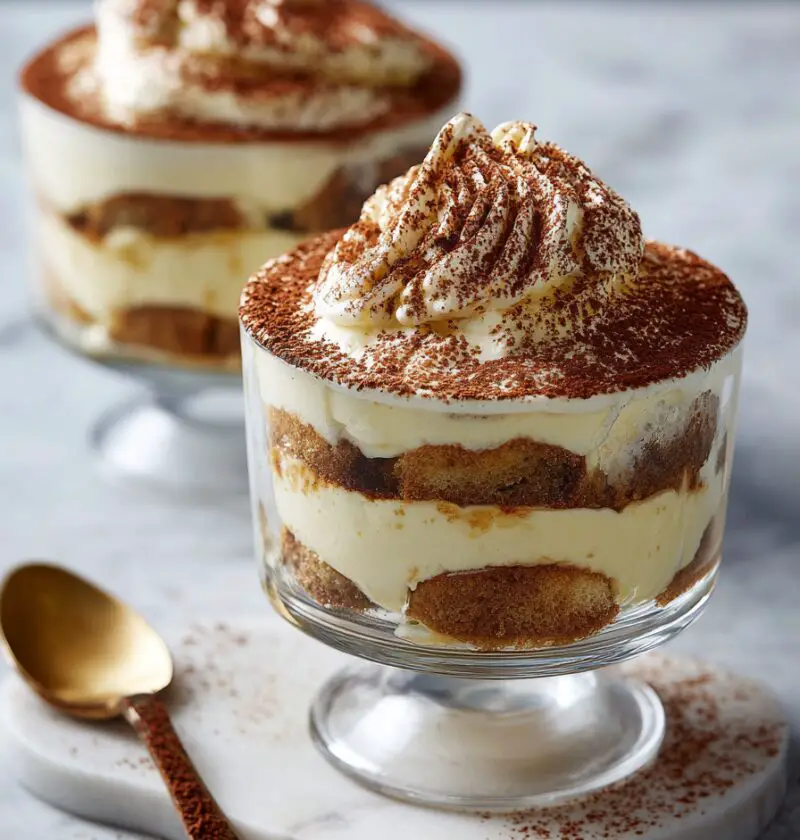
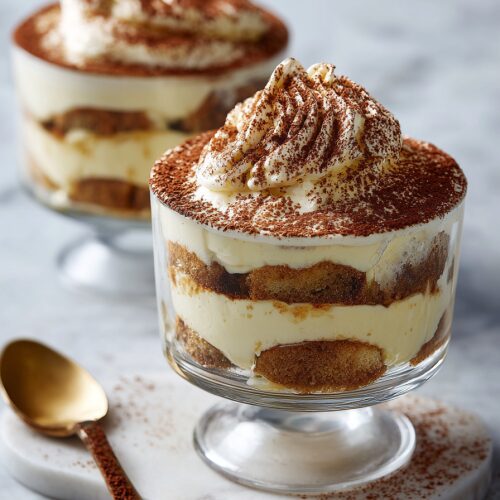
This classic Italian tiramisu dessert layers coffee-soaked ladyfingers with a rich mascarpone cream filling, a gentle kick of liqueur, and a cloud of cocoa powder on top. It’s an elegant, chilled Italian dessert that I love pulling out for holidays, birthdays, and quiet Saturday nights when my husband and I “just want a little something” after dinner—famous last words. This homemade tiramisu is my go-to make ahead dessert because it tastes even better the next day, and it never fails to impress.
Why You’ll Love This Tiramisu Recipe
- No baking required – This no bake tiramisu takes the pressure off; your oven can stay off, even in July.
- Truly classic flavor – Coffee soaked ladyfingers, mascarpone cheese mixture, and a cocoa powder topping give you that traditional tiramisu recipe taste you find in a good Italian restaurant.
- Perfect make ahead dessert – It actually improves after chilling, so your work is done long before guests ring the doorbell.
- Crowd-pleasing party dessert – This creamy coffee dessert serves a group easily and slices into beautiful layers.
- Simple ingredients, big payoff – Espresso, sugar, eggs, mascarpone, and ladyfingers—nothing wild, just the right combo.
- Easy to customize – From alcohol-free to extra boozy or even berry-studded, this classic tiramisu bends to your style.
- Great for coffee lovers – If you adore an espresso coffee dessert, this layered coffee dessert hits all the right notes.
- Rich, yet surprisingly light in texture – The mascarpone cream filling feels lush but not heavy, thanks to whipped eggs and cream.
What Makes This Tiramisu Special
Let me explain what sets this particular Tiramisu Recipe apart from the dozens floating around online.
First, it stays close to authentic tiramisu recipe roots: real espresso (or strong coffee), egg yolks whisked gently over steam for a silkier custard, and mascarpone cheese for that signature tangy richness. It’s a traditional tiramisu recipe at heart, just written in plain language so a tired, busy home cook (hi, that’s me most nights) can make it without stress.
Second, I’ve tested this version for both flavor and structure. A lot of tiramisu desserts either turn out soupy or dry. I adjusted the coffee soaking time and the mascarpone mixture ratios so the ladyfingers are moist, but the slices still hold their shape. You know that moment when you cut into a chilled Italian dessert and everyone leans in? This one gives you those distinct, pretty layers.
And third, I’ve included flexible options. Want it alcohol-free for the kids or pregnancy-safe? I’ve got you. Love your desserts rich and boozy? I’ve got that version, too. I even include a variation for a lighter, yogurt-based twist if you’re balancing a few holiday meals but still want a treat.
Ingredients
Here’s everything you’ll need for this classic Italian tiramisu. I’ll add little notes so you don’t have to guess.
For the coffee soaking mixture:
- 1 ½ cups strong espresso or very strong coffee, cooled
- 3 tablespoons coffee liqueur, dark rum, or Marsala wine (or leave out for alcohol-free)
- 1 teaspoon pure vanilla extract
For the mascarpone cream filling:
- 6 large egg yolks, room temperature
- ¾ cup granulated sugar
- 1 ½ cups (12 ounces / ~340 g) mascarpone cheese, cold (Italian brands like Galbani or BelGioioso work beautifully)
- 1 cup heavy whipping cream, cold
For assembling the tiramisu:
- 40–45 ladyfingers (savoiardi, firm and crunchy style, not soft cake-style)
- Unsweetened cocoa powder, for dusting the top (Dutch-process gives a deep color)
- Dark chocolate shavings (optional, but lovely for garnish)
Pan size: 9×13-inch baking dish (glass or ceramic works best so you can see the layers).
Ingredient tips:
- Coffee: Use espresso if you can. A stovetop Moka pot, Nespresso, or strong brewed coffee works. Weak coffee makes a sad tiramisu.
- Mascarpone: Keep it cold until you use it; warm mascarpone can separate.
- Egg yolks: Room temperature yolks whip up more easily and give a smoother texture.
- Heavy cream: Chill the bowl and beaters for fluffier whipped cream.

Directions
You know what? Tiramisu looks fancy, but it’s really just layering and chilling. Here’s how to do it step by step.
-
Make the coffee mixture
In a shallow bowl, stir together the cooled espresso, coffee liqueur (if using), and vanilla extract. Set aside. It should be cool, not warm, so it doesn’t over-soften the ladyfingers. -
Set up a gentle water bath for the yolks
Fill a medium saucepan with an inch or two of water and bring it to a very gentle simmer. Place a heatproof bowl on top (it shouldn’t touch the water). This is your double boiler—it helps cook the yolks safely without scrambling them. -
Whisk the yolks and sugar
Add the egg yolks and granulated sugar to the bowl over the simmering water. Whisk constantly for 8–10 minutes, until the mixture is pale, thick, and slightly increased in volume. It should feel warm, not hot. This creates a safe, custard-like base for your mascarpone cream. -
Cool the yolk mixture slightly
Remove the bowl from the heat and keep whisking for another minute off the stove to release steam. Let it cool for about 5 minutes, stirring occasionally so it doesn’t form a skin. -
Beat in the mascarpone
Add the cold mascarpone cheese to the lukewarm yolk mixture. Using a hand mixer on low or a spatula, blend gently until smooth and fully combined. Don’t overmix—stop as soon as it’s creamy; overmixing can make mascarpone grainy. -
Whip the cream
In a separate chilled bowl, whip the cold heavy cream to medium-stiff peaks. It should hold its shape on the whisk but still look soft and smooth, not chunky or curdled. -
Fold the whipped cream into the mascarpone mixture
Gently fold the whipped cream into the mascarpone mixture in 2–3 additions. Use a soft motion from the bottom of the bowl up, turning the bowl as you go. You want a light, airy mascarpone cream filling with no streaks. -
Prep your pan and workstation
Have your 9×13 pan ready, with the coffee soaking mixture nearby and the ladyfingers lined up. This makes assembly quick, which matters because the ladyfingers soak very fast. -
Dip the ladyfingers
Working one at a time, dip each ladyfinger into the coffee mixture for about 1 second per side—very quick. They should be moist but not collapsing. Arrange them in a single layer across the bottom of the pan. Trim to fit if needed. -
Add the first layer of mascarpone cream
Spread half of the mascarpone cheese mixture over the ladyfingers. Use an offset spatula or the back of a spoon to smooth it into an even layer. -
Repeat with a second layer
Add another layer of coffee soaked ladyfingers on top of the cream, then spread the remaining mascarpone cream over them. Smooth the top as evenly as you can; this makes the cocoa powder topping look neat. -
Dust with cocoa powder
Using a fine-mesh sieve, dust the top generously with unsweetened cocoa powder. You can add chocolate shavings now or just before serving. -
Chill thoroughly
Cover the pan tightly with plastic wrap and refrigerate for at least 6 hours, but 8–24 hours is even better. This resting time lets the flavors meld and firms up the layered coffee dessert so it slices cleanly. -
Serve and enjoy
Right before serving, add a fresh dusting of cocoa powder and extra chocolate shavings if you like. Cut into squares with a sharp knife, wiping the blade between cuts for tidy pieces.
Servings & Timing
- Yield: About 12 generous servings (or up to 16 smaller slices)
- Prep Time: 30–35 minutes active time
- Chill Time: Minimum 6 hours (overnight recommended)
- Total Time: About 6 ½–24 hours, including chilling
I usually make this authentic tiramisu recipe the evening before a party, then pull it out the next day when guests are finishing their coffee. It’s one of those desserts that actually rewards you for planning ahead.
Variations
A classic tiramisu is wonderful as-is, but it’s also fun to play a little.
- Alcohol-free tiramisu: Skip the liqueur and add an extra teaspoon of vanilla or a splash of almond extract for flavor.
- Extra chocolate tiramisu: Layer in finely chopped dark chocolate or mini chocolate chips between the cream layers for added crunch.
- Berry tiramisu: Add a thin layer of sliced strawberries or raspberries on top of each mascarpone layer for a lighter, fruity twist.
- Holiday tiramisu: Use a hazelnut liqueur and sprinkle toasted chopped hazelnuts on top for a cozy winter dessert.
- Lighter tiramisu: Replace one-third of the mascarpone with thick, whole-milk Greek yogurt for a slightly tangier, lighter cream.
- Individual tiramisu cups: Build layers in small glasses or jars instead of a big pan—perfect for parties and portion control.
Storage & Reheating (Well, “Rechilling”)
- Refrigerator: Cover the tiramisu tightly and store in the fridge for up to 3 days. The flavor is best on days 1–2, but it’s still delicious on day 3.
- Freezer: You can freeze tiramisu for up to 1 month. Wrap the dish in plastic wrap and then foil, or freeze individual slices in airtight containers.
- Thawing: Thaw frozen tiramisu in the refrigerator overnight. The texture holds up surprisingly well, though the ladyfingers will be a bit softer.
- Make ahead tips: For a party, make this rich creamy tiramisu 1–2 days in advance. Dust with a final light layer of cocoa right before serving to freshen up the look.
No reheating needed—this is a chilled dessert, so the “ready to serve” moment is when it’s nicely cold and set.
Notes From My Kitchen
- Don’t over-soak the ladyfingers. This is the number one place people get stuck. A quick dip is enough. If they sit in the coffee too long, they’ll fall apart and your tiramisu dessert will be mushy.
- Use real espresso if you can. The coffee flavor is the backbone of a good Italian tiramisu. Strong instant espresso works too—just mix it on the stronger side.
- Taste as you go. Before assembling, taste your mascarpone cream filling. If you like it sweeter, you can sprinkle a tablespoon or two of powdered sugar over the top layer later.
- Chill longer than you think. I know it’s hard to wait, but this classic tiramisu recipe really does need those hours in the fridge for the layers to marry and firm up.
- Serving for a crowd. For a big family gathering, I sometimes make one and a half recipes and use a large lasagna pan. This disappears fast at potlucks.
- For raw egg concerns: The yolks are gently heated over a water bath, which helps, but if you’re serving someone very high-risk, you can use pasteurized eggs for extra peace of mind.
FAQs
Can I make this Tiramisu Recipe without alcohol?
Yes—just leave out the liqueur and add an extra teaspoon of vanilla. You still get that deep coffee flavor without any alcohol.
What can I use instead of mascarpone cheese?
Mascarpone is traditional, but if you can’t find it, you can use full-fat cream cheese softened with a tablespoon or two of heavy cream. The flavor will be a bit tangier and less classic, but still tasty.
Are the eggs safe to eat in tiramisu?
The yolks are warmed with sugar over a gentle water bath, which reduces the risk, but if you’re pregnant, elderly, or serving immunocompromised guests, use pasteurized eggs for extra safety.
Can I use regular soft ladyfingers or sponge cake?
Use firm, crisp savoiardi-style ladyfingers if you can. Softer cake-style ones soak up more liquid and may give you a mushier texture.
My tiramisu turned out runny—what happened?
Usually this means the ladyfingers were soaked too long or the cream mixture wasn’t chilled long enough. Next time, dip the cookies briefly and give the dessert at least 8 hours of chill time.
Can I make this as an easy tiramisu recipe without the double boiler step?
You can whisk the yolks and sugar in a regular bowl without heating, but be sure to use pasteurized eggs and understand the texture may be a little looser. I find the gentle heating makes a more stable, creamy coffee dessert.
How far ahead can I make tiramisu for a party?
You can assemble it 1–2 days in advance. It actually tastes better the second day, which makes it a fantastic make ahead dessert for holidays.
Can I cut the recipe in half?
Yes, assemble it in an 8×8 or 9×9 pan. The layers will be slightly thicker, but it works very well for smaller households.
Conclusion
This classic Tiramisu Recipe brings together everything I love about a good dessert: no baking, simple ingredients, a touch of nostalgia, and that “wow” moment when you bring it to the table. It’s a traditional Italian tiramisu at heart, but written with all the little tips I’ve learned so you can make it calmly in your own kitchen.
If you try this rich creamy tiramisu dessert, I’d love to hear how it went—leave a comment, share a photo, or tell me what twist you added. And if you’re still in a cozy coffee mood, you might enjoy pairing it with homemade espresso drinks or another coffee-forward dessert next.
Classic Tiramisu
Ingredients
- 1 1/2 cups strong espresso or very strong coffee cooled
- 3 tablespoons coffee liqueur, dark rum, or Marsala wine optional, or omit for alcohol-free
- 1 teaspoon pure vanilla extract
- 6 large egg yolks room temperature
- 3/4 cup granulated sugar
- 1 1/2 cups mascarpone cheese about 12 ounces / ~340 g, cold
- 1 cup heavy whipping cream cold
- 40-45 ladyfingers (savoiardi) firm, crunchy style, not soft cake-style
- unsweetened cocoa powder for dusting the top; Dutch-process preferred
- dark chocolate shavings optional, for garnish
Instructions
- In a shallow bowl, stir together the cooled espresso (or strong coffee), coffee liqueur (if using), and vanilla extract. Set aside. The mixture should be cool, not warm, so it doesn’t over-soften the ladyfingers.1 1/2 cups strong espresso or very strong coffee, 3 tablespoons coffee liqueur, dark rum, or Marsala wine, 1 teaspoon pure vanilla extract
- Fill a medium saucepan with 1–2 inches of water and bring it to a very gentle simmer. Place a heatproof bowl on top, making sure the bottom of the bowl does not touch the water. This acts as a double boiler.
- Add the egg yolks and granulated sugar to the bowl over the simmering water. Whisk constantly for 8–10 minutes, until the mixture is pale, thick, slightly increased in volume, and warm (not hot).6 large egg yolks, 3/4 cup granulated sugar
- Remove the bowl from the heat and whisk for another minute off the stove to release steam. Let cool for about 5 minutes, stirring occasionally to prevent a skin from forming.
- Add the cold mascarpone cheese to the lukewarm yolk mixture. Using a hand mixer on low speed or a spatula, gently blend just until smooth and fully combined. Do not overmix to avoid a grainy texture.1 1/2 cups mascarpone cheese
- In a separate chilled bowl, whip the cold heavy whipping cream to medium-stiff peaks. It should hold its shape but still look soft and smooth, not chunky or curdled.1 cup heavy whipping cream
- Gently fold the whipped cream into the mascarpone mixture in 2–3 additions, using an up-and-over motion and turning the bowl as you go. Fold just until no streaks remain and the cream is light and airy.
- Have a 9×13-inch baking dish ready. Place the coffee mixture nearby and lay out the ladyfingers so assembly can go quickly.
- Working one at a time, quickly dip each ladyfinger into the coffee mixture for about 1 second per side. They should be moist but not collapsing. Arrange in a single layer across the bottom of the pan, trimming to fit as needed.1 1/2 cups strong espresso or very strong coffee, 40-45 ladyfingers (savoiardi)
- Spread half of the mascarpone cream evenly over the layer of ladyfingers, smoothing the surface with an offset spatula or the back of a spoon.
- Create a second layer of dipped ladyfingers on top of the cream, then spread the remaining mascarpone cream evenly over the top. Smooth the surface as neatly as possible.40-45 ladyfingers (savoiardi)
- Using a fine-mesh sieve, generously dust the top of the tiramisu with unsweetened cocoa powder. Add dark chocolate shavings now or just before serving, if desired.unsweetened cocoa powder, dark chocolate shavings
- Cover the dish tightly with plastic wrap and refrigerate for at least 6 hours, preferably 8–24 hours, until fully chilled and set so it slices cleanly.
- Just before serving, add an extra light dusting of cocoa powder and more chocolate shavings if you like. Cut into squares with a sharp knife, wiping the blade between cuts for neat slices.unsweetened cocoa powder, dark chocolate shavings