Strawberry Fudge Recipe
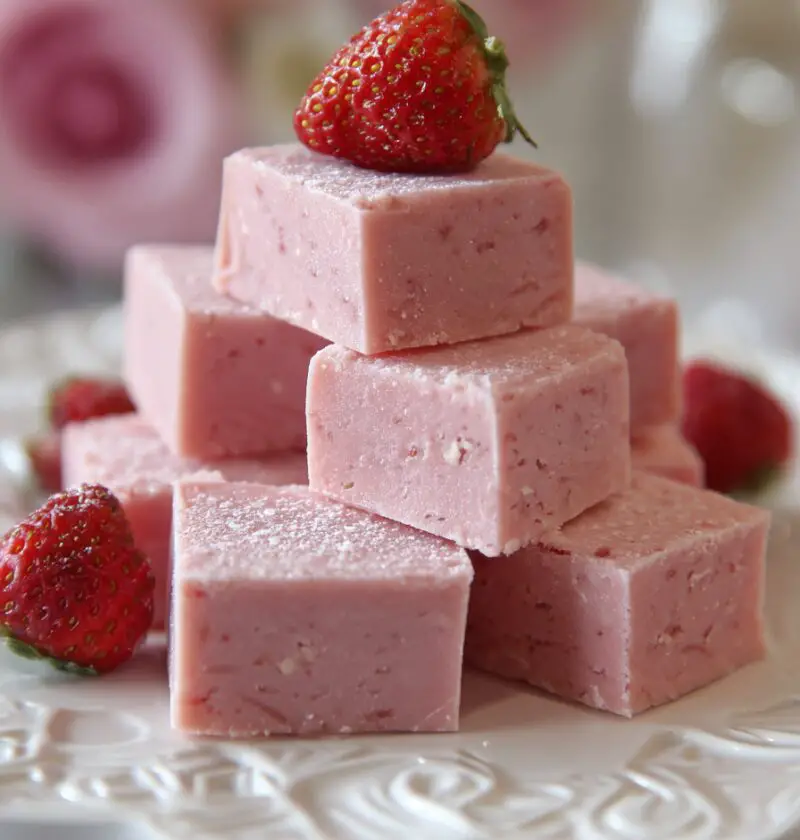
This creamy Strawberry Fudge Recipe is sweet, pretty-in-pink, completely no-bake, and comes together in minutes—perfect for Valentine’s Day, spring parties, or whenever you’re craving a fun strawberry dessert recipe without turning on the oven.
Meet Your New Favorite Strawberry Fudge Recipe
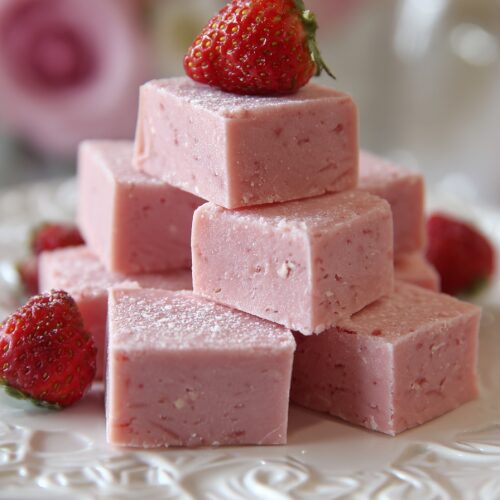
This Strawberry Fudge Recipe is a simple, homemade strawberry fudge made with white chocolate, sweetened condensed milk, and a punch of real strawberry flavor. It’s rich but not heavy, silky but still sliceable, and honestly, it looks like it walked straight out of a candy shop window.
I started making this easy strawberry fudge years ago when my kids were still in middle school. I needed something fast for a bake sale (because of course they told me the night before), and traditional stovetop fudge felt like too much babysitting. This creamy strawberry fudge, made in the microwave, saved me—and it’s been a family favorite holiday fudge recipe ever since.
What makes it special?
- It’s a quick, no bake strawberry fudge.
- Uses the “cheater” method with condensed milk fudge, so no sugar thermometers or worrying about soft-ball stage.
- It’s naturally festive—this pink strawberry fudge looks like it was made for Valentine’s Day, Easter, baby showers, or Christmas cookie trays.
- You can whip it up in about 10 minutes, then let the fridge do the rest.
If you’re a fan of white chocolate strawberry fudge or those old-fashioned strawberry candy recipes, you’re going to love this.
Why You’ll Love This Strawberry Fudge Recipe
- No oven needed – This is a true no-bake strawberry fudge you can make even on the hottest summer day.
- Fast and fuss-free – About 10 minutes of hands-on time; the rest is just chilling in the fridge.
- Microwave-friendly – This can be a full microwave strawberry fudge; no fancy equipment required.
- Perfect for gifting – The pretty pink color and smooth texture make it ideal for holiday fudge boxes or Valentine’s Day fudge tins.
- Beginner-friendly – No candy thermometer, no special skills—great for kids or new bakers to help with.
- Customizable flavor – Make it more natural with freeze-dried strawberries or a little more nostalgic with strawberry gelatin.
- Stores beautifully – Keeps well in the fridge and freezer, so you can make it ahead for parties.
- Crowd-pleasing sweetness – It tastes like a cross between strawberries-and-cream ice cream and a soft candy bar.
Ingredients
Here’s everything you need for this simple, homemade strawberry fudge. I’ll share a few tips and easy swaps as we go.
- 3 cups (about 18 oz / 510 g) white chocolate chips
Use a brand that melts smoothly (I like Ghirardelli or Guittard). White baking bars chopped small also work. - 1 can (14 oz / 396 g) sweetened condensed milk
This is the base of our condensed milk fudge—make sure you’re not grabbing evaporated milk by mistake. - 3 tablespoons unsalted butter, cut into small pieces
Adds extra creaminess and shine. - 1 teaspoon pure vanilla extract
Rounds out the flavor and keeps it from tasting too “one-note” sweet. - 2–3 tablespoons finely crushed freeze-dried strawberries or
2 tablespoons strawberry gelatin powder (like Jell-O)- Freeze-dried strawberries give a more natural, slightly tangy strawberry flavor and subtle pink color.
- Strawberry gelatin gives brighter color and a nostalgic candy vibe—either works for this strawberry fudge recipe.
- 1/2–1 teaspoon strawberry extract (optional but recommended if you like strong flavor)
Start with 1/2 teaspoon, taste, and add more as needed. - Pinch of fine sea salt
Just a pinch helps balance the sweetness. - Optional toppings (1–3 tablespoons total):
- Crushed freeze-dried strawberries
- Pink or white sprinkles
- Mini marshmallows, chopped small
These make your pink strawberry fudge look extra fun and festive.
Pan prep:
- 1 (8×8-inch) square baking pan (metal or glass)
- Parchment paper for lining (leave overhang so you can lift out the fudge)

Step-by-Step Directions
Let’s walk through this Strawberry Fudge Recipe together. It’s easy, but a few little tricks make it extra smooth and creamy.
-
Prep your pan.
Line an 8×8-inch pan with parchment paper, letting it hang over the sides like little handles. Lightly grease the parchment with a tiny bit of butter or nonstick spray so the fudge doesn’t stick. -
Combine the base ingredients.
In a medium microwave-safe bowl, add the white chocolate chips, sweetened condensed milk, and butter. Don’t stir yet—just place everything in the bowl so it melts evenly. -
Melt gently in the microwave.
Microwave on 50–60% power for 30 seconds at a time, stirring well after each burst.- It usually takes 2–3 rounds, depending on your microwave.
- Stop when the mixture is mostly melted and smooth; it will finish melting as you stir.
If you see any stubborn bits of chocolate, keep stirring before you add more heat—white chocolate can scorch if it’s overheated.
-
Add flavorings and color.
Stir in the vanilla extract, pinch of salt, and your strawberry ingredient of choice (freeze-dried strawberry powder or strawberry gelatin). Add 1/2 teaspoon strawberry extract if using.- Stir well, scraping the sides and bottom so everything is fully combined.
- Taste (careful, it’s warm) and add a little more strawberry extract or strawberry powder if you want a stronger flavor.
-
Adjust texture if needed.
If the mixture seems very thick and stiff, you can warm it for another 10–15 seconds at 50% power and stir again. You want it thick like brownie batter, not crumbly. -
Pour and smooth.
Pour the fudge mixture into your prepared pan. Use a silicone spatula to spread it evenly into the corners and smooth the top. Work fairly quickly; it starts to set as it cools. -
Decorate the top (optional but fun).
While the fudge is still warm and soft on top, sprinkle crushed freeze-dried strawberries, sprinkles, or mini marshmallows over the surface. Gently press them in with your hand or the back of a spatula so they stick. -
Chill until firm.
Transfer the pan to the refrigerator and chill for at least 2 hours, or until the strawberry fudge is firm enough to cut cleanly. For the neatest squares, 3–4 hours is even better. -
Slice and serve.
Use the parchment to lift the fudge slab out of the pan. Place on a cutting board and use a sharp knife to cut into 25 small squares (5×5) or 16 larger ones (4×4). Wipe the knife between cuts for clean edges.
You know what? The hardest part is waiting for it to chill.
Servings & Timing
- Yield: About 16–25 pieces of fudge (depending on how big you cut the squares)
- Prep Time: 10–15 minutes
- Chill Time: 2–4 hours
- Total Time: About 2 hours 15 minutes to 4 hours 15 minutes (mostly hands-off chilling)
If you’re planning this for a party or holiday dessert tray, I recommend making it the day before so you’re not watching the clock.
Fun Variations on This Strawberry Fudge
Once you’ve made this simple strawberry fudge recipe once, it’s easy to play around with flavors:
- Strawberry Shortcake Fudge – Fold in 1/2 cup of crushed vanilla wafer cookies or shortbread right before spreading into the pan.
- White Chocolate Strawberry Swirl Fudge – Reserve 1/4 cup of the melted white chocolate mixture (without strawberry), then swirl it over the pink layer before chilling.
- Strawberry Cheesecake Fudge – Stir in 3–4 tablespoons of softened cream cheese and a few crushed graham crackers, then add an extra tablespoon or two of strawberry powder.
- Valentine’s Day Fudge – Top with heart-shaped sprinkles and use extra strawberry extract for a bold, candy-shop strawberry flavor.
- Berry Medley Fudge – Mix freeze-dried raspberries or blueberries with the strawberries for a more complex berry candy flavor.
- Dairy-Free Strawberry Fudge – Use dairy-free white baking chips and coconut condensed milk, then line your pan well since the texture will be slightly softer.
Storage & Reheating (Plus Make-Ahead Tips)
This homemade strawberry fudge is a great make-ahead treat—almost like your future self sent you candy.
-
Room Temperature:
If your kitchen is cool, you can keep the fudge in an airtight container at room temperature for up to 2 days. Cut pieces and place parchment between layers to prevent sticking. -
Refrigerator:
For fresher, firmer fudge, store in an airtight container in the fridge for up to 1 week. This is my favorite way to keep that creamy strawberry fudge texture just right. -
Freezer:
Want to get ahead for holidays? Place fudge squares on a baking sheet to freeze solid, then transfer to a freezer bag or container. They’ll keep well for up to 2 months.
To serve, thaw in the fridge for a few hours or on the counter for 20–30 minutes. No reheating needed—this is a no-bake strawberry fudge, so you’re just letting it soften. -
Lunchbox or Gift Boxes:
If packing as a strawberry candy recipe for gifts, I like to keep the fudge chilled first, then place it in small paper cups inside a tin or box. It holds its shape better and doesn’t stick.
Notes From My Kitchen
A few things I’ve learned after making this Strawberry Fudge Recipe more times than I can count:
- White chocolate quality matters. Cheaper chips sometimes stay lumpy or seize. If your fudge looks grainy, it might be the chips, not you.
- Go easy with the heat. White chocolate burns faster than dark chocolate. Keep your microwave on 50–60% power and stir well between bursts.
- Taste as you go. Strawberry extract can be strong. Start small, taste, then add more if needed. It’s much easier to add flavor than take it away.
- For brighter pink fudge: A small drop or two of pink food coloring makes the color pop, especially for Valentine’s Day fudge or baby showers.
- Cut when cold, serve slightly cool. Fudge slices more neatly when it’s cold from the fridge, but the flavor is best when it’s had 5–10 minutes on the counter to soften a bit.
- Make it your signature. Maybe you always top it with crushed freeze-dried strawberries, or always make it extra tangy—those little tweaks are what turn a simple strawberry fudge recipe into “your” strawberry fudge.
Honestly, it’s one of those recipes that feels fancy but behaves like a weeknight dessert.
Frequently Asked Questions
1. Can I make this Strawberry Fudge Recipe on the stovetop instead of the microwave?
Yes. Place the white chocolate, condensed milk, and butter in a small saucepan over low heat, stirring constantly until melted and smooth. Don’t let it simmer.
2. My fudge didn’t set—what went wrong?
Most often, it just needs more chill time. If it’s still very soft after several hours, it may have had too much liquid or not enough chocolate; you can refrigerate overnight or re-melt with an extra handful of chips and re-chill.
3. Can I use fresh strawberries?
Fresh berries release too much moisture and will make the fudge weepy and soft. For reliable results, stick with freeze-dried strawberries or strawberry gelatin for this easy strawberry fudge.
4. Is this fudge very sweet?
Yes, like most condensed milk fudge recipes, it’s definitely on the sweeter side—but the strawberry flavor and little pinch of salt help balance it out. Cut small pieces if you prefer just a bite or two.
5. Can I double this recipe?
Absolutely. Double everything and use a 9×13-inch pan. The thickness will be similar, and you’ll have plenty for a holiday platter or party.
6. How do I make this fudge more natural-tasting?
Skip the gelatin and strawberry extract and use finely crushed freeze-dried strawberries instead, maybe with a teaspoon of lemon juice powder or zest for a little brightness.
7. Can I use candy melts instead of white chocolate chips?
You can, but the flavor will be more like candy coating than creamy white chocolate. If you go that route, try mixing candy melts with at least some real white chocolate for better taste.
8. Is this recipe gluten-free?
Yes, as long as your white chocolate, strawberry ingredients, and toppings are certified gluten-free. Always double-check labels if you’re serving someone with celiac or gluten sensitivity.
Final Thoughts
This Strawberry Fudge Recipe checks a lot of boxes: it’s quick, no-bake, beautifully pink, and tastes like a little square of strawberries-and-cream happiness. Whether you’re making Valentine’s Day fudge, filling holiday tins, or just treating yourself on a weeknight, it’s the kind of simple strawberry dessert recipe that makes people smile.
If you try this homemade strawberry fudge, I’d love to hear how it turned out—tell me your favorite variation or who you shared it with. And if you enjoy no bake strawberry fudge recipes like this, you might also enjoy exploring more of my easy candy recipes and holiday sweets on the blog.
Strawberry Fudge
Ingredients
- 3 cups white chocolate chips about 18 oz / 510 g; use a brand that melts smoothly
- 14 oz sweetened condensed milk 1 can; do not substitute evaporated milk
- 3 tablespoons unsalted butter cut into small pieces
- 1 teaspoon pure vanilla extract
- 2-3 tablespoons freeze-dried strawberries finely crushed to a powder, OR use strawberry gelatin in the next ingredient instead
- 2 tablespoons strawberry gelatin powder like Jell-O; use instead of freeze-dried strawberries if preferred
- 1/2-1 teaspoon strawberry extract optional but recommended; start with 1/2 teaspoon and adjust to taste
- 1 pinch fine sea salt
- crushed freeze-dried strawberries optional topping, 1–3 tablespoons
- pink or white sprinkles optional topping, 1–3 tablespoons
- mini marshmallows optional topping, chopped small; 1–3 tablespoons
- 1 8x8-inch square baking pan metal or glass, for setting the fudge
- parchment paper for lining the pan, with overhang
Instructions
- Line an 8x8-inch square baking pan with parchment paper, leaving an overhang on two sides to act as handles. Lightly grease the parchment with a little butter or nonstick spray to prevent sticking.1 8x8-inch square baking pan, parchment paper
- In a medium microwave-safe bowl, add the white chocolate chips, sweetened condensed milk, and butter. Do not stir yet; arrange them so they melt evenly.3 cups white chocolate chips, 14 oz sweetened condensed milk, 3 tablespoons unsalted butter
- Microwave the mixture on 50–60% power for 30 seconds at a time, stirring well after each burst. Repeat for 2–3 rounds, or until the mixture is mostly melted and smooth. The residual heat will finish melting any small bits; stir thoroughly before adding more heat to avoid scorching the white chocolate.3 cups white chocolate chips, 14 oz sweetened condensed milk, 3 tablespoons unsalted butter
- Stir in the vanilla extract, a pinch of fine sea salt, and your strawberry ingredient of choice: either the finely crushed freeze-dried strawberries OR the strawberry gelatin powder. If using, add 1/2 teaspoon strawberry extract. Mix very well, scraping the sides and bottom of the bowl. Carefully taste and add a bit more strawberry extract or strawberry powder if you want a stronger flavor.1 teaspoon pure vanilla extract, 2-3 tablespoons freeze-dried strawberries, 2 tablespoons strawberry gelatin powder, 1/2-1 teaspoon strawberry extract, 1 pinch fine sea salt
- If the fudge mixture is very thick and stiff, microwave it for another 10–15 seconds at 50% power and stir again. The consistency should be thick like brownie batter, not dry or crumbly.
- Pour the strawberry fudge mixture into the prepared pan. Use a silicone spatula to spread it evenly into the corners and smooth the top. Work fairly quickly, as the mixture will begin to set as it cools.1 8x8-inch square baking pan, parchment paper
- While the fudge is still warm and soft on top, sprinkle with optional toppings such as crushed freeze-dried strawberries, pink or white sprinkles, or chopped mini marshmallows. Gently press them into the surface so they adhere.crushed freeze-dried strawberries, pink or white sprinkles, mini marshmallows
- Transfer the pan to the refrigerator and chill for at least 2 hours, or until the fudge is firm enough to cut cleanly. For the neatest squares, chill 3–4 hours or overnight.
- Use the parchment overhang to lift the set fudge out of the pan and place it on a cutting board. With a sharp knife, cut into 25 small squares (5x5) or 16 larger squares (4x4), wiping the knife between cuts for clean edges. Serve slightly cool or at room temperature.
Notes
Timing: 10–15 minutes of hands-on prep plus 2–4 hours of chilling.
Storage: Store in an airtight container at room temperature (cool kitchen) for up to 2 days or in the refrigerator for up to 1 week. For longer storage, freeze pieces on a baking sheet until firm, then transfer to a freezer-safe container or bag for up to 2 months. Thaw in the fridge for a few hours or at room temperature for 20–30 minutes.
Tips: Use good-quality white chocolate chips to avoid grainy texture, and always melt white chocolate gently at 50–60% power to prevent scorching. Cut the fudge when it is cold from the fridge for the cleanest slices, then let it sit for 5–10 minutes for the best flavor and texture. For brighter pink color, you can add a drop or two of pink food coloring. This recipe can be doubled and set in a 9x13-inch pan.