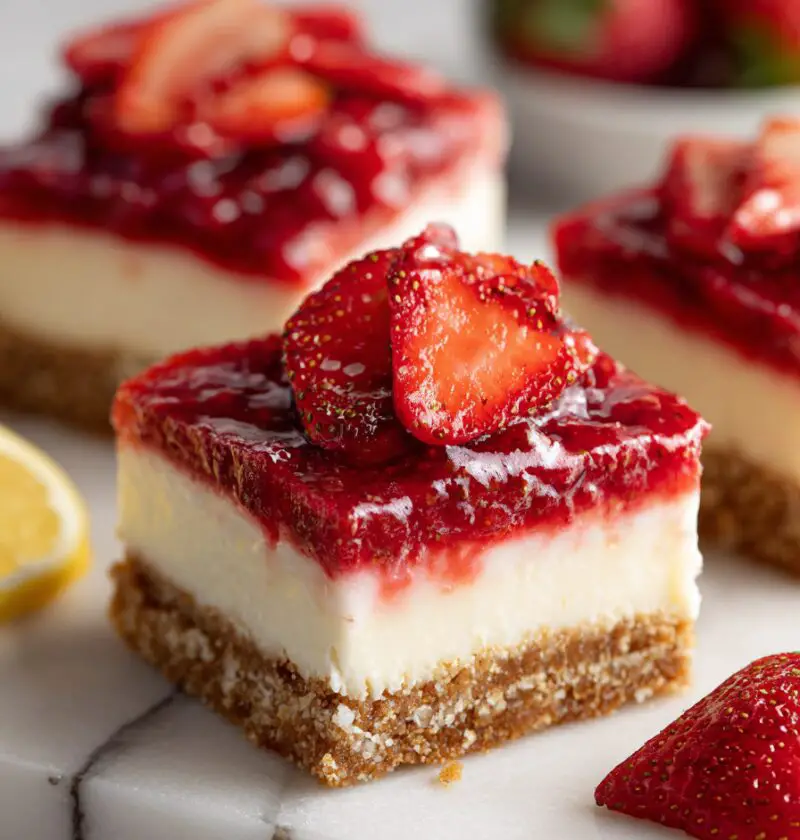
Strawberry Cheesecake Bars Recipe
If you’re looking for a dessert that feels a little fancy but is wonderfully easy to make, this Strawberry Cheesecake Bars Recipe is the one to keep close. These creamy cheesecake bars have a buttery graham cracker crust, a rich cream cheese filling, and a bright strawberry topping that makes every bite taste like spring and summer rolled into one.
A sweet little treat that always gets compliments
There’s something so comforting about strawberry cheesecake. It has that old-fashioned dessert charm we all know, but in bar form, it becomes even better for potlucks, baby showers, church suppers, backyard cookouts, and family weekends. You don’t need a springform pan. You don’t need to fuss with slicing perfect wedges. You simply bake, chill, cut into neat little cheesecake squares, and serve.
That’s a big reason I love this Strawberry Cheesecake Bars Recipe so much. It gives you all the creamy pleasure of classic cheesecake in a simpler, more approachable style. And if you’ve ever had a full cheesecake crack on top right before guests arrive, well, you know why that matters.
I started making strawberry dessert bars years ago when I wanted a make-ahead homemade dessert for Mother’s Day brunch. Fresh strawberries were in season, sweet and fragrant, and I wanted something pretty enough for the table but practical enough for a busy kitchen. These bars checked every box. They’re rich without being too heavy, fruity without being overly sweet, and easy enough for a beginner baker to feel confident making.
From a recipe development point of view, this dessert works because it balances three textures beautifully: a crisp, buttery crust, a smooth and tangy cream cheese dessert layer, and a soft, jammy strawberry topping. That contrast is what makes people come back for “just one more little square.” And yes, they usually do.
Why you’ll love this recipe
- Easy to slice and serve for parties or family gatherings
- All the flavor of classic cheesecake in simple bar form
- The graham cracker crust adds buttery crunch
- Fresh strawberry topping makes it feel bright and seasonal
- Perfect make-ahead dessert recipe for holidays and weekends
- Less fussy than a traditional round cheesecake
- Great for spring and summer entertaining
- Freezer-friendly, which is always a blessing
- Uses everyday ingredients you can find in any U.S. grocery store
- A reliable sweet bars recipe that looks bakery-worthy without the bakery price
Ingredients
Here’s everything you’ll need for this easy cheesecake recipe. I’ve included a few simple notes because those little choices really do make a difference.
For the graham cracker crust
- 2 cups graham cracker crumbs (about 14 full graham cracker sheets)
- 1/4 cup granulated sugar
- 1/2 cup unsalted butter, melted
Tip: Use finely crushed crumbs so the crust holds together well. A food processor works best, but a zip-top bag and rolling pin do the job too.
For the cheesecake filling
- 16 ounces full-fat cream cheese, softened
- 2/3 cup granulated sugar
- 2 large eggs, room temperature
- 1 teaspoon pure vanilla extract
- 1/4 cup sour cream
Tip: Full-fat cream cheese gives the creamiest texture. Philadelphia is a dependable choice. Let it soften fully so your filling blends smooth without lumps.
For the strawberry topping
- 2 cups fresh strawberries, hulled and chopped
- 1/3 cup granulated sugar
- 1 tablespoon lemon juice
- 1 tablespoon cornstarch
- 2 tablespoons water
Tip: Fresh berries give the best flavor for this fruit dessert recipe, especially in peak strawberry season. If using frozen strawberries, thaw and drain them first so the topping doesn’t turn watery.

Directions
1. Prep your pan and oven
Preheat your oven to 325°F. Line an 8×8-inch baking pan with parchment paper, leaving a little overhang on the sides so you can lift the bars out later. That one small step makes cleanup easier and slicing much neater.
2. Make the graham cracker crust
In a medium bowl, mix the graham cracker crumbs, sugar, and melted butter until the texture feels like wet sand. Press the mixture firmly into the bottom of the pan. I like to use the flat bottom of a measuring cup for this—simple, but it works like a charm.
3. Bake the crust briefly
Bake the crust for 8 to 10 minutes, just until lightly golden and set. Remove it from the oven and let it cool for a few minutes while you make the filling. This quick pre-bake helps keep the crust crisp under the creamy layer.
4. Beat the cheesecake filling
In a large bowl, beat the softened cream cheese and sugar until smooth and fluffy. Add the eggs one at a time, mixing on low speed after each addition. Stir in the vanilla and sour cream until just combined. Don’t overmix here; too much air can lead to cracks, and we want silky baked cheesecake bars, not puffy cheesecake soufflé.
5. Pour and smooth
Spread the filling over the slightly cooled crust in an even layer. Tap the pan gently on the counter once or twice to release any air bubbles. It’s a little bakery trick, and it helps more than you’d think.
6. Bake until just set
Bake for 30 to 35 minutes, or until the edges are set and the center still has a slight jiggle. That jiggle is your friend. If the center is stiff in the oven, the bars may be overbaked by the time they cool.
7. Cool slowly
Remove the pan from the oven and let it cool at room temperature for about 45 minutes. Then transfer it to the refrigerator and chill for at least 3 hours, preferably longer. Overnight is even better if you’re planning ahead.
8. Make the strawberry topping
While the bars chill, add the chopped strawberries, sugar, and lemon juice to a small saucepan over medium heat. In a separate tiny bowl, stir the cornstarch and water together, then pour it into the strawberries. Cook for 4 to 6 minutes, stirring often, until the mixture thickens and looks glossy. Let it cool completely before spooning it over the bars.
9. Top and chill again if needed
Once the cheesecake is fully chilled, spread or spoon the cooled strawberry topping over the top. If you’d like cleaner slices, chill the topped bars for another 30 minutes before cutting.
10. Slice and serve
Use the parchment to lift the bars out of the pan. Slice into squares or rectangles with a sharp knife, wiping the blade clean between cuts. That little extra effort gives you those pretty, tidy cheesecake squares everyone admires.
Servings & Timing
- Yield: 9 large bars or 12 smaller bars
- Prep Time: 20 minutes
- Bake Time: 40 to 45 minutes total, including the crust
- Chill Time: 3 to 4 hours
- Total Time: About 4 hours 15 minutes, with most of that being hands-off chilling time
If you’re serving these for a party, make them the day before. Honestly, they taste even better after a full night in the fridge.
Variations
Sometimes it’s nice to play around a little, especially if you’ve made the base recipe once and want a new spin.
- Swap the strawberries for raspberries or blueberries for a different berry version.
- Add a little lemon zest to the filling for a brighter, fresher flavor.
- Use vanilla wafer crumbs instead of graham crackers for a softer, sweeter crust.
- Stir a spoonful of strawberry jam into the topping for deeper berry flavor when berries aren’t at their peak.
- Make them gluten-free by using gluten-free graham-style crumbs.
- Add white chocolate chips to the filling for a richer, more indulgent bar.
Storage & Reheating
These strawberry bars store beautifully, which is one reason they’re so handy.
- Refrigerator: Store in an airtight container in the fridge for up to 5 days.
- Freezer: Freeze the bars without the topping, wrapped tightly, for up to 2 months. Thaw overnight in the refrigerator, then add fresh topping before serving if you can.
- Make-ahead tip: Bake the bars 1 day ahead and top them the next day for the freshest look and flavor.
- Reheating: No reheating needed. These are best served chilled or lightly cool from the refrigerator.
Notes
A few things I learned while testing this Strawberry Cheesecake Bars Recipe may save you some trial and error.
First, room-temperature cream cheese really matters. If it’s too cold, the filling can stay lumpy no matter how long you beat it, and nobody wants that. I usually leave mine out for about 45 minutes to an hour.
Second, don’t rush the chilling time. Cheesecake is a patient dessert. It sets as it cools, and those extra hours in the fridge help the flavors settle and the texture turn dense and creamy.
Third, if your strawberries are extra juicy, cook the topping a minute longer so it thickens properly. A runny topping still tastes nice, sure, but it can slide off the bars and make slicing messy. And while we’re being honest, neat slices make this homemade dessert look twice as impressive.
One more thing: if you want very clean edges, freeze the bars for 20 minutes before slicing. Not fully frozen—just firm enough to cut beautifully. It’s a small trick, but it works like a charm for photos, parties, and bake sale trays.
FAQs
Can I use frozen strawberries instead of fresh?
Yes, you can. Thaw and drain them well first, then cook the topping a bit longer if needed so it thickens nicely.
Why did my cheesecake bars crack?
Cracks usually happen from overmixing or overbaking. Mix the filling gently and pull the bars from the oven when the center still has a slight jiggle.
Can I make this dessert recipe ahead of time?
Absolutely. These baked cheesecake bars are ideal for making a day in advance, and they actually taste better after chilling overnight.
What’s the best way to cut clean cheesecake bars?
Use a sharp knife and wipe it clean between each cut. Chilling the bars well first also helps a lot.
Can I use low-fat cream cheese?
You can, but the texture won’t be quite as rich or creamy. For the best classic cream cheese dessert feel, full-fat works better.
How do I know when cheesecake bars are done baking?
The edges should look set, while the center should still wobble slightly when you gently shake the pan. That’s the sweet spot.
Can I double this recipe?
Yes, double it and bake in a 9×13-inch pan. You may need to add a few extra minutes to the baking time.
Do I need a water bath for cheesecake bars?
No, and that’s one of the reasons this is such an approachable easy cheesecake recipe. Bars are much simpler and less fussy than a full cheesecake.
Conclusion
This Strawberry Cheesecake Bars Recipe is creamy, bright, and easy enough for a casual weekend bake, yet pretty enough for a special gathering. Between the buttery crust, smooth cheesecake filling, and glossy strawberry topping, it’s the kind of strawberry dessert bars recipe people remember.
If you give these a try, I’d love to hear how they turned out for you. Leave a comment, share your favorite variation, and if you’re in the mood for more fruity treats, check out another dessert recipe with berries, lemon, or a classic no-fuss bar cookie.