S’mores Fudge Recipe
If you love classic campfire s’mores but don’t want smoke in your hair or sticky fingers, this S’mores Fudge Recipe is your new secret weapon—no bake, deeply chocolatey, and layered with graham cracker crust and gooey marshmallow topping.
This easy fudge recipe tastes like a campfire inspired dessert in tidy little homemade fudge squares, perfect for parties, holiday platters, or weeknight “we need something sweet” moments. It’s a rich chocolate treat, but still simple enough that kids can help and feel like they did the whole thing themselves.
What Makes This S’mores Fudge Recipe So Special
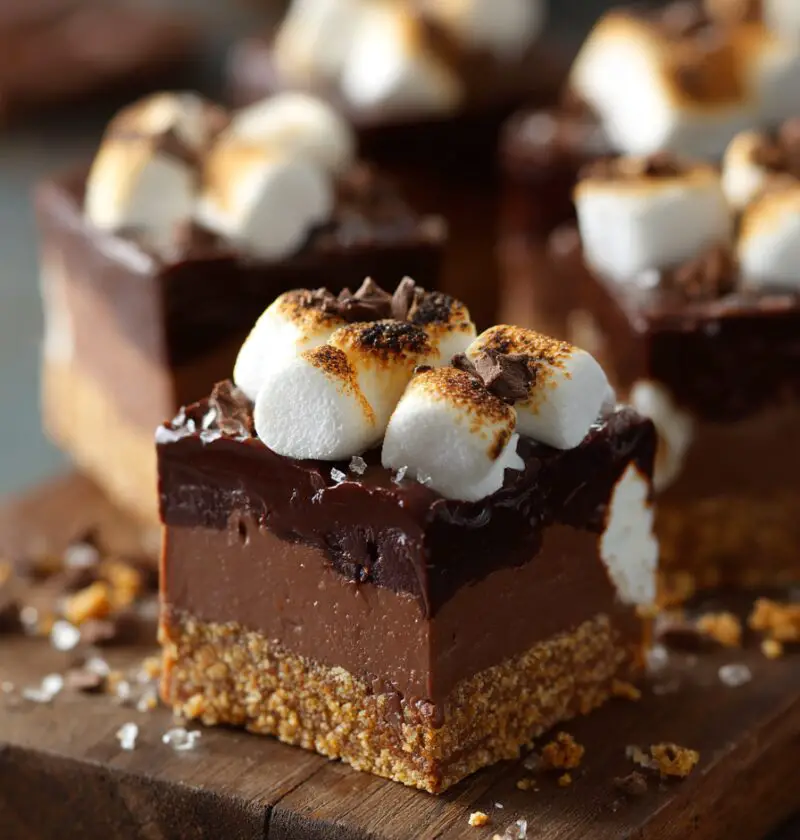
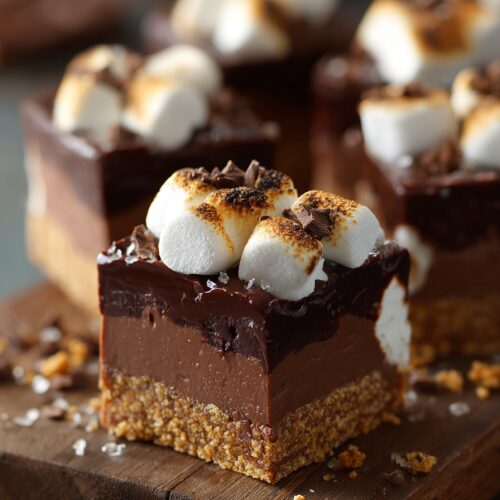
Let me explain what we’re making here. This S’mores Fudge Recipe is a layered chocolate fudge dessert with three cozy, nostalgic layers:
- A buttery graham cracker crust that mimics that classic crunchy cookie.
- A thick, silky chocolate fudge center made with sweetened condensed milk.
- A fluffy marshmallow topping that brings all the s’mores vibes, without the fire pit.
It’s basically s’mores fudge meets old-fashioned chocolate fudge—no thermometer, no oven, no stress. I was inspired by the campfire nights we used to have when my kids were little. We’d always end up with someone dropping a marshmallow in the ashes, someone else burning theirs on purpose (you know who you are), and at least one dog trying to sneak off with the graham crackers.
Now that everyone’s older and our schedules are busier, I still want that same flavor, just in a calmer, more controlled dessert—something I can bring to a potluck, tuck into a lunchbox, or serve at a game night. This recipe hits that sweet spot: a no bake dessert that’s indulgent yet easy, familiar yet just fancy enough for your holiday table.
Is it “healthy”? Let’s be honest, it’s fudge. But it is special because:
- You can cut small portions for built-in portion control.
- It’s richer than a basic chocolate bar, so a little goes a long way.
- It layers texture—crunchy, creamy, chewy—so every bite feels satisfying.
And because it’s a kid friendly dessert, it’s a fun way to get younger helpers into the kitchen, measuring, stirring, and sprinkling marshmallows like little pastry chefs.
Why You’ll Love This Recipe
- No oven needed—this truly is a no bake dessert.
- Simple ingredients you probably already have in your pantry.
- Fast prep: about 15–20 minutes of hands-on time.
- No candy thermometer, no fancy skills, just melt-and-stir.
- Layers of texture: crunchy graham cracker crust, creamy layered chocolate fudge, pillowy marshmallow topping.
- Perfect party dessert recipe—easy to transport and serve in neat little squares.
- Campfire inspired dessert flavor without smoke, bugs, or weather drama.
- Great for gifting—homemade fudge squares look lovely in tins or boxes.
- Flexible and forgiving: easy flavor swaps and add-ins like nuts, caramel, or peanut butter.
- Kid friendly dessert that kids can help make and eat with big smiles.
Ingredients
Here’s everything you need to make this S’mores Fudge Recipe at home. I’ve added a few notes to help you get the best texture and flavor.
For the graham cracker crust:
- 1 ½ cups graham cracker crumbs (about 10–12 full sheets, finely crushed)
- 6 tablespoons unsalted butter, melted
- 3 tablespoons granulated sugar
- ¼ teaspoon fine sea salt (helps balance the sweetness)
For the chocolate fudge layer:
- 1 can (14 ounces) sweetened condensed milk
- 2 cups semi-sweet chocolate chips (you can use Ghirardelli, Nestlé, or your favorite brand)
- ½ cup milk chocolate chips (for that classic s’mores chocolate flavor)
- 1 teaspoon pure vanilla extract
- Pinch of salt
For the marshmallow topping:
- 2–3 cups mini marshmallows (enough to fully cover the top)
- 1–2 graham crackers, roughly crushed (for sprinkling on top; optional but pretty)
- Optional: a few extra chocolate chips for scattering on top
A few quick tips:
- Graham crackers: Crush them very finely (a food processor works great, or a zip-top bag and rolling pin) so the crust packs well and holds together.
- Chocolate chips: Semi-sweet gives a rich chocolate fudge flavor, while the milk chocolate chips tie it back to classic s’mores. If you prefer a deeper cocoa note, use all semi-sweet or even part dark chocolate.
- Marshmallows: Mini marshmallows melt and slice more evenly than big ones. If you only have large, chop them a bit before adding.

Directions
Before you start, line an 8-inch or 9-inch square baking pan with parchment paper, leaving “handles” hanging over the sides. This makes it so much easier to lift and slice your s’mores fudge later.
-
Prepare the pan and parchment
Lightly grease the pan with a thin layer of butter or nonstick spray, then press in the parchment so it sticks. This keeps the parchment from sliding around and also prevents sticking along the edges. -
Make the graham cracker crust
In a medium bowl, combine the graham cracker crumbs, sugar, and salt. Pour in the melted butter and stir until everything looks like damp sand. If you grab a handful and squeeze, it should hold together. -
Press the crust into the pan
Transfer the crumb mixture into your prepared pan. Use the bottom of a measuring cup or a flat glass to press it down firmly into an even layer. Pressing well is the difference between a sturdy crust and one that crumbles when you slice. -
Chill the crust
Pop the pan into the fridge for at least 10–15 minutes while you prepare the chocolate fudge layer. This quick chill helps the butter firm up so the crust holds together under the warm fudge. -
Melt the chocolate and condensed milk
In a medium, heavy-bottomed saucepan, add the sweetened condensed milk, semi-sweet chocolate chips, and milk chocolate chips. Set the heat to low and stir constantly with a heatproof spatula or wooden spoon. You want slow, gentle melting—if it starts to bubble, turn the heat down. -
Stir until smooth and glossy
When the chocolate chips are mostly melted, remove the pan from the heat. Keep stirring until the mixture is completely smooth and shiny. Stir in the vanilla extract and a pinch of salt. The salt seems tiny, but it really balances this rich chocolate treat. -
Pour the fudge over the crust
Take your chilled graham cracker crust out of the fridge. Pour the warm chocolate fudge over the top and gently spread it out into an even layer, reaching all the corners. Tap the pan on the counter a few times to release any air bubbles—this helps you get neat homemade fudge squares later. -
Add the marshmallow topping
While the fudge is still warm and soft, sprinkle the mini marshmallows all over the top. Gently press them down with clean hands or the back of a spatula so they stick into the fudge layer. Scatter extra graham cracker pieces and a few chocolate chips over the marshmallows if you like. -
Chill until firm
Place the pan in the refrigerator and let the s’mores fudge chill for at least 2 hours, or until completely set. If you’re planning ahead, you can chill it overnight—just cover the pan once the fudge has cooled to room temperature. -
Slice and serve
When the fudge is firm, use the parchment handles to lift it out of the pan and onto a cutting board. Use a sharp knife to cut into 25 small squares (5×5) or 16 larger squares (4×4). Wipe the knife with a warm, damp cloth between cuts for the cleanest slices.
Optional toasting step:
If you really want that toasted marshmallow flavor, you can lightly toast the marshmallow topping with a kitchen torch before chilling. Move the flame constantly and stay back a bit—marshmallows like to catch fire. Let cool, then chill as usual. I skip this sometimes when I’m rushed, and it’s still delicious.
Servings & Timing
- Yield: About 16–25 squares, depending on how big you cut them
- Prep Time: 15–20 minutes
- Chill Time: 2–3 hours
- Total Time: About 2½–3½ hours (mostly inactive chilling time)
For parties, I like cutting them into smaller pieces, almost like candy, so guests can sample different desserts without feeling overwhelmed.
Variations
You know what? This S’mores Fudge Recipe is a great base for little twists. Here are a few ideas:
- Peanut Butter Swirl S’mores Fudge: Swirl ¼ cup melted peanut butter over the warm fudge layer before adding the marshmallows.
- Salted Caramel S’mores Fudge: Drizzle ¼ cup thick caramel sauce on top of the chocolate layer and sprinkle with flaky sea salt.
- Dark Chocolate Lovers’ Fudge: Use all dark chocolate chips and skip the milk chocolate for a more intense chocolate fudge.
- Gluten-Free S’mores Fudge: Use gluten-free graham crackers; the recipe works exactly the same.
- Rocky Road S’mores Fudge: Add ½ cup chopped nuts (walnuts or pecans) to the fudge layer and top with marshmallows as written.
- Holiday Party Dessert Version: Stir in red and green sprinkles or crushed peppermint candies for a festive twist.
Storage & Reheating
- Fridge: Store your s’mores fudge in an airtight container in the refrigerator for up to 1 week. Place parchment or wax paper between layers to prevent sticking.
- Freezer: For longer storage, freeze the fudge squares on a baking sheet until firm, then transfer to a freezer bag or container. They’ll keep well for up to 2–3 months.
- Thawing: Let frozen fudge sit in the fridge for a few hours, or on the counter for 20–30 minutes, until it softens slightly but is still firm enough to hold its shape.
- Make-ahead: This recipe is wonderful for making ahead. I often prepare it 1–2 days before a party; the flavors even mingle and deepen a bit as it sits.
No real reheating needed—if the fudge feels too firm from the fridge, just let it sit at room temperature for 10–15 minutes before serving so the texture softens and the chocolate flavor blooms.
Notes
- Pan size matters: An 8-inch pan gives thicker, more indulgent pieces of s’mores fudge; a 9-inch pan gives slightly thinner pieces, which can be nice for dessert platters.
- Texture tip: If your fudge feels a bit too soft, it usually just needs more chilling time. If it’s very soft, you might have measured extra condensed milk or not quite enough chocolate. Add a tablespoon or two more chocolate chips next time.
- Cutting clean squares: A long, sharp knife and a quick wipe between cuts make a huge difference. You can also warm the knife under hot water, dry it, then slice.
- Sweetness balance: This is a rich chocolate treat. If you’d like it slightly less sweet, use more semi-sweet or dark chocolate chips and fewer milk chocolate chips, and don’t skip the pinch of salt.
- Serving idea: Arrange the homemade fudge squares on a wooden board with extra graham crackers, marshmallows, and chocolate pieces—it looks like a s’mores board and makes everyone smile.
And one more little thing: this recipe is very forgiving. Don’t stress about perfectly even marshmallows or absolutely smooth fudge. A little rustic charm is part of its appeal.
FAQs
Can I use only one kind of chocolate chips?
Yes. You can use all semi-sweet or all milk chocolate chips. Just keep the total amount at about 2½ cups for proper fudgy texture.
Do I have to toast the marshmallows?
No. The marshmallow topping is delicious un-toasted and keeps this a true no bake dessert. Toasting is just a fun extra step if you have a kitchen torch and a little extra time.
My fudge isn’t setting. What went wrong?
Most often, it just needs more time in the fridge—give it a full 3–4 hours. If it’s still soft, you may have added too much condensed milk or not enough chocolate; next time, measure carefully and use level cups.
Can I double this recipe for a crowd?
Yes, you can double everything and use a 9×13-inch pan. Chill time may be a bit longer because the fudge layer is thicker.
Is this recipe kid friendly?
Absolutely. Kids can help crush graham crackers, stir (with supervision around the stove), and sprinkle the marshmallow topping. Just keep adults in charge of melting the chocolate.
Can I make this S’mores Fudge Recipe dairy-free?
You can experiment with dairy-free chocolate chips and a dairy-free sweetened condensed “coconut” milk. The texture may differ slightly, but many readers have good luck with that swap in similar easy fudge recipes.
What’s the best way to package this fudge for gifts?
Let the fudge chill completely, cut into neat squares, then layer in cookie tins or boxes with parchment between layers. Keep the tins chilled until gifting if your house runs warm.
Can I use a different crust instead of graham crackers?
Yes. Crushed digestive biscuits, vanilla wafers, or even Oreo crumbs (with a bit less sugar) all make a fun twist on the graham cracker crust.
Conclusion
This S’mores Fudge Recipe brings all the cozy, campfire-inspired dessert flavors you love—graham cracker crust, melty chocolate fudge, and marshmallow topping—into a simple, no bake dessert you can make any time of year. It’s lush, nostalgic, and just fussy enough to feel special, while still easy enough for a Tuesday night.
Give it a try, cut yourself a square (or two), and let me know how it turns out in the comments. And if you’re in a fudgy mood, you might like to make a batch of my no-bake peanut butter bars or classic chocolate fudge next for a full dessert tray that everyone will remember.
S'mores Fudge
Ingredients
- 1 1/2 cups graham cracker crumbs about 10–12 full sheets, finely crushed
- 6 tablespoons unsalted butter melted, plus extra for greasing pan
- 3 tablespoons granulated sugar
- 1/4 teaspoon fine sea salt for graham cracker crust
- 1 can sweetened condensed milk 14 ounces
- 2 cups semi-sweet chocolate chips
- 1/2 cup milk chocolate chips
- 1 teaspoon pure vanilla extract
- salt a pinch, for fudge layer
- 2 cups mini marshmallows 2–3 cups, enough to fully cover the top
- 1 sheet graham crackers 1–2 sheets, roughly crushed, for topping (optional)
- chocolate chips a small handful, extra for scattering on top (optional)
Instructions
- Line an 8- or 9-inch square baking pan with parchment paper, leaving overhang on two sides to create handles. Lightly grease the pan with butter or nonstick spray before adding the parchment so it sticks and the edges don’t stick.
- In a medium bowl, combine the graham cracker crumbs, granulated sugar, and 1/4 teaspoon fine sea salt. Pour in the melted butter and stir until the mixture looks like damp sand and holds together when squeezed.1 1/2 cups graham cracker crumbs, 6 tablespoons unsalted butter, 3 tablespoons granulated sugar, 1/4 teaspoon fine sea salt
- Transfer the crumb mixture to the prepared pan. Use the bottom of a measuring cup or flat glass to press it firmly into an even layer. Chill in the refrigerator for 10–15 minutes to help the crust set while you make the fudge layer.
- In a medium heavy-bottomed saucepan over low heat, combine the sweetened condensed milk, semi-sweet chocolate chips, and milk chocolate chips. Stir constantly with a heatproof spatula or wooden spoon until the chocolate is mostly melted. If it starts to bubble, reduce the heat.1 can sweetened condensed milk, 2 cups semi-sweet chocolate chips, 1/2 cup milk chocolate chips
- Remove the saucepan from the heat and continue stirring until the mixture is completely smooth and glossy. Stir in the vanilla extract and a pinch of salt to balance the sweetness.1 teaspoon pure vanilla extract, salt
- Take the chilled crust out of the refrigerator. Pour the warm fudge mixture over the crust and gently spread it into an even layer, reaching all the corners. Tap the pan on the counter a few times to release any air bubbles.
- While the fudge is still warm and soft, sprinkle the mini marshmallows evenly over the top. Gently press them down so they adhere to the fudge. Scatter the roughly crushed graham cracker pieces and a few extra chocolate chips over the marshmallows, if using.2 cups mini marshmallows, 1 sheet graham crackers, chocolate chips
- For a toasted marshmallow flavor, lightly toast the marshmallow layer with a kitchen torch before chilling. Keep the flame moving and hold it back a bit to avoid burning or catching the marshmallows on fire. Let cool briefly.
- Place the pan in the refrigerator and chill for at least 2 hours, or until the fudge is completely set. For best results or for make-ahead, chill for 2–3 hours or overnight. Once the pan is no longer warm, cover it while chilling if storing overnight.
- When firm, use the parchment handles to lift the fudge out of the pan onto a cutting board. Use a long, sharp knife to cut into 16 larger squares (4x4) or up to 25 smaller squares (5x5). Wipe the knife with a warm, damp cloth between cuts for the cleanest slices. Let sit at room temperature for 10–15 minutes if very cold before serving.