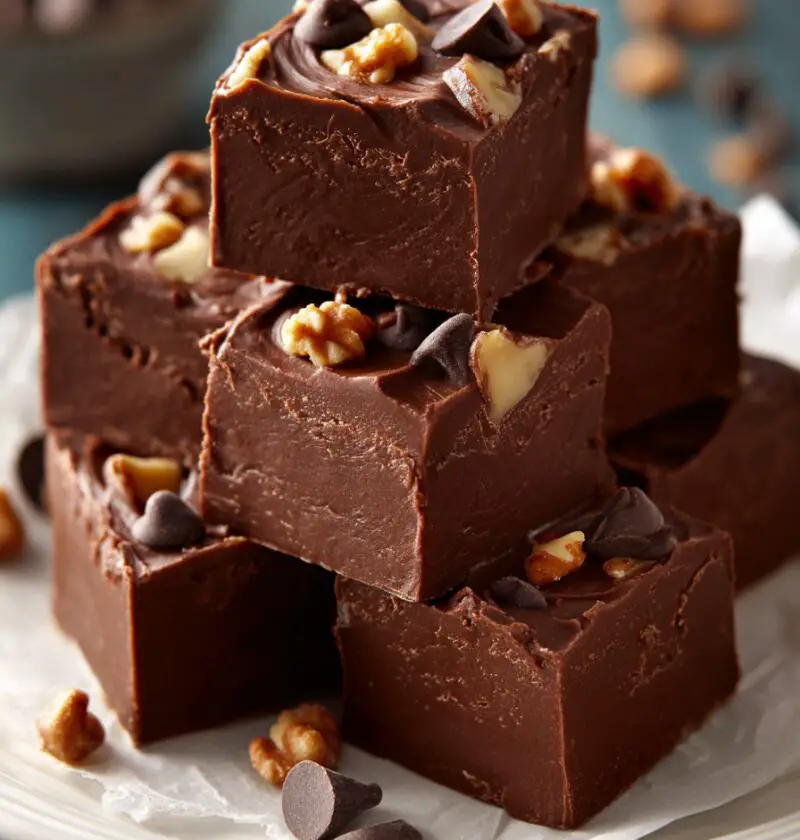
See’s Candy Copycat Fudge Recipe
This See’s Candy Copycat Fudge Recipe gives you that rich, decadent chocolate fudge you love from the classic candy shop—no baking, just an easy stovetop method that’s perfect for holidays, gifting, or sneaking a square after dinner.
I grew up in California, and a little box of See’s was our “fancy treat” for every big occasion—graduations, Christmas, even report cards. Their old fashioned fudge recipe was always the first thing to disappear from the box. These days, I love making my own copycat See’s candy fudge at home. It’s creamy, sturdy enough for gift boxes, and honestly? It tastes like something you’d find behind the glass counter at a candy shop.
This homemade chocolate fudge is a classic creamy chocolate marshmallow fudge, made on the stovetop with real butter, good chocolate, and plenty of walnuts if you like a nutty chocolate walnut fudge. It’s naturally no-bake, and once you understand the timing and temperature, it’s surprisingly simple. I make it every December for holiday platters, and again in the summer when I don’t want to turn on the oven but still want a rich treat.
Is it “health food”? No, it’s an old fashioned fudge recipe. But it is special-occasion food made with ingredients you recognize, and you control the portion size, the nuts, and even the sweetness if you tweak the chocolate. That feels like a win to me at 50, when I care as much about traditions and memories as I do about sugar grams.
Why You’ll Love This Recipe
- No oven needed—this is an easy stovetop fudge.
- Silky, creamy texture that sets firm enough to slice clean squares.
- Tastes like classic candy shop fudge without standing in line.
- Ready the same day—about 30 minutes hands-on plus chilling.
- Perfect holiday gift fudge for tins, cookie trays, and teacher gifts.
- Uses simple pantry ingredients you can find at any grocery store.
- Foolproof with a candy thermometer, plus visual cues if you don’t have one.
- Easy to customize: nuts or no nuts, darker chocolate, or festive toppings.
- Holds up well at room temperature on dessert tables and buffets.
- Budget-friendly—makes a whole “box of See’s” for a fraction of the price.
Ingredients
Here’s what you’ll need for this See’s Candy Copycat Fudge Recipe. This version makes a thick slab of rich decadent chocolate fudge in an 8-inch or 9-inch square pan.
-
3 cups (600 g) granulated sugar
Use regular white sugar; organic works too but can darken the color slightly. -
¾ cup (170 g) unsalted butter, cut into pieces
That’s 1½ sticks. I like unsalted so you can control the salt yourself. -
⅔ cup (160 ml) evaporated milk
This is not sweetened condensed milk—look for “evaporated milk” on the can. -
12 oz (about 2 cups) semisweet chocolate chips
Use a good brand like Ghirardelli or Guittard for the best flavor. You can mix half milk chocolate chips for a sweeter, classic candy shop fudge flavor. -
1 jar (7 oz / about 200 g) marshmallow creme or marshmallow fluff
This is what makes it a creamy chocolate marshmallow fudge and helps prevent graininess. -
1½ cups (150 g) chopped walnuts (optional but traditional)
Toast them lightly in a dry skillet for 4–5 minutes for the best flavor. -
1½ teaspoons pure vanilla extract
Real vanilla has a deeper flavor than imitation; it really does matter here. -
½ teaspoon fine sea salt
Balances the sweetness; if you used salted butter, reduce to ¼ teaspoon. -
Nonstick spray or extra butter for greasing the pan
You can also line with parchment paper for easier removal.
You can also experiment with a condensed milk chocolate fudge variation by swapping the sugar + evaporated milk for one 14-ounce can of sweetened condensed milk and reducing the butter to 4 tablespoons. The texture will be a little denser and sweeter, but still wonderfully smooth.

Directions
-
Prepare your pan.
Line an 8×8 or 9×9-inch square baking pan with parchment paper, letting the paper hang over the sides like little handles. Lightly grease the paper and any exposed pan with butter or nonstick spray. This makes it easy to lift out the fudge for neat cutting. -
Mix the sugar, butter, and evaporated milk.
In a heavy 3-quart saucepan, add the granulated sugar, butter pieces, and evaporated milk. I like using a heavy-bottomed stainless steel pot; thin pans burn fudge in a heartbeat. -
Bring to a rolling boil.
Set the pan over medium heat and cook, stirring constantly with a heatproof spatula or wooden spoon, until the mixture comes to a full rolling boil (big, steady bubbles all over the surface that don’t stop when you stir). -
Cook to the right temperature (this matters!).
Once it’s boiling, keep stirring and cook for about 4–5 minutes, or until the mixture reaches 234–240°F (112–116°C) on a candy thermometer—this is the “soft-ball stage.” If you don’t have a thermometer, cook for a full 5 minutes while stirring, watching for the mixture to thicken slightly and darken in color. -
Turn off the heat and add chocolate chips.
Remove the pan from the heat. Immediately add the chocolate chips and let them sit for 30 seconds to soften, then stir until completely melted and smooth. Scrape around the edges and corners so no bits of unmelted chocolate hide out. -
Add marshmallow creme, vanilla, and salt.
Stir in the marshmallow creme, vanilla, and salt. This will take a minute or two—keep stirring until the marshmallow is fully mixed and the fudge looks glossy and thick. This is where it turns from “chocolate sauce” into real fudge. -
Fold in the walnuts (if using).
Add chopped walnuts and fold gently. For a classic copycat See’s candy fudge, I stick to walnuts, but you can skip them for nut-free or use pecans if that’s what you have. -
Transfer to the pan.
Pour the hot fudge mixture into your prepared pan and spread it evenly with a spatula. It will start to thicken quickly, so don’t dawdle. Smooth the top as best you can; a little texture looks homemade and charming. -
Cool and chill.
Let the fudge cool at room temperature for about 30–45 minutes, then move it to the fridge and chill for at least 2 hours, or until firm. For the cleanest cuts, I like to chill it 3–4 hours or overnight. -
Cut into squares and serve.
Lift the fudge out of the pan using the parchment overhang. Place on a cutting board and use a long sharp knife, warmed under hot water and wiped dry, to cut into 36 small squares or 25 larger ones. Warming and wiping the knife between cuts helps keep the edges neat.
Servings & Timing
- Yield: About 25–36 pieces, depending on how large you cut the squares
- Prep Time: 15 minutes
- Cook Time: 10–15 minutes on the stovetop
- Chill Time: 2–4 hours
- Total Time: About 2½–4½ hours (mostly unattended chilling time)
If you’re planning this See’s Candy Copycat Fudge Recipe for a party or gift boxes, make it a day ahead so it has plenty of time to set and you’re not rushing around feeling sticky and stressed.
Variations
You know what? Once you nail this basic homemade chocolate fudge, you can play a little. Here are some of my favorite twists:
- Dark Chocolate Lover’s Fudge – Use 8 oz bittersweet chocolate chips and 4 oz semisweet for a deeper, less sweet classic candy shop fudge vibe.
- Nut-Free Creamy Fudge – Skip the walnuts and pour the fudge plain, or sprinkle the top with mini marshmallows or crushed candy canes.
- Condensed Milk Chocolate Fudge – Replace the sugar and evaporated milk with one 14-oz can of sweetened condensed milk, plus 4 tablespoons of butter, for an extra dense, almost truffle-like texture.
- Rocky Road Fudge – Stir 1 cup mini marshmallows and 1 cup chopped toasted almonds into the fudge right before pouring into the pan.
- Mocha Fudge – Add 1 tablespoon instant espresso powder to the hot sugar mixture; it enhances the chocolate and adds a subtle coffee note.
- Salted Caramel Swirl – Pour half the fudge into the pan, drizzle on ¼ cup thick caramel sauce, add the rest of the fudge, and swirl with a knife; finish with flaky sea salt on top.
Storage & Reheating
-
Room Temperature:
Store fudge in an airtight container at cool room temperature for 5–7 days. Layer pieces with parchment or wax paper so they don’t stick together. -
Refrigerator:
For longer storage, keep covered in the fridge for 2–3 weeks. Let pieces sit out for 10–15 minutes before serving so the texture softens a bit; cold fudge is firmer and less creamy. -
Freezer:
Fudge freezes beautifully. Wrap the slab or individual pieces tightly in plastic, then place in a freezer bag or container. Freeze for up to 3 months. Thaw overnight in the fridge, still wrapped, to prevent condensation on the surface. -
Make-Ahead Tips:
If you’re assembling holiday gift fudge boxes, you can make this recipe up to a week in advance and keep it chilled. I cut and package it a day or two before gifting so it stays fresh and pretty.
No real “reheating” is needed, but if your fudge gets very firm in the fridge, a few minutes at room temperature works wonders.
Notes
-
Use a candy thermometer if you can.
Cooking the sugar mixture to 234–240°F is the single biggest factor in getting fudge that’s creamy, not crumbly. Under-cooked fudge can be too soft and sticky; over-cooked can turn grainy or dry. -
No thermometer? Try the cold water test.
Drop a small spoonful of the hot mixture into a cup of very cold water. If you can gather it into a soft ball that flattens when pressed, you’re in the right range. -
Stir, but not too hard.
Stir constantly while boiling so it doesn’t scorch, but once you cool it slightly and add chocolate and marshmallow, don’t beat it like cake batter. Gentle, steady stirring keeps it smooth. -
Quality chocolate really matters.
This is a rich decadent chocolate fudge, and the flavor comes mostly from the chocolate. Use something you enjoy eating by the handful. -
Walnuts are classic—but flexible.
See’s is famous for nutty chocolate walnut fudge, but if your family hates walnuts, use pecans… or leave nuts out and call it “kid-friendly fudge.” No one will complain. -
Cut small squares.
Fudge is sweet and intense. I aim for 1- to 1½-inch squares; people can always take a second piece, and portion control is built in.
FAQs
Can I make this fudge without marshmallow creme?
You can, but the texture will change. Marshmallow creme helps keep this copycat See’s candy fudge smooth; if you skip it, you’re closer to a traditional old fashioned fudge recipe that needs more careful beating.
Why did my fudge turn grainy?
Graininess usually comes from sugar crystals. Make sure the sugar is fully dissolved before boiling, avoid scraping the sides of the pan into the finished fudge, and cook to the right temperature.
My fudge didn’t set—what happened?
It was probably undercooked. For next time, use a thermometer and aim for at least 234°F. For a soft batch, you can chill it longer or re-melt gently with a little more chocolate and re-pour.
Can I make this recipe without nuts?
Yes—just leave them out. The fudge will still be creamy and sturdy. You can sprinkle the top with flaky salt, crushed cookies, or festive sprinkles instead.
Is this recipe gluten-free?
The core ingredients are naturally gluten-free, but always check your chocolate chips, marshmallow creme, and vanilla for possible gluten or cross-contact warnings if someone is sensitive.
Can I double the recipe?
You can, but use a large heavy pot and a strong arm. Cook time might increase slightly. Pour into a 9×13-inch pan for a good thickness.
Can I use milk chocolate instead of semisweet?
You can, but the fudge will be sweeter and softer. I like using half milk chocolate and half semisweet for balance.
How do I package this fudge for gifts?
Cut into neat squares, place in mini paper candy cups or stack with parchment between layers, and tuck into tins or small boxes. For a holiday gift fudge box, mix it with a few cookies or homemade caramels for variety.
Conclusion
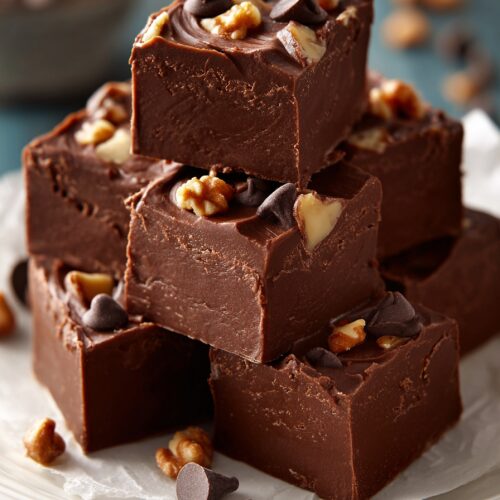
This See’s Candy Copycat Fudge Recipe brings all the charm of a classic candy shop fudge case right into your kitchen—creamy, chocolatey, and just sturdy enough to cut into perfect little squares. It’s the kind of homemade chocolate fudge that turns a simple afternoon into a tradition, whether you’re making it for Christmas platters, teacher gifts, or just because someone in your house had a long week.
Give it a try, play with the variations, and let me know in the comments how your batch turns out—or what you added to make it your own. And if you’re building a full candy tray, you might like to pair this with peanut butter fudge or homemade caramels next.
See's Candy Copycat Fudge
Ingredients
- 3 cups granulated sugar about 600 g; regular white sugar, organic is fine but may slightly darken the color
- 3/4 cup unsalted butter about 170 g, cut into pieces (1 1/2 sticks)
- 2/3 cup evaporated milk about 160 ml; NOT sweetened condensed milk
- 12 oz semisweet chocolate chips about 2 cups; use good quality (e.g., Ghirardelli or Guittard); you may swap in up to half milk chocolate for a sweeter fudge
- 7 oz marshmallow creme about 200 g; marshmallow fluff; helps keep fudge smooth and creamy
- 1 1/2 cups walnuts about 150 g, chopped; optional but traditional; toast lightly for best flavor
- 1 1/2 teaspoons pure vanilla extract
- 1/2 teaspoon fine sea salt reduce to 1/4 teaspoon if using salted butter
- Nonstick spray or butter for greasing the pan
- Parchment paper for lining the pan, optional but helpful
Instructions
- Line an 8x8- or 9x9-inch square baking pan with parchment paper, leaving overhang on two sides for handles. Lightly grease the parchment and any exposed pan with butter or nonstick spray.
- In a heavy 3-quart saucepan, combine the granulated sugar, butter pieces, and evaporated milk. Use a heavy-bottomed pan to help prevent scorching.
- Set the pan over medium heat and cook, stirring constantly, until the mixture comes to a full rolling boil with large, steady bubbles across the surface that do not stop when stirred.
- Continue to cook at a gentle but steady boil for about 4–5 minutes, stirring constantly, until the mixture reaches 234–240°F (112–116°C) on a candy thermometer (soft-ball stage). If you do not have a thermometer, boil for a full 5 minutes, watching for the mixture to thicken slightly and darken in color.
- Remove the saucepan from the heat. Immediately add the chocolate chips, let sit for about 30 seconds to soften, then stir until completely melted and smooth, scraping the sides and corners of the pan.
- Stir in the marshmallow creme, vanilla extract, and salt. Continue stirring until the marshmallow is fully incorporated and the mixture looks glossy, thick, and uniform.
- Gently fold in the chopped walnuts, if using, until evenly distributed throughout the fudge.
- Quickly pour the hot fudge mixture into the prepared pan. Spread it evenly with a spatula and smooth the top as desired. The fudge will begin to thicken as it cools, so work promptly.
- Let the fudge cool at room temperature for 30–45 minutes, then transfer to the refrigerator and chill for at least 2 hours, or up to overnight, until firm.
- Use the parchment handles to lift the fudge out of the pan onto a cutting board. With a long sharp knife warmed under hot water and dried, cut into 25–36 squares, wiping and re-warming the knife between cuts for the cleanest edges.