When it comes to the myriad of household chores, cleaning the bathroom stands out as a task that requires meticulous attention to detail. Yet, amid the scrubbing and disinfecting, one crucial area often escapes notice—the toilet tank. Ignoring this integral component can lead to foul odors, stubborn rust stains, and, more concerning, the corrosion of essential parts. In this comprehensive guide, we will delve deeper into the step-by-step process of cleaning your toilet tank effectively, ensuring not only a fresh-smelling bathroom but also a prolonged lifespan for your toilet.
Step 1: Empty the Tank
Initiating the cleaning process involves locating the water valve and shutting it off. Lift the tank lid, observe the water level, and proceed to flush the tank until it is completely empty. Depending on the flow rate, multiple flushes may be necessary to ensure the thorough evacuation of water from the tank.
Step 2: Assess the Tank’s Condition
Upon emptying the tank, the next crucial step is assessing its condition. If you encounter only surface dirt, a quick brush with a long-handled scrub brush should suffice. However, if you notice discoloration from mineral deposits and residue accumulating at the bottom of the tank and working its way up the sides, it’s time to bring out the big guns – vinegar. This natural star serves as an excellent line of defense against mold, hard water deposits, and more. Fill the tank with vinegar up to the overflow valve, letting it sit for a recommended duration of 12 hours. Subsequently, drain the vinegar, repeating the process as needed until the tank is free from stubborn deposits.
Step 3: Disinfect the Tank
Equipped with rubber gloves, generously spray the tank’s interior with your favorite disinfectant cleaner. It’s essential to direct the spray away from metal parts, as corrosive additives in certain cleaners, like bleach, can react with metal. Check the label for the manufacturer’s recommended dwell time, typically ranging between 10 to 15 minutes.
Step 4: Scrub Away Grime
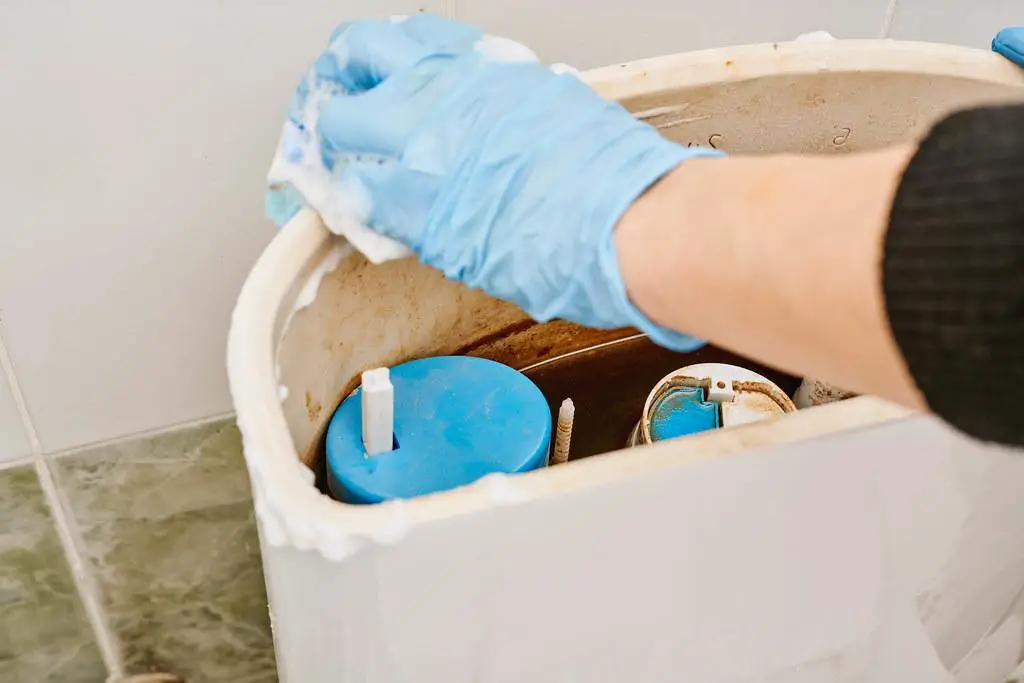
The heart of the cleaning process lies in scrubbing away accumulated grime and deposits. While some instructions may suggest using a toilet brush, it’s advisable to use a new, long-handled scrub brush to ensure the absence of contaminants from previous cleanings. Thoroughly scrub the tank’s corners, around accessories, and the bottom to eliminate any stubborn residues. Additional cleaner can be applied if necessary, ensuring a meticulous cleaning process.
Step 5 (Optional): Perform Maintenance
As you lift the lid during the cleaning process, take a moment to assess whether your toilet requires maintenance. If certain parts, such as the flapper, show signs of wear and tear or malfunction, it’s advisable to replace them promptly. This proactive step ensures the optimal functionality of your toilet and minimizes the risk of future issues.
Step 6: Clean All Parts
Dilution becomes key when cleaning the various parts of the tank to avoid potential damage. Soak a sponge with clean, warm water and apply a small amount of cleaner directly to the sponge. Wipe down the ball float, flapper, and other components of the toilet tank with the diluted disinfectant. Rinse the sponge as needed to maintain an effective cleaning process.
Step 7: Fill and Flush
With the tank’s interior thoroughly cleaned, turn on the water valve and allow the tank to fill. Flush the toilet once or twice to ensure the complete removal of any remaining cleaning agents. If, after inspection, the tank does not meet your cleanliness standards, repeat Steps 3 through 6 until satisfied. Once content, turn the faucet back on, refill the tank, and consider the task complete.
Tips for Ongoing Maintenance:
In addition to the periodic deep cleaning outlined above, maintaining a consistently clean toilet tank involves a few additional tips:
- Consider Using Tank Lozenges: Tank lozenges can be an excellent addition to your toilet tank maintenance routine. They help minimize mold, minerals, and contaminants. However, it’s crucial to avoid lozenges that contain bleach, as bleach is known to corrode metal. Conduct thorough research and read online reviews before purchasing to ensure compatibility with your toilet.
- Regular Refilling with Vinegar: If you opt not to use tank lozenges, consider emptying your toilet tank and refilling it regularly with vinegar. As mentioned in Step 2, vinegar effectively kills mold and mildew, dissolving accumulated mineral deposits before they become problematic. Allow the vinegar to sit in the tank overnight and flush the next morning for an ongoing maintenance solution.
- Adjust Cleaning Frequency Based on Usage: While some recommend monthly toilet tank cleaning, the frequency largely depends on household-specific factors. For smaller households with more than one toilet, a bi-annual deep cleaning may be sufficient. However, factors such as water hardness and usage patterns can influence the rate of mineral deposits. Regularly lift the tank lid to inspect its condition every couple of weeks, allowing you to gauge the appropriate cleaning cycle for your toilet.
- Keep Track of Inspections and Cleanings: To streamline your maintenance efforts, keep a calendar noting the dates of inspections and cleanings. This simple record-keeping practice ensures that you stay on top of your toilet tank’s condition and can proactively address any emerging issues.
In conclusion, by following these comprehensive steps and incorporating ongoing maintenance tips, you not only achieve a spotless toilet tank but also contribute to a fresh and hygienic bathroom environment. Cheers to a cleaner, healthier home that stands the test of time!


