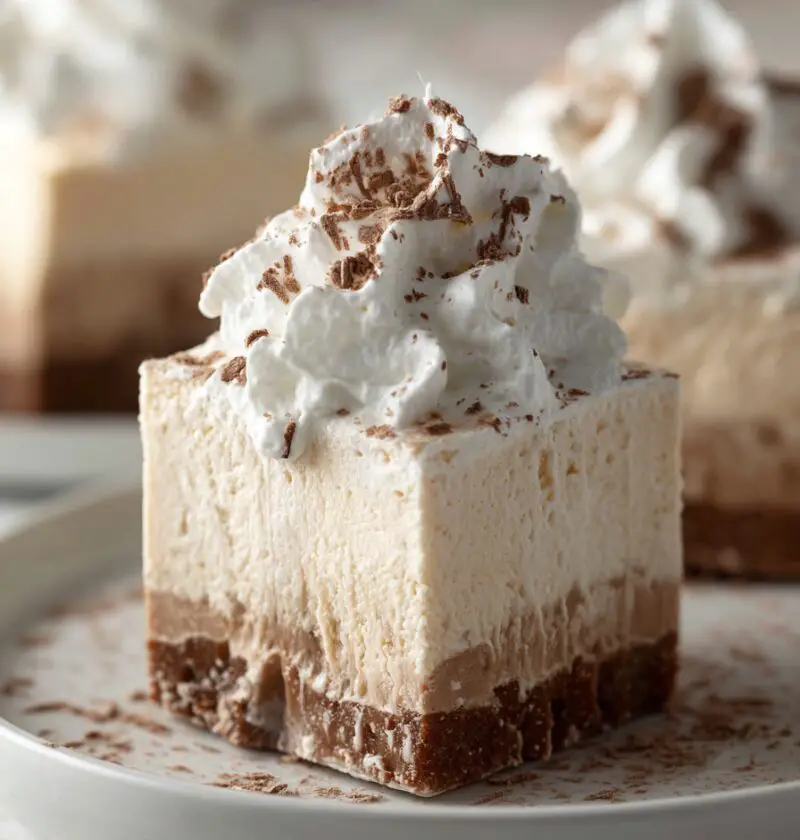
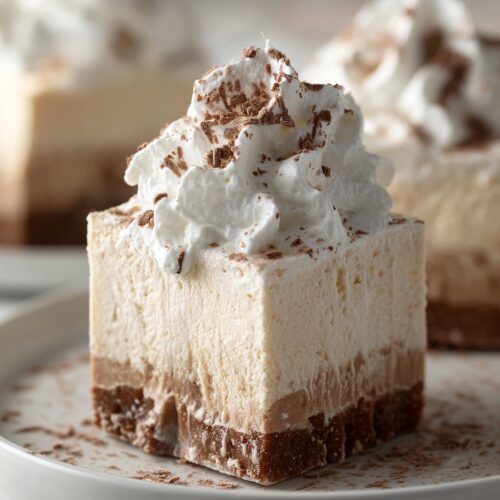
Root Beer Float Fudge Recipe
If you love creamy fudge and nostalgic soda-shop treats, this Root Beer Float Fudge Recipe brings both together in one easy, no-bake-style dessert that tastes just like a frosty root beer float with a scoop of vanilla ice cream on top.
This old fashioned-style fudge is made with white chocolate, sweetened condensed milk, and real root beer flavor for a fun, soda flavored fudge that’s smooth, sliceable, and perfect for parties or gift boxes. I’m a 50-year-old mom who grew up grabbing root beer floats at the local drive-in, and this root beer dessert takes me right back—without needing an ice cream machine or even turning on the oven. It’s a creamy fudge candy with a “vanilla ice cream” swirl that kids love and grown-ups can’t stop talking about.
Why You’ll Love This Recipe
- No oven needed – This Root Beer Float Fudge Recipe comes together on the stovetop or in the microwave, then chills in the fridge.
- Fun nostalgic flavor – Tastes like an old school root beer float, but in fudge form—perfect for anyone who loves retro, nostalgic dessert recipes.
- Easy homemade fudge – No candy thermometer, no tricky soft-ball stage; just melt, stir, and chill.
- Perfect party dessert idea – The marbled “ice cream fudge” swirl looks gorgeous on a tray for birthdays, cookouts, or game days.
- Great for gifting – This creamy fudge candy travels well and holds up in little treat boxes for neighbors, teachers, and holiday tins.
- Kid-friendly and family-approved – The root beer flavored sweets are mild and fun, and little helpers can sprinkle, swirl, and help cut.
- Flexible and customizable – Change the soda, add sprinkles, or tweak the swirl pattern to match your party colors or theme.
- Make ahead friendly – Stays fresh for days, so you can prepare it before a busy weekend or holiday gathering.
Ingredients
Here’s everything you need to make this Root Beer Float Fudge Recipe at home. I’ll add a few notes I’ve learned through lots of fudge-making and a few “oops” moments.
-
3 cups (18 oz / 510 g) white chocolate chips
Use a good-quality brand; cheaper chips sometimes stay lumpy or turn grainy. -
1 can (14 oz / 396 g) sweetened condensed milk
Make sure it’s sweetened condensed, not evaporated milk—they’re not the same. -
4 tablespoons (1/2 stick / 56 g) unsalted butter, cut into pieces
Butter adds richness and helps with that creamy, old fashioned fudge texture. -
2–3 teaspoons root beer concentrate or root beer extract
Start with 2 teaspoons, then taste; different brands vary in strength. (McCormick or Watkins root beer concentrate work well.) -
2 teaspoons pure vanilla extract
This creates the “vanilla ice cream fudge” layer and rounds out the soda flavor. -
1/4 teaspoon fine sea salt
Just enough to balance the sweetness. -
A few drops brown gel food coloring (optional)
For a root beer-colored swirl; totally optional, but it does help the look. -
Nonstick spray or extra butter
For greasing the pan. -
Optional garnish:
- White or chocolate sprinkles
- Mini marshmallows, chopped tiny (for a foamy “float” effect)

Pan size:
- 8×8-inch square baking pan for thicker, tall pieces
- 9×9-inch pan if you like slightly thinner squares that stretch further at parties
If you’re planning this as a party dessert idea for a crowd, I like to use a 9×9 and cut small bite-sized cubes—people always come back for seconds anyway.
Directions
-
Prep your pan
Lightly grease your baking pan with nonstick spray or butter, then line it with parchment paper, leaving an overhang on two sides like a sling—this makes it easy to lift out the fudge later. -
Set up your “double boiler” (or use the microwave)
For the stovetop: add about an inch of water to a medium saucepan and place a heatproof bowl on top (the bottom of the bowl shouldn’t touch the water). For the microwave: use a large microwave-safe bowl instead. -
Melt the base mixture
Add the white chocolate chips, sweetened condensed milk, and butter to the bowl.- Stovetop: heat over medium-low, stirring often, until the mixture is mostly melted and smooth.
- Microwave: heat in 30-second bursts, stirring well each time, until melted and creamy.
Watch closely—white chocolate can scorch or seize if overheated.
-
Add salt and flavorings
Remove from heat. Stir in the salt and 1 teaspoon of vanilla extract. The mixture should be thick but pourable. If it looks too stiff, you can add 1–2 teaspoons of milk or cream and stir again. -
Divide for the “float” effect
Carefully pour about 1 cup of the fudge mixture into a separate small bowl. This will be your vanilla “ice cream fudge” layer.- To the smaller bowl: add the remaining 1 teaspoon vanilla extract and stir.
- To the main bowl: add 2 teaspoons root beer concentrate and a few drops of brown gel coloring (if using). Stir well and taste. If you want a stronger root beer kick, add up to 1 more teaspoon concentrate.
-
Pour the root beer fudge layer
Pour the root beer fudge into the prepared pan and spread it evenly with a spatula. It will start to thicken as it cools, so work steadily. Tap the pan gently on the counter to smooth the top and release any air bubbles. -
Add the vanilla “ice cream” swirl
Spoon the vanilla fudge by dollops over the root beer layer. Use a butter knife or skewer to gently swirl the two layers together—less swirling gives big, bold ribbons; more swirling gives a softer marbled look. Don’t overdo it or the colors will blend too much. -
Add toppings (optional but fun)
Sprinkle the top with mini marshmallows, white sprinkles, or even a few crushed root beer candies for extra soda-shop vibes. Press very gently so they set into the surface. -
Chill until firm
Cover the pan and chill in the refrigerator for 2–3 hours, or until the fudge is set and firm enough to slice. If your fridge runs warm or it’s a hot summer day, give it closer to 4 hours. -
Slice and serve
Lift the fudge out using the parchment overhang and place it on a cutting board. Use a sharp knife to cut into 1-inch squares or rectangles. Wiping the knife between cuts gives those nice, clean edges you see in fancy candy shops.
Servings & Timing
- Yield: About 36 small squares (or 25 bigger pieces)
- Prep Time: 15–20 minutes
- Chill Time: 2–3 hours (hands-off)
- Total Time: About 2.5–3.5 hours, most of it chilling in the fridge
Honestly, the hardest part is waiting for that pan of root beer float fudge to set while the house smells like a little soda fountain.
Variations
You know what? Once you master this Root Beer Float Fudge Recipe, it’s so easy to play around with flavors:
- Classic Root Beer Only – Skip the vanilla swirl and flavor the whole batch with root beer concentrate for simple root beer fudge.
- Root Beer Float with Chocolate “Foam” – Add a thin drizzle of melted dark chocolate over the chilled fudge and let it harden for a root beer-and-chocolate twist.
- Diet-Friendly Version – Use sugar-free white chocolate chips and a sugar-free sweetened condensed milk substitute for a lower-sugar treat (texture may be slightly softer).
- Cherry Cola Fudge – Swap root beer concentrate for cherry flavoring and a splash of cola, then keep the vanilla swirl for a retro cherry cola float vibe.
- Birthday Party Sprinkle Fudge – Stir rainbow sprinkles into the vanilla fudge portion before swirling for a fun kid’s party dessert idea.
- Root Beer Float Fudge Bars – Press a thin layer of crushed vanilla sandwich cookies mixed with melted butter into the pan as a crust before adding the fudge.
Storage & Reheating
Fudge is one of those easy homemade sweets that actually gets better after a day or two, and this root beer dessert is no exception.
-
Room temperature:
Store sliced fudge in an airtight container at cool room temperature for up to 4–5 days. Place parchment paper between layers to keep pieces from sticking. -
Refrigerator:
For a firmer bite and longer shelf life, keep the container in the fridge for up to 2 weeks. Let pieces sit at room temperature for 10–15 minutes before serving so the texture softens a bit. -
Freezer:
Wrap tightly in plastic, then place in a freezer bag or container. Freeze for up to 2–3 months. Thaw in the fridge overnight, then bring to room temp before serving.
There’s no real “reheating” needed for fudge, but if it’s very cold from the fridge or freezer, that short rest on the counter makes it taste creamier and more like a true vanilla ice cream fudge experience.
Notes
A few personal tips from many batches of this soda flavored fudge:
- White chocolate quality matters. Cheaper white chips sometimes turn pasty or don’t melt fully. If that happens, you can usually save it with a teaspoon of neutral oil and some patient stirring.
- Go slow with the root beer concentrate. It’s powerful. Start with less, taste, and add a little more. If you overdo it, the fudge can taste slightly bitter or “medicinal.”
- Don’t overheat. White chocolate is a bit fussy. Gentle heat and frequent stirring keep it smooth and creamy. If you’re nervous, the stovetop double boiler method is more forgiving than the microwave.
- Swirling is forgiving. If you think you “messed up” the swirl, slice it anyway. Once cut, even wonky swirls look pretty and intentional.
- Cut small. This is a rich, creamy fudge candy. Smaller squares go a long way and are easier to share at parties or tuck into tins.
One fun thing I’ve noticed: adults who loved root beer as kids light up when they try this. It’s that familiar flavor, but in a new, cozy fudge form that feels a little special.
FAQs
1. Can I use actual root beer soda instead of root beer concentrate?
Not really. Root beer soda doesn’t have enough flavor once cooked down, and the extra liquid can make your fudge too soft. Root beer concentrate or extract gives you that strong soda-shop flavor without watering things down.
2. My fudge turned grainy—what happened?
Grainy fudge usually comes from overheating the white chocolate or letting water get into the mixture. Next time, keep the heat low and stir often, and make sure no steam or water drips into the bowl.
3. Can I make this Root Beer Float Fudge Recipe without sweetened condensed milk?
This version relies on sweetened condensed milk for texture and sweetness. If you want a more traditional “boiled sugar” old fashioned fudge, you’d need a different recipe with sugar, cream, and a candy thermometer.
4. How strong is the root beer flavor?
It’s noticeable but not overwhelming—more like a sweet, creamy root beer dessert than a sharp soda hit. You can always adjust by adding a little more or less concentrate to suit your taste.
5. Is there a way to make this dairy-free?
You can try dairy-free white baking chips and a dairy-free sweetened condensed coconut milk. The texture may be slightly softer and the flavor will have a hint of coconut, but it still works as a fun root beer fudge recipe.
6. Can I swirl in real vanilla ice cream?
Ice cream doesn’t work in fudge because of the water content; it’ll affect texture and shelf life. The vanilla fudge portion in this recipe is meant to taste like vanilla ice cream without melting or spoiling.
7. How far ahead can I make this for a party?
You can make this up to 5–7 days ahead if you store it in the fridge in an airtight container. For the prettiest edges, cut it the day you plan to serve.
8. Can I double the recipe?
Yes. Double all ingredients and use a 9×13-inch pan. Chilling time may be a bit longer since the fudge layer will be thicker.
Conclusion
This Root Beer Float Fudge Recipe turns a classic soda fountain treat into an easy homemade fudge that’s creamy, nostalgic, and just plain fun to share. It looks festive on a dessert tray, tastes like childhood in candy form, and doesn’t ask you to fuss with a thermometer or complicated steps.
If you make this root beer float fudge, I’d love to hear how it turns out—tell me in the comments what everyone thought, and whether you tried any fun variations. And if you’re in a fudge mood, peek around my other easy fudge and nostalgic dessert recipes for more treats that bring back those happy, simple flavors.
Root Beer Float Fudge
Ingredients
- 3 cups white chocolate chips about 18 oz / 510 g; use good-quality chips for best melting
- 14 oz sweetened condensed milk one can; do not substitute evaporated milk
- 4 tablespoons unsalted butter about 1/2 stick / 56 g, cut into pieces
- 2 teaspoons root beer concentrate or root beer extract start with 2 teaspoons, add up to 1 teaspoon more to taste
- 2 teaspoons pure vanilla extract divided, for the base and vanilla swirl
- 1/4 teaspoon fine sea salt to balance sweetness
- brown gel food coloring a few drops, optional, for root beer-colored swirl
- nonstick spray or butter for greasing the pan
- white or chocolate sprinkles optional, for garnish
- mini marshmallows optional, chopped tiny for a foamy “float” effect
Instructions
- Lightly grease an 8×8-inch (or 9×9-inch for thinner pieces) square baking pan with nonstick spray or butter. Line with parchment paper, leaving an overhang on two sides like a sling for easy removal.nonstick spray or butter
- For stovetop: Add about 1 inch of water to a medium saucepan and place a heatproof bowl on top, making sure the bottom of the bowl does not touch the water. For microwave: Use a large microwave-safe bowl instead.
- Add the white chocolate chips, sweetened condensed milk, and butter to the bowl. For stovetop, heat over medium-low, stirring often, until mostly melted and smooth. For microwave, heat in 30-second bursts, stirring well after each, until melted and creamy. Do not overheat; white chocolate scorches easily.3 cups white chocolate chips, 14 oz sweetened condensed milk, 4 tablespoons unsalted butter
- Remove the bowl from heat. Stir in the fine sea salt and 1 teaspoon of the vanilla extract. The mixture should be thick but pourable. If it seems too stiff, stir in 1–2 teaspoons of milk or cream until smooth.2 teaspoons pure vanilla extract, 1/4 teaspoon fine sea salt
- Carefully pour about 1 cup of the fudge mixture into a separate small bowl to create the vanilla “ice cream” portion. To the smaller bowl, stir in the remaining 1 teaspoon vanilla. To the main bowl, add 2 teaspoons root beer concentrate and a few drops of brown gel food coloring if using. Stir well, taste, and add up to 1 more teaspoon concentrate if you prefer a stronger root beer flavor.2 teaspoons root beer concentrate or root beer extract, 2 teaspoons pure vanilla extract, brown gel food coloring
- Pour the root beer fudge from the main bowl into the prepared pan. Spread it evenly with a spatula. Tap the pan gently on the counter to smooth the top and release any air bubbles.
- Spoon the vanilla fudge in dollops over the root beer layer. Use a butter knife or skewer to gently swirl the two fudges together. For bold ribbons, swirl less; for a softer marbled look, swirl a bit more, but avoid overmixing so the colors don’t fully blend.
- If desired, sprinkle the top with mini marshmallows, white or chocolate sprinkles, or crushed root beer candies. Press very gently so they adhere to the surface.white or chocolate sprinkles, mini marshmallows
- Cover the pan and refrigerate for 2–3 hours, or until the fudge is fully set and firm enough to cut. In a warm kitchen or during hot weather, allow up to 4 hours.
- Lift the fudge from the pan using the parchment sling and place it on a cutting board. Use a sharp knife to cut into 1-inch squares or rectangles, wiping the blade between cuts for clean edges. Serve at cool room temperature.