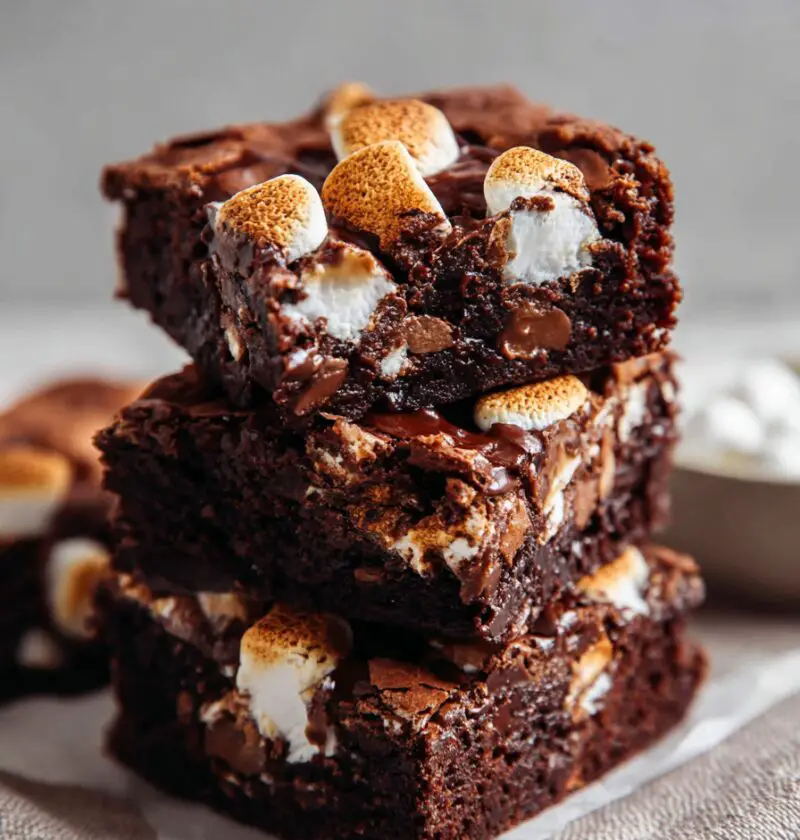
Rocky Road Brownies Recipe
If you’re craving a gooey, chocolate-loaded treat, this Rocky Road Brownies Recipe brings together fudgy brownies, toasted nuts, and melty marshmallows in one irresistible dessert bar.
These homemade rocky road brownies are my “everyone’s-happy” dessert: rich, chewy chocolate marshmallow brownies packed with crunchy nuts and a glossy chocolate topping. I love making them for casual Sunday dinners, neighborhood potlucks, and, honestly, whenever I see a bag of marshmallows staring at me from the pantry. They’re classic, a little nostalgic, and surprisingly easy for how dramatic they look on a plate.
Rocky road brownies are basically your favorite fudgy brownie base, dressed up as a chocolate nut marshmallow dessert. The texture is the real star here—soft and gooey in the middle, crackly at the edges, with those little pockets of toasted nuts and marshmallows that feel like a candy bar melted into your brownie pan.
As a 50-year-old mom who has baked her way through every soccer season, office potluck, and church fundraiser, I can tell you: desserts like this are the ones people remember. They look special but don’t ask you to spend all day in the kitchen. And if you’re a “one bowl, minimal mess” baker like me these days, this easy brownie recipe fits right in.

Why You’ll Love This Rocky Road Brownies Recipe
- Fudgy, not cakey – These are classic fudgy rocky road brownies with a rich, chewy center and shiny top.
- One bowl base – The brownie batter comes together in one bowl, so you’re not stuck with a sink full of dishes.
- Crowd-pleasing flavor combo – Chocolate, marshmallows, and nuts… like rocky road ice cream in brownie form.
- Great for parties and potlucks – This dessert bar recipe slices cleanly and travels well once it’s cooled.
- Easy pantry ingredients – You probably have everything you need on hand already: cocoa, sugar, flour, butter.
- Customizable mix-ins – Switch up the nuts, add chocolate chips, or use colored marshmallows for holidays.
- Freezer-friendly – These homemade rocky road brownies freeze beautifully for “future you” to enjoy.
- Kid-approved and adult-approved – Sweet and fun for kids, but rich enough that adults go back for seconds.
Ingredients
Here’s what you’ll need to make this Rocky Road Brownies Recipe. I’ve included a few tips and simple swaps as we go.
For the fudgy brownie base:
- 1 cup (2 sticks / 226 g) unsalted butter, melted and slightly cooled
- 1 ¾ cups (350 g) granulated sugar
- ½ cup (100 g) packed light brown sugar (adds moisture and a caramel note)
- 4 large eggs, room temperature
- 2 teaspoons pure vanilla extract
- 1 cup (120 g) all-purpose flour, spooned and leveled
- 1 cup (95 g) unsweetened cocoa powder (I like Ghirardelli or Hershey’s Special Dark)
- ½ teaspoon fine sea salt (or ¾ teaspoon kosher salt)
- ½ teaspoon baking powder
For the rocky road topping:
- 1 ½ cups mini marshmallows (use fresh, soft ones for better melt)
- 1 cup chopped nuts – walnuts, pecans, or almonds all work (lightly toasted if you have time)
- 1 cup (170 g) semi-sweet chocolate chips or chunks
- 2 tablespoons unsalted butter
- 2 tablespoons heavy cream (or whole milk in a pinch)
- Pinch of salt
Optional but highly recommended:
- ½ teaspoon instant espresso powder (mixed into the brownie batter to deepen the chocolate flavor; doesn’t taste like coffee)
- Extra mini marshmallows and a sprinkle of flaky sea salt for garnish
Ingredient notes:
- Butter: Use real butter, not margarine. If you only have salted butter, reduce the added salt a bit.
- Cocoa powder: Natural or Dutch-process both work here. Dutch will give you a deeper chocolate color and flavor.
- Nuts: For the best nutty chocolate brownies, toast the nuts at 350°F (175°C) for 6–8 minutes until fragrant—this brings out their flavor.
- Marshmallows: Mini marshmallows melt more evenly and give that classic rocky road look.
Directions
Let’s walk through this rocky road brownie recipe step by step. You don’t need fancy tools—just a whisk, a bowl, and a baking pan.
-
Prep your pan and oven.
Preheat your oven to 350°F (175°C). Line a 9×13-inch baking pan with parchment paper, leaving a little overhang on the sides so you can lift the brownies out later. Lightly grease the parchment. (This keeps your gooey brownie dessert from sticking.) -
Mix the wet ingredients.
In a large bowl, whisk together the melted butter, granulated sugar, and brown sugar until glossy and thick, about 1–2 minutes. Add the eggs one at a time, whisking well after each. Stir in the vanilla extract (and espresso powder, if using). The mixture should look smooth and slightly thick. -
Add the dry ingredients.
Sift the flour, cocoa powder, salt, and baking powder directly into the bowl with the wet ingredients. Gently fold with a spatula or wooden spoon just until you don’t see dry streaks. Try not to overmix here—stopping when everything is just combined helps keep the brownies fudgy. -
Spread the batter.
Pour the brownie batter into your prepared pan. Use an offset spatula or the back of a spoon to spread it evenly into the corners. The batter will be thick—that’s a good sign. -
Bake the brownie base.
Bake for 22–26 minutes, or until the edges are set and a toothpick inserted in the center comes out with moist crumbs (not wet batter). If your oven runs hot, start checking at 20 minutes. The center may still look slightly soft; it will continue to cook a bit as it cools. -
Prep the rocky road topping while the brownies bake.
In a small saucepan over low heat, combine the chocolate chips, butter, and heavy cream. Stir constantly until smooth and glossy. Remove from heat and stir in a pinch of salt. This makes a quick, rich chocolate layer for your chocolate marshmallow brownies. -
Layer on the marshmallows and nuts.
As soon as the brownies come out of the oven, sprinkle the mini marshmallows and chopped nuts evenly over the hot surface. The residual heat starts to soften the marshmallows and helps everything “stick.” -
Add the warm chocolate topping.
Drizzle the warm chocolate mixture over the marshmallow-nut layer. You can spread it gently with a spatula or leave it more rustic so some marshmallows peek through. Either way gives that classic rocky road look. -
Finish in the oven for a quick melt.
Return the pan to the oven for 3–5 minutes. You just want the marshmallows to puff slightly and get a touch of golden color in spots. Keep an eye on them—marshmallows can go from toasty to burned pretty fast. -
Cool completely before slicing.
Let the brownies cool in the pan on a wire rack for at least 1–2 hours. For cleaner cuts, refrigerate them for 45–60 minutes once they’re no longer hot. Use the parchment overhang to lift the whole slab out, then cut into squares with a sharp knife. Wiping the knife between cuts helps keep those layers neat.
You’ll know they’re just right when the base feels set but still slightly soft, and the top looks glossy, bumpy, and a little sticky from the marshmallows.
Servings & Timing
- Yield: About 24 small brownies or 18 larger brownies
- Prep Time: 20 minutes
- Bake Time: 25–30 minutes total (including the quick finishing bake with the topping)
- Cooling Time: 1–2 hours (less if you don’t mind slightly messy slices)
- Total Time: About 2 to 2½ hours, mostly hands-off while brownies cool
If you’re planning these for a party, I like to bake them in the morning so they’re perfectly set by late afternoon.
Variations
If you like to play with your dessert bar recipe, here are some fun twists on these rocky road brownies:
- Peanut Rocky Road Brownies: Swap the nuts for salted peanuts and use peanut butter chips with the chocolate chips.
- Mint Rocky Road: Add ½ teaspoon peppermint extract to the brownie batter and use dark chocolate chips on top.
- Gluten-Friendly Version: Use a 1:1 gluten-free all-purpose baking blend in place of regular flour; keep everything else the same.
- S’mores Style: Add a layer of crushed graham crackers over the baked brownies before sprinkling on marshmallows and nuts.
- Extra Gooey Version: Stir ½ cup chocolate chips directly into the brownie batter for even more melty pockets.
- Holiday Rocky Road: Use red and green mini marshmallows and sprinkle with festive sprinkles for Christmas dessert trays.
Storage & Reheating
Counter:
- Store brownies in an airtight container at room temperature for 2–3 days. If your kitchen runs warm, I suggest no more than 48 hours on the counter because of the marshmallows.
Fridge:
- For longer storage, refrigerate up to 5 days. Stack slices between layers of parchment so they don’t stick. Let them sit at room temperature for 20–30 minutes before serving so they taste fudgier and less firm.
Freezer:
- Freeze individual squares on a baking sheet until solid, then transfer to a freezer bag or container. They’ll keep for up to 2 months.
- Thaw in the fridge overnight or on the counter for about 30–45 minutes. The marshmallows soften again nicely.
Reheating (if you want them warm):
- Microwave a single brownie for 8–10 seconds—just enough to soften the chocolate and marshmallow topping without fully melting it.
You know what? A warm rocky road brownie with a scoop of vanilla ice cream is one of those little joys that makes a long week feel better.
Notes
-
Don’t overbake the base.
The secret to gooey brownie dessert bars is pulling them when the center still has some moist crumbs. If you wait until the toothpick is totally clean, you’ll end up with a drier, cakier texture. -
Use room temperature eggs.
Cold eggs can seize the melted butter a bit and make the batter harder to mix. If you forget to take them out, set them in a bowl of warm (not hot) water for 5–7 minutes. -
Toasting nuts is worth it.
I resisted this step for years, but toasted nuts give these nutty chocolate brownies so much more flavor. Just a few minutes in the oven while it preheats makes a big difference. -
Cut smaller for parties.
These are rich. For buffets or potlucks, I like to cut them into bite-sized bars—people appreciate being able to try a little of everything. -
Use parchment, not foil.
Foil can sometimes stick and tear, especially with sticky marshmallows. Parchment paper gives you cleaner edges and easier lifting. -
Make it ahead.
For the neatest slices and best flavor, bake the day before serving. The flavors mingle as they rest, and they slice like a dream the next day.
FAQs
Can I use a boxed brownie mix for this Rocky Road Brownies Recipe?
Yes, you can use your favorite boxed mix as the base and then follow the directions for the rocky road topping. Just bake the mix in a 9×13 pan and add the marshmallows, nuts, and chocolate layer as described.
What nuts are best for rocky road brownies?
Walnuts and pecans are classic, but almonds and hazelnuts are delicious too. If you’re baking for kids, I find walnuts are usually the most familiar.
Can I make these rocky road brownies without nuts?
Absolutely. Just skip the nuts and add extra mini marshmallows or some chocolate chips for more texture—perfect for nut-free households.
Why are my brownies dry instead of fudgy?
Most likely, they were baked a few minutes too long or the oven runs hot. Next time, start checking earlier and pull them when a toothpick comes out with moist crumbs instead of being completely clean.
Do I have to use mini marshmallows?
Mini marshmallows melt more evenly and spread out nicely, but you can chop large marshmallows into smaller pieces if that’s what you have.
Can I make these rocky road brownies dairy-free?
Yes—use a dairy-free butter substitute, non-dairy chocolate chips, and a splash of almond or oat milk in the topping. Check that your marshmallows are dairy-free as well.
How do I get clean slices with all those marshmallows?
Chill the brownies in the fridge before cutting and use a sharp knife. Wipe the knife with a warm, damp cloth between slices for the cleanest cuts.
Can I halve the recipe?
You can halve everything and bake in an 8×8 or 9×9-inch pan. Just keep an eye on the baking time; it may be a bit shorter.
Conclusion
These rocky road brownies bring together everything we love in a dessert bar recipe: fudgy chocolate, gooey marshmallows, and crunchy nuts, all wrapped up in one easy pan. They’re simple enough for a casual weeknight treat, but special enough to bring to birthdays, holidays, or that office party you forgot about until the last minute.
If you try this Rocky Road Brownies Recipe, let me know how it went—tell me what nuts you used, whether you went extra gooey, and who you shared them with. And if you’re in a brownie mood, you might also enjoy exploring my other chocolate desserts like classic chewy brownies or peanut butter swirl bars next time you’re baking.

Rocky Road Brownies
Ingredients
- 1 cup unsalted butter melted and slightly cooled (2 sticks / 226 g)
- 1 3/4 cups granulated sugar
- 1/2 cup light brown sugar packed (100 g)
- 4 large eggs room temperature
- 2 teaspoons pure vanilla extract
- 1 cup all-purpose flour spooned and leveled (120 g)
- 1 cup unsweetened cocoa powder natural or Dutch-process (about 95 g)
- 1/2 teaspoon fine sea salt or 3/4 teaspoon kosher salt
- 1/2 teaspoon baking powder
- 1 1/2 cups mini marshmallows fresh and soft
- 1 cup chopped nuts walnuts, pecans, or almonds; lightly toasted if possible
- 1 cup semi-sweet chocolate chips or chunks (170 g)
- 2 tablespoons unsalted butter for topping
- 2 tablespoons heavy cream or whole milk
- salt pinch, for chocolate topping
- 1/2 teaspoon instant espresso powder optional, to deepen chocolate flavor
- extra mini marshmallows optional, for garnish
- flaky sea salt optional, for garnish
Instructions
- Preheat oven to 350°F (175°C). Line a 9×13-inch baking pan with parchment paper, leaving an overhang on the long sides for easy lifting. Lightly grease the parchment.
- In a large bowl, whisk together the melted butter, granulated sugar, and brown sugar until glossy and thick, about 1–2 minutes. Whisk in the eggs one at a time, mixing well after each addition. Stir in the vanilla extract and instant espresso powder (if using) until smooth.1 cup unsalted butter, 1 3/4 cups granulated sugar, 1/2 cup light brown sugar, 4 large eggs, 2 teaspoons pure vanilla extract, 1/2 teaspoon instant espresso powder
- Sift the flour, cocoa powder, salt, and baking powder into the bowl with the wet ingredients. Gently fold with a spatula just until no dry streaks remain, being careful not to overmix.1 cup all-purpose flour, 1 cup unsweetened cocoa powder, 1/2 teaspoon fine sea salt, 1/2 teaspoon baking powder
- Pour the thick brownie batter into the prepared pan and spread it evenly into the corners with a spatula or the back of a spoon.
- Bake for 22–26 minutes, or until the edges are set and a toothpick inserted in the center comes out with moist crumbs but not wet batter. The center may look slightly soft; it will continue to set as it cools.
- While the brownies bake, combine the chocolate chips, 2 tablespoons butter, and heavy cream in a small saucepan over low heat. Stir constantly until melted and smooth, then remove from heat and stir in a pinch of salt.1 cup semi-sweet chocolate chips or chunks, 2 tablespoons unsalted butter, 2 tablespoons heavy cream, salt
- As soon as the brownie base comes out of the oven, sprinkle the mini marshmallows and chopped nuts evenly over the hot surface so they begin to soften.1 1/2 cups mini marshmallows, 1 cup chopped nuts
- Drizzle the warm chocolate mixture over the marshmallow and nut layer. Gently spread if desired, or leave it rustic so some marshmallows show through.
- Return the pan to the oven for 3–5 minutes, just until the marshmallows puff and take on a light golden color in spots. Watch closely so they don’t burn.
- Cool the brownies in the pan on a wire rack for at least 1–2 hours. For cleaner cuts, chill in the refrigerator for 45–60 minutes once no longer hot. Lift out using the parchment overhang and cut into 18–24 squares with a sharp knife, wiping the blade between cuts. Garnish with extra mini marshmallows and flaky sea salt if desired.extra mini marshmallows, flaky sea salt