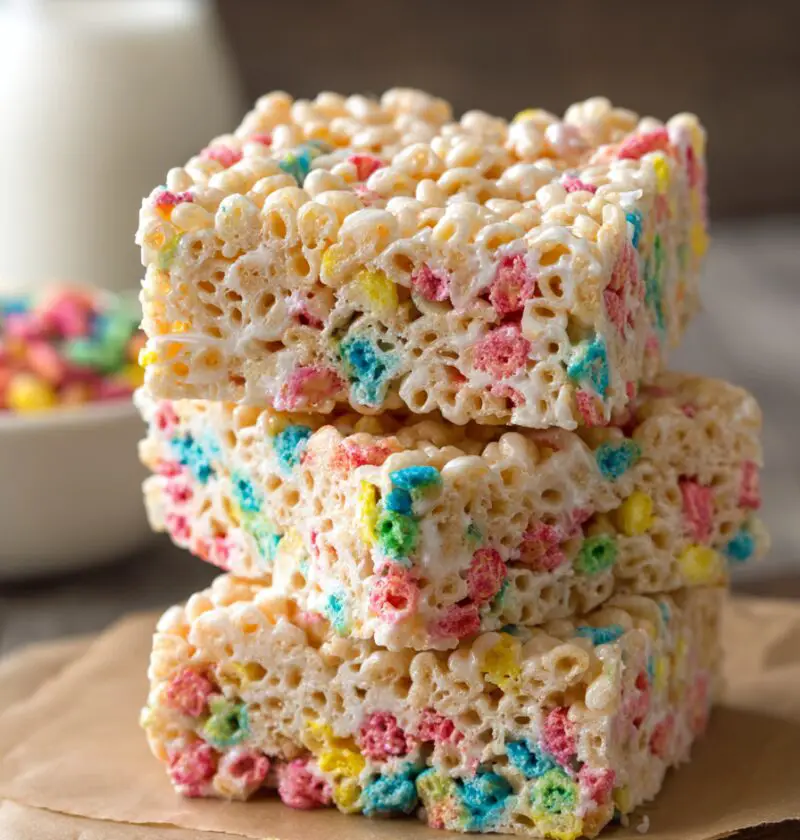
Rice Krispie Treats Recipe (Soft, Chewy, and No-Fuss)
This Rice Krispie Treats Recipe is my go-to no-bake, family-favorite dessert—soft, chewy, full of buttery marshmallow flavor, and ready in about 20 minutes from pantry to plate.
If you grew up in the U.S. like I did, you probably have at least one sweet memory tied to rice krispie treats—school bake sales, birthday parties, or a pan waiting on the counter after you finished your homework. This classic Rice Krispie Treats Recipe takes that nostalgic cereal bar and gives it just the right upgrades: extra marshmallow, the perfect cereal-to-butter ratio, and a little salt to keep it from tasting flat.
I make these marshmallow rice krispie treats when I need a quick dessert that everyone—kids, teens, and “grown-up kids” like me—will happily grab. They’re wonderful as a party dessert bar, an easy after-school snack, or a simple marshmallow treat to tuck into lunchboxes. And since they’re no bake rice krispie treats, you don’t need to touch the oven, which is a gift on hot summer days or when every rack is already full for the holidays.
A funny thing? Every time “Rice Krispie Treats Recipe” starts trending on Google, it’s usually right before Halloween, Easter, or the end of the school year. Busy parents and grandparents (hi, that’s me) love a quick dessert recipe that feels homemade but doesn’t keep us in the kitchen all day.
Let’s chat about why this is the easy rice krispie treats recipe you’ll keep coming back to.
Why You’ll Love This Rice Krispie Treats Recipe
- No oven needed – This is a true no bake rice krispie treat recipe, perfect when you don’t want to heat up the house.
- Ready in about 20 minutes – From melting the butter to pressing the bars, you’re looking at a very fast, very forgiving cereal bar recipe.
- Soft, chewy texture – Extra marshmallows and a little trick with the heat give you chewy rice krispie treats instead of rock-hard bricks.
- Kid-friendly and kid-approved – This is a kids friendly dessert that little helpers can stir, sprinkle, and cut (with supervision).
- Simple pantry ingredients – Just cereal, butter, marshmallows, and a few flavor boosters you probably already own.
- Perfect for parties – These rice krispie snack bars cut cleanly, stack in a container, and travel well for bake sales and potlucks.
- Easily customizable – From chocolate drizzle to holiday sprinkles, you can turn these classic rice krispie treats into something festive for any season.
- Consistent results – This recipe uses tested ratios so your homemade rice krispie treats come out the same way every time—no guessing.
Ingredients for Classic Rice Krispie Treats
Here’s what you’ll need for this family favorite dessert. These amounts make a thick 9×13-inch pan of rice krispie dessert bars.
- 6 cups crisp rice cereal (like Kellogg’s Rice Krispies)
- 10 cups mini marshmallows, divided (a standard 16 oz bag is usually about 8–9 cups; you may need part of a second bag)
- 6 tablespoons unsalted butter (use real butter, not margarine, for best flavor)
- 1 teaspoon pure vanilla extract
- ¼ teaspoon fine sea salt (or ½ teaspoon kosher salt)
- Optional for extra richness: 2 tablespoons heavy cream or half-and-half
- Optional for topping: sprinkles, flaky sea salt, melted chocolate, or colored candy melts
A few ingredient tips from my kitchen:
- Cereal: Fresh cereal matters. Stale cereal will give you sad, soft bars instead of that gentle, satisfying crunch. If it’s been open in the pantry for weeks, save it for something else.
- Marshmallows: Mini marshmallows melt more evenly than the big ones. Using part of the marshmallows as “stir-ins” at the end gives you those lovely little pockets of gooey marshmallow.
- Butter: If you like a deeper, nutty flavor, you can brown the butter slightly—but keep the heat gentle or you’ll end up with harder bars.
- Salt: Don’t skip it. A tiny bit of salt keeps these from being one-note sweet and really makes them taste like “bakery” treats instead of just cereal and sugar.

How to Make This Rice Krispie Treats Recipe
-
Prep your pan.
Lightly grease a 9×13-inch baking dish with butter or nonstick spray, or line it with parchment paper, leaving some overhang for easy lifting. This keeps the marshmallow rice krispie treats from sticking and makes cleanup nicer. -
Measure everything first.
Pour the 6 cups of cereal into a large mixing bowl and set it aside. Measure out your 10 cups of mini marshmallows, keeping 2 cups aside to stir in at the end. This step goes fast once the marshmallows start melting, so you’ll be glad you’re ready. -
Melt the butter gently.
In a large pot (I like using a heavy-bottomed Dutch oven), melt the 6 tablespoons of butter over low heat. Low and slow is the key; high heat can scorch the butter and make the final bars tough. -
Add marshmallows and melt.
Add 8 cups of the mini marshmallows to the melted butter. Stir constantly over low heat until the marshmallows are almost fully melted and smooth, with just a few tiny lumps left. This should take around 3–5 minutes.
Tip: If the mixture starts bubbling aggressively, your heat is too high—turn it down. Overheated sugar is what makes rice krispie treats hard. -
Flavor the mixture.
Turn off the heat. Stir in the vanilla, salt, and the optional 2 tablespoons of heavy cream if you’re using it. That little splash of cream helps keep the mixture soft and gives a richer flavor, kind of like frosting in cereal-bar form. -
Combine with cereal.
Pour the warm marshmallow mixture over the cereal in your mixing bowl. Add the remaining 2 cups of mini marshmallows. Stir with a buttered spatula or a sturdy wooden spoon until every bit of cereal is coated. Work fairly quickly, but don’t stress—it’s forgiving. -
Press into the pan (gently!).
Transfer the mixture to your prepared baking dish. Lightly butter your hands or use a piece of parchment paper to press the mixture into an even layer. Don’t press too firmly or you’ll compress the cereal and make the bars dense and hard. Think “coax into place,” not “smash into submission.” -
Decorate and cool.
While the top is still slightly warm, add sprinkles, a light pinch of flaky sea salt, or drizzle with melted chocolate if you like. Let the pan cool at room temperature for at least 30–45 minutes before cutting. -
Cut into bars.
Lift the slab out using the parchment (if you lined the pan), and cut into 18–24 bars with a sharp knife. For really clean edges, wipe the knife between cuts.
You know what? The hardest part of this whole process is waiting for them to cool enough so they slice nicely. My grandkids always circle the counter like little dessert vultures.
Servings & Timing
- Yield: About 18–24 rice krispie snack bars, depending on how large you cut them
- Prep Time: 10 minutes (measuring, lining pan, melting butter)
- Cook Time: 5–8 minutes on the stovetop
- Cooling Time: 30–45 minutes at room temperature
- Total Time: Around 50–60 minutes (most of that is hands-off cooling time)
If you’re in a rush, you can pop the pan into the fridge for 15–20 minutes to speed up the firming. Just don’t leave them in there for hours, or they can get a bit too firm and lose that lovely chewy pull.
Fun Variations on Rice Krispie Treats
Once you have a solid classic rice krispie treats base, you can play a little—this is where kids get especially excited.
- Chocolate Chip Rice Krispie Treats: Stir ½–¾ cup mini chocolate chips into the mixture once it’s cooled for a minute or two so they don’t fully melt.
- Peanut Butter Rice Krispie Treats: Add ½ cup creamy peanut butter to the melted butter-marshmallow mixture for a salty-sweet twist.
- Birthday Party Dessert Bars: Mix in rainbow sprinkles and top with more before the bars set—these make such a fun party dessert bars tray.
- S’mores Rice Krispie Treats: Fold in a handful of crushed graham crackers and mini chocolate chips, then lightly torch the top marshmallow bits if you’re feeling fancy.
- Gluten-Free Rice Krispie Treats: Use a certified gluten-free crisp rice cereal and check that your marshmallows are gluten-free as well.
- Holiday Marshmallow Treats: Use red and green sprinkles at Christmas, pastel M&M’s at Easter, or orange and black jimmies for Halloween to match the season.
Storage, Freezing & Make-Ahead Tips
These simple marshmallow treats are pretty low-maintenance, which makes them great for planning ahead.
- Room Temperature: Store in an airtight container at room temp for up to 3 days. Place parchment between layers to keep them from sticking.
- Fridge: You can refrigerate them if your kitchen is warm, but they’ll firm up. If you chill them, let them sit at room temp for 20–30 minutes before serving so they soften again.
- Freezer: For longer storage, wrap individual bars tightly in plastic wrap, then place in a freezer bag. Freeze for up to 6 weeks. Thaw at room temperature in the wrapper for about 30–45 minutes.
- Make-Ahead for Parties: Make this Rice Krispie Treats Recipe 1–2 days before your event, store in an airtight container, and cut them the day of serving for the freshest edges.
Notes from My Kitchen
- Don’t crank the heat. Almost every “my rice krispie treats turned out hard” message I get traces back to the same thing: the marshmallow mixture boiled. Keep the heat low and gentle; it really matters.
- Use a big pot. Even though it seems like “just cereal,” everything fluffs up. A larger pot makes stirring easier and less messy.
- Butter your tools. Lightly butter or spray your spatula and your hands before pressing the mixture into the pan. It’s a small step that saves a lot of sticking and grumbling.
- Ratio matters. This recipe uses a marshmallow-heavy ratio compared to that classic box version, which is why these easy rice krispie treats taste softer and richer. If you like a firmer bar, you can reduce the marshmallows by 1–2 cups.
- Cut to fit the crowd. For kids’ parties, I like smaller squares—around 24–28 pieces. For grown-up gatherings, I go with 18 bigger bars; people still come back for seconds anyway.
I’ve tested this recipe with both store brands and name brands of cereal and marshmallows. Name brands tend to melt a bit more evenly, but your homemade rice krispie treats will still be delicious either way.
Rice Krispie Treats Recipe FAQs
1. How do I keep rice krispie treats from getting hard?
Use low heat when melting the butter and marshmallows, don’t press the mixture too firmly into the pan, and avoid refrigerating for long periods.
2. Can I use jumbo marshmallows instead of mini?
Yes, but they’ll take longer to melt and may not melt as evenly; chop them a bit and stir patiently over low heat.
3. Can I make these rice krispie treats without butter?
You can use a plant-based butter or coconut oil, but the flavor will change; vegan butters generally work better than oil-only swaps.
4. How do I make thicker or thinner bars?
For thicker bars, use an 8×8 or 9×9-inch pan; for thinner bars, use a larger rimmed baking sheet and spread the mixture more widely.
5. Are rice krispie treats gluten-free?
They can be if you use a gluten-free crisp rice cereal and check that your marshmallows and flavorings are gluten-free; always read the labels carefully.
6. Can I double this recipe?
Yes, you can double the ingredients and use two 9×13-inch pans, or a large rimmed half-sheet pan—just make sure your pot is big enough for stirring.
7. Why are my rice krispie treats too sticky to cut?
They probably haven’t cooled enough or the marshmallow ratio is extra high; let them sit longer, or butter your knife and cut with a gentle sawing motion.
8. Can I add mix-ins like candy or nuts?
Absolutely—just stir them in once the marshmallow-cereal mixture has cooled for a minute so they don’t melt or sink to the bottom.
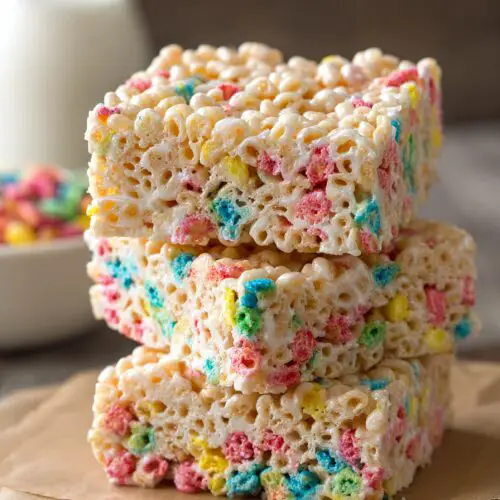
Final Thoughts
This Rice Krispie Treats Recipe is one of those simple, classic desserts that never goes out of style—soft, chewy, buttery, and endlessly adaptable for parties, holidays, or a random Tuesday treat. It’s the kind of family favorite dessert that brings kids running to the kitchen and makes grown-ups “just have one more” more times than they care to admit.
If you try these classic rice krispie treats, let me know how they turn out—leave a comment, share your favorite variation, or tell me if you grew up eating them too. And if you’re on a no-bake kick, you might enjoy my other quick dessert recipes like chocolate peanut butter cereal bars or no-bake cheesecake cups.
Rice Krispie Treats Recipe (Soft, Chewy, and No-Fuss)
Ingredients
- 6 cups crisp rice cereal such as Kellogg’s Rice Krispies; use fresh, not stale
- 10 cups mini marshmallows divided; 8 cups for melting, 2 cups stirred in at the end
- 6 tablespoons unsalted butter use real butter, not margarine
- 1 teaspoon pure vanilla extract
- 1/4 teaspoon fine sea salt or 1/2 teaspoon kosher salt
- 2 tablespoons heavy cream or half-and-half optional, for extra richness and softness
- sprinkles, flaky sea salt, melted chocolate, or colored candy melts optional, for topping
- butter or nonstick spray for greasing the pan and tools
Instructions
- Lightly grease a 9×13-inch baking dish with butter or nonstick spray, or line it with parchment paper, leaving some overhang for easy lifting.
- Pour 6 cups of crisp rice cereal into a large mixing bowl and set aside. Measure 10 cups of mini marshmallows, reserving 2 cups to stir in later and 8 cups for melting.
- In a large, heavy-bottomed pot or Dutch oven, melt 6 tablespoons of unsalted butter over low heat. Keep the heat low to avoid scorching and tough treats.
- Add 8 cups of mini marshmallows to the melted butter. Stir constantly over low heat for about 3–5 minutes, until almost fully melted and smooth with just a few tiny lumps remaining. If the mixture starts bubbling aggressively, reduce the heat.
- Turn off the heat. Stir in the vanilla extract, fine sea salt, and the optional 2 tablespoons of heavy cream or half-and-half until fully combined.
- Pour the warm marshmallow mixture over the cereal in the large mixing bowl. Add the remaining 2 cups of mini marshmallows. Using a buttered spatula or sturdy wooden spoon, stir until all of the cereal is evenly coated.
- Transfer the mixture to the prepared baking dish. Lightly butter your hands or use a piece of parchment paper to gently press the mixture into an even layer. Do not press too firmly or the bars will become dense and hard.
- While the top is still slightly warm, add sprinkles, a light pinch of flaky sea salt, or drizzle with melted chocolate or colored candy melts if desired. Let the pan cool at room temperature for 30–45 minutes, or until set.
- Lift the slab out of the pan using the parchment overhang, if using. Cut into 18–24 bars with a sharp knife, wiping the knife between cuts for clean edges. Serve and enjoy.