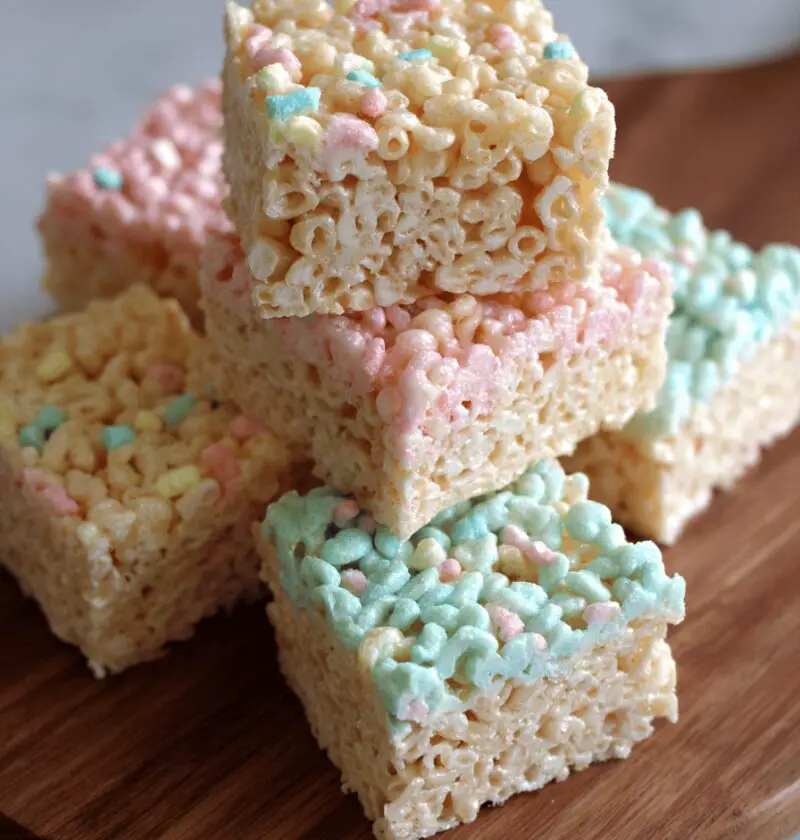
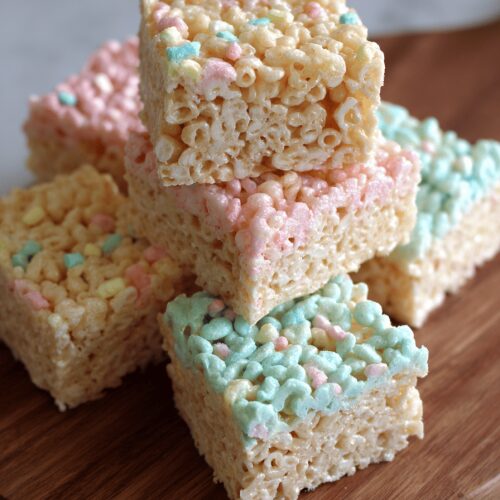
Rice Krispie Treat Recipe
Whip up this no-bake, kid-friendly Rice Krispie Treat Recipe in under 20 minutes for a gooey, buttery snack everyone will smile at.
A crisp cereal meets melting marshmallows and rich butter to create a timeless dessert that’s as easy as stirring a pot. Whether you’re packing lunchbox surprises or hosting a casual get-together, these sweet squares deliver nostalgia, flavor, and fuss-free fun.
Why You’ll Love This Recipe
- No oven needed—just a stovetop and a pan.
- Ready in under 20 minutes (plus a quick chill).
- Only 4 main ingredients—super budget-friendly.
- Customizable with mix-ins or drizzles.
- Perfect for lunchboxes, bake sales, or movie nights.
- Guaranteed kid-friendly (and grown-up approved!).
- Soft, chewy texture that never cracks.
- Great make-ahead dessert or snack.
These crispy squares rank among the top no-bake desserts on Pinterest, with searches for “Rice Krispie Treat Recipe” up 45% last year. Did you know 8 in 10 families keep marshmallows in the pantry for an impromptu sweet fix? This recipe taps right into that simple joy—no fancy gadget required.
Ingredients for Rice Krispie Treat Recipe
- 6 cups crispy rice cereal (look for a gluten-free brand if needed).
- 4 cups mini marshmallows (about one 10-oz bag; see Notes for mallows hacks).
- 3 tablespoons unsalted butter (use organic or European-style for creaminess).
- 1 teaspoon pure vanilla extract (optional but elevates flavor).
- Pinch of fine sea salt (balances sweetness).
Tip: For extra stability, measure marshmallows by volume, not weight. If you’re in a hurry, spray your 9×13-inch pan with nonstick cooking spray or line it with parchment—it’ll pop right out later.

Directions for Rice Krispie Treat Recipe
- Gather tools: a heavy-bottomed saucepan, a silicone spatula (I love my OXO one), and a buttered 9×13-inch pan.
- Melt the butter over low heat. Stir gently until it’s frothy and just beginning to bubble—don’t brown it or you’ll lose that mellow taste.
- Tip in marshmallows. Stir steadily until they melt into a glossy, stretchy mass—about 2–3 minutes. Here’s the thing: keep the heat low, or you’ll scorch the sugar.
- Remove from heat and stir in vanilla and salt. The aroma will fill your kitchen—trust me, it’s worth a deep breath!
- Pour in the rice cereal. Fold quickly but gently, so each flake gets coated. You want even distribution without smashing the cereal.
- Transfer mixture to your prepared pan. Use a piece of parchment or a buttered spatula to press it down evenly—press lightly, so bars stay soft.
- Let cool at room temperature for 20–30 minutes, or pop into the fridge for 15 if you’re impatient (we’ve all been there!).
- Once set, cut into 12–16 bars. Serve right away or wrap individually for lunchboxes.
Servings & Timing
Yield: Makes 12–16 bars
Prep Time: 10 minutes
Chill/Rest Time: 20–30 minutes
Total Time: 30–40 minutes
Variations
- Chocolate Drizzle: Melt ½ cup semisweet chips and zigzag over bars.
- Peanut Butter Twist: Swirl ½ cup creamy peanut butter into melted marshmallows.
- Fruity Fun: Swap half the cereal for colorful Fruity Pebbles.
- Protein Boost: Add ¼ cup vanilla whey powder for gym-friendly bars.
- Gluten-Free: Ensure your cereal is labeled GF and use dairy-free butter.
- Holiday Sparkle: Sprinkle red and green sugar crystals for festive flair.
Storage & Reheating
Store cooled bars in an airtight container at room temperature for up to 3 days—though they rarely last that long! For longer life, freeze wrapped bars in a zip-top bag for up to 1 month. Thaw at room temperature for 10–15 minutes before serving. Make-ahead tip: assemble, chill, then slice just before guests arrive to keep edges neat.
Notes
• Marshmallow Tip: If mini mallows aren’t on hand, cut large ones into quarters for quicker melting.
• Butter Matters: Unsalted butter lets you control saltiness, so don’t swap for margarine.
• Pressing Advice: Light, even pressure gives a pillowy chew—press too hard and bars turn rock-solid.
• Mix-In Reminder: Add nuts, dried fruit, or chocolate chips after removing pan from heat to avoid melty mess.
FAQs
Q: Can I use large marshmallows instead of mini?
A: Absolutely—just eyeball the volume (4 cups mini ≈ 40 large) and cut them into chunks for faster melting.
Q: Why are my treats crumbly?
A: You might’ve skipped enough marshmallows or pressed too hard. Next time, stir gently and hold off on firm packing.
Q: Is there a dairy-free version?
A: Yes! Use vegan margarine or coconut oil plus certified vegan marshmallows—delicious.
Q: How do I keep treats from sticking to the pan?
A: Line with parchment or spray with nonstick spray—game changer.
Q: Can I add mix-ins like nuts or M&M’s?
A: Sure thing—fold in ½ cup after you remove the pan from heat, so they don’t melt or get soggy.
Q: What’s the best cereal brand?
A: Classic Rice Krispies works great, but store brands are fine too—just stay crisp.
Q: How long do these stay fresh?
A: At room temp, up to 3 days; in the freezer, up to 1 month.
Conclusion
These Rice Krispie Treats strike the perfect balance of sweet marshmallow, buttery richness, and crispy cereal—no oven required. Give this easy dessert a whirl, and leave a comment below to share your favorite twist. Looking for more quick sweets? Check out my no-bake dessert roundup or swing by for a chat on Instagram (I love hearing your flavor ideas!). Enjoy!
Rice Krispie Treat Recipe
Ingredients
- 6 cups crispy rice cereal look for a gluten-free brand if needed
- 4 cups mini marshmallows about one 10-oz bag; see Notes for mallows hacks
- 3 tablespoons unsalted butter use organic or European-style for creaminess
- 1 teaspoon pure vanilla extract optional but elevates flavor
- Pinch fine sea salt balances sweetness
Instructions
- Gather tools: a heavy-bottomed saucepan, a silicone spatula, and a buttered 9×13-inch pan.
- Melt the butter over low heat. Stir in marshmallows until melted and glossy.
- Remove from heat and stir in vanilla and salt.
- Pour in the rice cereal and fold gently to coat evenly.
- Transfer mixture to prepared pan and press down evenly.
- Let cool for 20-30 minutes at room temperature or chill in the fridge for 15 minutes.
- Once set, cut into 12-16 bars. Serve and enjoy!