Rice Cracker Recipe (Crispy, Light, and Surprisingly Easy!)
If you’ve been hunting for a Rice Cracker Recipe that’s crispy, light, and actually doable on a busy weeknight, you’ve just found it—these homemade rice crackers are baked, gluten free, and perfect for snacking.
I’ve been making variations of Japanese-style baked rice crackers for years, and this version is my current favorite: thin, shatteringly crisp, with a gentle toasty flavor and a savory, umami-rich bite. They’re one of those snacks that feel a little “fancy,” but they’re made with pantry staples and a simple process. I like to keep a jar of these crunchy rice snacks on the counter for afternoon tea, movie nights, and to tuck into lunch boxes.
What makes this homemade rice cracker recipe special? First, it’s baked, not fried, so you get that addictive crunch without a heavy, greasy finish. Second, it’s naturally gluten free (assuming you use gluten free soy sauce or tamari), and you can control everything—from the amount of salt to how spicy or cheesy you want them. And third, these are so much better than store-bought Japanese rice crackers because you can enjoy them warm from the oven when they’re at maximum crisp.
I often make a batch on Sunday and stash them in an airtight container. By Wednesday, they’re usually gone. My kids blame my husband; my husband blames “the snack fairy.” Sure.
Why You’ll Love This Rice Cracker Recipe
- Perfectly crispy and crunchy – These baked rice crackers shatter in your mouth like your favorite Japanese rice crackers, but without deep frying.
- Naturally gluten free – Made with rice flour and gluten free tamari (or soy sauce), they’re a great healthy snack recipe for mixed-diet households.
- Simple pantry ingredients – Just rice flour, water, oil, and seasonings you probably already have.
- Customizable flavors – Make them cheesy, spicy, sesame-studded, or seaweed-topped; the base recipe is a blank canvas.
- Baked, not fried – Less mess, less oil, and they still taste wonderfully savory and satisfying.
- Kid- and lunchbox-friendly – Pack them into school lunches or snack trays; they travel well and hold their crunch.
- Great for meal prep – One batch makes a generous jar of savory rice crackers that keep for days.
- Snack board superstar – Pair these homemade rice crackers with cheese, hummus, or a simple veggie platter and you’re party-ready.
Ingredients
Here’s what you’ll need for this easy rice cracker recipe. I’ll add a few tips and simple swaps along the way.
-
1 cup (140 g) white rice flour
(Look for fine rice flour—Bob’s Red Mill or a good Asian grocery brand both work well. Don’t use sweet/glutinous rice flour for this base recipe.) -
2 tablespoons (16 g) cornstarch or potato starch
(This helps create extra crispy rice crackers; potato starch gives a slightly lighter crunch.) -
1/2 teaspoon fine sea salt
(Use fine salt so it disperses evenly in the dough.) -
1/4 teaspoon garlic powder
(Optional but adds a nice savory backbone.) -
2 tablespoons neutral oil
(Grapeseed, canola, or light olive oil—nothing too strongly flavored. Sesame oil is great as a flavor booster, but don’t use it alone.) -
3–4 tablespoons water, plus extra as needed
(Start with 3 and add by the teaspoon; different rice flours absorb water differently.) -
1 tablespoon gluten free soy sauce or tamari
(Gives that classic Japanese rice cracker savoriness; regular soy sauce is fine if gluten isn’t a concern.) -
1 teaspoon toasted sesame oil
(Optional but highly recommended for a deeper, nutty flavor.) -
2–3 tablespoons toasted sesame seeds (white, black, or a mix)
(For texture and flavor; I like a mix of black and white sesame seeds.) -
Flaky sea salt, for sprinkling (optional)
(A pinch on top right before baking gives little salty pops when you bite.)
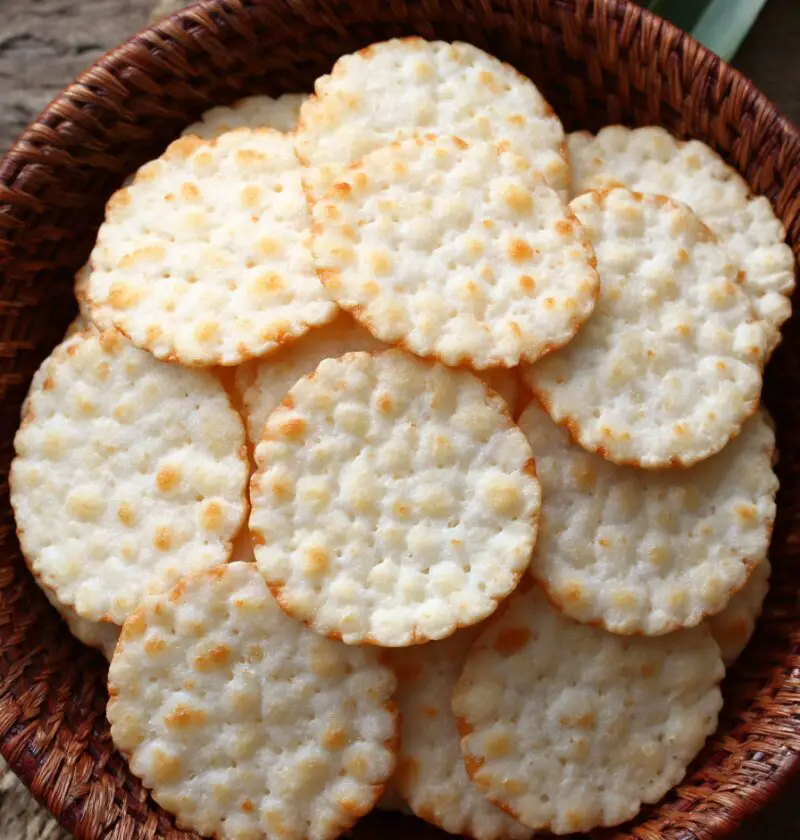
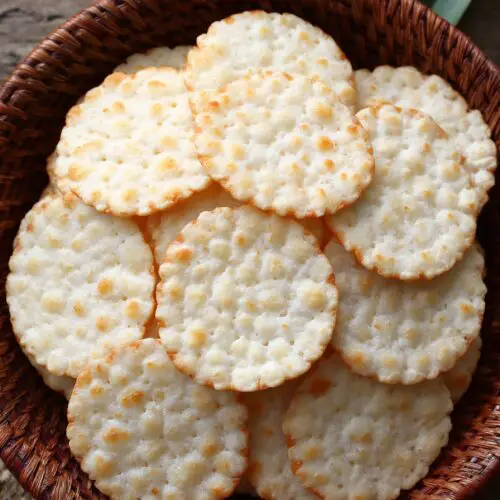
If you’re a visual cook like I am, take a look at the image below to get a feel for the thickness and color you’re aiming for:

Directions
-
Preheat the oven and prep your pans
Preheat your oven to 350°F (175°C). Line two baking sheets with parchment paper or silicone baking mats. Parchment helps you roll the dough thinly and keeps the crackers from sticking. -
Mix the dry ingredients
In a medium bowl, whisk together the rice flour, cornstarch (or potato starch), sea salt, and garlic powder until well combined. This step helps prevent little pockets of starch or spice in your dough. -
Stir in the wet ingredients
Add the neutral oil, soy sauce (or tamari), and sesame oil to the dry mixture. Stir with a spatula; it will look a bit crumbly at this stage. -
Add water gradually
Add 3 tablespoons of water and mix until a soft dough starts to form. If it’s still dry or crumbly, add more water 1 teaspoon at a time, just until the dough comes together into a smooth, slightly firm ball. You’re aiming for a texture similar to soft modeling clay—pliable, not sticky. -
Fold in sesame seeds
Gently knead in the toasted sesame seeds with your hands or a spatula, just until evenly distributed. If the dough cracks badly when pressed, your dough is a bit dry; wet your hands and knead briefly to bring it back together. -
Divide the dough
Split the dough into two equal portions. It’s much easier to roll thin rice crackers in smaller batches. -
Roll the dough very thin
Place one portion between two sheets of parchment paper. Using a rolling pin, roll the dough out as thin as you can—about 1/16 inch (1–2 mm). The thinner you go, the crisper your baked rice crackers will be. If the parchment slides, tuck a damp kitchen towel under it. -
Remove top parchment and score
Peel off the top layer of parchment and slide the bottom sheet (with the dough) onto your baking sheet. Using a sharp knife or pizza cutter, score the dough into small squares or rectangles (about 1–1½ inches). You don’t need to cut all the way through; scoring makes it easier to break into neat crackers after baking. -
Season the tops
Lightly sprinkle the dough with flaky sea salt, if using. For extra flavor, you can also sprinkle a few more sesame seeds on top and gently press them into the surface. -
Repeat with the second half of dough
Roll and score the remaining dough just as you did the first batch, and place it on the second baking sheet. -
Bake until golden and crisp
Bake both trays at 350°F (175°C) for 15–20 minutes, rotating the pans halfway through. You’re looking for light golden edges and a dry, firm feel. Thinner pieces brown a bit faster, so keep an eye toward the 13–15 minute mark. If some edge pieces brown sooner, you can remove them and return the rest to the oven. -
Cool completely for maximum crunch
Let the crackers cool on the baking sheets for 5 minutes, then transfer them to a wire rack to cool completely. They’ll crisp up even more as they cool—don’t judge the final texture while they’re still warm. -
Break apart and enjoy
Once fully cooled, break along the score lines into individual crackers. Taste one (okay, maybe three) and adjust finishing salt on future batches if needed.
Servings & Timing
- Yield: About 60–70 small rice crackers, depending on how thin you roll and how you cut.
- Prep Time: 15–20 minutes
- Bake Time: 15–20 minutes
- Total Time: Around 35–40 minutes
So realistically, you’re less than an hour away from a jar full of crispy rice crackers that taste like they came from a specialty shop.
Fun Variations to Try
Once you master this base rice cracker recipe, it’s hard not to start experimenting. Here are some easy twists:
- Spicy Chili Rice Crackers – Add 1/4–1/2 teaspoon cayenne or Korean gochugaru to the dry ingredients and a sprinkle of chili flakes on top.
- Cheesy Rice Crackers – Mix 1/4 cup finely grated Parmesan into the dough and skip the soy sauce if you want a milder flavor.
- Nori Seaweed Crackers – Press small strips of roasted nori onto the tops before baking for a classic Japanese rice cracker feel.
- Everything Seasoning Crackers – Sprinkle everything bagel seasoning over the top instead of plain salt right before baking.
- Herb & Pepper Crackers – Add 1 teaspoon dried rosemary or thyme and a few cracks of black pepper to the dough.
- Smoky Paprika Crackers – Stir 1 teaspoon smoked paprika into the dry mix for a beautiful color and gentle smokiness.
You can even split the dough in half and season each half differently, so you get two flavor profiles from one baking session.
Storage & Reheating
Homemade rice crackers stay wonderfully crisp if you store them well:
-
Room Temperature Storage:
Keep cooled crackers in an airtight container at room temperature for 5–7 days. A glass jar with a tight lid works beautifully and looks charming on the counter. -
For Extra Insurance Against Humidity:
If you live somewhere humid, tuck a little packet of food-safe desiccant or a few grains of dry rice wrapped in cheesecloth in the jar to absorb moisture. -
Freezer:
You can freeze baked crackers in a zip-top freezer bag for up to 1 month. Press out as much air as you can. Thaw at room temperature—no need to reheat unless they feel soft. -
Re-crisping Soft Crackers:
If your crispy rice crackers lose their crunch, spread them on a baking sheet and warm at 300°F (150°C) for 5–7 minutes, then cool completely. They’ll perk right back up. -
Make-Ahead Tip:
The dough can be made, rolled between parchment, and refrigerated flat for up to 24 hours before baking. Score right before baking and proceed as usual.
Notes & Tested Tips
- Thickness is everything. The most important factor for success with this rice cracker recipe is how thin you roll the dough. Thicker dough = chewier crackers. If you’re not sure, err on the side of thinner.
- Rice flour differences. Some rice flours are more finely milled than others. If your dough feels gritty when raw, let it rest for 5–10 minutes so the water can hydrate the flour; the texture will improve.
- Flavor balance. Soy sauce and sesame oil are powerful, so keep tasting future batches. If you like a lighter flavor, reduce soy sauce slightly and replace the liquid with water.
- Pan color matters. Darker baking sheets can brown the crackers faster. Start checking at 12 minutes the first time you make them and adjust timing for your oven and pans.
- Don’t overcrowd flavor add-ins. It’s tempting to add everything at once—cheese, herbs, chili—but too many extras can make the dough crumbly or burn-prone. Start simple, then tweak.
- For kids’ snacks. Cut the dough into fun shapes with mini cookie cutters (stars, hearts, little animals). Just gather scraps, reroll gently, and repeat.
Honestly, the first time you make these, you’ll learn a lot about your own oven and how thin you like them. My first batch years ago was a bit pale and shy on salt. By batch three, they were requested “by name” in lunch boxes.
FAQs
1. Can I use leftover cooked rice instead of rice flour?
You can, but it’s a different process—you’d need to blend the cooked rice into a paste first and spread very thinly. This particular rice cracker recipe is designed for rice flour, which gives more consistent, easy results.
2. Are these rice crackers gluten free?
Yes, as long as you use certified gluten free soy sauce or tamari and gluten free rice flour. Regular soy sauce usually contains wheat, so read the label.
3. My crackers turned out chewy, not crispy. What went wrong?
Most likely they were rolled too thick or underbaked. Next time, roll the dough thinner and bake a few minutes longer, watching for light golden edges. Also, let them cool completely before judging the texture.
4. Can I make these oil-free?
You can reduce the oil slightly, but completely skipping it will give you a more brittle, less flavorful cracker. If you’re cutting back, keep at least 1 tablespoon oil for texture and taste.
5. Why did my crackers brown unevenly?
Ovens have hot spots, and dough thickness can vary. Rotate your pans halfway through baking, and try to roll the dough to an even thickness. Removing done pieces early can also help.
6. Can I use brown rice flour instead of white rice flour?
Yes—brown rice flour works, but the crackers will be a bit nuttier and sometimes slightly more crumbly. Start with the same measurements but be ready to add an extra teaspoon or two of water.
7. How do I keep these crackers crunchy in a humid climate?
Store them in a truly airtight container, and add a little food-safe moisture absorber. You can also re-crisp them in the oven at 300°F (150°C) for a few minutes whenever they start to soften.
8. Are these good for cheese boards or charcuterie?
Absolutely. Their light crunch is lovely with soft cheeses, smoked salmon, or even just a swipe of cream cheese and cucumber. They hold up well and don’t get soggy quickly.
Conclusion
This Rice Cracker Recipe gives you all the joy of those crispy, savory Japanese rice crackers—right from your own oven, with ingredients you recognize and can pronounce. They’re baked, naturally gluten free, endlessly customizable, and honestly a little addictive in the best possible way.
Give them a try this week, and let me know in the comments how your batch turns out—especially if you experiment with flavors. If you enjoyed this healthy snack recipe, you might also like pairing these crispy rice crackers with homemade hummus, a bright veggie dip, or a simple cheese spread for an easy, wholesome snack board.
Rice Cracker Recipe (Crispy, Light, and Surprisingly Easy!)
Ingredients
- 1 cup white rice flour about 140 g; finely milled; do not use sweet/glutinous rice flour
- 2 tablespoons cornstarch or potato starch about 16 g; potato starch gives a slightly lighter crunch
- 1/2 teaspoon fine sea salt
- 1/4 teaspoon garlic powder optional, for extra savoriness
- 2 tablespoons neutral oil such as grapeseed, canola, or light olive oil
- 3-4 tablespoons water start with 3 tablespoons, then add by the teaspoon as needed
- 1 tablespoon gluten free soy sauce or tamari regular soy sauce is fine if gluten is not a concern
- 1 teaspoon toasted sesame oil optional but recommended for deeper, nutty flavor
- 2-3 tablespoons toasted sesame seeds white, black, or a mix
- flaky sea salt for sprinkling on top, optional
Instructions
- Preheat your oven to 350°F (175°C). Line two baking sheets with parchment paper or silicone baking mats to prevent sticking and to make rolling the dough easier.
- In a medium bowl, whisk together the white rice flour, cornstarch or potato starch, fine sea salt, and garlic powder (if using) until well combined and evenly distributed.1 cup white rice flour, 2 tablespoons cornstarch or potato starch, 1/2 teaspoon fine sea salt, 1/4 teaspoon garlic powder
- Add the neutral oil, soy sauce or tamari, and toasted sesame oil to the dry mixture. Stir with a spatula until the mixture looks evenly moistened and a bit crumbly.2 tablespoons neutral oil, 1 tablespoon gluten free soy sauce or tamari, 1 teaspoon toasted sesame oil
- Add 3 tablespoons of water and mix until a soft dough starts to form. If the dough still looks dry or crumbly, add more water 1 teaspoon at a time until it comes together into a smooth, slightly firm ball with a texture similar to soft modeling clay—pliable but not sticky.3-4 tablespoons water
- Gently knead the toasted sesame seeds into the dough with your hands or a spatula until evenly distributed. If the dough cracks badly when pressed, lightly wet your hands and knead briefly to bring it back together.2-3 tablespoons toasted sesame seeds
- Divide the dough into two equal portions. Working with smaller portions makes it easier to roll the dough very thin.
- Place one portion of dough between two sheets of parchment paper. Using a rolling pin, roll the dough out as thinly and evenly as possible, about 1/16 inch (1–2 mm) thick. If the parchment slides on the counter, place a damp kitchen towel underneath to hold it in place.
- Peel off the top sheet of parchment and carefully slide the bottom sheet with the rolled dough onto one of the prepared baking sheets. Using a sharp knife or pizza cutter, score the dough into small squares or rectangles about 1–1½ inches wide. Score deeply enough to mark but not necessarily cut all the way through.
- Lightly sprinkle the surface of the scored dough with flaky sea salt, if using. For additional flavor and texture, you can also sprinkle a few extra sesame seeds on top and gently press them into the dough.flaky sea salt, 2-3 tablespoons toasted sesame seeds
- Repeat the rolling, transferring, scoring, and seasoning steps with the second portion of dough and place it on the second prepared baking sheet.
- Bake both trays at 350°F (175°C) for 15–20 minutes, rotating the pans halfway through baking. The crackers are done when the edges are light golden and the surface feels dry and firm. Thinner pieces may brown faster; start checking around 13–15 minutes and remove any pieces that brown early, returning the rest to the oven if needed.
- Let the crackers cool on the baking sheets for about 5 minutes, then transfer them to a wire rack to cool completely. They will continue to crisp as they cool, so wait until fully cooled before judging the final texture.
- Once the crackers are completely cool, break them along the score lines into individual crackers. Taste and adjust the amount of finishing salt in future batches if desired. Store in an airtight container.
Notes
- Roll the dough as thinly and evenly as possible; thickness is the main factor determining crispness.
- If your rice flour feels gritty, let the dough rest 5–10 minutes so the flour hydrates.
- Dark baking sheets brown crackers faster; start checking at 12 minutes the first time you bake them.
- Avoid overloading the dough with too many mix-ins (cheese, herbs, chili, etc.) at once, which can make it crumbly or prone to burning.
- For kids, cut the dough into fun shapes with mini cookie cutters; gently reroll scraps as needed. Fun variations:
- Spicy Chili Rice Crackers: Add 1/4–1/2 teaspoon cayenne or Korean gochugaru to the dry ingredients and sprinkle chili flakes on top before baking.
- Cheesy Rice Crackers: Mix 1/4 cup finely grated Parmesan into the dough; optionally reduce or omit the soy sauce for a milder flavor.
- Nori Seaweed Crackers: Press small strips of roasted nori onto the tops before baking.
- Everything Seasoning Crackers: Sprinkle everything bagel seasoning over the top instead of plain salt.
- Herb & Pepper Crackers: Add 1 teaspoon dried rosemary or thyme and a few cracks of black pepper to the dough.
- Smoky Paprika Crackers: Add 1 teaspoon smoked paprika to the dry mix for color and gentle smokiness. FAQs (summary):
- Use rice flour (white or brown) for this recipe; cooked rice requires a different method.
- To keep gluten free, use certified gluten free soy sauce or tamari.
- Chewy crackers usually mean the dough was too thick or underbaked; roll thinner and bake a bit longer.
- Reducing the oil is possible but skipping it entirely will affect flavor and texture; keep at least 1 tablespoon.
- Uneven browning often comes from hot spots and uneven thickness; rotate pans and roll evenly.