Peanut Butter Pie Recipe
If you’re craving something creamy, dreamy, and downright nostalgic, this Peanut Butter Pie Recipe is the easy no-bake dessert you’ll want on repeat all year long.
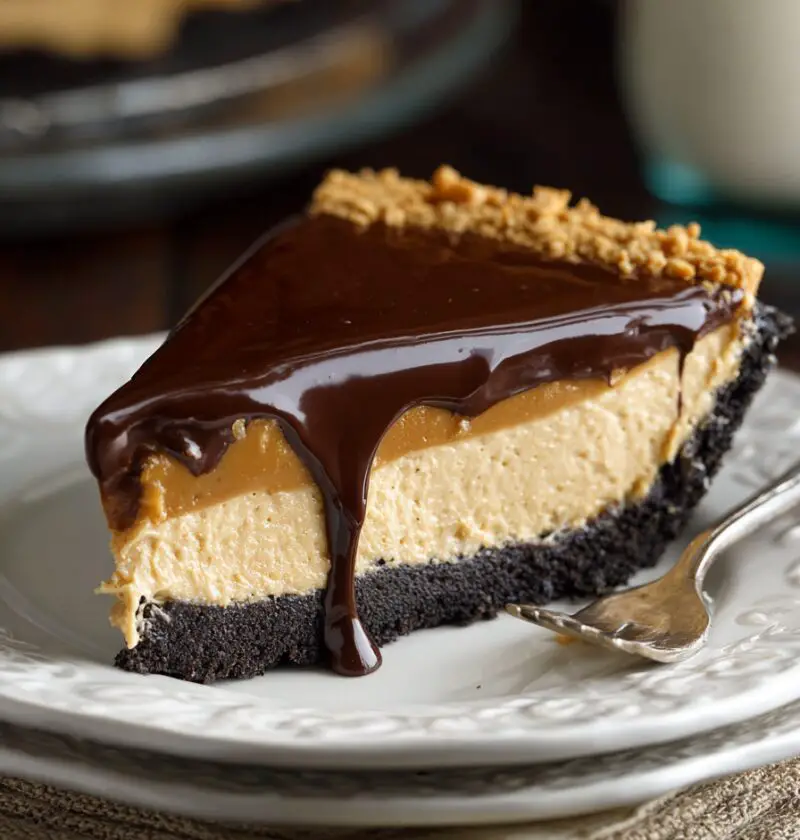
I’ve been making some version of this peanut butter pie for nearly 25 years, and it still amazes me how fast it disappears at family gatherings. This is a cool, silky, creamy peanut butter pie with a buttery graham cracker crust, fluffy whipped topping, and an optional chocolate drizzle for the chocolate lovers. It feels special enough for holidays, but simple enough for a Tuesday night “we need dessert” moment.
Google Trends keeps telling us the same story year after year: searches for no bake peanut butter pie and easy peanut butter pie spike around summer holidays and Thanksgiving. That makes sense to me—no oven, familiar flavors, and ingredients most of us already have in the pantry. This version leans a touch lighter than the old-fashioned ones (a little less sugar, a bit more protein from the peanut butter), but it’s still very much a rich peanut butter dessert. No fake-outs here.
I love serving this pie:
- After a casual cookout with neighbors
- As a make-ahead dessert for Thanksgiving (especially when the oven is already packed with turkey and rolls)
- For birthdays when the birthday person “doesn’t like cake” (we all have one of those, right?)
All right, let’s talk about why this Peanut Butter Pie Recipe absolutely deserves a spot in your dessert rotation.
Why You’ll Love This Peanut Butter Pie Recipe
- No oven needed – This is a true no bake peanut butter pie, perfect for hot days or busy holidays when the oven is already claimed.
- Simple pantry ingredients – Peanut butter, cream cheese, powdered sugar, whipped cream, graham crackers… nothing fancy or hard to find.
- Creamy, fluffy texture – The filling is silky and light, like a peanut butter cloud in a graham cracker crust pie shell.
- Make-ahead friendly – It needs chill time, which means you can make it the day before and forget about dessert stress.
- Easy to customize – Turn it into a chocolate peanut butter pie, make it gluten-free, or play around with different toppings.
- Kid and adult approved – The flavor is classic and nostalgic; it hits that peanut butter cup note without being too heavy.
- Works for every season – Cool and refreshing in summer, cozy and familiar in fall and winter.
- Beginner-friendly recipe – If you can stir and press a crust into a pan, you can nail this dessert pie recipe.
Ingredients
This homemade peanut butter pie uses straightforward ingredients, but the balance between them is what gives you that creamy, rich, yet not-too-sweet bite. You can use store brands for almost everything here; the key is choosing a smooth, classic peanut butter.

For the graham cracker crust
- 1 ½ cups graham cracker crumbs (about 10–12 full sheets, finely crushed)
- ¼ cup granulated sugar
- 6 tablespoons unsalted butter, melted (cooled slightly)
- Pinch of fine sea salt (helps balance the sweetness)
Tip: If you’re short on time, you can use a store-bought 9-inch graham cracker crust, but a homemade crust gives better flavor and crunch.
For the creamy peanut butter pie filling
- 8 ounces cream cheese, softened to room temperature
- 1 cup creamy peanut butter (traditional style like Jif or Skippy, not natural that separates)
- 1 cup powdered sugar, sifted (helps keep the filling smooth)
- 1 teaspoon pure vanilla extract
- ¼ teaspoon fine sea salt
- 1 ¼ cups heavy whipping cream, cold
- OR 1 (8-ounce) tub whipped topping, thawed, for a more old-school version
For the chocolate peanut butter pie finish (optional but wonderful)
- ¼ cup semi-sweet chocolate chips
- 2 teaspoons coconut oil or butter
- Additional whipped cream for topping (about 1 cup whipped)
- Chopped peanuts, mini peanut butter cups, or chocolate shavings, for garnish
Ingredient notes & substitutions
- Peanut butter: For the best texture, use creamy, shelf-stable peanut butter. Natural peanut butter tends to separate and can make the filling oily or grainy.
- Cream cheese: Full-fat cream cheese gives that classic cheesecake-style richness. Reduced-fat will work but won’t be quite as luscious.
- Heavy cream vs. whipped topping: Heavy cream whipped from scratch tastes fresher and less sweet. Whipped topping gives a more nostalgic “church potluck pie” vibe. Both work.
- Graham crackers: You can swap in chocolate grahams or crushed peanut butter sandwich cookies for a twist on classic homemade peanut butter pie.
Directions
Let me walk you through this step by step. It’s simple, but a few small details help get that perfect, fluffy texture.
1. Prepare the pie pan
Lightly grease a 9-inch pie dish with a tiny bit of butter or nonstick spray, just enough to help with slicing later.
2. Make the graham cracker crust
In a medium bowl, combine the graham cracker crumbs, granulated sugar, melted butter, and a pinch of salt. Stir until the mixture looks like wet sand and holds together when you squeeze a bit in your hand.
3. Press and chill the crust
Pour the crumb mixture into the pie dish. Use the bottom of a measuring cup or glass to press the crumbs firmly and evenly across the bottom and up the sides. Try not to rush this; a well-packed crust holds together beautifully.
Chill the crust in the fridge for at least 20 minutes while you make the filling.
4. Whip the cream (if using heavy cream)
In a cold mixing bowl, whip the heavy cream with a hand mixer or stand mixer on medium-high until medium-stiff peaks form—about 3–4 minutes. Don’t overbeat. Set aside in the fridge.
(If you’re using whipped topping, you can skip this step.)
5. Beat the cream cheese and peanut butter
In a large bowl, beat the softened cream cheese with the peanut butter on medium speed until smooth and fully combined, about 1–2 minutes. Scrape down the sides of the bowl.
6. Add sweetness and flavor
Add the powdered sugar, vanilla, and salt. Start mixing on low speed (so you don’t cover yourself in sugar), then increase to medium and beat until the mixture is thick, smooth, and slightly fluffy.
7. Fold in the whipped cream
Gently fold the whipped cream (or whipped topping) into the peanut butter mixture in 2–3 additions. Use a spatula and a light hand, turning the bowl as you go. This step gives you that light, airy whipped cream peanut butter pie filling—try not to deflate it.
8. Fill the crust
Spoon the filling into the chilled graham cracker crust. Smooth the top with an offset spatula or the back of a spoon, swirling the top if you like a rustic look.
9. Chill the pie
Cover loosely with plastic wrap or foil and refrigerate for at least 4 hours, or overnight for best results. The filling will firm up as it chills, making it easier to slice cleanly.
10. Add the chocolate topping (optional)
When you’re close to serving, place chocolate chips and coconut oil (or butter) in a microwave-safe bowl. Heat in 20-second bursts, stirring between each, until smooth and glossy. Let cool for 5–10 minutes so it’s slightly thickened but still pourable.
Drizzle over the chilled pie and add extra whipped cream around the edges if you like. Sprinkle with chopped peanuts or mini peanut butter cups for a true chocolate peanut butter pie moment.
11. Slice and serve
Use a sharp knife run under hot water, then dried, to get clean slices. Serve chilled, and watch it vanish faster than you’d think.
Servings & Timing
- Yield: 8–10 slices
- Prep Time: 25 minutes (including crust)
- Chill Time: Minimum 4 hours (overnight is even better)
- Total Time: About 4 hours 25 minutes, mostly hands-off
You can easily make two pies if you’re feeding a crowd—this recipe doubles well, and statistics from my own family holidays show “one pie per crowd” is never enough.
Variations
You know what? This Peanut Butter Pie Recipe is a fantastic starting point. Here are some fun twists:
- Oreo Crust Peanut Butter Pie: Use crushed chocolate sandwich cookies instead of graham crackers for a deeper, darker flavor.
- Gluten-Free Peanut Butter Pie: Use gluten-free graham crackers or cookies for the crust; the filling is naturally gluten-free.
- Greek Yogurt Swirl: Fold ¼–⅓ cup vanilla Greek yogurt into the filling for a subtle tang and a touch of extra protein.
- Salted Caramel Peanut Butter Pie: Drizzle salted caramel sauce over the filling before chilling and again over the top before serving.
- Peanut Butter Cup Explosion: Stir chopped mini peanut butter cups into the filling and sprinkle more on top.
- Lightened-Up Version: Use reduced-fat cream cheese, a little less powdered sugar, and more Greek yogurt, then serve smaller slices. The flavor stays rich, but the pie feels a bit lighter.
Storage & Reheating
(Though “reheating” is generous—this is a chilled dessert.)
- Fridge: Store the pie, covered, in the refrigerator for up to 4 days. The crust stays fairly crisp the first 2 days and gradually softens after that.
- Freezer: For longer storage, wrap the entire pie (or individual slices) tightly in plastic wrap, then foil, and freeze for up to 2 months. It tastes like a frozen peanut butter ice cream pie when eaten partially thawed.
- Thawing: Move from freezer to fridge and let thaw gently for several hours or overnight. If you’re impatient, you can let slices sit at room temperature for 15–20 minutes.
- Make-ahead: This is an ideal make-ahead dessert. Make it up to 24 hours before serving, keep it chilled, and finish with whipped cream and chocolate drizzle just before bringing it to the table.
Notes
A few personal tips from years of making this easy peanut butter pie:
- Soft cream cheese is non-negotiable. If the cream cheese is still cold, you’ll get lumps. Let it sit out 30–45 minutes, or cut it into cubes to speed it up.
- Don’t rush the chill time. I know it’s tempting. But the filling sets up best with at least 4 hours in the fridge; overnight gives that clean, cheesecake-like slice.
- Balance the sweetness. If your family likes things less sweet, you can reduce the powdered sugar to ¾ cup. If they have more of a sweet tooth, 1 ¼ cups will give you a richer dessert pie recipe feel.
- Texture tweaks: If you like a firmer, more cheesecake-style filling, use a bit less whipped cream (about 1 cup instead of 1 ¼). For extra-fluffy, use 1 ½ cups.
- Add a little crunch: Fold in ¼–½ cup chopped peanuts or crushed peanut butter candies to add an extra textural surprise.
Honestly, the biggest “mistake” I see readers make is cutting it too soon. If it’s still soft and messy, it will still taste amazing—it just won’t have those pretty, photo-ready slices.
FAQs
Can I make this Peanut Butter Pie Recipe without cream cheese?
Yes. You can replace the cream cheese with equal parts mascarpone or a thick Greek yogurt, but the flavor and texture will be slightly different—less cheesecake-like and more mousse-like.
Can I use natural peanut butter?
You can, but the results are less consistent. Natural peanut butter tends to separate and can make the filling oily or grainy. If you do use it, stir it very well and be prepared for a softer set.
How do I make this peanut butter pie without whipped topping?
Use the heavy cream version in the recipe—whipping it yourself gives a fresher taste and avoids added stabilizers. It’s my personal favorite way to make this creamy peanut butter pie.
Why is my filling runny or too soft?
Most often, the pie just needs more chill time. Also check that you whipped the cream to medium-stiff peaks and didn’t use low-fat cream or a very loose whipped topping.
Can I turn this into mini peanut butter pies?
Absolutely. Press the crust into muffin tins lined with paper liners, add the filling, and chill. They’ll set a bit faster—about 2–3 hours in the fridge.
Is this dessert very sweet?
It’s definitely a rich peanut butter dessert, but not cloying. If you’re sensitive to sweetness, start with ¾ cup powdered sugar and taste the filling before adding more.
Can I make this as a chocolate peanut butter pie from the start?
Yes—use a chocolate cookie crust, add 2–3 tablespoons cocoa powder to the filling along with the powdered sugar, and finish with the chocolate drizzle and chocolate shavings.
What’s the best way to cut clean slices?
Use a sharp knife dipped in hot water and wiped dry before each cut. It sounds fussy, but it really helps the slices look neat.
Conclusion
This Peanut Butter Pie Recipe checks all the boxes: creamy, comforting, simple, and make-ahead friendly. It’s the kind of dessert that feels like a big, sweet hug—and sometimes, that’s exactly what we need.
If you try this recipe, let me know how it turns out in the comments or by leaving a rating. I love seeing your twists—whether you go full chocolate peanut butter pie, keep it classic, or turn it into cute mini pies. And if you’re still in a dessert mood, you might enjoy my other easy desserts like no-bake cheesecakes or bar cookies for your next gathering.

Peanut Butter Pie
Ingredients
- 1 1/2 cups graham cracker crumbs about 10–12 full sheets, finely crushed
- 1/4 cup granulated sugar
- 6 tablespoons unsalted butter melted, cooled slightly
- fine sea salt pinch, for crust
- 8 ounces cream cheese softened to room temperature
- 1 cup creamy peanut butter traditional style (not natural that separates)
- 1 cup powdered sugar sifted
- 1 teaspoon pure vanilla extract
- 1/4 teaspoon fine sea salt for filling
- 1 1/4 cups heavy whipping cream cold (or 1 (8-ounce) tub whipped topping, thawed)
- 1/4 cup semi-sweet chocolate chips optional, for drizzle
- 2 teaspoons coconut oil or butter for melting with chocolate
- 1 cup whipped cream additional, for topping (optional)
- chopped peanuts, mini peanut butter cups, or chocolate shavings for garnish, optional
Instructions
- Lightly grease a 9-inch pie dish with a small amount of butter or nonstick spray to help with slicing later.
- In a medium bowl, combine the graham cracker crumbs, granulated sugar, melted butter, and a pinch of fine sea salt. Stir until the mixture looks like wet sand and holds together when you squeeze a bit in your hand.1 1/2 cups graham cracker crumbs, 1/4 cup granulated sugar, 6 tablespoons unsalted butter, fine sea salt
- Pour the crumb mixture into the prepared pie dish. Use the bottom of a measuring cup or glass to press the crumbs firmly and evenly across the bottom and up the sides of the dish. Chill the crust in the refrigerator for at least 20 minutes while you make the filling.
- In a cold mixing bowl, whip the cold heavy whipping cream with a hand mixer or stand mixer on medium-high speed until medium-stiff peaks form, about 3–4 minutes. Do not overbeat. Set aside in the refrigerator. If you are using whipped topping, skip this step.1 1/4 cups heavy whipping cream
- In a large bowl, beat the softened cream cheese and creamy peanut butter together on medium speed until smooth and fully combined, about 1–2 minutes. Scrape down the sides of the bowl as needed.8 ounces cream cheese, 1 cup creamy peanut butter
- Add the sifted powdered sugar, vanilla extract, and 1/4 teaspoon fine sea salt to the cream cheese mixture. Start mixing on low speed, then increase to medium and beat until the mixture is thick, smooth, and slightly fluffy.1 cup powdered sugar, 1 teaspoon pure vanilla extract, 1/4 teaspoon fine sea salt
- Gently fold the whipped cream (or whipped topping) into the peanut butter mixture in 2–3 additions. Use a spatula and a light hand, turning the bowl as you go, to keep the filling light and airy.1 1/4 cups heavy whipping cream
- Spoon the peanut butter filling into the chilled graham cracker crust. Smooth the top with an offset spatula or the back of a spoon, swirling the surface if desired.
- Cover the pie loosely with plastic wrap or foil and refrigerate for at least 4 hours, or overnight for best results, until the filling is fully set and firm enough to slice cleanly.
- Near serving time, place the semi-sweet chocolate chips and coconut oil or butter in a microwave-safe bowl. Heat in 20-second bursts, stirring between each, until melted, smooth, and glossy. Let cool for 5–10 minutes until slightly thickened but still pourable.1/4 cup semi-sweet chocolate chips, 2 teaspoons coconut oil or butter
- Drizzle the cooled melted chocolate over the chilled pie. Add additional whipped cream on top if desired and sprinkle with chopped peanuts, mini peanut butter cups, or chocolate shavings.1/4 cup semi-sweet chocolate chips, 1 cup whipped cream, chopped peanuts, mini peanut butter cups, or chocolate shavings
- Run a sharp knife under hot water, wipe it dry, and slice the cold pie for clean pieces. Serve chilled.