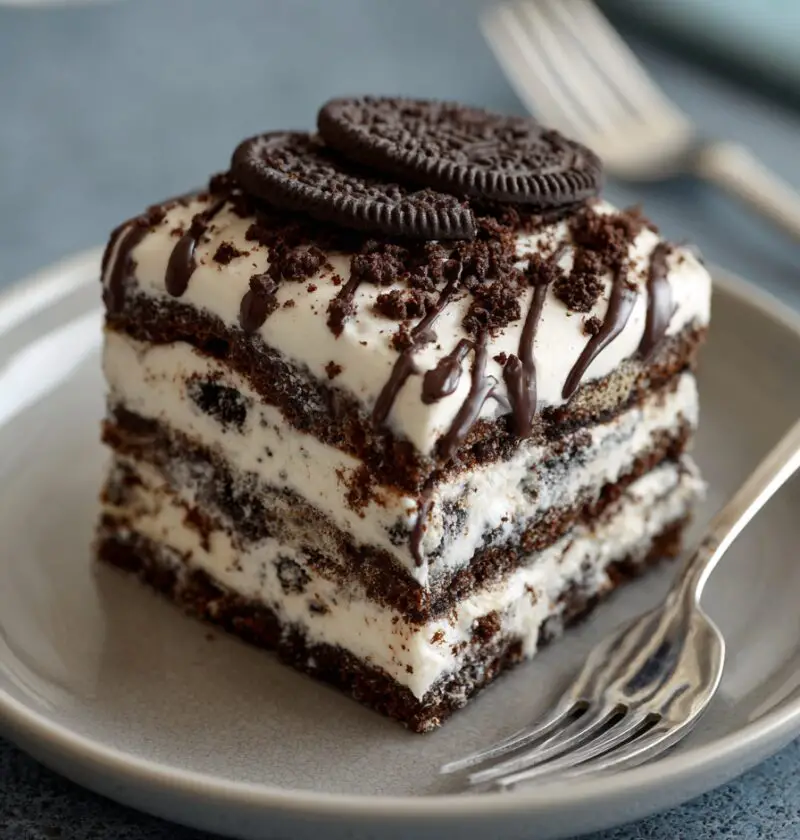
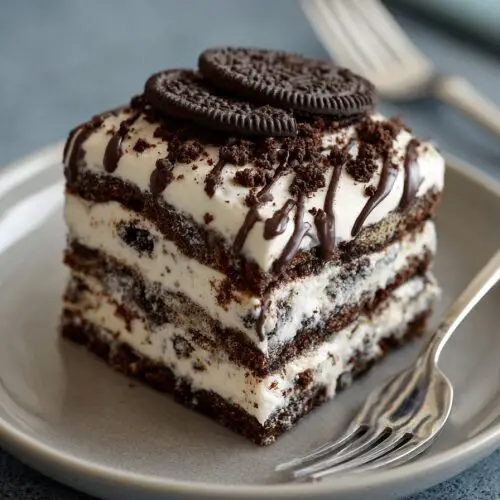
Oreo Icebox Cake Recipe
If you’re craving a creamy, chocolatey treat that looks fancy but takes almost no effort, this Oreo Icebox Cake Recipe is your new go-to no bake dessert for busy days, hot summers, and last-minute get-togethers.
I’ve been making refrigerator cakes since the early ’90s, when my kids were little and I needed something I could toss together during nap time. This Oreo icebox cake is my modern twist on that classic idea: layers of chocolate cookie dessert goodness, fluffy whipped cream filling, and the magic of the fridge doing all the work.
It’s a simple Oreo dessert recipe that feels nostalgic and playful, but still special enough for birthdays, cookouts, or that random Tuesday when you just need a little joy. The best part? No oven, no fuss, and you can easily make it ahead. Honestly, what’s not to love?
Why You’ll Love This Oreo Icebox Cake Recipe
- No oven needed – This is a true no bake dessert, perfect for hot summer days when you don’t want extra heat in the kitchen.
- Simple ingredients – Just Oreos, cream, a touch of cream cheese, and a few pantry staples. No fancy shopping trip.
- Make-ahead friendly – It actually tastes better after resting in the fridge, making it an ideal make ahead dessert for parties.
- Kid- and adult-approved – It’s basically a layered Oreo cake with whipped cream; I’ve never seen anyone say no to that combo.
- Customizable – You can play with flavors, toppings, and add-ins (I’ll share variations below), so it never gets boring.
- Beautiful presentation – Those Oreo whipped cream layers look dramatic when sliced, but it’s secretly very easy.
- Great for feeding a crowd – A full 9×13 pan serves a bunch of people, so it’s perfect for potlucks and cookouts.
- No baking skills required – If you can layer and spread, you can make this cake. It’s that forgiving.
Ingredients
For this Oreo Icebox Cake Recipe, you’ll build layers of cookies and a fluffy, stable whipped cream filling. I like using real cream for a fresher taste, but I’ll mention a Cool Whip shortcut, too.
For the Oreo layers:
- 1 family-size package Oreo cookies (about 48 cookies; regular, Double Stuf also works if you like a softer, richer cake)
- 1/2 cup cold milk (optional, for lightly dipping cookies if you want a very soft texture)
For the whipped cream filling:
- 8 oz cream cheese, softened to room temperature (full-fat for best texture)
- 3 cups heavy whipping cream, very cold
- 3/4 cup powdered sugar (also called confectioners’ sugar)
- 2 teaspoons pure vanilla extract (or 1 teaspoon vanilla + 1 teaspoon almond extract for a bakery-style flavor)
- 1/4 teaspoon fine sea salt (just a pinch to balance sweetness)
For topping and garnish (optional but recommended):
- 6–8 extra Oreo cookies, crushed
- Chocolate shavings or mini chocolate chips
- Fresh berries or a drizzle of chocolate sauce, for serving (optional)
Ingredient Tips:
- Oreos: Store-brand chocolate sandwich cookies work too, but classic Oreos soften especially well in the fridge.
- Cream cheese: Make sure it’s fully softened so it blends smoothly—cold cream cheese will leave little bits.
- Heavy cream: Look for 36% or higher milk fat; keep it refrigerated until you’re ready to whip so it thickens quickly.
- Powdered sugar: Helps stabilize the whipped cream so your layered Oreo dessert slices cleanly the next day.

Directions
You’ll be using a 9×13-inch baking dish for this refrigerator cake. Glass or ceramic both work well.
-
Chill your tools.
Place a large mixing bowl and the beaters of your hand mixer (or the bowl of your stand mixer) in the fridge or freezer for about 10–15 minutes. Cold tools help the whipped cream thicken faster and hold better. -
Beat the cream cheese.
In the chilled bowl, add the softened cream cheese. Beat on medium speed for 1–2 minutes, until smooth and creamy. Scrape down the sides so there are no lumps. -
Add powdered sugar, vanilla, and salt.
Sprinkle in the powdered sugar, vanilla extract, and salt. Beat again until everything is smooth, fluffy, and slightly lighter in color. This is your flavor base. -
Whip the cream.
Pour the cold heavy cream into the bowl with the cream cheese mixture. Start on low speed so it doesn’t splash, then increase to medium-high. Beat for 3–5 minutes, until you have stiff but fluffy peaks. The mixture should hold its shape when you lift the beater, but still look smooth and creamy—not grainy. -
Check the sweetness and texture.
Taste a spoonful. If you like it sweeter, you can blend in another tablespoon or two of powdered sugar. If it feels too thick, beat just a bit less next time; over-whipping can make it slightly dense. -
Prepare your cookies.
Set aside about 6–8 Oreos for the topping. Keep them whole for now. For the rest, you’ll use them as the “cake” layers. If you like a very soft icebox cake with a cake-like bite, pour the 1/2 cup milk into a shallow dish so you can quickly dip each cookie before layering. -
Build the first Oreo layer.
In your 9×13 pan, arrange a single layer of Oreo cookies across the bottom. Lay them flat and close together. It’s okay if you have to break a few cookies in half to cover the edges. If you’re using milk, give each cookie a very quick dip (1 second per side)—don’t soak them or they’ll fall apart. -
Add the first whipped cream layer.
Spoon about one-third of the whipped cream filling over the cookies. Use an offset spatula or the back of a spoon to spread it evenly to the edges. Aim for a smooth, even layer—this helps those pretty slices later. -
Repeat the layers.
Add a second layer of Oreos over the cream (dipping in milk first if using), then another one-third of the cream. Repeat with a third layer of Oreos and finish with the remaining whipped cream spread across the top. -
Crush and add the topping.
Take the reserved Oreos and crush them roughly in a zip-top bag with a rolling pin, or just crumble them by hand. Sprinkle the crushed cookies evenly over the top. Add chocolate shavings, chips, or a light drizzle of chocolate sauce if you’d like a more dramatic look. -
Chill the cake.
Cover the pan tightly with plastic wrap or foil. Refrigerate for at least 4 hours, but overnight is best. During this time, the Oreo layers soften and the whipped cream filling firms up so it slices like a soft layered cake. -
Slice and serve.
When ready to serve, use a sharp knife to cut squares. Wipe the knife between cuts for clean layers. Garnish individual slices with berries or extra whipped cream if you’re feeling fancy.
Servings & Timing
- Yield: About 12–16 servings, depending on slice size
- Prep Time: 20 minutes
- Chill Time: 4–12 hours (overnight gives the best texture)
- Total Time: About 4 hours 20 minutes to overnight
For a weeknight dessert, I usually assemble it after dinner and let it sit overnight. By the next afternoon, the Oreos are perfectly cake-like, and the cream is set and sliceable.
Variations
You know what? Once you make this classic version, you’ll probably start dreaming up your own twists. Here are a few to get you started:
- Mint Oreo Icebox Cake – Use mint Oreos and add 1/4 teaspoon peppermint extract to the whipped cream filling.
- Peanut Butter Oreo Version – Gently fold 1/2 cup creamy peanut butter into the cream cheese before adding the cream.
- Cool Whip Shortcut – Swap the whipped cream filling for two 8-oz tubs of Cool Whip, slightly thawed, for an ultra-easy cool whip Oreo cake.
- Mocha Oreo Dessert – Add 1 tablespoon instant espresso powder dissolved in 1 tablespoon hot water to the cream cheese mixture.
- Gluten-Free Twist – Use gluten-free chocolate sandwich cookies and check your cream cheese and vanilla to ensure they’re gluten-free.
- Birthday Cake Style – Use Golden Oreos, add sprinkles to the cream, and top with more sprinkles for a funfetti vibe.
Storage & Reheating
No reheating here—this is a cold dessert—but storage matters for the best texture.
-
In the fridge:
Store covered in the refrigerator for 3–4 days. The cookies will continue to soften, but the cream stays stable thanks to the cream cheese and powdered sugar. -
In the freezer:
For a firmer, almost ice cream cake texture, you can freeze the Oreo icebox cake for up to 1 month. Wrap the whole pan tightly with plastic wrap and then foil. Thaw in the fridge for a few hours before serving, or slice and serve slightly frozen on a hot day. -
Make-ahead tips:
This is one of my favorite make ahead desserts for holidays or cookouts. Assemble the day before, chill overnight, and you’re stress-free when guests show up. If you plan to keep it longer than 24 hours, add any fresh fruit toppings right before serving so they stay bright and fresh.
Notes
-
Cookie softness:
If you like more contrast—some crunch left in the Oreos—skip the milk-dipping and chill closer to 4 hours instead of overnight. For very soft, cake-like layers, dip in milk and chill overnight. -
Sweeter vs. less sweet:
This recipe is lightly sweet compared with some Oreo desserts. For a sweeter filling, add up to 1 cup powdered sugar total. For something less sweet, start with 1/2 cup and taste. -
Pan size:
A 9×13 pan gives you a nice, broad Oreo layer dessert that’s easy to slice into squares. You can also use an 8×8 or 9×9 pan for a taller cake—just know you may not use every cookie. -
Neat slices hack:
For restaurant-style slices, pop the pan in the freezer for 20–30 minutes before cutting. The layers firm just enough that your knife glides cleanly. -
Serving style:
For parties, I sometimes spoon it into clear cups or small mason jars instead of a big pan. It turns into individual Oreo parfaits that look adorable on a dessert table.
FAQs
Can I make this Oreo icebox cake without cream cheese?
Yes. You can skip the cream cheese and whip 3 cups heavy cream with 3/4 cup powdered sugar and 2 teaspoons vanilla. The cake will be a bit softer and lighter, so chill it well before slicing.
Can I use Cool Whip instead of whipped cream?
Absolutely. Use two 8-oz tubs of Cool Whip; spread it the same way you would the whipped cream layers. It makes this already easy Oreo cake even quicker.
Do I have to dip the Oreos in milk?
No, that step is optional. Undipped Oreos will still soften as the cake chills; dipping just speeds up the process and creates extra-soft layers.
How long should I chill the cake before serving?
At least 4 hours, but 8–12 hours (or overnight) gives the best texture for neat slices and soft, cake-like cookies.
Can I make this as a round cake instead of in a 9×13 pan?
Yes. You can layer it in a springform pan lined with parchment. It makes a beautiful layered Oreo cake that you can unmold and slice like a traditional cake.
Why did my whipped cream turn grainy?
That usually means it was over-whipped. Next time, stop as soon as stiff peaks form. If it’s only slightly grainy, you can sometimes save it by gently folding in a few extra tablespoons of liquid cream.
Is this Oreo icebox cake safe to leave out at room temperature?
Because of the dairy, try to keep it chilled. It can sit out for about 1–2 hours at a party, but return leftovers to the fridge as soon as you can.
Can I add fruit between the layers?
Yes, sliced strawberries or raspberries are lovely between the whipped cream and Oreo layers. Just be aware that very juicy fruit can add moisture, so it’s best enjoyed within a day or two.
Conclusion
This Oreo Icebox Cake Recipe is one of those desserts that feels like a little bit of magic: simple ingredients, no baking, and yet it turns into something that makes everyone’s eyes light up. It’s part layered Oreo cake, part whipped cream dream, and completely perfect for busy families, summer parties, or those moments when you just want something sweet without a lot of effort.
If you make this refrigerator cake, I’d love to hear how it turned out—tell me in the comments what variation you tried or what your guests thought. And if you enjoy no bake dessert recipes, you might also like exploring more chilled treats, like chocolate pudding pies, yogurt parfaits, or other icebox cakes that keep your kitchen cool and your dessert game strong.
Oreo Icebox Cake
Ingredients
- 1 family-size package Oreo cookies about 48 cookies; regular or Double Stuf
- 1/2 cup milk cold, optional, for dipping cookies
- 8 oz cream cheese softened to room temperature; full-fat for best texture
- 3 cups heavy whipping cream very cold; 36% milk fat or higher
- 3/4 cup powdered sugar also called confectioners’ sugar; adjust to taste
- 2 teaspoons pure vanilla extract or 1 teaspoon vanilla + 1 teaspoon almond extract
- 1/4 teaspoon fine sea salt a pinch to balance sweetness
- 6-8 Oreo cookies reserved for topping, crushed
- chocolate shavings or mini chocolate chips optional, for garnish
- fresh berries or chocolate sauce optional, for serving and garnish
Instructions
- Place a large mixing bowl and the beaters of your hand mixer (or the bowl of your stand mixer) in the fridge or freezer for 10–15 minutes to chill.
- Add the softened cream cheese to the chilled bowl. Beat on medium speed for 1–2 minutes, until smooth and creamy, scraping down the sides as needed.8 oz cream cheese
- Add the powdered sugar, vanilla extract, and salt. Beat until the mixture is smooth, fluffy, and slightly lighter in color.3/4 cup powdered sugar, 2 teaspoons pure vanilla extract, 1/4 teaspoon fine sea salt
- Pour the cold heavy whipping cream into the bowl with the cream cheese mixture. Start beating on low, then increase to medium-high and whip for 3–5 minutes, until stiff but fluffy peaks form. The mixture should hold its shape but still look smooth and creamy.3 cups heavy whipping cream
- Taste the whipped cream filling and, if you prefer it sweeter, beat in an additional tablespoon or two of powdered sugar.3/4 cup powdered sugar
- Set aside 6–8 Oreo cookies for topping. Keep them whole for now. Pour the milk (if using) into a shallow dish for quickly dipping the remaining Oreos when assembling.1 family-size package Oreo cookies, 1/2 cup milk, 6-8 Oreo cookies
- In a 9×13-inch baking dish, arrange a single, even layer of Oreo cookies across the bottom. If using milk, give each cookie a very quick dip (about 1 second per side) before placing it in the pan. Break a few cookies as needed to cover the edges.1 family-size package Oreo cookies, 1/2 cup milk
- Spoon about one-third of the whipped cream filling over the Oreo layer. Spread it evenly to the edges with an offset spatula or the back of a spoon.
- Add a second layer of Oreo cookies (dipping in milk if using), followed by another one-third of the whipped cream. Repeat with a third Oreo layer and finish with the remaining whipped cream spread evenly on top.1 family-size package Oreo cookies, 1/2 cup milk
- Crush the reserved Oreos in a zip-top bag with a rolling pin or crumble them by hand. Sprinkle the crushed cookies evenly over the top. Add chocolate shavings, mini chocolate chips, or a drizzle of chocolate sauce if desired.6-8 Oreo cookies, chocolate shavings or mini chocolate chips
- Cover the pan tightly with plastic wrap or foil. Refrigerate for at least 4 hours, or overnight for the best soft, cake-like cookie texture and clean slices.
- When ready to serve, slice the cake into squares with a sharp knife, wiping the blade between cuts for neat layers. Garnish with fresh berries or extra whipped cream and chocolate sauce if you like.fresh berries or chocolate sauce