Oreo Dirt Cake Recipe
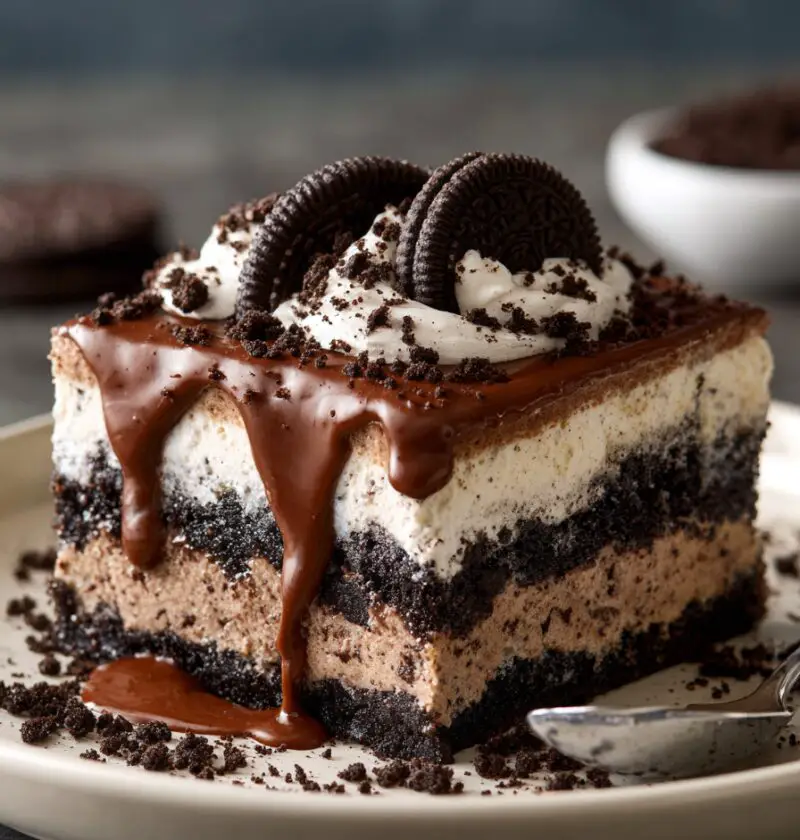
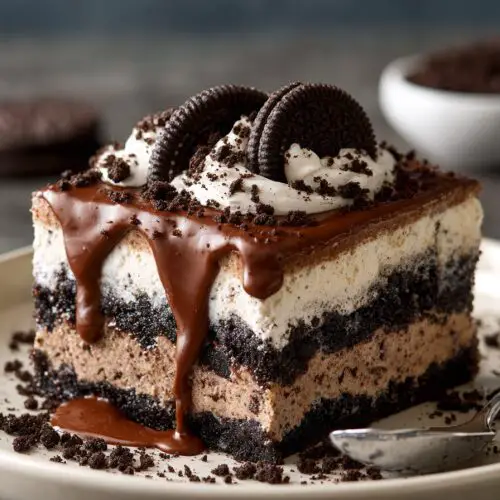
This nostalgic, no-bake Oreo Dirt Cake Recipe is a creamy, kid-friendly refrigerator dessert that layers chocolate pudding, whipped cream, and Oreo crumb topping into one dreamy bite.
About This Oreo Dirt Cake Recipe
If you grew up in the States, there’s a good chance an Oreo dirt cake made an appearance at at least one birthday party, potluck, or school event. This Oreo Dirt Cake Recipe is my grown-up-but-still-fun version of that classic layered Oreo dessert: crushed Oreo cookies, a velvety chocolate pudding layer, and a fluffy Oreo whipped cream dessert all tucked into a chilled pan.
You get the richness of a chocolate pudding dessert, the crunch of Oreo crumb topping, and the lightness of whipped cream—without ever turning on the oven. It’s a true no bake Oreo dessert, which means it’s perfect for hot summer days when the last thing you want is a preheated kitchen.
I love making this Oreo dessert recipe for summer holidays, classroom celebrations, and casual Sunday dinners when I want something playful on the table. My kids called it “edible dirt” when they were little; now my grand-niece calls it “worms and mud cake.” Same idea, same smiles.
Is it healthy? Let’s be honest, it’s a treat. But you can make a few smart swaps—lighter cream cheese, reduced-fat whipped topping, or less sugar in the pudding layer—without losing that creamy, comforting texture. It’s a great refrigerator dessert recipe because the flavors actually get better as it chills overnight.
And you know what? Sometimes, a chilled pan of easy Oreo cake in the fridge just makes a long week feel a whole lot better.
Why You’ll Love This Oreo Dirt Cake Recipe
- No oven needed—this is a true no-bake Oreo dessert, perfect for warm days.
- Simple ingredients you can grab at any grocery store (hello, Oreo cookies and instant pudding).
- Crowd-pleaser for all ages—kids love the “dirt” look, adults love the creamy layers.
- Ideal make-ahead pudding dessert recipe; it actually tastes better the next day.
- Easy to transport, which makes it a great Oreo party dessert for potlucks and picnics.
- Customizable—change the pudding flavor, toppings, or cookie mix to suit any holiday.
- Budget-friendly; feeds a crowd without a long ingredient list.
- Light, fluffy texture with just enough crunch from the Oreo crumb topping.
- Foolproof for beginner bakers—no fancy tools, no complicated techniques.
- Works year-round, but especially lovely as a summer dessert recipe straight from the fridge.
Ingredients
Here’s everything you’ll need for this layered Oreo and pudding cake in a 9×13-inch pan:
- 1 family-size package Oreo cookies (about 48 cookies) – divided; regular, not double-stuffed, works best for texture.
- 1/2 cup (1 stick) unsalted butter, melted – helps bind the bottom cookie layer.
- 8 oz cream cheese, softened – brick style, not whipped; full-fat gives the best creamy texture.
- 1 cup powdered sugar – sweetens the cream cheese layer without graininess.
- 2 teaspoons vanilla extract – real vanilla adds deeper flavor to the creamy layer.
- 3 cups cold milk – whole or 2% for the pudding; very cold so it thickens properly.
- 2 packages (3.4 oz each) instant chocolate pudding mix – this is the heart of the chocolate pudding dessert layer.
- 12 oz whipped topping (like Cool Whip), thawed – divided; keep it cold but not frozen.
- Pinch of salt – just a little to balance the sweetness.
- Gummy worms or chocolate rocks (optional) – for the classic “dirt” look if you’re making this a kids friendly dessert.
A few quick tips while you gather everything:
- Let your cream cheese sit out for about 30–45 minutes so it blends lump-free.
- Make sure you’re using instant pudding mix, not cook-and-serve; that won’t set the same way.
- If you like less sweetness, you can reduce the powdered sugar to 3/4 cup.
- Store-brand sandwich cookies work, but real Oreos tend to give the best flavor for this Oreo dessert recipe.

Directions
-
Crush the Oreos
Add the Oreo cookies to a large zip-top bag and crush them with a rolling pin until you have fine crumbs with a few small chunks. You can also pulse them in a food processor—just leave a little texture so the Oreo crumb topping isn’t too powdery. -
Make the cookie base
In a medium bowl, stir together about 2/3 of the crushed Oreos and the melted butter until everything is evenly moistened. Press this mixture firmly into the bottom of a 9×13-inch pan to form a loose “crust.” A flat-bottomed measuring cup makes pressing much easier. -
Beat the cream cheese layer
In a large mixing bowl, beat the softened cream cheese with a hand mixer until smooth and fluffy. Add the powdered sugar, vanilla, and a small pinch of salt. Beat again until creamy and well blended, scraping down the sides of the bowl as needed. -
Fold in whipped topping
Gently fold in half of the whipped topping (about 6 oz) into the cream cheese mixture. Use a spatula and light, sweeping motions so you keep it airy. This becomes your first creamy layer for the Oreo whipped cream dessert. -
Spread the cream cheese mixture
Spoon the cream cheese mixture over the Oreo base. Spread it into an even layer with an offset spatula or the back of a spoon. Try not to disturb the cookie base too much, but don’t stress if a few crumbs mix in. -
Prepare the chocolate pudding
In a separate large bowl, whisk together the cold milk and the instant chocolate pudding mixes for 2 minutes, or until thickened. Let it sit for another 3–5 minutes to firm up. It should be thick but still spreadable—like soft yogurt. -
Add the pudding layer
Gently pour or scoop the thickened chocolate pudding over the cream cheese layer. Spread it out evenly from edge to edge. This gives you that classic Oreo and pudding cake feel with a nice contrast of flavors. -
Top with remaining whipped topping
Spread the remaining whipped topping over the chocolate pudding layer. Use gentle strokes so you don’t pull the pudding up into the topping. If you like, create a few swoops with the back of a spoon for a homemade look. -
Finish with Oreo “dirt”
Sprinkle the remaining crushed Oreos evenly over the top as your Oreo crumb topping. It should resemble fresh potting soil—which is exactly what makes this Oreo dirt cake so fun. Now is the time to tuck in gummy worms or candy “rocks” if you’re serving this as a kids friendly dessert. -
Chill until set
Cover the pan with plastic wrap or a lid and refrigerate for at least 4 hours, or overnight for cleaner slices and deeper flavor. This is a refrigerator dessert recipe, so the chill time is where the magic happens. -
Serve and enjoy
Slice into squares with a sharp knife. For the neatest edges, wipe the knife between cuts. Serve straight from the fridge—this Oreo dirt cake recipe tastes best cold.
Servings & Timing
- Yield: About 12–16 servings, depending on how large you cut the squares
- Prep Time: 25–30 minutes
- Chill Time: 4 hours (overnight is even better)
- Total Time: About 4 hours 30 minutes, with most of that completely hands-off in the fridge
This makes a generous pan, so it’s an easy Oreo cake to bring to parties, cookouts, or school functions.
Variations
- Peanut Butter Twist: Use one chocolate pudding and one peanut butter pudding, and drizzle warm peanut butter over the base before adding the cream cheese layer.
- Mint Oreo Dirt Cake: Swap regular Oreos for mint Oreos and add 1/2 teaspoon peppermint extract to the cream cheese mixture for a refreshing holiday or St. Patrick’s Day dessert.
- Gluten-Friendly Version: Use gluten-free sandwich cookies and confirm your pudding mix is gluten-free for a crowd with mixed dietary needs.
- Birthday Party Version: Stir rainbow sprinkles into the whipped topping layer and top with more sprinkles plus mini chocolate chips.
- Lighter Version: Use reduced-fat cream cheese, light whipped topping, and sugar-free pudding mixes; it won’t taste exactly the same, but it still hits that creamy, dreamy pudding dessert recipe note.
- Halloween “Graveyard” Cake: Decorate the top with cookie “tombstones,” candy pumpkins, and write names with icing for a spooky Oreo party dessert.
Storage & Reheating
Reheating doesn’t really apply here (you want it cold!), but storage matters:
- Fridge: Cover tightly with plastic wrap or a lid and store in the refrigerator for 3–4 days. The cookie crumbs will soften over time, but the flavor stays wonderful.
- Freezer: You can freeze this Oreo dirt cake recipe, tightly covered, for up to 1 month. The texture will be a bit firmer once thawed but still tasty.
- Thawing: Thaw overnight in the fridge, not on the counter, so the dairy stays safe and the layers stay stable.
- Make-Ahead Tips: This is an excellent make-ahead Oreo dessert recipe—assemble the day before serving and keep chilled. If you’re worried about the top getting too soft, you can sprinkle the Oreo crumb topping just before serving.
Notes
- If your cream cheese is still a little cold, you may see small lumps; just beat it extra well before adding the whipped topping.
- For a stronger chocolate flavor, add a tablespoon of unsweetened cocoa powder to the pudding mix or use one chocolate and one dark chocolate pudding.
- Don’t rush the chill time. I know it’s tempting, but the layers really need that 4-hour rest to set; otherwise, it will scoop more like a trifle than slice like a cake.
- If you’re serving this outdoors in summer heat, keep the pan in a cooler or set the dish in a larger pan filled with ice to help it stay firm.
- A glass pan is nice because you can see all the pretty layers of this layered Oreo dessert, but a metal pan chills a bit faster.
- For extra texture, reserve a small handful of Oreo chunks (not crumbs) to sprinkle over the top right before serving.
Honestly, after making this a few dozen times over the years, my biggest lesson is: don’t overthink it. It’s meant to be fun, a little messy, and very, very comforting.
FAQs
Can I make Oreo dirt cake a day ahead?
Yes, and I actually recommend it. This Oreo dirt cake recipe tastes even better after chilling overnight, and the layers slice more cleanly.
Can I use homemade whipped cream instead of whipped topping?
You can, but stabilize it with a bit of powdered sugar (about 1/4 cup per cup of cream) so it holds up in the fridge and doesn’t deflate.
What kind of pudding works best?
Instant chocolate pudding is classic, but you can use white chocolate, vanilla, or even cookies-and-cream pudding for a twist on the usual chocolate pudding dessert.
My pudding layer is runny—what happened?
Most likely the milk wasn’t cold enough, or you used cook-and-serve pudding. Stick with instant pudding and whisk for the full 2 minutes, then let it rest to thicken.
Can I cut this recipe in half?
Yes, you can assemble it in an 8×8 or 9×9 pan. Just cut all the ingredients in half and keep the chill time the same.
Is this safe to leave out at room temperature for a party?
Because it contains dairy, try to keep it out no longer than 2 hours. For longer events, store it in the fridge and bring out smaller portions at a time.
Can I make this without cream cheese?
You can skip the cream cheese layer and simply use pudding and whipped topping over the Oreo base. It will be lighter and more like a very easy Oreo cake parfait.
How can I make it less sweet?
Use less powdered sugar in the cream cheese mixture, choose sugar-free pudding, and don’t pile quite as much Oreo crumb topping on top.
Conclusion
This Oreo Dirt Cake Recipe brings together everything we love about a no bake Oreo dessert: layers of cool, creamy pudding, fluffy whipped topping, and that nostalgic Oreo crunch. It’s simple, make-ahead friendly, and almost guaranteed to disappear at any gathering.
Give it a try this week—whether it’s for a birthday, a barbecue, or just a little family treat—and let me know how it goes. Leave a comment with your favorite twist, and if you enjoy easy refrigerator desserts like this, you might also love a classic no-bake cheesecake or a simple chocolate pudding pie next.
Oreo Dirt Cake
Ingredients
- 1 family-size package Oreo cookies about 48 cookies, regular (not double-stuffed), divided
- 1/2 cup unsalted butter melted
- 8 oz cream cheese brick style, softened
- 1 cup powdered sugar
- 2 teaspoons vanilla extract
- 3 cups milk very cold; whole or 2%
- 2 packages instant chocolate pudding mix 3.4 oz each, not cook-and-serve
- 12 oz whipped topping like Cool Whip, thawed and divided
- 1 pinch salt
- gummy worms or chocolate rocks optional, for decorating the top
Instructions
- Add the Oreo cookies to a large zip-top bag and crush them with a rolling pin until you have fine crumbs with a few small chunks. Alternatively, pulse them in a food processor, leaving a bit of texture so the topping isn’t too powdery.
- In a medium bowl, combine about 2/3 of the crushed Oreos with the melted butter and stir until evenly moistened. Press this mixture firmly into the bottom of a 9x13-inch pan to form a loose crust. Use the bottom of a measuring cup to help press it into an even layer.
- In a large mixing bowl, beat the softened cream cheese with a hand mixer until smooth and fluffy. Add the powdered sugar, vanilla extract, and a pinch of salt. Beat again until creamy and well combined, scraping down the sides of the bowl as needed.
- Gently fold in half of the whipped topping (about 6 oz) into the cream cheese mixture using a spatula and light sweeping motions to keep it airy. This becomes the first creamy layer.
- Spoon the cream cheese mixture over the Oreo base and spread it into an even layer with an offset spatula or the back of a spoon. Try not to disturb the cookie base too much.
- In a separate large bowl, whisk together the cold milk and the instant chocolate pudding mixes for about 2 minutes, or until thickened. Let the mixture sit for 3–5 minutes to firm up; it should be thick but spreadable, like soft yogurt.
- Gently pour or scoop the thickened pudding over the cream cheese layer and spread it evenly from edge to edge to create the chocolate layer.
- Spread the remaining whipped topping over the pudding layer using gentle strokes so you don’t pull the pudding up into the topping. Optionally, create decorative swoops on the surface with the back of a spoon.
- Sprinkle the remaining crushed Oreos evenly over the top to resemble “dirt.” If desired, tuck gummy worms or chocolate rocks into the crumbs for a classic dirt-cake look.
- Cover the pan with plastic wrap or a lid and refrigerate for at least 4 hours, or overnight, until the layers are fully set and chilled.
- Slice into squares with a sharp knife, wiping the blade between cuts for neat edges. Serve cold straight from the fridge.