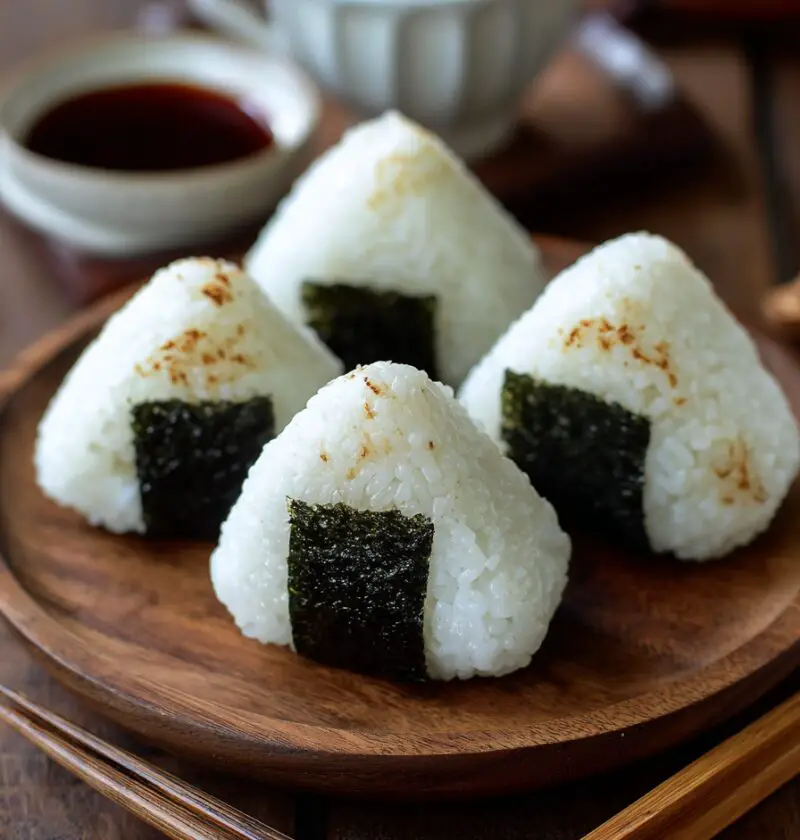
Onigiri Recipe: Simple Japanese Rice Balls You’ll Want Every Week
This easy, cozy Onigiri Recipe gives you classic Japanese rice balls—soft, sticky rice wrapped in salty nori with savory fillings—perfect for lunches, snacks, and tucking into a bento box.
I still remember the first time I packed homemade onigiri for my husband’s work lunch. He texted me a picture from his desk—half-eaten rice ball, a few crumbs of nori on his keyboard—and just wrote, “More of these, please.” That’s the thing about traditional onigiri: they’re humble, portable, and quietly comforting. Japanese rice balls aren’t fancy food; they’re real-life, everyday Japanese comfort food, and once you learn this simple method, you can put them on repeat.
This Onigiri Recipe is my go-to when I want something satisfying but not heavy, especially on busy weekdays. It’s also a great entry point if you’re new to Japanese home cooking. No special chef skills, no complicated sauces—just good sticky rice, seaweed, and a handful of fun fillings.
Why You’ll Love This Onigiri Recipe
- Simple pantry ingredients – Just rice, salt, nori, and a few basic fillings you probably already have.
- Perfect for meal prep – These Japanese rice balls keep well and are ideal for bento box ideas, lunchboxes, and grab-and-go snacks.
- Kid- and adult-friendly – Mild flavors for picky eaters, with spicier onigiri filling ideas for adventurous palates.
- Naturally portable – Seaweed-wrapped rice that fits neatly in your hand; it’s basically a tidy little rice and seaweed snack.
- Customizable fillings – Make them vegetarian, pescatarian, or protein-packed using leftovers.
- Budget-friendly – A very affordable Japanese lunch recipe that stretches a pot of rice into several meals.
- No frying or baking – Everything is made on the stovetop; once the rice is cooked, the “cooking” part is done.
- Cozy and nostalgic – Feels like traditional onigiri you’d find in a Tokyo convenience store or a homemade bento.
Ingredients
For this easy onigiri recipe, you’ll want to be a little picky about the rice. The right texture makes all the difference with these sticky rice balls.
For the Rice Balls
- 2 cups uncooked Japanese short-grain rice (sushi rice or “Japanese rice”; look for brands like Kokuho Rose or Nishiki)
- 2 ¼ cups water (for cooking the rice; follow your package if it differs)
- 1 teaspoon fine sea salt (plus extra for shaping)
- 1 teaspoon rice vinegar (optional, for a subtle flavor and shine)
For the Nori and Seasoning
- 4–5 full sheets nori (toasted seaweed), cut into strips or rectangles
- ½ teaspoon flaky sea salt or kosher salt (for sprinkling)
- 1 tablespoon furikake (optional, Japanese rice seasoning with sesame seeds, seaweed, etc.)
Filling Ideas (Pick 1–3 to Start)
You can mix and match these to make filled rice balls that suit everyone at the table:
- 4 tablespoons canned tuna, drained + 1–2 tablespoons Japanese mayo (Kewpie preferred) + ½ teaspoon soy sauce
- 3 tablespoons cooked salmon, flaked + pinch salt + squeeze of lemon
- 2–3 umeboshi (pickled plums), pitted and roughly chopped (classic traditional onigiri filling)
- 3 tablespoons finely chopped cooked chicken or rotisserie chicken + 1 tablespoon mayo + dash soy sauce
- 3 tablespoons seasoned kombu or seaweed salad (for a vegetarian option)
- 2 tablespoons miso paste mixed with 1 teaspoon honey or sugar (for a sweet-salty vegetarian filling)
Optional Garnishes
- Toasted sesame seeds (white or black)
- Thinly sliced green onions
- Shichimi togarashi (Japanese chili seasoning) for a little heat
Ingredient Tips
- Rice: Use Japanese short-grain rice, not jasmine or basmati. The natural starch gives you those classic sticky rice balls that hold their shape. Medium-grain Calrose can work in a pinch.
- Nori: Toasted nori sheets labeled for sushi rolls work best. If your nori tastes a little stale, you can quickly wave it over a warm burner for a few seconds to crisp it up.
- Salt: Salt isn’t just for flavor—it helps preserve homemade onigiri for a few hours at room temperature and gives that nostalgic convenience-store taste.
- Fillings: Keep fillings on the drier side. Anything too saucy will make the rice ball fall apart or soak through the nori.

Step-by-Step Directions
-
Rinse the Rice Until the Water’s Almost Clear
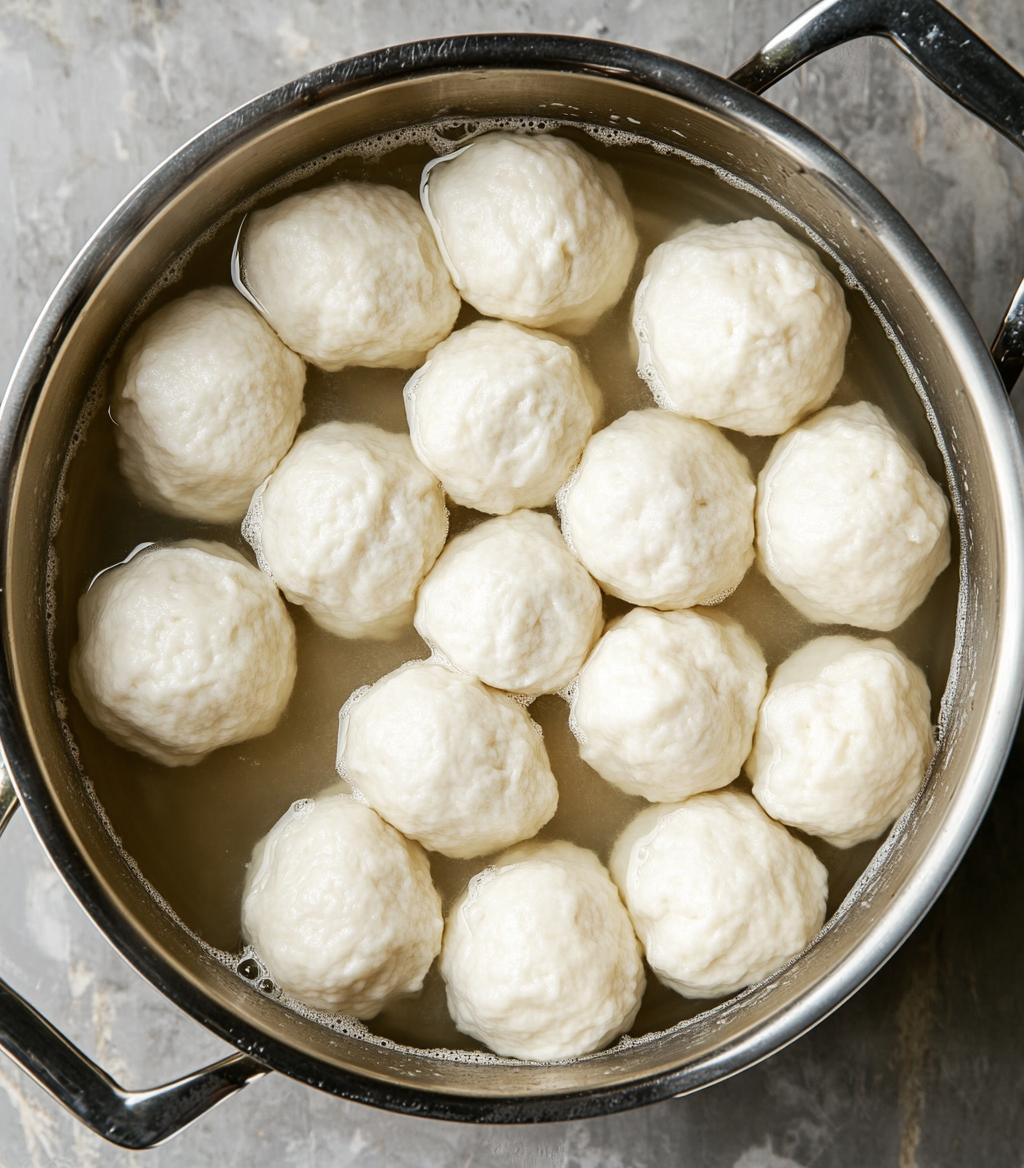
Add the Japanese rice to a bowl and cover with cold water. Swirl gently with your hand, then drain. Repeat 3–5 times until the water is only slightly cloudy. This rinsing step removes excess starch so your rice is sticky but not gummy. -
Cook the Rice (Stovetop or Rice Cooker)
Combine rinsed rice and 2 ¼ cups water in a medium pot or rice cooker. If using a pot, cover, bring to a gentle boil, then reduce heat to low and cook for 15–18 minutes. Turn off the heat and let it rest, covered, for 10 minutes so the grains finish steaming. -
Season the Rice Lightly
While the rice is still warm, gently fluff it with a rice paddle or wooden spoon. Sprinkle in 1 teaspoon fine sea salt and 1 teaspoon rice vinegar if using. Mix with a cutting-and-folding motion so you don’t mash the grains. Warm rice is much easier to shape than cold rice. -
Prepare Your Fillings
While the rice cooks or rests, stir together your filling choices. For tuna mayo, combine drained tuna, Japanese mayo, and soy sauce in a small bowl. For salmon, flake the fish and season. Keep fillings in small bowls near your work area so you can assemble quickly. -
Set Up a Shaping Station
Fill a small bowl with clean water and another with a tablespoon or so of salt. Cut your nori sheets into rectangles or strips (about 1½ to 2 inches wide). Have a tray or plate ready for finished onigiri. Lightly damp hands and a pinch of salt is the secret to smooth, well-shaped rice balls that don’t stick to you. -
Portion the Rice
With damp, lightly salted hands, scoop about ½ cup warm rice (about a small handful) into your palm. If you like smaller snack-sized onigiri, use closer to ⅓ cup. Press it slightly to form a rough ball or patty. -
Add the Filling
Use your thumb to press a small indentation into the center of the rice. Add about 1–2 teaspoons of your chosen filling. Don’t overfill—too much filling makes it hard for the rice to seal around it. -
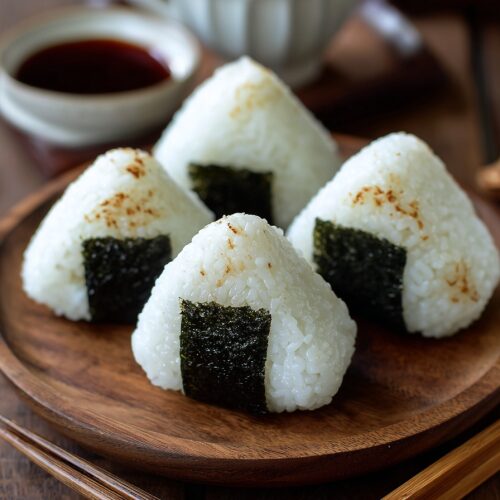
Shape into Triangles or Balls
Gently fold the rice around the filling to cover it. To make the classic triangle shape, cup your hands around the rice and press lightly with your fingertips, turning it a little as you go—almost like turning a small steering wheel. Press just enough to hold together; if you squeeze too hard, the rice gets dense and tough. -
Wrap with Nori
Place a strip or rectangle of nori along the bottom or side of the onigiri. The rough side of the nori should touch the rice, the shiny side faces out. Press gently so it adheres. You can fully wrap it like a little package or just add one wide strip, which makes a nice “handle” for your fingers. -
Garnish and Serve
If you’d like, sprinkle the tops of your Japanese rice balls with furikake, sesame seeds, or chopped green onions. Serve warm or at room temperature. Traditional onigiri are wonderful slightly warm, but they’re just as tasty after cooling.
Servings & Timing
- Yield: About 10–12 medium onigiri (depending on size)
- Prep Time: 15 minutes (rinsing rice, prepping fillings)
- Cook Time: 20 minutes for rice + 10 minutes resting
- Assembly Time: 20 minutes
- Total Time: About 55–65 minutes from start to finish
If you’re making these for a family lunch or bento box ideas for the week, you can double the rice and fillings and work assembly-line style. It’s actually quite relaxing once you get into a rhythm.
Fun Variations on Classic Onigiri
Once you’ve done the basic onigiri recipe a couple of times, you can play around:
- Spicy Tuna Onigiri – Add sriracha or chili crisp to your tuna-mayo filling for a bolder rice ball recipe.
- Cheesy Onigiri – Tuck a small cube of mozzarella or mild cheddar inside for a melty surprise.
- Vegetable Furikake Onigiri – Skip fillings and mix furikake, sesame seeds, and chopped green onions directly into the rice before shaping.
- Kimchi Rice Balls – Finely chop kimchi, squeeze out excess juice, and mix it with a bit of rice for a tangy, spicy center.
- Onigiri with Brown Rice Blend – Use half Japanese short-grain white rice and half short-grain brown rice for a more wholesome twist (expect a slightly looser texture).
- Pan-Seared Yaki Onigiri – Brush finished onigiri with soy sauce and lightly sear in a nonstick pan until crisp and golden on the outside.
Storage & Reheating Tips
One of the things I love about homemade onigiri is how easy they are to stash away for later.
-
Room Temperature (Same Day):
Wrapped tightly, these savory rice balls are fine at room temperature for about 4–6 hours, making them ideal for lunchboxes and picnics. -
Refrigerator:
Store cooled onigiri in an airtight container or wrap each individually in plastic wrap. They’ll keep for 1–2 days. Rice hardens in the fridge, so let them come back to room temperature for 20–30 minutes before eating, or warm gently. -
Freezer:
You can freeze onigiri (without nori) individually wrapped in plastic, then placed in a freezer bag. They’re best within 1 month. Thaw overnight in the fridge or reheat from frozen. -
Reheating:
For softer rice, sprinkle a few drops of water over the rice ball, wrap in a damp paper towel, and microwave 20–30 seconds at a time until just warm. Add fresh nori after reheating so it stays crisp. -
Make-Ahead Advice:
If packing bento, wrap the rice balls separately and tuck nori strips in a little baggie, then wrap them right before eating. This keeps the seaweed from turning chewy.
Notes from My Kitchen (and a Few Lessons Learned)
- Warm Rice Is Your Friend: Shaping onigiri with rice that’s still pleasantly warm (not hot) makes everything easier. Cold rice tends to crack and won’t stick as well.
- Don’t Skip the Hand Salt: Lightly salting your hands feels old-fashioned, but it’s a key step in traditional onigiri. It seasons the outside and helps the rice surface stay smooth.
- Gentle Pressure Is Key: When I first started, I packed them too tightly because I didn’t want them to fall apart. The texture was dense and dry. Now I think of it as “hugging” the rice, not squeezing it.
- Dry Fillings Work Best: I once tried stuffing onigiri with leftover saucy stir-fry. Delicious idea, terrible execution—leaky rice balls everywhere. Stick to drier fillings or pat wet ones with a paper towel.
- Use the Right Rice: I know I already said this, but it’s worth repeating. Japanese short-grain rice really is non-negotiable if you want that classic sticky texture.
- Make It a Family Project: Kids love forming the triangles and adding the nori “jackets.” It’s a fun way to introduce them to Japanese snack food without anything too strange or spicy.
FAQs About This Onigiri Recipe
1. Can I use regular long-grain rice or jasmine rice?
You can, but I don’t recommend it. Long-grain rice doesn’t have enough stickiness, so your onigiri will crumble. For reliable results, use Japanese short-grain or sushi rice.
2. Do I have to use nori?
No, you can skip the seaweed and serve them plain as simple rice balls. They’ll still taste great, but you’ll miss that salty, toasty nori flavor.
3. How much filling should I add to each rice ball?
About 1–2 teaspoons per onigiri is plenty. Too much filling makes it hard to seal and can cause the rice to split.
4. My rice keeps sticking to my hands. What am I doing wrong?
Keep your hands lightly damp and salted. Rinse and re-salt as needed. If the rice is extremely sticky, it may be slightly overcooked or too hot—let it cool for a few minutes.
5. Are onigiri eaten hot or cold?
They’re usually eaten at room temperature or slightly warm. If they’ve been refrigerated, let them sit out a bit or rewarm gently so the rice softens.
6. Can I make vegetarian or vegan onigiri?
Absolutely. Use fillings like umeboshi, seasoned kombu, miso paste, or even mashed avocado with sesame and salt. Check your nori and seasonings to make sure they’re vegan.
7. Can I use a mold to shape them?
Yes. Onigiri molds are inexpensive and handy if you want uniform shapes. Just press warm rice into the mold, add filling, cover with more rice, and press firmly, then release.
8. Are these safe for kids’ lunchboxes?
Pack them in a clean, insulated lunch bag with an ice pack if they’ll be out for more than 4 hours. Stick to less perishable fillings like salted salmon, umeboshi, or plain seasoned rice.
Wrapping It Up (Pun Very Much Intended)
This simple Onigiri Recipe brings classic Japanese rice balls right into your kitchen—soft, salty, and customizable for any mood or meal. Whether you’re packing a quick Japanese meal for work, filling a bento box for your kids, or just craving a cozy rice and seaweed snack, onigiri are a small but mighty comfort.
If you try these homemade onigiri, let me know how it goes—what fillings you used, how they packed for lunch, and whether your family has a new favorite snack. And if you’re in the mood for more Japanese rice recipes or bento box ideas, stick around and explore; there’s a whole world of comforting Japanese home cooking waiting for you.
Onigiri Recipe: Simple Japanese Rice Balls
Ingredients
- 2 cups Japanese short-grain rice uncooked; sushi rice or Japanese rice such as Kokuho Rose or Nishiki
- 2 1/4 cups water for cooking the rice, or follow package directions
- 1 teaspoon fine sea salt plus extra for salting hands when shaping
- 1 teaspoon rice vinegar optional, for subtle flavor and shine
- 4-5 sheets nori toasted seaweed, cut into strips or rectangles
- 1/2 teaspoon flaky sea salt or kosher salt for sprinkling on finished onigiri (optional)
- 1 tablespoon furikake optional, Japanese rice seasoning
- 4 tablespoons canned tuna drained, for tuna mayo filling
- 1-2 tablespoons Japanese mayonnaise Kewpie preferred, for tuna mayo filling
- 1/2 teaspoon soy sauce for tuna mayo filling
- 3 tablespoons cooked salmon flaked, pinch of salt and squeeze of lemon, for salmon filling
- 2-3 umeboshi pickled plums, pitted and roughly chopped, for traditional filling
- 3 tablespoons cooked chicken finely chopped or rotisserie chicken + 1 tablespoon mayo + dash soy sauce, for chicken filling
- 3 tablespoons seasoned kombu or seaweed salad for vegetarian filling
- 2 tablespoons miso paste mixed with 1 teaspoon honey or sugar, for sweet-salty vegetarian filling
- 1 teaspoon honey or sugar for miso filling
- toasted sesame seeds white or black, optional garnish
- green onions thinly sliced, optional garnish
- shichimi togarashi Japanese chili seasoning, optional for heat
Instructions
- Add the Japanese short-grain rice to a bowl and cover with cold water. Swirl gently with your hand, then drain. Repeat 3–5 times until the water is only slightly cloudy to remove excess starch.2 cups Japanese short-grain rice, 2 1/4 cups water
- Combine the rinsed rice and 2 1/4 cups water in a medium pot or rice cooker. For stovetop, cover, bring to a gentle boil, then reduce heat to low and cook for 15–18 minutes. Turn off the heat and let rest, covered, for 10 minutes to finish steaming.2 cups Japanese short-grain rice, 2 1/4 cups water
- While the rice is still warm, gently fluff with a rice paddle or wooden spoon. Sprinkle in 1 teaspoon fine sea salt and 1 teaspoon rice vinegar if using. Mix with a cutting-and-folding motion so you don’t mash the grains. Keep the rice warm for easier shaping.1 teaspoon fine sea salt, 1 teaspoon rice vinegar
- While the rice cooks or rests, prepare 1–3 fillings. For tuna mayo, mix drained tuna with Japanese mayo and soy sauce. For salmon, flake the cooked salmon and season with a pinch of salt and a squeeze of lemon. Chop umeboshi, or mix chopped chicken with mayo and a dash of soy sauce. Place each filling in a small bowl near your work area.4 tablespoons canned tuna, 1-2 tablespoons Japanese mayonnaise, 1/2 teaspoon soy sauce, 3 tablespoons cooked salmon, 2-3 umeboshi, 3 tablespoons cooked chicken, 3 tablespoons seasoned kombu or seaweed salad, 2 tablespoons miso paste, 1 teaspoon honey or sugar
- Fill a small bowl with clean water and another with a tablespoon or so of salt for your hands. Cut nori sheets into rectangles or strips about 1 1/2–2 inches wide. Have a tray or plate ready for finished onigiri. Lightly damp hands and a pinch of salt help keep the rice from sticking and season the outside.1 teaspoon fine sea salt, 4-5 sheets nori
- With damp, lightly salted hands, scoop about 1/2 cup warm rice (or 1/3 cup for smaller snacks) into your palm. Press it slightly to form a rough ball or patty.2 cups Japanese short-grain rice, 1 teaspoon fine sea salt
- Use your thumb to press a small indentation into the center of the rice. Add about 1–2 teaspoons of your chosen filling. Do not overfill so the rice can seal around it.4 tablespoons canned tuna, 1-2 tablespoons Japanese mayonnaise, 1/2 teaspoon soy sauce, 3 tablespoons cooked salmon, 2-3 umeboshi, 3 tablespoons cooked chicken, 3 tablespoons seasoned kombu or seaweed salad, 2 tablespoons miso paste, 1 teaspoon honey or sugar
- Gently fold the rice around the filling to cover it completely. For the classic triangle, cup your hands around the rice and press lightly with your fingertips, turning the rice a bit as you go. Press just enough for the onigiri to hold together without compacting the rice too tightly.2 cups Japanese short-grain rice
- Place a strip or rectangle of nori along the bottom or side of each onigiri. The rough side of the nori should face the rice and the shiny side should face out. Press gently so it adheres. You can fully wrap the rice or just add one wide strip as a handle.4-5 sheets nori
- If desired, sprinkle the tops of the onigiri with flaky salt, furikake, toasted sesame seeds, chopped green onions, or a pinch of shichimi togarashi. Serve warm or at room temperature.1/2 teaspoon flaky sea salt or kosher salt, 1 tablespoon furikake, toasted sesame seeds, green onions, shichimi togarashi