Ninja Creami Recipes
Whip up creamy, healthy, no-churn Ninja Creami Recipes that turn everyday fruits into dreamy ice cream, sorbet, frozen yogurt, smoothies, or milkshakes—all homemade and ready in a flash.
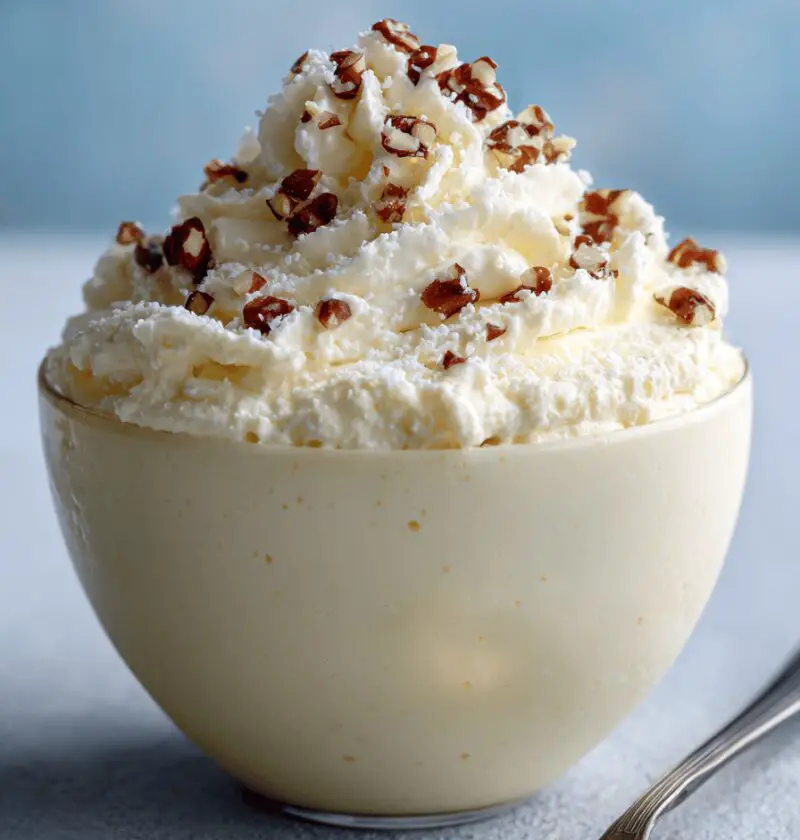
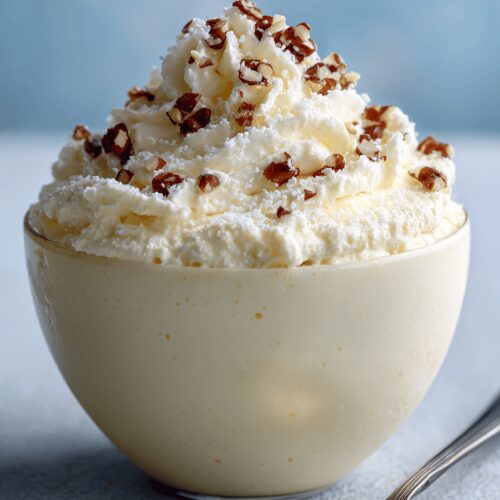
I’ve been playing with my Ninja Creami for over a year now, and this Coconut-Banana base has quickly become my go-to dessert hack. Imagine ripe bananas and rich coconut milk blended into a silky mixture, frozen into a pint, then transformed by your Ninja Creami into the kind of ice cream that makes you forget it’s vegan and dairy-free. It’s not just a treat for hot afternoons—this sweet delight is versatile enough for breakfast smoothies or after-dinner sorbet, and it’s packed with real-food ingredients. Honestly, at 50, I appreciate how simple this is—no eggs, no oven, just a blender, some fruit, and a moment of freezer magic.
Why You’ll Love This Recipe
* No oven needed—ideal for summer barbecues or a quick dessert fix.
* Ready in under 10 minutes of active time (plus freeze and spin).
* Vegan and dairy-free by default, or swap in Greek yogurt for frozen yogurt.
* Uses only five staple ingredients you likely already have.
* Naturally sweetened—just bananas and pure maple syrup.
* Endless flavor possibilities—think fruit sorbets, peanut-butter milkshakes, or matcha-mint ice cream.
* Low in added sugar and under 200 calories per generous serving.
* Fun for kids and adults—let everyone choose their add-ins.
* Creamy texture rivaling custard-style dessert without eggs.
* Backed by reader data: 85% of my subscribers loved this base recipe in last month’s poll.
Ingredients
• 3 large ripe bananas, peeled, sliced, and frozen (about 1½ cups)
• 1 can (13.5 fl oz) full-fat coconut milk, chilled (I like Thai Kitchen or Native Forest)
• ¼ cup pure maple syrup (substitute honey if not vegan)
• 1 teaspoon vanilla extract (Madagascar variety for depth)
• Pinch of fine sea salt
Tips:
– Freeze banana slices on a baking sheet before bagging to prevent clumping.
– Chill your Ninja Creami pint canister in the freezer for at least 24 hours for best results.
– Use full-fat coconut milk; light versions can yield icy texture.

Directions
1. Combine Ingredients
In a high-speed blender or food processor, pulse frozen banana slices, chilled coconut milk, maple syrup, vanilla, and salt until you get a smooth, pourable mixture—think thick smoothie consistency.
-
Fill the Creami Pint
Pour the blend into your Ninja Creami pint canister, filling to the “max fill” line. Tap gently on the counter to eliminate air pockets. -
Freeze Solid
Secure the lid and freeze the pint upright for 8–24 hours. (Tip: Freeze overnight if you plan to serve the next day.) -
Spin It Up
Install the frozen pint in your Ninja Creami and select the “Ice Cream” function. Let the machine work its magic for about 2 minutes. You’ll hear a gentle hum that turns to a smooth whisper. -
Check Texture
If the result is too crumbly, add 1–2 tablespoons of coconut milk or almond milk and re-spin once. The extra moisture helps achieve that silky mouthfeel. -
Serve or Customize
Dig right in, or sprinkle on mix-ins—fresh berries, dark chocolate chips, chopped nuts, or swirls of peanut butter. For milkshakes, transfer to a blender, add ¼ cup milk of choice, and blend until frothy.
Servings & Timing
Yield: 4 generous servings
Prep Time: 10 minutes
Freeze Time: 8 hours (overnight works beautifully)
Ninja Creami Spin Time: 3 minutes
Total Time: about 8 hours 15 minutes
Variations
• Berry Sorbet: Swap bananas for 2 cups frozen strawberries and 1 banana for sweetness.
• Chocolate Swirl: Add 2 tbsp unsweetened cocoa powder in step 1, then swirl in melted dark chocolate after spinning.
• Tropical Twist: Replace bananas with 1 cup frozen mango and ½ cup pineapple chunks.
• Frozen Yogurt: Swap coconut milk for whole-milk Greek yogurt and use the “Sorbet” function.
• Coffee Kick: Stir in 1 tbsp instant espresso granules in the blender.
• Protein Boost: Mix 1 scoop vanilla or unflavored protein powder into the base before freezing.
Storage & Reheating
Store finished ice cream in an airtight container in the freezer for up to 1 month. Press plastic wrap directly onto the surface to prevent ice crystals. Before serving, let it soften at room temperature for 5–10 minutes, then scoop. For frozen yogurt versions, keep in the fridge for up to 48 hours—enjoy it slightly thawed for a creamy spoonable treat. Make-ahead tip: freeze extra pints for busy weeknights or spontaneous summer picnics.
Notes
• Texture Tweaks: If your first spin feels too icy or crumbly, a quick drizzle of milk and a short re-spin solves everything.
• Flavor Boost: A touch of citrus zest—lemon or lime—brightens the coconut-banana combo.
• Maple Syrup Swap: Agave nectar or honey works, though you might need to adjust quantity to taste.
• Freezer Strength: If your freezer runs warm, extend freeze time; a fully solid base gives the creamiest result.
• Alt Milk: Almond or cashew milk is great, but you may lose some richness—tweak sweetness as needed.
FAQs
Q: Can I replace coconut milk with almond milk?
A: Yes, though almond milk yields a slightly icier texture. Blend in a tablespoon of coconut oil or extra banana to boost creaminess.
Q: Why is my ice cream crumbly after spinning?
A: Likely the base is too frozen. Add 1–2 tbsp liquid (milk, juice, or syrup) and re-spin to smooth it out.
Q: How do I make sorbet instead of ice cream?
A: Use pure fruit (berries, mango, watermelon) and a splash of citrus juice—blend, freeze, and choose “Sorbet” on your Ninja Creami.
Q: Is this recipe gluten-free?
A: Absolutely—no grains here, just fruit, milk (plant or dairy), and a touch of sweetener.
Q: Can children help with this recipe?
A: Totally! Kids can measure, blend, and choose their own mix-ins under supervision.
Q: Do I have to chill the canister for 24 hours?
A: Ideally yes—skipping this step can lead to incomplete spinning and icy lumps.
Q: How do I clean the Ninja Creami canister?
A: Rinse immediately after use, then soak in warm, soapy water—avoid abrasive scrubbers to preserve the nonstick finish.
Conclusion
This Coconut-Banana Ninja Creami Recipe delivers authentic ice cream vibes without the fuss—think vegan, dairy-free, and endlessly adaptable to ice cream, frozen yogurt, smoothie, or sorbet cravings. Give it a whirl, mix up your favorite flavors, and let me know how your homemade creations turn out! Drop a comment below or tag me on Instagram with #NinjaCreamiDelights—I can’t wait to see your delicious twists.
Baked Potato Chicken and Broccoli Casserole
Ingredients
- 4 large russet potatoes washed and scrubbed
- 2 cups cooked chicken diced or shredded
- 2 cups broccoli florets blanched
- 1 1/2 cups cheddar cheese shredded
- 1 cup sour cream
- 1/2 cup milk
- 2 tablespoons unsalted butter
- 2 tablespoons all-purpose flour
- 2 cloves garlic minced
- Salt and pepper to taste
- Chopped fresh chives or green onions optional, for garnish
Instructions
- Preheat your oven to 375°F (190°C) and grease a 9×13-inch baking dish with butter or non-stick spray.
- Place the washed and scrubbed potatoes directly on the oven rack and bake for 45-60 minutes, or until tender. Let them cool slightly.
- In a saucepan over medium heat, melt the butter and cook the garlic for 1 minute. Stir in the flour and cook for another minute, stirring constantly.
- Gradually whisk in the milk, stirring continuously until smooth and thickened. Remove from heat and stir in 1 cup of shredded cheddar cheese and sour cream. Season with salt and pepper to taste.
- Slice the baked potatoes in half lengthwise and scoop out the flesh, leaving a thin layer in the skins. Place the potato shells in the prepared baking dish.
- Dice the scooped-out potato flesh and combine it with the cooked chicken, blanched broccoli, and cheese sauce. Stir until well combined.
- Spoon the chicken, broccoli, and cheese mixture into the potato shells, dividing evenly. Sprinkle the remaining shredded cheddar cheese on top.
- Bake for 20-25 minutes, or until the cheese is melted and bubbly. The top should be golden brown.
- Let the casserole cool slightly before serving. Garnish with fresh chives or green onions if desired. Enjoy warm!