Icebox Cake Recipe
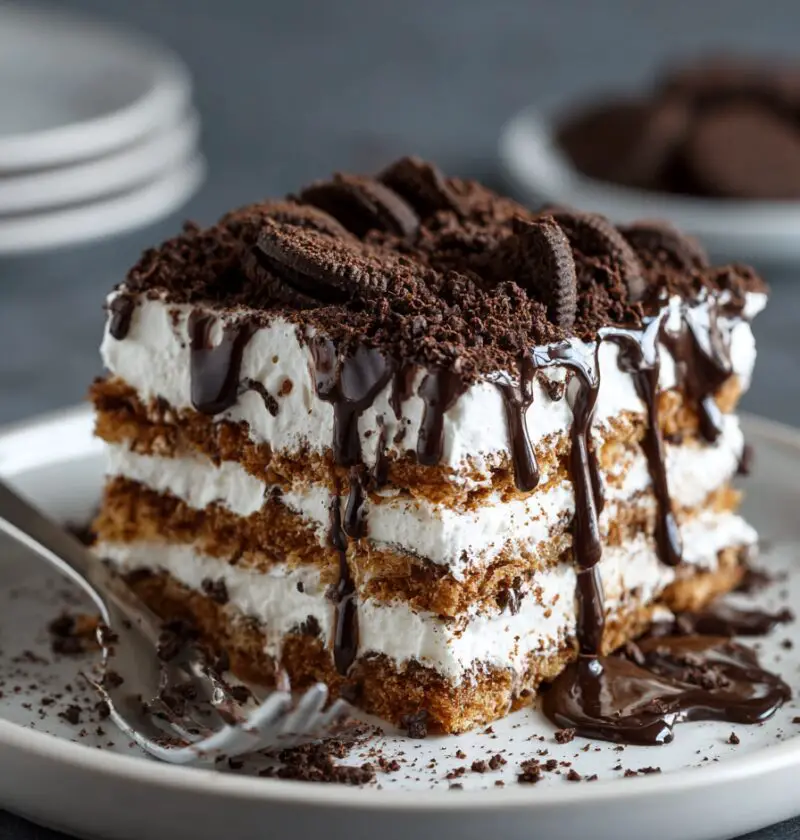
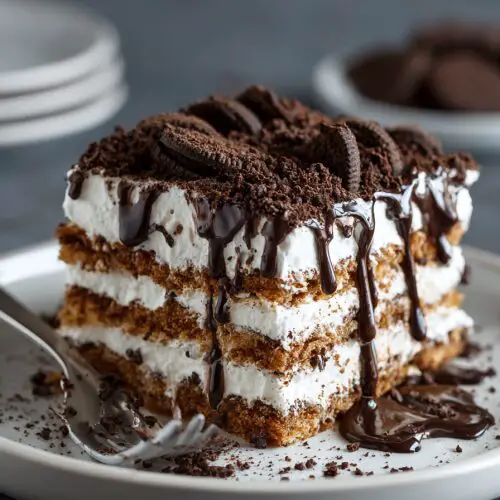
This easy Icebox Cake Recipe layers cookies and whipped cream into a no-bake, chilled dessert that’s creamy, nostalgic, and perfect for hot summer days or holiday gatherings.
What Makes This Icebox Cake Recipe So Special?
If you grew up in the United States before every kitchen had central air, you probably remember “icebox cakes” being talked about by mothers and grandmothers. This classic icebox cake recipe is a simple refrigerator cake dessert made from layers of graham crackers (or chocolate wafers) and a fluffy whipped cream filling. No bake, no fuss—just time in the fridge and a little patience.
I love this no bake icebox cake because it feels like a bridge between generations. My grandmother made a chocolate icebox cake with those famous thin chocolate wafers; my kids prefer graham cracker layers with extra vanilla. I land somewhere in the middle—classic, but with a few modern tweaks like stabilized cream so it slices cleanly and lasts longer.
It’s also a wonderful make ahead dessert. You build this creamy layered cake in a pan, pop it into the refrigerator, and let time do the magic. The cookies soften into cake-like layers, the whipped cream settles, and you’re left with a chilled dessert recipe that looks like you worked much harder than you actually did.
Whether you’re planning a summer dessert idea for a cookout, a simple dessert recipe for a weekday treat, or a fuss-free holiday option, this vanilla and chocolate wafer icebox cake checks all the boxes. And yes, you can absolutely play with flavors—strawberries, peanut butter, coffee, you name it.
Let me walk you through it, step by step.
Why You’ll Love This Recipe
- No oven needed – the perfect no bake icebox cake for hot days or busy holidays.
- Only 20 minutes of hands-on time – the fridge does the rest of the work.
- Simple pantry ingredients – graham cracker layers, cream, sugar, and a few flavor boosters.
- Make ahead friendly – tastes even better after resting overnight.
- Kid- and crowd-approved – a creamy layered cake everyone recognizes and loves.
- Flexible flavors – use chocolate wafers, vanilla wafers, or graham crackers.
- Easy to transport – great refrigerator cake dessert for potlucks and family reunions.
- Scales up or down – make it in an 8×8 pan for a small group or a 9×13 for a crowd.
- Naturally egg-free – perfect when you’re juggling different dietary needs.
Ingredients
Here’s everything you need for this classic, easy icebox cake. I’ll give you my base version with a vanilla whipped cream filling and chocolate accents.
For the whipped cream filling
- 3 cups heavy whipping cream, very cold
- 1 cup powdered sugar (confectioners’ sugar)
- 1 teaspoon pure vanilla extract (use a good-quality brand like Nielsen-Massey if you can)
- 1 teaspoon almond extract (optional, but adds a lovely bakery-style flavor)
- 4 ounces cream cheese, softened to room temperature (helps stabilize the cream)
- Pinch of fine sea salt (balances the sweetness)
For the layers
- 2 sleeves graham crackers (about 18–20 full sheets), or a mix of graham and chocolate wafers
- 1 cup mini chocolate chips or finely chopped dark chocolate
- ½ cup chocolate shavings or curls, for topping (optional but pretty)
Optional flavor boosters / variations
- 1–2 cups sliced fresh strawberries or raspberries (for a berry icebox cake)
- ¼ cup strong brewed coffee, cooled (brush lightly on chocolate wafers for mocha flavor)
- 2–3 tablespoons cocoa powder (to turn the cream into chocolate whipped filling)
Ingredient tips
- Heavy cream: Make sure it’s at least 36% fat and very cold. I usually stick the metal mixing bowl in the fridge for 10–15 minutes, too.
- Cream cheese: This gives body to the whipped cream and keeps your creamy layered cake from collapsing after a day or two. Beat it until smooth so there are no lumps.
- Crackers/wafers: Classic icebox cake is often made with chocolate wafer cookies, but graham crackers or vanilla wafers work beautifully and are easier to find everywhere.
- Sugar: Powdered sugar helps keep the whipped cream smooth and stable—granulated sugar can make it a bit grainy.

Here’s what you’re aiming for: distinct layers now, soft cake-like layers after chilling.
Directions
You know what? Once you set everything out, this easy icebox cake comes together fast. The key is to be a little patient with the chill time.
-
Chill your tools
Place your mixing bowl and whisk attachment (or beaters) in the fridge or freezer for 10–15 minutes. Cold tools help the heavy cream whip up faster and thicker. -
Beat the cream cheese base
In the chilled bowl, add the softened cream cheese. Beat on medium speed for 1–2 minutes until completely smooth and creamy, scraping down the sides as needed. This prevents little lumps in your whipped cream filling. -
Add cream, sugar, and flavorings
Pour in the cold heavy whipping cream, powdered sugar, vanilla extract, almond extract (if using), and a pinch of salt. Start beating on low so the sugar doesn’t puff everywhere, then increase to medium-high. -
Whip to stiff peaks
Beat for 2–4 minutes, watching closely. You’re looking for stiff peaks—when you lift the whisk, the cream should stand up and hold its shape. Don’t walk away; whipped cream can go from perfect to too stiff quickly. -
Prepare your pan
Grab a 9×13-inch baking dish for a larger crowd, or an 8×8 or 9×9 pan for a taller, smaller cake. Lightly spray the bottom with nonstick spray or line it with parchment for easier slicing. -
Lay down the first cookie layer
Arrange a single layer of graham crackers (or chocolate wafers) in the bottom of the pan. Break pieces as needed to cover the surface. Gaps are fine; the cream will fill them in. -
Add a layer of whipped cream filling
Spread about 1½ to 2 cups of the whipped cream over the crackers. Use an offset spatula or the back of a spoon to push it all the way to the edges in an even layer. -
Sprinkle chocolate
Scatter a handful of mini chocolate chips or chopped chocolate over the cream. This gives you that classic chocolate icebox cake feel without overpowering the vanilla cream. -
Repeat the layers
Add another layer of crackers, then cream, then chocolate. Keep going until you run out of crackers, finishing with a thick layer of whipped cream on top. For most pans, you’ll get 3–4 layers of cookies. -
Decorate the top
Smooth the final cream layer, then garnish with chocolate shavings, extra mini chips, or even a dusting of cocoa powder. If you’re doing a fruit version, arrange sliced berries on top just before serving rather than now. -
Chill (this part matters!)
Cover the pan tightly with plastic wrap or foil and refrigerate for at least 4 hours, but 8 hours or overnight is even better. This rest time turns the graham cracker layers into a soft, cake-like texture. -
Slice and serve
When you’re ready to serve, use a sharp knife to cut into squares. For the cleanest slices, wipe the knife with a warm, damp cloth between cuts.
If the cake feels a little soft when you cut it, that’s normal—this is a creamy dessert, not a sturdy sheet cake. That melting, tender texture is the whole charm.
Servings & Timing
- Yield: About 12–15 servings in a 9×13-inch pan; 9 generous servings in an 8×8 pan
- Prep Time: 20 minutes
- Chill Time: 4–24 hours (overnight recommended for the best texture)
- Total Time: 4 hours 20 minutes to 1 day, mostly unattended
I usually assemble this icebox cake recipe the night before a party, then I’m not rushing around the day of the event.
Variations
Here’s where you can have some fun with this refrigerator cake dessert:
- Strawberry Shortcake Icebox Cake: Swap half the graham crackers for vanilla wafers and add a layer of sliced strawberries between each cream layer.
- Mocha Chocolate Icebox Cake: Use chocolate wafer cookies and brush them lightly with cooled coffee, then add 2 tablespoons cocoa powder to the whipped cream.
- Peanut Butter Cup Version: Whisk ½ cup creamy peanut butter into the cream cheese before adding the cream, and sprinkle chopped peanut butter cups between layers.
- Lemon Berry Icebox Cake: Add 2 tablespoons lemon zest and 2 tablespoons lemon juice to the cream and layer with fresh berries.
- Gluten-Free Icebox Cake: Use gluten-free graham crackers or cookies; everything else in this simple dessert recipe is naturally gluten-free.
- Lighter Greek Yogurt Twist: Swap 1 cup of heavy cream for 1 cup of full-fat Greek yogurt for a tangier, slightly lighter filling.
Storage & Reheating
“Reheating” doesn’t really apply here—this is a chilled dessert recipe—but storage matters a lot.
-
Fridge:
Store the icebox cake tightly covered in the refrigerator. It keeps well for 3–4 days. The layers will get even softer over time, but the cream cheese helps everything stay stable. -
Freezer:
You can freeze leftovers for up to 1 month. Freeze in the pan, then cut individual squares and store them in airtight containers. Thaw in the fridge for a few hours before serving. -
Make ahead:
For the best texture, assemble the day before serving and chill overnight. If you’re adding fresh fruit on top, add it within 2–4 hours of serving so it stays bright and juicy.
Notes
A few things I’ve learned after making this easy icebox cake more times than I can count:
- Stabilized cream is worth it. The little bit of cream cheese in the whipped cream keeps it from deflating and helps the cake slice nicely, even on day two or three.
- Don’t skimp on chill time. The magic of an icebox cake happens in the fridge. If you rush it, the crackers will still be crunchy and you’ll miss that “soft layered cookie cake” experience.
- Play with textures. I like a mix of smooth cream and small bits of chocolate or fruit in the layers. It keeps every bite interesting instead of one-note sweet.
- Use what you have. Graham crackers, vanilla wafers, chocolate wafers, shortbread cookies—this recipe is forgiving. Just keep the layers even.
- Cut smaller pieces than you think. This is rich. People can always come back for seconds, and they usually do.
And one little personal thing: I almost always save one corner piece for myself, because the edges soak up extra cream. That’s the cook’s treat.
FAQs
Can I make this icebox cake recipe without cream cheese?
Yes. You can skip the cream cheese and just use heavy cream, powdered sugar, and vanilla, but serve it within 24 hours for the best texture.
Can I use Cool Whip instead of homemade whipped cream?
You can. Substitute about 3–4 cups thawed whipped topping for the cream mixture, though you’ll lose a bit of that fresh cream taste.
How long does an icebox cake need to chill?
At least 4 hours, but 8 hours or overnight gives you the classic, soft, cake-like layers you’re probably craving.
Why is my icebox cake runny or too soft?
The cream may not have been whipped to stiff peaks, or the cream cheese wasn’t fully softened and blended. Next time, whip a bit longer and chill the cake overnight.
Can I make a chocolate-only version?
Absolutely. Use chocolate wafers or chocolate graham crackers, add cocoa powder to the cream, and use chocolate shavings on top for a full chocolate icebox cake.
Is this dessert very sweet?
It’s sweet, but not overpowering. If you prefer a less sweet dessert, reduce the powdered sugar to ¾ cup and skip extra candy add-ins.
Can I add fresh fruit inside the layers?
Yes—just pat berries or sliced fruit dry with a paper towel before layering to avoid excess moisture, which can water down the cream.
What’s the best pan to use?
A glass 9×13 pan is my favorite because you can see the pretty layers from the side, but a metal pan or ceramic dish also works.
Conclusion
This Icebox Cake Recipe is one of those simple dessert recipes that quietly steals the show—no bake, creamy, and full of nostalgic charm. It’s a make ahead dessert you can trust for birthdays, cookouts, holidays, or any night when you want something sweet without turning on the oven.
If you try this classic icebox cake (or one of the variations!), let me know how it turns out—leave a comment, share your tweaks, or tell me which cookies you used. And if you’re in the mood for more chilled treats, you might enjoy a lemon icebox pie or a layered pudding dessert next.
Icebox Cake
Ingredients
- 3 cups heavy whipping cream very cold, at least 36% fat
- 1 cup powdered sugar confectioners’ sugar
- 1 teaspoon pure vanilla extract
- 1 teaspoon almond extract optional
- 4 ounces cream cheese softened to room temperature
- fine sea salt pinch, to taste
- 2 sleeves graham crackers about 18–20 full sheets; or a mix of graham and chocolate wafers
- 1 cup mini chocolate chips or finely chopped dark chocolate
- 1/2 cup chocolate shavings or curls optional, for topping
- 1 tablespoon nonstick spray or use parchment to line pan, as needed
- 1 cup fresh berries optional variation; sliced strawberries or raspberries, patted dry
- 1/4 cup strong brewed coffee optional variation; cooled, for brushing on chocolate wafers
- 2 tablespoons unsweetened cocoa powder optional variation; to make chocolate whipped cream
Instructions
- Place your mixing bowl and whisk attachment (or beaters) in the fridge or freezer for 10–15 minutes so they are well chilled before whipping the cream.
- In the chilled bowl, add the softened cream cheese. Beat on medium speed for 1–2 minutes until completely smooth and creamy, scraping down the sides as needed so there are no lumps.4 ounces cream cheese
- Pour in the cold heavy whipping cream, powdered sugar, vanilla extract, almond extract (if using), and a pinch of fine sea salt. Start beating on low to avoid splattering, then increase to medium-high speed.3 cups heavy whipping cream, 1 cup powdered sugar, 1 teaspoon pure vanilla extract, 1 teaspoon almond extract, fine sea salt
- Beat the mixture for 2–4 minutes, watching closely, until stiff peaks form. When you lift the whisk, the cream should stand up and hold its shape without drooping.
- Lightly spray a 9×13-inch baking dish (or an 8×8 or 9×9 pan for a taller cake) with nonstick spray or line the bottom with parchment paper for easier slicing.1 tablespoon nonstick spray
- Arrange a single layer of graham crackers (or chocolate wafers) in the bottom of the pan. Break pieces as needed to cover the surface; small gaps are fine.2 sleeves graham crackers
- Spread about 1½ to 2 cups of the whipped cream evenly over the cracker layer, pushing the cream all the way to the edges with an offset spatula or the back of a spoon.
- Scatter a handful of mini chocolate chips or finely chopped dark chocolate evenly over the cream layer.1 cup mini chocolate chips
- Continue layering: crackers, whipped cream, then chocolate, until you run out of crackers, finishing with a thick layer of whipped cream on top. You will usually get 3–4 layers of cookies.2 sleeves graham crackers, 1 cup mini chocolate chips
- Smooth the final cream layer, then garnish with chocolate shavings, extra mini chocolate chips, or a light dusting of cocoa powder. If using fresh berries, add them shortly before serving rather than now.1 cup mini chocolate chips, 1/2 cup chocolate shavings or curls, 1 cup fresh berries, 2 tablespoons unsweetened cocoa powder
- Cover the pan tightly with plastic wrap or foil and refrigerate for at least 4 hours, preferably 8 hours or overnight, until the crackers have softened into cake-like layers.
- When ready to serve, cut the icebox cake into squares with a sharp knife. For the cleanest slices, wipe the blade with a warm, damp cloth between cuts. Serve chilled.