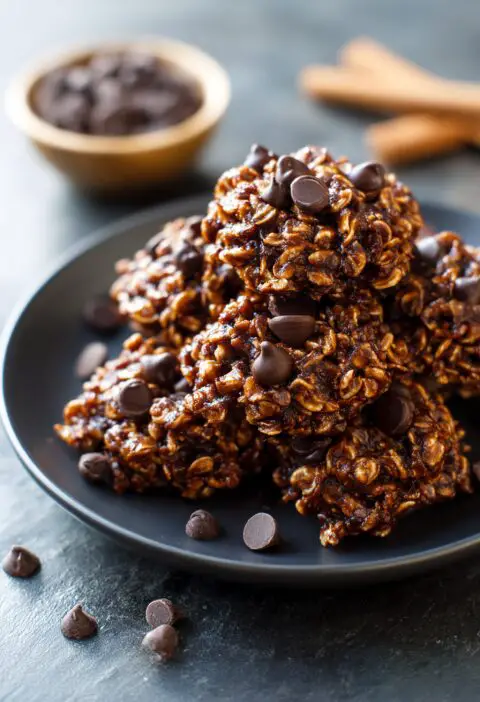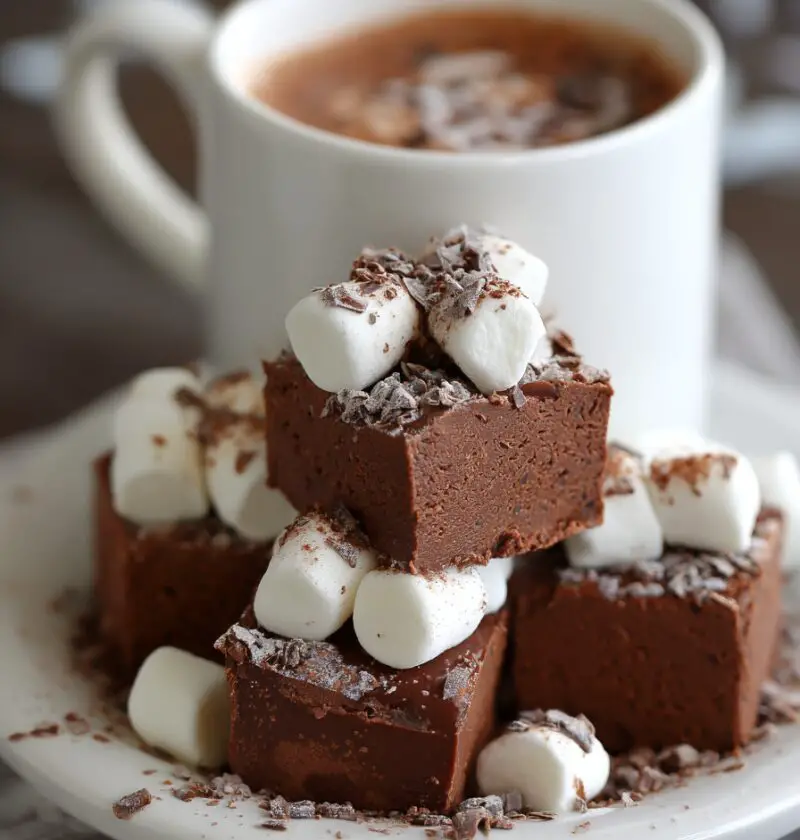
Hot Cocoa Fudge Recipe
This Hot Cocoa Fudge Recipe wraps all the cozy, mug-of-cocoa comfort you love into a creamy, no-bake chocolate fudge dessert that’s perfect for chilly nights, holiday trays, and last-minute gifts.
I’ve been making fudge since my kids were little, and this version is the one they still ask for every winter. It tastes just like a rich mug of hot chocolate—only thicker, creamier, and cut into little squares you can share. Classic hot cocoa flavors, a fluffy marshmallow topping, and no oven needed. If you’ve ever felt nervous about making fudge, stay with me; this easy hot cocoa fudge is very forgiving and beginner-friendly.
Compared with old-fashioned candy-thermometer fudge, this homemade hot cocoa fudge recipe uses sweetened condensed milk and chocolate chips as its base. That means no fiddling with soft-ball stages or worrying about crystallization. It’s a smooth, creamy hot cocoa fudge that still feels special enough to call a winter fudge recipe or even a holiday fudge recipe, but simple enough for a weeknight treat when you’re craving rich chocolate fudge.
Why You’ll Love This Recipe
- No oven needed – it’s a true no-bake chocolate fudge dessert.
- Simple ingredients – mostly pantry and grocery-store basics you already know.
- Fast prep – about 15 minutes of hands-on time, then the fridge does the work.
- Classic hot cocoa flavor – hot chocolate fudge with real cocoa mix and marshmallows.
- Ultra-creamy texture – soft, sliceable, and not grainy or dry.
- Perfect for gifting – holds its shape in cookie tins and treat boxes.
- Easy to customize – make it peppermint, mocha, or dairy-free with simple swaps.
- Kid-friendly – fun to stir, sprinkle, and taste-test along the way.
Ingredients
Here’s everything you need for this Hot Cocoa Fudge Recipe. I’ve added a few little notes so you can get that perfect, creamy batch on the first try.
For the hot cocoa fudge:
- 3 cups (about 18 oz / 510 g) semi-sweet chocolate chips
- Use a brand you like to eat straight. Ghirardelli, Guittard, or Nestlé all work well.
- 1 can (14 oz / 396 g) sweetened condensed milk
- Make sure it’s sweetened condensed milk, not evaporated milk—they’re very different.
- 1/4 cup (1/2 stick / 56 g) unsalted butter, cut into pieces
- Butter adds richness and helps the fudge set with a smooth texture.
- 1/4 cup hot cocoa mix (about 3–4 tablespoons, not sugar-free)
- Use your favorite hot chocolate mix—Swiss Miss, Ghirardelli, or a store brand; just avoid sugar-free for best flavor.
- 1 teaspoon pure vanilla extract
- Vanilla rounds out the chocolate and makes it taste more “bakery-style.”
- 1/4 teaspoon fine sea salt
- A tiny bit of salt keeps the fudge from tasting flat or overly sweet.
- 2 tablespoons heavy cream (optional, for extra creamy hot cocoa fudge)
- I like to add this when I want that ultra-luxurious texture.
For the marshmallow hot cocoa fudge topping:
- 1 1/2 cups mini marshmallows, divided
- 1 cup stirred into the fudge, 1/2 cup sprinkled on top for that hot cocoa look.
- 2 tablespoons crushed candy canes or peppermint candies (optional)
- Great for a holiday fudge recipe variation and a little crunch.
- 1 tablespoon mini chocolate chips or chocolate shavings (optional)
- For a “barista hot chocolate” vibe on top.
Pan and tools:
- 8×8-inch square baking pan (metal or glass)
- Parchment paper
- Medium saucepan or heavy-bottomed pot
- Silicone spatula or wooden spoon

Directions
You know what? Fudge has a reputation for being fussy, but this easy hot cocoa fudge is honestly quite relaxed. Just take your time with the melting step and you’re good.
-
Prep your pan.
Line an 8×8-inch pan with parchment paper, letting it hang over the sides like little handles. Lightly spray the parchment with nonstick spray or rub with a tiny bit of butter. This makes it much easier to lift out and slice your fudge later. -
Combine the base ingredients.
In a medium saucepan, add the chocolate chips, sweetened condensed milk, butter, hot cocoa mix, and heavy cream (if using). Don’t turn on the heat yet—just get everything in the pan so it warms evenly. -
Melt low and slow.
Set the saucepan over low heat. Stir constantly with a silicone spatula or wooden spoon as the chocolate chips begin to melt. Keep the heat low—if the chocolate gets too hot, the fudge can turn greasy or grainy. You’re looking for a thick, glossy, smooth mixture. -
Stir in vanilla and salt.
Once the mixture is completely smooth with no visible chocolate chunks, remove the pan from the heat. Stir in the vanilla extract and sea salt. Taste a small dab (careful, it’s warm). If it tastes a bit too sweet for you, you can sprinkle in another pinch of salt. -
Fold in marshmallows.
Let the mixture cool for 2–3 minutes, stirring now and then. This keeps the marshmallows from completely melting. Then gently fold in 1 cup of mini marshmallows. They’ll soften a little but should mostly hold their shape, giving that “hot cocoa with marshmallows” feel. -
Spread into the pan.
Scrape the fudge mixture into your prepared pan. Use your spatula to spread it evenly into the corners and smooth the top. If it feels very thick, press it into place with the back of the spatula or an offset spatula. -
Add the hot cocoa topping.
Immediately sprinkle the remaining 1/2 cup mini marshmallows evenly over the top. If you’re going festive, add crushed candy canes and mini chocolate chips too. Gently press the toppings into the surface so they stick as the fudge sets. -
Chill until firm.
Cover the pan lightly with foil or plastic wrap and refrigerate for at least 2 hours, or until the fudge is firm to the touch in the center. For the neatest slices, 3–4 hours is even better, and overnight is great if you’re planning ahead. -
Slice and serve.
Use the parchment handles to lift the fudge out of the pan and set it on a cutting board. With a sharp knife, cut into 1-inch squares for a big batch (about 36 pieces) or larger 1.5-inch squares for more indulgent portions. Wipe the knife with a warm, damp cloth between cuts for super clean edges. -
Enjoy and share.
Serve your hot chocolate fudge slightly chilled or at cool room temperature. The marshmallow topping will stay soft and chewy, while the fudge underneath is rich and creamy.
Servings & Timing
- Yield: About 36 small squares (or 25 larger pieces)
- Prep Time: 15 minutes
- Chill Time: 2–4 hours (3+ hours for cleanest slices)
- Total Time: About 2 hours 15 minutes to 4 hours, including chilling
If you’re planning this winter fudge recipe for a party or gift boxes, I recommend making it the night before. The flavor deepens a bit as it rests.
Variations
Once you’ve mastered this basic Hot Cocoa Fudge Recipe, it’s very easy to play with flavors:
- Peppermint Hot Cocoa Fudge: Add 1/2 teaspoon peppermint extract with the vanilla and top with extra crushed candy canes.
- Mocha Hot Chocolate Fudge: Stir 1 tablespoon instant espresso powder into the hot cocoa mix for a coffeehouse-style treat.
- Salted Hot Cocoa Fudge: Sprinkle a pinch of flaky sea salt (like Maldon) over the top just before chilling.
- Dark Chocolate Lover’s Fudge: Use 2 cups dark chocolate chips and 1 cup semi-sweet for a deeper, less sweet fudge.
- Nutty Hot Cocoa Fudge: Fold in 1/2 cup chopped toasted walnuts or pecans along with the marshmallows.
- Dairy-Free Hot Cocoa Fudge: Use dairy-free chocolate chips, vegan butter, and coconut-based sweetened condensed milk; check that your cocoa mix is dairy-free too.
Storage & Reheating
Fudge doesn’t actually need reheating—but how you store it does change the texture a bit.
-
Room Temperature:
If your kitchen is cool (around 65–70°F) and not humid, you can keep the fudge in an airtight container at room temperature for up to 4 days. It’ll be a little softer and very creamy. -
Refrigerator:
For longer storage, keep your hot cocoa fudge in a sealed container in the fridge for up to 2 weeks. Layer the pieces with parchment or wax paper so they don’t stick together. Let the fudge sit at room temperature for 10–15 minutes before serving for best flavor. -
Freezer:
This fudge freezes well. Place squares on a baking sheet to freeze solid, then transfer to a freezer bag or airtight container. Freeze for up to 2–3 months. Thaw in the fridge overnight, then bring to room temp before serving. -
Make-Ahead Tips:
If you’re planning holiday tins or gift boxes, you can make this holiday fudge recipe 5–7 days ahead. Store chilled, then package closer to gifting day so it tastes fresh.
Notes
-
Chocolate quality matters.
You don’t need fancy gourmet bars, but using decent chocolate chips truly improves the flavor and texture. If you enjoy eating them out of the bag, they’ll make good fudge. -
Keep the heat gentle.
The number one reason homemade hot cocoa fudge can go wrong is overheating. Stick with low heat and steady stirring. If the mixture starts to bubble, turn the heat down. -
Adjusting sweetness.
Hot cocoa mix and sweetened condensed milk are both sweet. If you prefer less sweet fudge, use dark chocolate chips for at least half the chocolate and don’t use extra-sweet cocoa mixes. -
Pan size flexibility.
An 8×8 pan gives thicker pieces. A 9×9 pan works too; the fudge will just be a bit thinner and set slightly faster. -
Cutting for gifts.
For treat boxes, I like to cut smaller 3/4-inch squares and arrange them in mini cupcake liners. You suddenly look like you run your own little candy shop. -
Testing notes from my kitchen.
I tested this recipe with and without heavy cream. With cream, the fudge is a touch softer and melts more on the tongue; without it, it’s a bit firmer but still creamy. Both are delicious, so follow your texture preference.
FAQs
1. Why didn’t my fudge set?
Usually this happens if the chocolate mixture was overheated or if the ratios were off. Chill it longer first; if it’s still too soft after several hours, you can gently remelt it and add an extra 1/2 cup chocolate chips.
2. Can I make this Hot Cocoa Fudge Recipe without hot cocoa mix?
Yes. Replace the 1/4 cup hot cocoa mix with 2 tablespoons unsweetened cocoa powder and 1–2 tablespoons powdered sugar, adjusting to taste.
3. Can I use marshmallow creme instead of mini marshmallows?
You can swirl 1/2 to 3/4 cup marshmallow creme onto the top of the warm fudge in the pan. It won’t hold little “marshmallow shapes,” but it gives a gorgeous, swirly, marshmallowy top.
4. How do I keep the marshmallows from melting completely?
Let the fudge mixture cool a couple of minutes off the heat before folding in the marshmallows, and work quickly. They’ll soften but shouldn’t disappear.
5. Can I make this in the microwave instead of on the stove?
Yes. Combine the chocolate chips, sweetened condensed milk, butter, and cocoa mix in a large microwave-safe bowl. Heat in 20–30 second bursts, stirring well each time, just until smooth. Then continue with the recipe.
6. Is this recipe gluten-free?
The base fudge is usually gluten-free, but always check your hot cocoa mix and marshmallows—some brands contain trace gluten or are processed in shared facilities.
7. Can I double this recipe?
Definitely. Double all the ingredients and use a 9×13-inch pan. Chill a little longer, since the fudge will be thicker and larger.
8. How long will the fudge stay fresh for gifting?
If kept chilled and then brought to room temperature before gifting, it tastes great for about 10–14 days. For shipping, I recommend sending it within 3–4 days of making and packing it snugly in a tin.
Conclusion
This Hot Cocoa Fudge Recipe brings everything we love about a steaming mug of hot chocolate into a creamy, sliceable treat—rich chocolate fudge, fluffy marshmallows, and that cozy winter feeling in every bite. It’s simple enough for beginner cooks, but special enough to anchor a holiday dessert tray or gift box.
If you try this easy hot cocoa fudge, I’d love to hear how it turns out for you—tell me in the comments how you served it, or which variation you tried. And if you’re in a chocolate mood, you might also enjoy my peppermint bark candy or a pan of classic chewy brownies to round out your sweet spread.
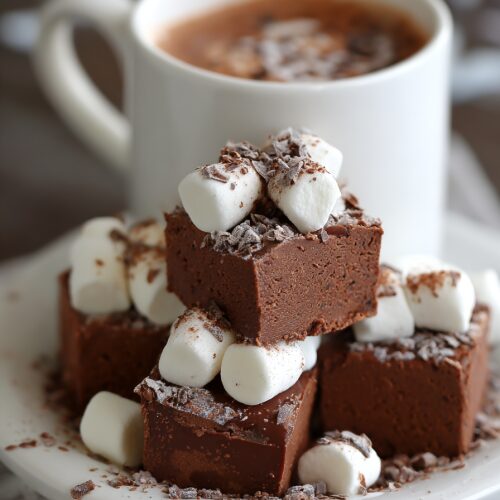
Hot Cocoa Fudge
Ingredients
- 3 cups semi-sweet chocolate chips about 18 oz / 510 g; use a good-quality brand you like to eat plain
- 1 can sweetened condensed milk 14 oz / 396 g; not evaporated milk
- 1/4 cup unsalted butter 1/2 stick / 56 g, cut into pieces
- 1/4 cup hot cocoa mix about 3–4 tablespoons; not sugar-free; use your favorite hot chocolate mix
- 1 teaspoon pure vanilla extract
- 1/4 teaspoon fine sea salt plus an extra pinch to taste, if needed
- 2 tablespoons heavy cream optional, for extra creamy fudge
- 1 1/2 cups mini marshmallows divided; 1 cup folded into fudge, 1/2 cup on top
- 2 tablespoons crushed candy canes or peppermint candies optional, for topping and holiday variation
- 1 tablespoon mini chocolate chips or chocolate shavings optional, for topping
- 1 pinch flaky sea salt optional, for salted hot cocoa fudge variation
Instructions
- Line an 8×8-inch square baking pan with parchment paper, leaving overhang on two sides to create handles. Lightly spray the parchment with nonstick spray or rub with a small amount of butter to make removing and slicing the fudge easier.
- In a medium saucepan, add the semi-sweet chocolate chips, sweetened condensed milk, unsalted butter, hot cocoa mix, and heavy cream (if using). Do not turn on the heat yet; allow all ingredients to be in the pan so they warm evenly.3 cups semi-sweet chocolate chips, 1 can sweetened condensed milk, 1/4 cup unsalted butter, 1/4 cup hot cocoa mix, 2 tablespoons heavy cream
- Set the saucepan over low heat. Stir constantly with a silicone spatula or wooden spoon as the chocolate chips melt. Keep the heat low to prevent the chocolate from overheating, which can cause the fudge to become greasy or grainy. Continue stirring until the mixture is thick, glossy, and completely smooth.
- Remove the pan from the heat once the mixture is smooth. Stir in the vanilla extract and fine sea salt until fully incorporated. Taste a small amount carefully; if it seems too sweet, add a tiny extra pinch of salt and stir again.1 teaspoon pure vanilla extract, 1/4 teaspoon fine sea salt
- Let the fudge mixture cool for 2–3 minutes off the heat, stirring occasionally so it cools evenly. Gently fold in 1 cup of the mini marshmallows. They should soften slightly but mostly hold their shape to mimic marshmallows in hot cocoa.1 1/2 cups mini marshmallows
- Scrape the fudge mixture into the prepared pan. Use a spatula to spread it evenly into the corners and smooth the top. If the mixture is very thick, press it gently into an even layer with the back of the spatula or an offset spatula.
- Immediately sprinkle the remaining 1/2 cup mini marshmallows evenly over the surface. If desired, add crushed candy canes or peppermint candies and mini chocolate chips or chocolate shavings. Gently press the toppings into the fudge so they adhere as it sets. For a salted hot cocoa variation, sprinkle a small pinch of flaky sea salt over the top.1 1/2 cups mini marshmallows, 2 tablespoons crushed candy canes or peppermint candies, 1 tablespoon mini chocolate chips or chocolate shavings, 1 pinch flaky sea salt
- Cover the pan lightly with foil or plastic wrap and refrigerate for at least 2 hours, or until the center of the fudge is firm to the touch. For the cleanest slices, chill 3–4 hours or overnight.
- Use the parchment handles to lift the chilled fudge out of the pan and place it on a cutting board. With a sharp knife, cut into about 36 small 1-inch squares or 25 larger 1.5-inch squares. Wipe the knife with a warm, damp cloth between cuts for neat edges.
- Serve the fudge slightly chilled or at cool room temperature. Store leftovers in an airtight container at room temperature for up to 4 days if your kitchen is cool, or in the refrigerator for up to 2 weeks. For longer storage, freeze for 2–3 months; thaw in the refrigerator, then bring to room temperature before serving.
Notes
Freezer: Freeze cut squares on a baking sheet until solid, then transfer to an airtight container or freezer bag for 2–3 months. Thaw in the fridge overnight, then bring to room temperature.
Variations: For Peppermint Hot Cocoa Fudge, add 1/2 teaspoon peppermint extract with the vanilla and top with extra crushed candy canes. For Mocha, stir 1 tablespoon instant espresso powder into the hot cocoa mix. For Dark Chocolate Lover’s Fudge, use 2 cups dark chocolate chips and 1 cup semi-sweet. For Nutty Fudge, fold in 1/2 cup chopped toasted walnuts or pecans along with the marshmallows. For Dairy-Free, use dairy-free chocolate chips, vegan butter, and coconut-based sweetened condensed milk, and ensure your cocoa mix and marshmallows are dairy-free.
Troubleshooting: If the fudge does not set, chill longer first. If still too soft, gently remelt the mixture and stir in an additional 1/2 cup chocolate chips, then re-chill. Keep the heat low while melting to avoid grainy or greasy texture.
Pan flexibility: A 9×9-inch pan also works; the fudge will be slightly thinner and may set a bit faster.
Microwave option: Combine the chocolate chips, sweetened condensed milk, butter, and cocoa mix in a microwave-safe bowl. Heat in 20–30 second intervals, stirring well after each, just until smooth, then proceed with the recipe.