Something about baking on a lazy Sunday afternoon always puts me in a nostalgic mood. You know that moment when butter softens on the counter and sugar crystals catch the light? Before long, you’re whisking eggs and flour into a batter that feels like a warm hug in progress.
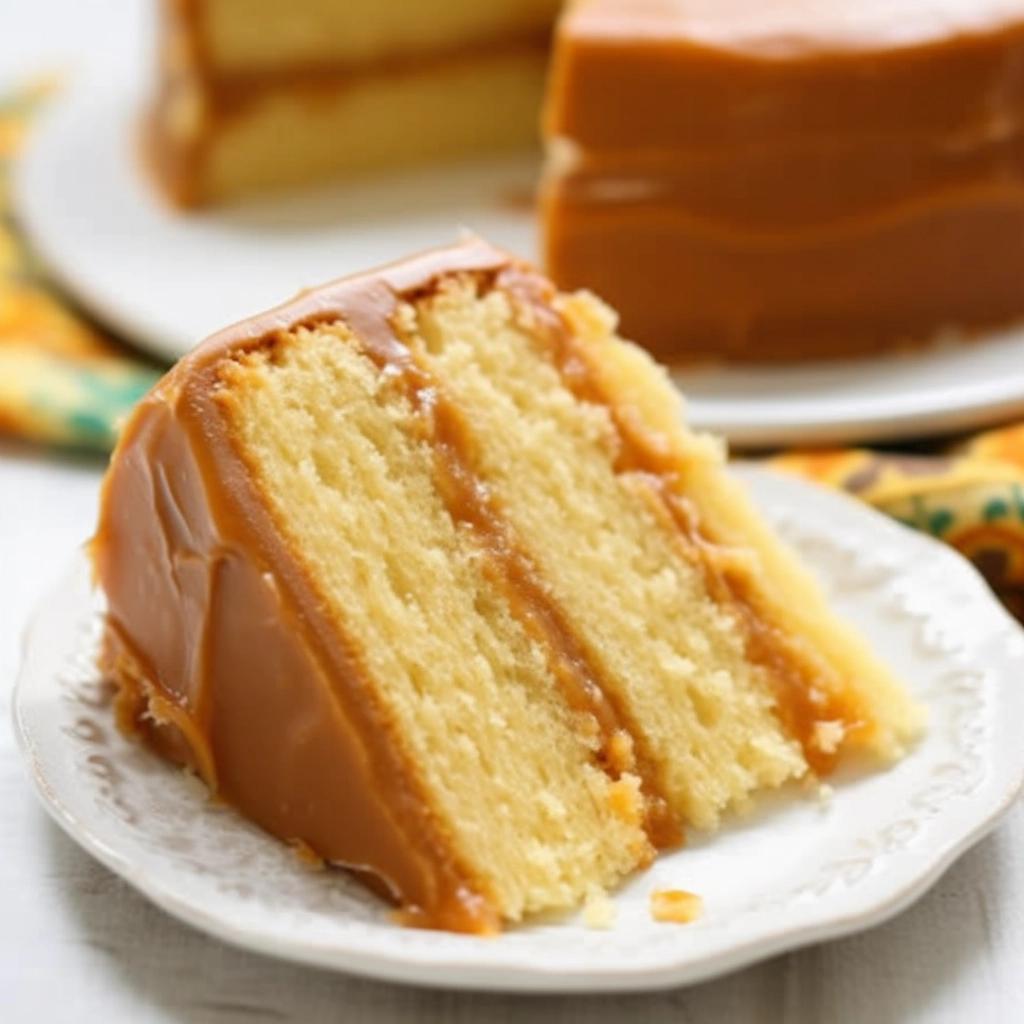
There’s a quiet thrill in slowly pouring that amber caramel over pillowy cake layers—it somehow feels both simple and adventurous, a bit like sampling a quirky café au lait recipe on a whim.

Why You’ll Love It
From the first bubble of sugar melting in the pan, your kitchen transforms with a cozy, almost electric buzz. Caramel cake is one of those rare desserts that strikes a perfect chord between indulgent and unexpectedly light. It’s like sinking into your favorite armchair—utterly comforting but never overwhelming.
Each forkful delivers a soft crumb that yields beneath the weight of glossy, buttery icing; it’s a balance that keeps you reaching back for more. Guests tend to hover around the counter, coffee mugs in hand, sneaking taste after taste before you can even ask if they’d like seconds. Sometimes the icing thickens into a fudgy blanket, and sometimes it pours like warm honey—either way, it looks stunning and tastes divine.
Honestly, no matter if you’re hosting a birthday bash or just treating yourself on a brisk Monday evening, a slice of this cake feels like permission to slow down and savor something sweet. It’s foolproof enough for weekend bakers but interesting enough to impress your most dessert-savvy friends.
Timing and Servings
Plan on about three hours from start to finish. Here’s a rough breakdown:
- Cake batter prep and mixing: 15 minutes
- Baking the layers: 25–30 minutes
- Cooling time: 30–40 minutes
- Caramel simmer: 90–120 minutes
- Assembly and setting: 10–15 minutes
Once everything’s ready, you’ll have a cake that serves 10–12 people comfortably. If you like neat layers, allow an extra few minutes to trim each tier. And hey, that’s a perfect moment to cue up a playlist—maybe something on vinyl or a curated café-style mix—and admire your trusty KitchenAid standing by, gleaming like a badge of honor.
Ingredients
- 1 cup (2 sticks) unsalted butter, room temperature, plus ¾ cup (1½ sticks) for the icing
- ⅓ cup vegetable oil
- 2½ cups granulated sugar (divided)
- 3 cups cake flour, sifted (Swans Down is a favorite)
- 6 large eggs, room temperature
- 2 tablespoons baking powder
- ½ teaspoon fine salt
- 1 cup sour cream (or use buttermilk for extra tang)
- 2 tablespoons pure vanilla extract, divided
- 24 ounces evaporated milk (two 12-ounce cans)
Directions
- Preheat your oven to 350°F (175°C). Grease three 9-inch round pans with butter or nonstick spray, then dust with flour.
- In a large bowl or the bowl of your KitchenAid mixer, cream together 1 cup butter, oil, and 2 cups sugar on medium-high until pale and fluffy—about 5 minutes. You want that whipped-cream lightness.
- Lower the speed to medium, then add eggs one at a time, letting each egg fully incorporate. Mix in 1 tablespoon vanilla.
- In a separate bowl, whisk flour, baking powder, and salt. With the mixer on low, alternate adding the dry mix and sour cream, starting and ending with flour. Stop as soon as you see no streaks. Overmixing is the enemy of tender crumbs.
- Divide the batter evenly among the pans. Slide them into the oven and bake for 25–30 minutes, or until a toothpick comes out with a few moist crumbs.
- Cool the cakes in their pans for 10 minutes. Then run a thin knife around the edges, invert them onto wire racks, and peel off the parchment. Let them cool completely before you even think of icing—patience pays off.
- For the caramel icing, combine ¾ cup butter, remaining ½ cup sugar, evaporated milk, and 1 teaspoon vanilla in a heavy-bottomed saucepan.
- Keep the heat at medium-low and stir now and then. It can take 90 minutes to 2 hours for the mix to thicken and turn a deep, glossy amber. Imagine honey slowly darkening in a jar.
- When it’s thick enough to coat a spoon’s back, remove from heat and let it rest 15 minutes—still pourable but not lava-hot.
- Stack your cooled layers on a cake stand. Pour some caramel between each layer and then over the top. Let gravity do its thing for 10–15 minutes before slicing.
Variations
- Pinch of cinnamon or freshly grated nutmeg in the batter for warm spice notes.
- Swap sour cream with Greek yogurt if you want a tangy punch and a bit more protein.
- Make cupcakes: bake for 18–20 minutes, then drizzle caramel while they’re still warm.
- Dairy-free? Use vegan butter and full-fat coconut milk in place of evaporated milk. The texture shifts, but you’ll still get that caramel thrill.
Storage & Reheating Tips
Cover the assembled cake loosely with foil and store in the fridge. It stays moist up to four days, but I recommend finishing it within two for peak gooeyness. If you’d rather skip the chill, just leave it on the counter—just don’t expect it to last past the day. To revive a slice, zap it for 10–12 seconds in the microwave. The caramel softens, the cake warms, and you’ll almost swear it’s freshly baked.
Tip: a scoop of vanilla bean ice cream or a sprinkle of flaky sea salt on each slice turns it into something you’d find in an upscale bakery.
FAQs
Why is my caramel too runny?
If it hasn’t cooked long enough, it stays thin. Keep simmering on medium-low, and stir gently—just like watching a pot of risotto, it demands patience.
Can I use brown sugar instead of white sugar?
You can, yes. Brown sugar lends a molassesy depth and extra moisture, so expect a darker, slightly denser cake. Still delicious.
What’s the best way to level the cake layers?
A cake leveler is your friend, or use a long serrated knife. Rotate the cake slowly as you slice, keeping your cuts steady. A light hand is key.
How do I prevent the caramel from sticking?
A heavy-bottomed pan and a silicone spatula help. Keep the heat under control—too hot and it’ll bubble furiously and scorch.
Can I freeze this cake?
Absolutely. Freeze un-iced layers wrapped tightly in plastic and foil. Thaw overnight in the fridge before you ice.
Conclusion
Baking this caramel cake is a bit like going on a relaxing day trip—you set off with simple ingredients and, after a few detours (hello, simmer time), you end up with something truly memorable. It’s the kind of dessert that makes you pause, take a bite, and think, “Yep, this was worth every minute.” Whether it’s for a festive table or a quiet night in, give it a whirl. Your future self (and everyone at the table) will thank you for the sweet, buttery reward.