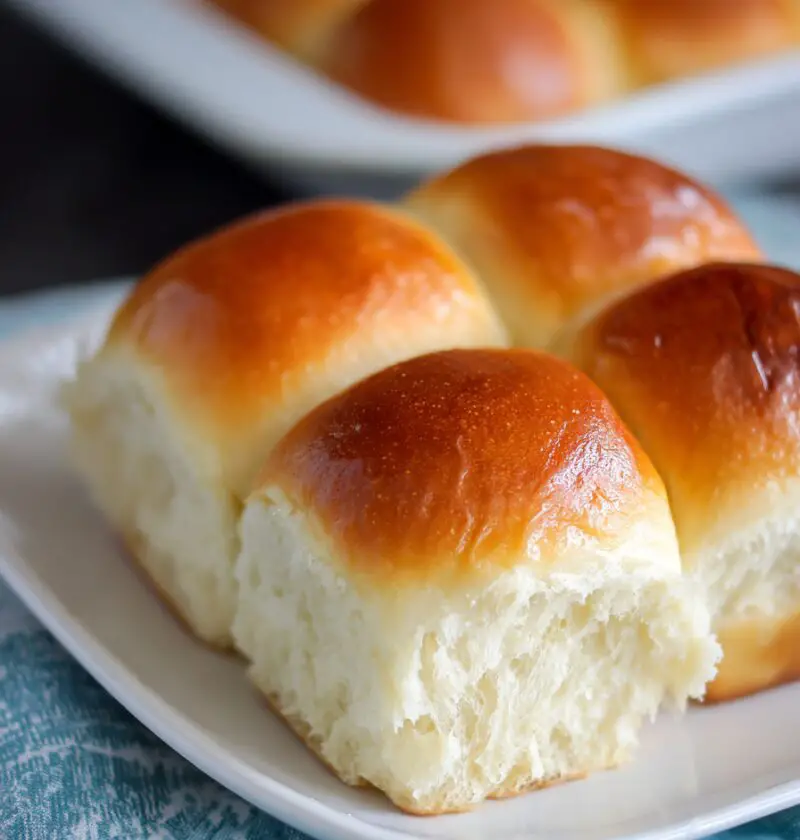
Hawaiian Roll Recipe (Soft, Fluffy & Perfectly Sweet)
If you’ve ever torn into a warm, pillow-soft roll that tastes a little sweet, a little buttery, and totally irresistible—this Hawaiian Roll Recipe is what you’ve been searching for.
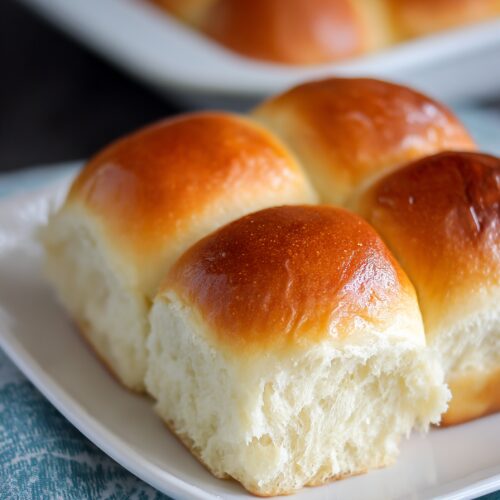
I’m a 50-year-old mom, grandma, and lifelong carb-lover, and these homemade Hawaiian rolls are the kind of sweet dinner rolls that make everyone hover near the oven “just to check.” They’re fluffy Hawaiian bread rolls with a subtle tropical flavor, golden brown tops, and that classic pull-apart texture you know from store-bought Hawaiian sweet buns—only better, because they’re fresh and made in your own kitchen.
Why You’ll Love This Hawaiian Roll Recipe
Let me explain why this Hawaiian roll recipe has become a family favorite (and yes, my neighbors ask for them too):
- Soft, pillowy texture that stays tender for days
- Just the right sweetness for both dinner and dessert
- Uses simple pantry ingredients—no specialty products needed
- Perfect for sliders, holiday meals, or soaking up gravy
- Make-ahead friendly, with great freezer results
- Fluffy Hawaiian bread with real pineapple juice for tropical flavor
- Pull-apart rolls that look bakery-worthy without fancy equipment
- Easy to double for parties, potlucks, and barbecues
- Smells like a bakery while baking—seriously, you’ll have people wandering into your kitchen
- A forgiving sweet yeast dough, great for intermediate bakers and beginners ready to level up
Ingredients
Here’s everything you’ll need to make this homemade Hawaiian roll recipe. This makes about 15–16 medium rolls in a 9×13-inch pan.
- 3/4 cup (180 ml) pineapple juice, warmed to about 105–110°F (lukewarm, not hot) – gives that signature tropical flavor
- 1/4 cup (60 ml) whole milk, warmed slightly – helps create soft yeast rolls
- 2 1/4 teaspoons active dry yeast (1 standard packet) – you can use instant yeast with minor adjustments
- 1/3 cup (70 g) granulated sugar – adds sweetness and helps browning
- 2 large eggs, at room temperature – for richness and structure
- 1/4 cup (57 g) unsalted butter, melted and slightly cooled – use real butter for the best buttery dinner rolls
- 1 teaspoon vanilla extract – rounds out the sweet homemade bread flavor
- 1 teaspoon fine sea salt or table salt – balances all the sweetness
- 3 1/2–4 cups (420–480 g) all-purpose flour, spooned and leveled – start with 3 1/2 cups and add only as needed
- 2 tablespoons honey (optional but recommended) – deepens the flavor and softness of the sweet yeast dough
For egg wash and topping:
- 1 egg, beaten with 1 tablespoon water (for shiny golden brown rolls)
- 2–3 tablespoons melted butter (for brushing after baking)
A few quick tips on ingredients:
- Flour: Different brands absorb differently. Start on the lower end; the dough should be slightly tacky but not sticky. That’s the sweet spot for soft homemade rolls.
- Yeast: If your yeast doesn’t foam during proofing, it’s likely dead—toss it and start over. It’s frustrating, but it beats wasting all the other ingredients.
- Pineapple juice: Use 100% pineapple juice, not a sugary “drink.” Canned juice works perfectly and is easy to keep on hand.
Directions
-
Proof the yeast
In a medium bowl or measuring cup, combine the warm pineapple juice, warm milk, 1 tablespoon of the sugar, and the yeast. Stir gently and let it sit for 5–10 minutes, until it looks foamy and bubbly on top. If it stays flat, your yeast may be expired—better to restart now than later. -
Mix the wet ingredients
In the bowl of a stand mixer (or a large mixing bowl if kneading by hand), whisk together the remaining sugar, eggs, melted butter, vanilla extract, honey (if using), and salt. Once the yeast mixture is foamy, pour it into the bowl and stir until combined. -
Add the flour gradually
Add 3 1/2 cups of flour to the bowl. Using the dough hook attachment (or a wooden spoon), mix on low speed until the dough starts to come together. If the dough looks very sticky and won’t pull away from the sides of the bowl, add more flour 1–2 tablespoons at a time. You’re looking for a soft, slightly tacky dough that clings a bit but doesn’t completely coat your fingers. -
Knead the dough
Increase the mixer speed to medium-low and knead for about 6–8 minutes, or knead by hand on a lightly floured surface for 8–10 minutes. The sweet yeast dough should become smooth, elastic, and still a little tacky. If it’s dry or stiff, you’ve added too much flour—next time, stop a bit sooner. -
First rise (bulk fermentation)
Shape the dough into a ball and place it in a lightly greased bowl, turning it once to coat. Cover with plastic wrap or a clean kitchen towel. Let it rise in a warm, draft-free spot for about 1–1 1/2 hours, or until doubled in size. A slightly warm (but turned off) oven or the microwave with a cup of hot water inside makes a great rising cabinet. -
Prepare the pan
While the dough rises, lightly grease a 9×13-inch baking pan with butter or nonstick spray. You can also line it with parchment for easier cleanup and lifting. This helps the pull apart rolls release without tearing. -
Shape the rolls
Once the dough has doubled, gently punch it down to release the gas. Turn it out onto a lightly floured surface. Divide into 15–16 equal pieces (you can eyeball, but a kitchen scale makes it more even—about 55–60 g each). Shape each piece into a tight ball by tucking the edges underneath and rolling it under your cupped hand until smooth. -
Pan the rolls
Arrange the dough balls in the prepared 9×13-inch pan in 3–4 even rows, spacing them slightly apart. They’ll puff up and touch as they rise, giving you that classic pull-apart effect that makes homemade Hawaiian rolls so fun to serve. -
Second rise
Cover the pan loosely with plastic wrap or a towel and let the rolls rise again for 45–60 minutes, or until puffy and nearly doubled. They should be touching or almost touching. If your kitchen is cool, this may take closer to an hour. Be patient here—this is where the magic happens. -
Preheat the oven
During the last 15 minutes of rising, preheat your oven to 350°F (175°C). Make sure your rack is in the center position for even baking. -
Brush with egg wash
Whisk the egg with 1 tablespoon water. Gently brush the tops of the risen rolls with a light coat of egg wash. This step is what helps them bake into shiny, golden brown rolls like you’d see at a bakery. -
Bake
Bake the rolls at 350°F for 18–22 minutes, or until they’re deep golden on top and the centers reach about 190°F on an instant-read thermometer. If the tops are browning too fast, tent loosely with foil for the last 5–7 minutes. -
Finish with butter
As soon as the rolls come out of the oven, brush the tops with melted butter. This makes your homemade sweet rolls glossy, soft, and extra flavorful. Let them cool in the pan for at least 10–15 minutes before serving, though I’ll be honest—someone in my house always sneaks one sooner.
Servings & Timing
- Yield: 15–16 soft homemade rolls
- Prep Time: 25–30 minutes (mixing and shaping)
- Rise Time: 2–2 1/2 hours total (first and second rises)
- Bake Time: 18–22 minutes
- Total Time: About 3 hours (mostly hands-off rising time)
These aren’t “instant” rolls, but they’re straightforward. Most of the time is just letting the sweet dough do its thing.
Variations on This Hawaiian Roll Recipe
You know what? Once you’ve mastered this base recipe, you can have a lot of fun with it:
- Coconut Hawaiian Rolls: Replace 1/4 cup of the milk with canned coconut milk and sprinkle toasted shredded coconut on top after buttering.
- Whole Wheat Twist: Swap 1 to 1 1/2 cups of the all-purpose flour with white whole wheat flour for a slightly heartier—but still soft—sweet homemade bread.
- Garlic Butter Hawaiian Rolls: After baking, brush the tops with melted butter mixed with minced garlic and a pinch of parsley for a savory-sweet side.
- Cheesy Slider Rolls: Sprinkle shredded mozzarella or mild cheddar over the rolls during the last 5 minutes of baking for gooey pull-apart rolls perfect for sliders.
- Cinnamon Sugar Sweet Rolls: Brush shaped rolls with melted butter and sprinkle with cinnamon sugar before the second rise for dessert-style Hawaiian sweet buns.
- Dairy-Free Version: Use plant-based butter and unsweetened almond milk or coconut milk; just keep an eye on the dough texture and adjust flour slightly.
Storage & Reheating
A good Hawaiian roll recipe should stay soft for days—and this one does.
- Room Temperature: Store cooled rolls in an airtight container or zip-top bag at room temperature for 2–3 days. They stay surprisingly soft thanks to the enriched dough with butter, eggs, and pineapple juice.
- Refrigerator: You can refrigerate them for up to 5 days, but they may dry out a bit faster. If I’m being honest, I prefer room temperature or freezing over the fridge.
- Freezer: For longer storage, wrap rolls tightly in plastic wrap and then foil, or place in a freezer bag. Freeze for up to 2 months. Thaw at room temperature, still wrapped, so condensation doesn’t make them soggy.
Reheating tips:
- For soft, warm rolls, wrap them in foil and reheat at 300°F (150°C) for 8–10 minutes, or until warmed through.
- For a single roll, 10–15 seconds in the microwave works—cover with a damp paper towel so it doesn’t dry out.
Make-ahead advice:
- You can prepare the dough through shaping, place the pan in the fridge overnight, and do the second rise in the refrigerator. The next day, pull the pan out, let the rolls sit at room temperature for 45–60 minutes, and bake as directed. This is my trick for holiday dinners when oven space is like prime real estate.
Notes from My Kitchen (Little Lessons Learned)
- Don’t rush the rise: With enriched bread recipes like this—those with butter, eggs, and sugar—the yeast works a bit slower. That’s normal. Letting the dough fully double gives you lighter, fluffier Hawaiian sweet buns.
- Dough texture matters more than exact flour amounts: Humidity, flour brand, and even how you measure can change things. Always focus on how the dough feels: soft, elastic, and a little tacky.
- Use a thermometer if you can: For bread, a quick-read thermometer is like a safety net. Rolls are usually done around 190°F in the center. Underdone rolls can look pretty on top but doughy inside.
- Browning is flavor: Don’t be afraid of a deep golden brown top. That color means more flavor and that classic bakery look.
- Holiday hack: I often bake these in the morning, cool them, then rewarm them in foil right before dinner. No stress, all the glory.
- Serve them creatively: Beyond serving them as buttery dinner rolls, we love them for ham and cheese sliders, turkey sandwiches the day after Thanksgiving, or even split and toasted with jam for breakfast.
FAQs About Homemade Hawaiian Rolls
1. Can I make this Hawaiian roll recipe without a stand mixer?
Yes. Mix the dough with a wooden spoon, then knead by hand on a lightly floured surface for about 8–10 minutes until smooth and elastic.
2. My dough is very sticky. Should I keep adding flour?
Add flour gradually—1–2 tablespoons at a time—until the dough is just tacky but not gluey. Too much flour will make the rolls dense instead of fluffy.
3. Can I use instant yeast instead of active dry yeast?
You can. Skip the initial proofing step and mix instant yeast directly with the flour, then warm the liquids as directed and proceed. Rise times may be slightly shorter, so keep an eye on the dough rather than the clock.
4. Why didn’t my rolls rise enough?
Common culprits: old yeast, liquids that were too hot (which can kill yeast), or a cold kitchen. Next time, check the yeast freshness and use a warm, draft-free spot for rising.
5. Can I reduce the sugar in this recipe?
You can reduce the sugar by 2–3 tablespoons without affecting the structure too much, but the classic Hawaiian flavor will be less pronounced and the rolls may not brown quite as deeply.
6. Are these rolls actually “Hawaiian”?
These are inspired by popular Hawaiian sweet rolls (like King’s Hawaiian) with pineapple juice and a light sweetness. They’re not a traditional island recipe, but they bring that same tropical flavor bread vibe to your table.
7. Can I make the rolls smaller or larger?
Yes—smaller rolls (20–24) will bake a bit faster, and larger rolls (12) may take a few more minutes. Just watch the color and use a thermometer if you’re unsure.
8. How do I keep the bottoms from getting too dark?
Use a light-colored metal pan, place it on the middle rack, and if your oven runs hot on the bottom, set the pan on top of a baking sheet for a little insulation.
Conclusion
This Hawaiian roll recipe gives you everything you love about store-bought Hawaiian sweet buns—soft, fluffy, sweet, and golden—but with the cozy satisfaction of homemade bread. They’re the kind of soft homemade rolls that make weeknight dinners feel special and holiday meals feel complete.
If you try these fluffy Hawaiian bread rolls, I’d love to hear how they turned out—tell me in the comments what you served them with, or if you tried any fun variations. And if you’re in a baking mood, you might also enjoy exploring more homemade sweet rolls and enriched bread recipes to keep that warm-oven magic going.
Hawaiian Roll Recipe (Soft, Fluffy & Perfectly Sweet)
Ingredients
- 3/4 cup pineapple juice warmed to 105–110°F (lukewarm, not hot), 100% juice
- 1/4 cup whole milk warmed slightly
- 2 1/4 teaspoons active dry yeast 1 standard packet; instant yeast can be substituted with adjusted method
- 1/3 cup granulated sugar divided (1 tablespoon used for proofing yeast)
- 2 large eggs at room temperature
- 1/4 cup unsalted butter melted and slightly cooled
- 1 teaspoon vanilla extract
- 1 teaspoon fine sea salt or table salt
- 3 1/2–4 cups all-purpose flour spooned and leveled; start with 3 1/2 cups and add only as needed
- 2 tablespoons honey optional but recommended
- 1 large egg beaten with 1 tablespoon water, for egg wash
- 2–3 tablespoons unsalted butter melted, for brushing baked rolls
Instructions
- In a medium bowl or measuring cup, combine the warm pineapple juice, warm milk, 1 tablespoon of the granulated sugar, and the active dry yeast. Stir gently and let sit for 5–10 minutes, until foamy and bubbly on top. If the mixture does not foam, discard and start again with fresh yeast.3/4 cup pineapple juice, 1/4 cup whole milk, 2 1/4 teaspoons active dry yeast, 1/3 cup granulated sugar
- In the bowl of a stand mixer (or a large mixing bowl), whisk together the remaining granulated sugar, eggs, melted butter, vanilla extract, honey (if using), and salt. Once the yeast mixture is foamy, pour it into the bowl and stir until well combined.1/3 cup granulated sugar, 2 large eggs, 1/4 cup unsalted butter, 1 teaspoon vanilla extract, 1 teaspoon fine sea salt or table salt, 2 tablespoons honey, 3/4 cup pineapple juice, 1/4 cup whole milk, 2 1/4 teaspoons active dry yeast
- Add 3 1/2 cups of all-purpose flour to the bowl. Using the dough hook attachment (or a wooden spoon), mix on low speed until the dough starts to come together. If the dough is very sticky and will not pull away from the sides of the bowl, add more flour 1–2 tablespoons at a time until you have a soft, slightly tacky dough that clings a bit but does not heavily coat your fingers.3 1/2–4 cups all-purpose flour
- Increase the mixer speed to medium-low and knead for 6–8 minutes, or knead by hand on a lightly floured surface for 8–10 minutes, until the dough is smooth, elastic, and still a little tacky. Avoid adding excess flour so the rolls stay soft and fluffy.3 1/2–4 cups all-purpose flour
- Shape the dough into a ball and place it in a lightly greased bowl, turning once to coat. Cover with plastic wrap or a clean kitchen towel and let rise in a warm, draft-free spot for 1–1 1/2 hours, or until doubled in size.
- Lightly grease a 9x13-inch baking pan with butter or nonstick spray. Optionally line with parchment paper for easier removal and cleanup.
- Once the dough has doubled, gently punch it down to release gas and turn it out onto a lightly floured surface. Divide into 15–16 equal pieces (about 55–60 g each, if using a scale). Shape each piece into a tight ball by tucking the edges underneath and rolling it under your cupped hand until the surface is smooth.
- Place the dough balls into the prepared 9x13-inch pan in even rows, spacing them slightly apart. They will expand and touch as they rise and bake, creating pull-apart rolls.
- Cover the pan loosely with plastic wrap or a kitchen towel and let the rolls rise for 45–60 minutes, or until very puffy and nearly doubled in size. The rolls should be touching or almost touching.
- During the last 15 minutes of the second rise, preheat the oven to 350°F (175°C) with the rack in the center position.
- In a small bowl, beat the egg with 1 tablespoon of water. Gently brush the tops of the risen rolls with a light coat of egg wash for a shiny, golden finish.1 large egg
- Bake the rolls at 350°F (175°C) for 18–22 minutes, or until the tops are a deep golden brown and the centers register about 190°F on an instant-read thermometer. If the tops brown too quickly, tent the pan loosely with foil for the last 5–7 minutes of baking.
- Remove the pan from the oven and immediately brush the hot rolls with melted butter. Let cool in the pan for at least 10–15 minutes before serving warm.2–3 tablespoons unsalted butter