Ground Venison Jerky Recipe
If you’ve got a freezer full of venison and a craving for a high‑protein snack, this Ground Venison Jerky Recipe is a wonderfully lean, flavorful way to turn ground meat into chewy, savory homemade jerky—without needing any fancy equipment.
I’ve been making venison jerky for years, but using ground venison instead of whole muscle cuts has become my favorite method. This ground venison jerky recipe is easy, budget‑friendly, and perfect whether you’re packing hunting snacks, loading up the kids’ sports bags, or just trying to keep better-for-you, low fat jerky on hand. We’ll talk dehydrator and oven venison jerky options, plus a smoked variation if you like that campfire flavor.
Why You’ll Love This Ground Venison Jerky Recipe
- Extra tender, not tough – Ground venison jerky is softer and easier to chew than traditional whole-muscle jerky, which is great for kids and older jaws like mine.
- Lean and high-protein – Venison is naturally very lean, so you get a high protein venison snack without all the extra fat.
- No special tools required – A basic dehydrator or even just your oven will work beautifully; no meat slicer needed.
- Perfect for using ground venison – If your deer came back from the processor mostly ground, this is a smart way to enjoy it beyond chili and burgers.
- Endlessly customizable – Make it a spicy venison jerky, sweet and smoky, teriyaki-style, or even low-sodium; the seasoning is completely in your hands.
- Great make-ahead snack – Once dried, this homemade venison jerky stores well and packs easily for road trips, hiking, camping, or busy workdays.
- Budget-conscious – Turning your own ground meat jerky at home costs a fraction of store-bought snack sticks and jerky.
- Kid- and hunter-approved – My grandkids and my hunting buddies both request this year after year, which says a lot.
What Makes This Ground Venison Jerky Special?
Let me explain why this particular venison jerky recipe has earned a permanent spot in my fall and winter routine.
Most jerky recipes use thinly sliced whole cuts of meat. That’s great, but it can get a bit tough, and you need a sharp knife and some patience. Ground venison jerky, on the other hand, uses seasoned ground meat pressed into flat strips or snack sticks. It’s more tender, cooks evenly, and you can season it more thoroughly since the spices mix right into the meat.
This recipe is:
- A lean venison jerky: Venison is lower in fat than beef, which means fewer calories from fat and a cleaner, meaty flavor.
- A high protein venison snack: Great for low-carb or higher-protein eating styles, or if you just want something that actually keeps you full between meals.
- Very approachable for beginners: Even if this is your first homemade venison jerky batch, you’ll be able to follow along easily. No curing chamber or complicated setup.
Personally, I pull this recipe out around hunting season when the freezer gets topped off. My husband is a deer hunter, and for years I kept making chili, tacos, and meatloaf—nothing wrong with that, but we wanted something portable. One weekend, after a long morning in the woods, he came home asking for “something like those gas station snack sticks…but actually good for me.” That sent me down the ground meat jerky rabbit hole, and here we are.
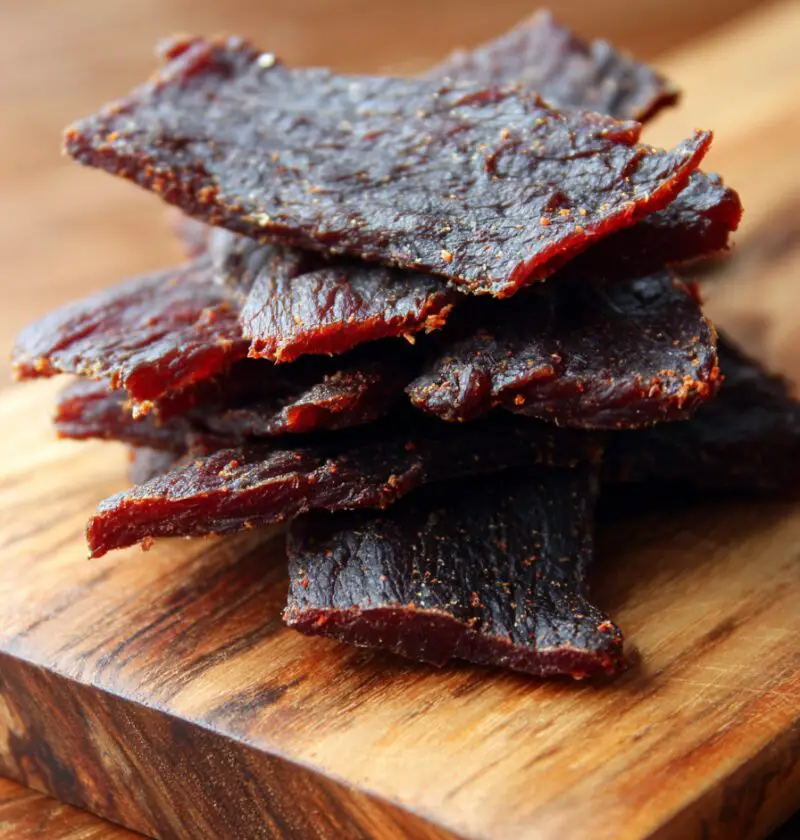
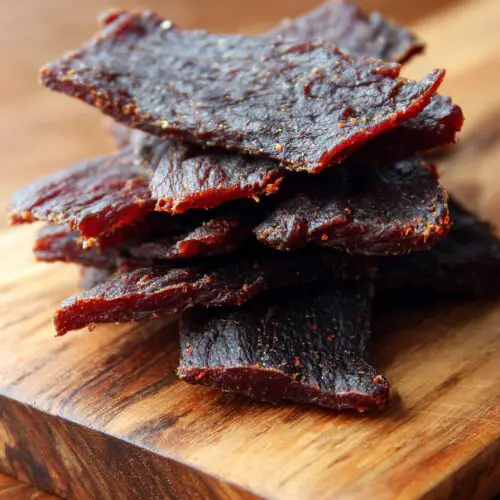
You’ll see a photo of the finished jerky strips here:

That’s the look we’re going for: uniform, slightly glossy, and flexible but dry.
Ingredients
For this ground venison jerky recipe, you’ll need:
- 2 pounds ground venison, very lean (90–95% lean; trim any visible fat before grinding if you process your own)
- 2 teaspoons kosher salt (use a little less if using table salt)
- 2 teaspoons black pepper, freshly ground if possible
- 2 teaspoons garlic powder
- 1½ teaspoons onion powder
- 1 teaspoon smoked paprika (adds a gentle smoky flavor even if you’re not smoking the jerky)
- 1 teaspoon crushed red pepper flakes (optional, for spicy venison jerky)
- 2 tablespoons brown sugar (light or dark; balances the salt and smoke)
- ¼ cup low-sodium soy sauce (or tamari for gluten-free)
- 2 tablespoons Worcestershire sauce
- 2 tablespoons apple cider vinegar (helps tenderize and adds a tangy note)
- 1 teaspoon liquid smoke (optional, use hickory or mesquite if you’re not smoking the jerky)
- ¼ teaspoon pink curing salt (Prague Powder #1) – optional but recommended for traditional jerky safety and color when dehydrating at low temperatures; follow package directions and do not exceed recommended amounts
A few ingredient notes and tips:
- Ground venison: If your venison is very dry or crumbly, you can mix in up to 2 tablespoons of ice-cold water to help it bind. Avoid adding extra fat like pork for this recipe; the leaner the better for long storage.
- Salt & curing salt: Curing salt is different from regular salt; it contains nitrite for food safety. If you skip it, keep the jerky refrigerated and eat it sooner. If you’re new to it, follow the manufacturer’s usage rate carefully.
- Soy sauce & Worcestershire: These bring umami and depth. Use low-sodium if you’re watching salt, and adjust kosher salt down slightly.
- Sweetness: Brown sugar helps balance the savory flavors and also aids browning. You can use honey or maple syrup instead, but reduce the liquid slightly so the mix isn’t too wet.
Directions
-
Mix the marinade ingredients.
In a medium bowl or large measuring cup, whisk together the salt, black pepper, garlic powder, onion powder, smoked paprika, red pepper flakes, brown sugar, soy sauce, Worcestershire sauce, apple cider vinegar, liquid smoke (if using), and pink curing salt. Make sure there are no clumps of sugar or spices. -
Combine with the ground venison.
Add the ground venison to a large mixing bowl. Pour the marinade mixture over the venison. Using clean hands (or food-safe gloves), gently work the seasonings into the meat until it’s evenly mixed. Don’t mash it aggressively—just fold and press until the texture looks uniform and sticky. -
Chill the seasoned meat.
Cover the bowl tightly with plastic wrap and refrigerate at least 4 hours, ideally overnight. This rest time lets the flavors soak through and gives the curing salt time to work, if you’re using it. The meat will firm up slightly as it chills, which makes forming strips easier. -
Prep your equipment.
- For dehydrator venison jerky: Set your dehydrator to 155°F (68°C) or the “meat/jerky” setting if it has one. Lightly spray the trays with cooking spray or line them with dehydrator-safe mesh sheets.
- For oven venison jerky: Preheat the oven to 170–180°F (or the lowest it will go). Line large baking sheets with foil, then place a wire rack on top. Lightly grease the racks so the jerky doesn’t stick.
-
Form the jerky strips or snack sticks.
You have two easy options here:- With a jerky gun: Fill the jerky gun with the chilled ground venison mixture. Pipe long, even strips or round snack sticks directly onto dehydrator trays or racks, about ¼-inch thick.
- Without a jerky gun: Place half the meat between two sheets of parchment paper. Roll it out with a rolling pin to about ¼-inch thickness, then peel off the top parchment and use a knife or pizza cutter to slice it into strips. Transfer strips carefully to your trays or racks with a spatula.
-
Dry the jerky.
- In a dehydrator: Dry the ground meat jerky at 155°F for about 4–6 hours. Rotate trays occasionally for even drying.
- In the oven: Place pans in the oven and prop the door open slightly with a wooden spoon to allow moisture to escape. Bake for about 3–5 hours, rotating pans and flipping strips halfway through.
The jerky is done when it’s dry to the touch, darker in color, and bends slightly before cracking but does not break cleanly.
-
Check for doneness and food safety.
For the most cautious approach, you can briefly finish the jerky in a 275°F oven for 10 minutes after dehydrating to ensure the internal temperature hits 160°F. This is especially helpful if your dehydrator doesn’t run hot. Let it cool completely on the racks before storing. -
Cool and store.
Once completely cool, blot any visible surface moisture or fat with paper towels. Transfer the jerky strips to airtight jars, zip-top bags, or vacuum-sealed bags, labeling them with the date. Now you’ve got homemade venison jerky ready whenever snack time calls.
Servings & Timing
- Yield: About 1 to 1¼ pounds of finished jerky (varies with dryness level)
- Prep Time: 20 minutes active
- Marinating Time: 4–12 hours
- Drying Time: 4–6 hours in a dehydrator; 3–5 hours in the oven
- Total Time: About 8–18 hours, mostly unattended (marinating and drying)
Flavor Twists & Easy Variations
Once you’ve made this ground venison jerky recipe once, it’s fun to play:
- Sweet & Smoky BBQ Jerky – Add 2 tablespoons of your favorite barbecue sauce and 1 extra teaspoon smoked paprika; reduce soy sauce by 1 tablespoon.
- Teriyaki Ground Venison Jerky – Swap the apple cider vinegar for rice vinegar, add 1 tablespoon honey and 1 teaspoon grated ginger.
- Extra Spicy Venison Jerky – Double the red pepper flakes and add ½ teaspoon cayenne; sprinkle a little extra black pepper over the formed strips before drying.
- Peppery Snack Sticks – Form thicker round “venison snack sticks” with a jerky gun and add an extra teaspoon of cracked black pepper to the mix.
- Low-Sugar Version – Skip the brown sugar and use a few drops of liquid stevia or omit sweetener entirely for a very savory, low carb jerky.
- Smoked Venison Jerky – Smoke at a low temperature (around 160–170°F) with hickory or apple wood instead of using liquid smoke; monitor closely to avoid over-drying.
Storage & Make-Ahead Tips
You know what? This is where homemade jerky really shines—it keeps beautifully.
- Room temperature: If you used curing salt, dried the jerky thoroughly, and stored it in an airtight container, it can sit at room temperature for about 1 week (cool, dry spot; no direct sun).
- Refrigerator: For the safest long-term storage, keep jerky in airtight containers or vacuum-sealed bags in the fridge for up to 3–4 weeks.
- Freezer: For longer storage, freeze the jerky for up to 3–6 months. I like to freeze in small snack-sized portions so I’m only thawing what we’ll eat.
To “reheat” or refresh:
- Thawing: If frozen, thaw overnight in the fridge or on the counter for an hour or two.
- Softening slightly: If a batch seems a bit too dry, place a small piece of apple or a damp (not wet) paper towel in the sealed container for a few hours to gently add back a bit of moisture—then remove it so you don’t overdo it.
This is a perfect make-ahead venison recipe: you can prep big batches in hunting season and enjoy lean venison jerky snacks all winter.
Notes from My Kitchen
- Consistency is key. Try to keep your strips an even ¼-inch thickness. Thinner pieces will dry faster and can get brittle while thicker ones stay soft, so it’s worth taking a minute to check.
- Don’t rush the chill. Letting the seasoned ground venison sit overnight really does make the flavor more developed and helps the texture hold together when forming strips.
- Taste test carefully. Since this is raw meat, you can cook a teaspoon of the seasoned mixture in a small skillet and taste it. Adjust salt, heat, or sweetness from there before forming the whole batch.
- Airflow matters. Whether you’re using a dehydrator or oven, make sure there’s space between strips. Overlapping pieces will steam instead of dry and won’t keep as well.
- Label everything. I now label bags with the flavor (Spicy, Teriyaki, Smoky) and the date. It sounds fussy, but when you’re reaching into the freezer in January, you’ll be glad you did.
- Watch the first batch closely. Every dehydrator and oven runs a little different. For your first time, start checking around the 3-hour mark so you get a feel for your setup.
Frequently Asked Questions
Can I make this ground venison jerky recipe without a dehydrator?
Yes, absolutely. The oven method works very well—just keep the temperature low (around 170°F) and crack the oven door so moisture can escape.
Do I have to use pink curing salt?
No, it’s optional. It helps with food safety and gives jerky that classic cured color, but if you skip it, store the jerky in the fridge and eat it within a couple of weeks or freeze it.
Can I use a mix of venison and another meat?
Yes, you can mix in up to 25–30% lean beef or pork, but keep the blend as lean as possible for better storage and less greasiness.
Why is my jerky crumbly and falling apart?
That usually means the meat wasn’t mixed enough to become sticky, or it was too lean and dry. Next time, mix a bit longer and add 1–2 tablespoons of ice water to help bind.
How do I know when the jerky is dry enough?
It should be dry and firm to the touch but still flexible—when you bend a strip, it should crack slightly but not snap cleanly in half.
Is this jerky recipe low carb?
Yes, it’s naturally low carb; if you’re strict low carb, reduce or omit the brown sugar and watch for added sugars in Worcestershire and soy sauce.
Can I make this ground venison recipe less salty?
Sure. Use low-sodium soy sauce, cut the kosher salt by ½ teaspoon, and taste-test a small cooked sample of the meat mixture before forming all the strips.
What if I don’t have a jerky gun?
No problem—use the parchment-and-rolling-pin method and cut the rolled meat into strips with a sharp knife or pizza cutter.
Final Thoughts & Friendly Nudge
This Ground Venison Jerky Recipe has become one of those “house staples” in my kitchen—lean, flavorful, a little rugged in spirit, and surprisingly simple to pull together. It’s an easy venison jerky that turns plain ground venison into satisfying, packable snacks that beat anything in the gas station aisle.
If you try this recipe, I’d love to hear how it turns out—did you make a spicy version, or go smoky and sweet? Leave a comment with your tweaks and results, and if you’re looking for more ground venison recipes or high protein venison snacks, stick around and explore; there’s a whole world of good eating hiding in that freezer.
Ground Venison Jerky
Ingredients
- 2 pounds ground venison very lean, 90–95% lean; trim any visible fat before grinding if processing your own
- 2 teaspoons kosher salt use slightly less if using table salt
- 2 teaspoons black pepper freshly ground if possible
- 2 teaspoons garlic powder
- 1 1/2 teaspoons onion powder
- 1 teaspoon smoked paprika adds gentle smoky flavor
- 1 teaspoon crushed red pepper flakes optional, for spicy venison jerky
- 2 tablespoons brown sugar light or dark; balances salt and smoke
- 1/4 cup low-sodium soy sauce or tamari for gluten-free
- 2 tablespoons Worcestershire sauce
- 2 tablespoons apple cider vinegar adds tang and helps tenderize
- 1 teaspoon liquid smoke optional; use hickory or mesquite if not smoking the jerky
- 1/4 teaspoon pink curing salt (Prague Powder #1) optional but recommended; follow package directions and do not exceed recommended amounts
- 1-2 tablespoons ice-cold water optional, only if venison is very dry or crumbly, to help bind
Instructions
- In a medium bowl or large measuring cup, whisk together the kosher salt, black pepper, garlic powder, onion powder, smoked paprika, crushed red pepper flakes (if using), brown sugar, soy sauce, Worcestershire sauce, apple cider vinegar, liquid smoke (if using), and pink curing salt. Whisk until the sugar and spices are fully dissolved and no clumps remain.2 teaspoons kosher salt, 2 teaspoons black pepper, 2 teaspoons garlic powder, 1 1/2 teaspoons onion powder, 1 teaspoon smoked paprika, 1 teaspoon crushed red pepper flakes, 2 tablespoons brown sugar, 1/4 cup low-sodium soy sauce, 2 tablespoons Worcestershire sauce, 2 tablespoons apple cider vinegar, 1 teaspoon liquid smoke, 1/4 teaspoon pink curing salt (Prague Powder #1)
- Place the ground venison in a large mixing bowl. Pour the marinade over the meat. Using clean hands or food-safe gloves, gently work the seasonings into the venison until the mixture is evenly combined and sticky but not overworked. If the meat seems very dry or crumbly, mix in 1–2 tablespoons of ice-cold water to help it bind.2 pounds ground venison, 1-2 tablespoons ice-cold water
- Cover the bowl tightly with plastic wrap and refrigerate for at least 4 hours, preferably overnight. This resting time allows the flavors to penetrate and gives the curing salt time to work if using. The mixture will firm up, making it easier to form into strips.
- For a dehydrator: Set the dehydrator to 155°F (68°C) or the jerky/meat setting if available. Lightly spray the trays with cooking spray or use dehydrator-safe mesh sheets. For an oven: Preheat the oven to 170–180°F (or the lowest setting). Line large baking sheets with foil and place wire racks on top. Lightly grease the racks so the jerky does not stick.
- With a jerky gun: Load the chilled ground venison mixture into the jerky gun and pipe long, even strips or round snack sticks directly onto the dehydrator trays or wire racks, about 1/4 inch thick. Without a jerky gun: Place half of the seasoned meat between two sheets of parchment paper. Roll it out with a rolling pin to about 1/4 inch thickness. Peel off the top parchment and cut the flattened meat into strips with a knife or pizza cutter. Transfer the strips carefully to the trays or racks, leaving space between pieces for airflow.
- In a dehydrator: Dry the ground venison jerky at 155°F for about 4–6 hours, rotating trays occasionally for even drying. In the oven: Place the pans in the oven and prop the door open slightly with a wooden spoon to allow moisture to escape. Bake for about 3–5 hours, rotating pans and flipping the strips halfway through. The jerky is done when it is dry to the touch, darker in color, and bends slightly before cracking but does not snap cleanly.
- For an extra food safety step, briefly finish the jerky in a 275°F (135°C) oven for 10 minutes after dehydrating to ensure the internal temperature reaches 160°F, especially if your dehydrator does not run very hot. Return the jerky to racks and let it cool completely.
- Allow the jerky to cool completely on the racks. Blot any visible surface moisture or fat with paper towels. Transfer the cooled jerky strips to airtight jars, zip-top bags, or vacuum-sealed bags. Label with the date and, if desired, the flavor variation. Store according to how soon you plan to eat it.
Notes
• Sweet & Smoky BBQ: Add 2 tbsp BBQ sauce and 1 tsp extra smoked paprika; reduce soy sauce by 1 tbsp.
• Teriyaki: Swap apple cider vinegar for rice vinegar; add 1 tbsp honey and 1 tsp grated ginger.
• Extra Spicy: Double red pepper flakes, add 1/2 tsp cayenne, and sprinkle extra black pepper on top before drying.
• Peppery Snack Sticks: Use a jerky gun with a round tip and add 1 tsp extra cracked black pepper.
• Low-Sugar: Omit brown sugar or replace with a no-calorie sweetener; watch labels on soy and Worcestershire for added sugars.
• Smoked Jerky: Smoke at 160–170°F with hickory or apple wood instead of using liquid smoke, watching closely to avoid over-drying.