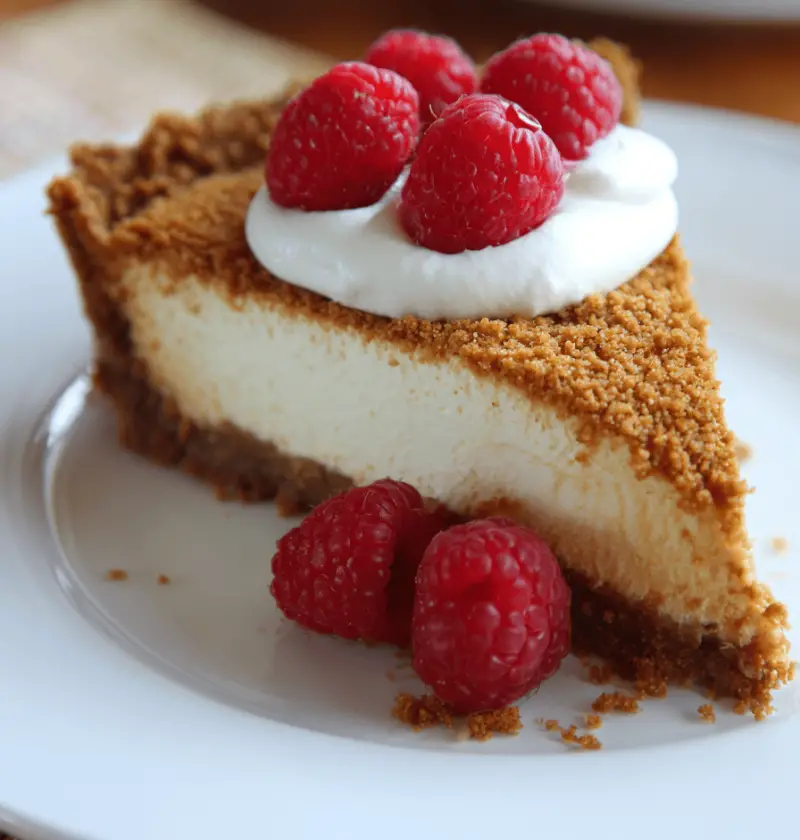
Graham Cracker Crust Recipe
This no-bake Graham Cracker Crust Recipe is quick, versatile, and delivers a golden, buttery crunch every time.
A graham cracker crust is the unsung hero of pies, cheesecakes, and tarts—simple yet essential. I first fell in love with this recipe during a summer potluck years ago, when I realized a sturdy crumb base can make or break a dessert. What makes this Graham Cracker Crust Recipe stand out? It’s entirely no-bake, whips up in under ten minutes, and feels light on the wallet. Plus, by choosing whole-grain graham crackers and a hint of honey, you get a slightly healthier spin—more fiber, less refined sugar. Honestly, once you press that buttery mix into your pan, you’ll feel like you’re laying the foundation for a little edible masterpiece.
Why You’ll Love This Recipe
- No oven needed—perfect for hot days or tiny kitchens.
- Ready in under 10 minutes—yes, really.
- Customizable sweetness—add more or less sugar to suit your taste.
- Holds up under heavy fillings—ideal for creamy pies and mousse.
- Kid-friendly: let them crush crackers with a rolling pin.
- Gluten-free option available (use GF graham crumbs).
- Minimal ingredients—pantry staples most of us already have.
- Great for festive flavors—pumpkin spice, peppermint, or citrus zest.
Ingredients
• 1¼ cups graham cracker crumbs (about 10 sheets; for coarser texture, pulse less)
• 3 tablespoons granulated sugar (swap for brown sugar for molasses notes)
• 4 tablespoons unsalted butter, melted and slightly cooled (use Kerry Gold for extra creaminess)
• 1 teaspoon honey (optional, for a touch of floral sweetness)
• Pinch of fine sea salt (balances sweetness and enhances flavor)

Directions
- Prep your crumbs: Place graham crackers in a zip-top bag and crush with a rolling pin until fine. Or blitz in a food processor for 5–8 seconds.
- Mix dry ingredients: In a bowl, stir crumbs, sugar, and salt until uniform. This ensures every bite has just the right hint of sweetness.
- Add butter and honey: Pour melted butter and honey over crumbs. Use a rubber spatula or your fingers to combine—it should feel like damp sand.
- Press firmly: Dump mixture into a 9-inch pie dish or springform pan. Use the bottom of a flat measuring cup to press evenly up the sides and across the bottom.
- Chill: Refrigerate for at least 30 minutes so the butter solidifies. Pro tip—pop it in the freezer if you’re in a hurry; 15 minutes will do.
- Check firmness: The crust should hold together when you tap it; if it’s too crumbly, drizzle a bit more melted butter and press again.
- Fill as desired: Pour in cheesecake batter, pudding, or pie filling—no further baking required for most recipes.
Servings & Timing
• Yield: One 9-inch crust, serving 8–10 slices
• Prep Time: 10 minutes (crushing, mixing, pressing)
• Chill Time: 30–45 minutes—your crust needs a moment to set
• Total Time: About 1 hour (including chill; you’ll spend under 10 minutes actively)
Variations
• Chocolate Twist: Stir in 2 tablespoons cocoa powder for a rich, fudgy base.
• Citrus Zest: Add 1 teaspoon lemon or orange zest to brighten flavor.
• Nutty Crunch: Fold in ¼ cup finely chopped pecans or almonds.
• Spiced Ginger: Substitute half the crumbs with ginger snaps for warmth.
• Coconut Swap: Mix ½ cup shredded coconut into crumbs for tropical flair.
Storage & Reheating
Store your Graham cracker crust in an airtight container in the fridge for up to 5 days. For longer keeps (up to 2 months), wrap tightly and freeze. When you’re ready to fill, thaw in the fridge for 1 hour. No reheating needed—just fill and serve cold or bake if your filling calls for it.
Notes
• Press firmly! A well-packed crust stays intact under heavy fillings.
• If you prefer a richer taste, brown your butter lightly—just watch it so it doesn’t burn.
• For gluten-free desserts, ensure your graham crumbs are certified GF.
• When I tested this recipe, I found that letting the crumbs sit 5 minutes after adding butter helps them absorb moisture evenly.
• Too sweet? Swap half the sugar for finely ground nuts or oat flour.
FAQs
Q: Can I bake this crust?
A: Absolutely—bake at 350°F for 8–10 minutes until golden. Let it cool before filling.
Q: What’s the difference between graham cracker crust and cookie crust?
A: Graham cracker crust uses crackers with a honey-wheat flavor, while cookie crusts use sweeter, richer cookies like Oreos or digestives.
Q: How do I make this dairy-free?
A: Use melted coconut oil or dairy-free margarine in place of butter.
Q: Can I double the recipe for a larger pan?
A: Yes—just double all ingredients and press into a 10- or 11-inch pan.
Q: Why is my crust soggy?
A: Chill it longer or bake briefly; a well-set crust repels moisture from fillings.
Q: Can I add spices?
A: Go for it—cinnamon, nutmeg, or cardamom add warm notes that pair beautifully with pumpkin or apple fillings.
Q: What pan works best?
A: A removable-bottom tart pan or springform pan makes it easy to release the crust without cracking.
Q: How do I avoid crumbs when slicing?
A: Run a sharp knife under hot water, dry it, then slice—clean between cuts for neat wedges.
Conclusion
This Graham Cracker Crust Recipe is your ticket to fuss-free, golden-crisp bases for every dessert craving. Whether you’re chilling a no-bake cheesecake or baking a fruit tart, this foundation never disappoints. Give it a try, leave a comment with your favorite twist, and peek at my No-Bake Lemon Cheesecake Recipe next for a complete showstopper!

Graham Cracker Crust Recipe
Ingredients
- 1¼ cups graham cracker crumbs about 10 sheets; for coarser texture, pulse less
- 3 tablespoons granulated sugar swap for brown sugar for molasses notes
- 4 tablespoons unsalted butter melted and slightly cooled (use Kerry Gold for extra creaminess)
- 1 teaspoon honey optional, for a touch of floral sweetness
- Pinch fine sea salt balances sweetness and enhances flavor
Instructions
- Place graham crackers in a zip-top bag and crush with a rolling pin until fine. Or blitz in a food processor for 5–8 seconds.
- In a bowl, stir crumbs, sugar, and salt until uniform. This ensures every bite has just the right hint of sweetness.
- Pour melted butter and honey over crumbs. Use a rubber spatula or your fingers to combine—it should feel like damp sand.
- Dump mixture into a 9-inch pie dish or springform pan. Use the bottom of a flat measuring cup to press evenly up the sides and across the bottom.
- Refrigerate for at least 30 minutes so the butter solidifies. Pro tip—pop it in the freezer if you’re in a hurry; 15 minutes will do.
- The crust should hold together when you tap it; if it’s too crumbly, drizzle a bit more melted butter and press again.
- Pour in cheesecake batter, pudding, or pie filling—no further baking required for most recipes.