Graduation Cheesecake Recipe
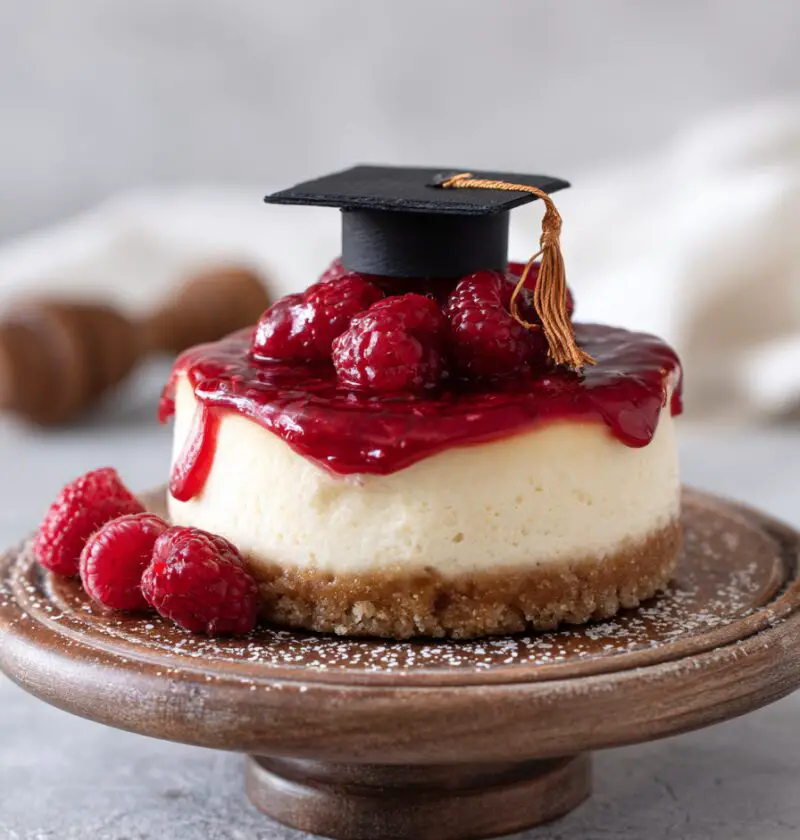
Looking for a Graduation Cheesecake Recipe that feels party-worthy, creamy, and downright unforgettable? This festive cheesecake is rich, smooth, beautifully baked, and perfect for celebrating that big cap-and-gown moment with family and friends.
A Celebration Cheesecake That Truly Feels Special
There’s something about a homemade cheesecake that says, “This day matters.” A layer cake is lovely, sure, but a graduation cheesecake has that extra bit of elegance that makes the dessert table feel complete. It’s classic, crowd-pleasing, and easy to dress up in school colors, sprinkles, berries, or even a chocolate drizzle if you want it to look a little fancy without making yourself crazy.
I’ve made some version of this cheesecake recipe for birthdays, retirement dinners, church potlucks, and yes, more than one graduation party over the years. And every single time, people hover around the dessert table waiting for that first slice. That’s always the sign, isn’t it? If guests are circling, you know you’ve got a winner.
What makes this one especially nice for a graduation party dessert is the balance. It’s rich but not too heavy, sweet but not cloying, and the texture is smooth as silk if you follow a few simple tips. This is a baked cheesecake, so it has that classic, dense-but-creamy texture folks expect from a true celebration cheesecake. It also holds up well for making ahead, which is a lifesaver when you’ve already got balloons to hang, relatives to greet, and enough pasta salad to feed half the county.
If you’re planning a cheesecake for graduation, this recipe is dependable, festive, and easy to personalize. That, to me, is what makes a special occasion cheesecake worth baking.
Why You’ll Love This Recipe
- It’s a true classic cheesecake with a creamy, dreamy texture.
- Perfect make-ahead dessert for busy graduation week.
- Easy to decorate in school colors or party themes.
- Feeds a crowd and slices beautifully.
- Uses simple grocery-store ingredients.
- Works as a formal dessert or a laid-back party cheesecake.
- Bakes up rich and smooth with no fancy pastry skills needed.
- Great base for fruit, chocolate, caramel, or festive toppings.
- Ideal for spring and early summer celebrations.
- Tastes even better after chilling overnight.
Ingredients
For the crust:
- 2 cups graham cracker crumbs (about 14 full graham cracker sheets)
- 1/4 cup granulated sugar
- 1/2 cup unsalted butter, melted
(Use a good-quality butter like Land O’Lakes for a richer flavor.)
For the cheesecake filling:
- 4 packages (8 ounces each) full-fat cream cheese, softened
(Philadelphia cream cheese gives the most reliable texture; full-fat works best for a creamy cheesecake.) - 1 1/4 cups granulated sugar
- 1 cup sour cream, room temperature
(Use full-fat sour cream for the smoothest finish; plain Greek yogurt can work in a pinch.) - 1/3 cup heavy cream
- 1 tablespoon pure vanilla extract
- 4 large eggs, room temperature
- 2 tablespoons all-purpose flour
(Helps stabilize the filling and reduces cracking.) - 1/4 teaspoon salt
For decorating, optional but very fun:
- Whipped cream
- Fresh strawberries, blueberries, or raspberries
- Colored sprinkles in school colors
- Chocolate drizzle
- Mini chocolate squares or candy toppers
- Crushed cookies or white chocolate shavings
Ingredient Tips for the Best Texture
A few little details make a big difference here. Let your cream cheese, eggs, and sour cream come to room temperature before mixing. Cold ingredients are one of the biggest reasons cheesecake batter turns lumpy. And when it comes to vanilla, use pure extract if you can. I know imitation has its place—my pantry has seen plenty of it—but in a dessert this simple, the flavor really comes through.

Directions
-
Preheat the oven and prep the pan.
Set your oven to 325°F. Lightly grease a 9-inch springform pan, then wrap the outside tightly with two layers of heavy-duty foil if you plan to use a water bath. This little extra step helps keep your baked cheesecake creamy and protects it from cracking. -
Make the graham cracker crust.
In a medium bowl, mix the graham cracker crumbs, sugar, and melted butter until the texture resembles wet sand. Press the mixture firmly into the bottom of the springform pan and slightly up the sides. I like to use the bottom of a measuring cup to pack it down evenly. -
Pre-bake the crust.
Bake the crust for 8 to 10 minutes, then remove it and let it cool while you mix the filling. This helps it stay crisp under the creamy filling, which is a small thing but a very nice thing. -
Beat the cream cheese and sugar.
In a large mixing bowl, beat the softened cream cheese until smooth, about 2 to 3 minutes. Add the sugar and beat again until fully combined. Scrape down the sides of the bowl often so you don’t get little pockets of cream cheese hiding in the batter. -
Add the creamy ingredients.
Mix in the sour cream, heavy cream, vanilla, flour, and salt. Blend on low speed until smooth. Low speed matters here; too much air in the batter can lead to cracks later. -
Add the eggs gently.
Add the eggs one at a time, mixing on low just until each one disappears into the batter. Don’t overmix at this stage. Honestly, this is probably the number-one cheesecake rule. Overbeating eggs can puff the cheesecake up in the oven and then cause it to sink or crack. -
Pour and smooth the batter.
Pour the filling over the cooled crust and gently smooth the top with a spatula. Tap the pan lightly on the counter once or twice to release any big air bubbles. -
Bake until just set.
Place the pan in a larger roasting pan and pour hot water into the roasting pan until it reaches about halfway up the sides of the springform pan. Bake for 60 to 75 minutes. The edges should look set, but the center should still have a slight jiggle—like Jell-O, not soup. -
Cool slowly.
Turn off the oven, crack the oven door, and let the cheesecake sit inside for 1 hour. This gradual cooling helps prevent cracking. After that, remove it from the oven and water bath, then let it cool completely at room temperature. -
Chill until fully firm.
Cover the cheesecake and refrigerate for at least 6 hours, though overnight is best. Cheesecake is a patient dessert. It asks you to wait, and then it rewards you for it. -
Decorate for graduation.
Just before serving, top with whipped cream swirls, fresh fruit, chocolate drizzle, or sprinkles in the graduate’s school colors. You can even pipe a simple “Congrats Grad” around the edge if you’re feeling cheerful and steady-handed.
Servings & Timing
- Yield: 12 to 14 slices
- Prep Time: 25 minutes
- Bake Time: 60 to 75 minutes
- Cooling Time: 1 hour
- Chill Time: 6 hours minimum
- Total Time: About 8 hours 30 minutes, including chilling
If you make it the day before, it feels much easier. And frankly, I recommend that for any graduation dessert when your kitchen is already doing three jobs at once.
Variations
- Berry Graduation Cheesecake: Top with strawberries, blueberries, and raspberries for a bright, patriotic look.
- Chocolate Celebration Cheesecake: Add 1/2 cup melted cooled chocolate to the filling for a richer dessert.
- Lemon Festive Cheesecake: Mix in 1 tablespoon lemon zest for a fresh spring flavor.
- Oreo Party Cheesecake: Swap graham crackers for crushed Oreos in the crust.
- Gluten-Free Version: Use gluten-free graham crackers and replace the flour with 1 tablespoon cornstarch.
- Mini Cheesecakes: Bake the batter in lined muffin tins for individual graduation party desserts.
Storage & Reheating
Store leftover cheesecake covered in the refrigerator for up to 5 days. It stays fresh best in a cake carrier or loosely wrapped with plastic wrap after the toppings are added.
For longer storage, freeze the cheesecake whole or in slices for up to 2 months. Wrap it tightly in plastic wrap and then foil. Thaw overnight in the refrigerator before serving.
This recipe is ideal for making ahead. In fact, it’s better after a full night in the fridge because the texture firms up and the flavor settles in beautifully. No reheating needed—this creamy cheesecake is meant to be served chilled.
Notes
A few things I’ve learned after making more cheesecakes than I can count:
First, don’t rush the softening step. If the cream cheese is still chilly in the middle, you’ll be fighting lumps, and that never ends well. Second, if your cheesecake cracks, don’t you dare toss it. That’s what whipped cream and pretty toppings are for. A cracked cheesecake still tastes like a dream.
I also find that a water bath makes a noticeable difference. Some bakers skip it, and yes, you can. But if you want that silky, bakery-style finish for a special occasion cheesecake, it helps. Think of it like ironing a graduation outfit—not always thrilling, but worth it.
If you want cleaner slices, dip a sharp knife in hot water and wipe it dry between cuts. It sounds fussy, but it works.
FAQs
Can I make this Graduation Cheesecake Recipe ahead of time?
Yes, and it’s actually better that way. Making it 1 day ahead gives the cheesecake time to chill fully and develop the best texture.
How do I keep my cheesecake from cracking?
Use room temperature ingredients, avoid overmixing the eggs, bake it gently, and cool it slowly. A water bath also helps quite a bit.
Can I use low-fat cream cheese?
You can, but the texture won’t be as rich or as smooth. For a true classic cheesecake, full-fat cream cheese gives the best results.
What if I don’t have a springform pan?
A springform pan is strongly recommended because it makes removal much easier. If you use a deep cake pan, line it well with parchment and expect a trickier release.
Can I freeze cheesecake for a graduation party?
Absolutely. Freeze it without toppings, then thaw overnight in the refrigerator and decorate before serving.
Why is my cheesecake lumpy?
Most likely, the cream cheese was too cold when mixed. Let all dairy ingredients sit out until they’re no longer chilled before starting.
What toppings work best for a graduation party dessert?
Whipped cream, fresh berries, chocolate drizzle, sprinkles, and candies in school colors all work beautifully. Keep it simple or go all out—it’s a celebration.
How do I know when the cheesecake is done baking?
The outer edges should be set, and the center should still wobble slightly. It will continue to set as it cools and chills.
Conclusion
This Graduation Cheesecake Recipe is everything you want in a celebration dessert—creamy, classic, make-ahead friendly, and easy to dress up for a big day. Whether you serve it plain and elegant or top it with berries and school colors, it’s a wonderful way to honor a graduate and feed a happy crowd.
If you try this graduation cheesecake, I’d love to hear how it turned out for you. Leave a comment, share your favorite topping ideas, or save this recipe for your next special occasion cheesecake.