Garlic Hummus Recipe No Tahini (Creamy, Simple, and So Garlicky)
If you’ve ever wanted a rich, creamy Garlic Hummus Recipe No Tahini that’s big on flavor, easy on the pantry, and completely fuss-free, this is the one you’ll come back to again and again.
I’ve been making hummus without tahini for years now—partly because I run out of tahini all the time, and partly because some of my friends are allergic to sesame. This garlic hummus is thick, velvety, and bright with lemon, and it uses everyday ingredients you probably already have: canned chickpeas, garlic, lemon, olive oil, and a few pantry spices. It also happens to be naturally vegan, dairy free, and can be made as a low‑oil or even oil free hummus option if that’s your style.
I like to set this garlic chickpea dip out with warm pita, crunchy veggies, and a glass of iced tea on a Friday night when everyone’s wandering through the kitchen. It’s Mediterranean hummus dip meets casual American snack board—nothing fancy, but it feels special.
Why You’ll Love This Garlic Hummus Recipe No Tahini
Let me explain why this one earns a permanent spot in your recipe box:
- No tahini needed – Perfect when you’re out of tahini or cooking for someone with a sesame allergy.
- Budget‑friendly – Uses canned chickpeas and pantry staples; way cheaper than store‑bought hummus.
- Big garlic flavor – You actually taste the garlic here; it’s a true homemade garlic hummus, not a “maybe there’s garlic in here?” situation.
- Naturally vegan & dairy free – A plant‑based, dairy free hummus that fits lots of different eating styles.
- Customizable texture – Make it ultra smooth and fluffy or leave it a bit rustic and chunky—it’s up to you.
- Easy hummus recipe for beginners – Toss, blend, and you’re done; no cooking skills required.
- Healthy snack option – Packed with protein and fiber from chickpeas, and you can use less oil or go oil free if you like.
- Perfect for meal prep – Keeps well in the fridge for several days, so you’ve always got a quick snack ready.
- Party‑ready Mediterranean hummus dip – Dress it up with toppings and it suddenly looks like it came off a restaurant mezze platter.
Ingredients
Here’s exactly what you’ll need for this Garlic Hummus Recipe No Tahini. I’ve included some quick tips for each ingredient, because those tiny choices really do change the final texture and flavor.
- 1 can (15 ounces / about 425 g) chickpeas (garbanzo beans), drained and rinsed
- You can use low‑sodium chickpeas; it makes salt control easier.
- 3–4 tablespoons aquafaba (liquid from the chickpea can), divided
- This helps create that smooth, almost whipped texture—especially helpful if you’re making tahini free hummus.
- 3–4 cloves fresh garlic, roughly chopped
- Start with 2 if you’re garlic‑shy; I use 4 for a bold garlic punch.
- 3 tablespoons freshly squeezed lemon juice (about 1 large lemon)
- Bottled lemon juice will work in a pinch, but fresh is brighter and cleaner.
- 2–3 tablespoons extra virgin olive oil
- Choose a mild, fruity oil; very peppery oils can overpower the garlic.
- 1½ teaspoons fine sea salt (or to taste)
- Start with 1 teaspoon if your chickpeas are well‑salted, then adjust.
- ½ teaspoon ground cumin
- Adds a gentle warmth and depth—don’t skip this; it makes it taste “hummus-y.”
- ¼ teaspoon smoked paprika (plus more for serving, optional)
- Optional but lovely; gives a whisper of smokiness.
- 2–4 tablespoons cold water, as needed
- Helps thin and smooth the hummus; cold water in particular helps it whip up fluffier.
- Optional garnish:
- Extra olive oil for drizzling
- Chopped fresh parsley
- Whole chickpeas
- Pinch of paprika or Aleppo pepper flakes
If you want an oil free hummus option, you can skip the olive oil and use extra aquafaba plus a bit more cold water to reach your desired creaminess.
Directions

-
Prep the chickpeas and aquafaba
Drain your can of chickpeas over a bowl, saving the liquid (that’s the aquafaba). Rinse the chickpeas under cool water for 15–20 seconds. This rinsing step helps remove that “canned” flavor and gives your homemade garlic hummus a cleaner taste. -
Peel the chickpeas for extra creaminess (optional but amazing)
If you’re after truly silky hummus without tahini, gently pinch each chickpea between your fingers—the skin will slip right off. It’s a little meditative, like shelling peas on the porch. This step can take 5–10 minutes, so feel free to skip it on busy days, but it does make the texture smoother. -
Blend garlic, lemon, and salt first
Add the chopped garlic, lemon juice, salt, and cumin to your food processor (or high‑speed blender). Blend for 20–30 seconds, scraping down the sides as needed. Let this lemon‑garlic mixture sit for a minute or two. That short rest helps take the harsh edge off the raw garlic while keeping the flavor strong. -
Add the chickpeas and spices
Add the drained chickpeas, smoked paprika, and 2 tablespoons of aquafaba to the food processor. Blend for about 1 minute, stopping to scrape down the sides. At this stage, the hummus will look dry and crumbly—that’s normal. -
Stream in the olive oil (or aquafaba, for oil free)
With the processor running, slowly stream in the olive oil. Blend for another 1–2 minutes, until the hummus starts to look creamy and pale. For a no tahini hummus, this extra blending time is key—it helps mimic the richness tahini usually provides. -
Adjust texture with cold water
Add 2 tablespoons of cold water and blend again, 30–60 seconds. Check the consistency: if you want it looser and fluffier, add another tablespoon of water at a time and blend until it’s just how you like it. The hummus should form soft peaks and swirl easily without looking runny. -
Taste and tweak the seasoning
Taste your garlic chickpea spread. Need more lemon? Salt? A little extra garlic? This is the moment to make it your own. Remember that flavors bloom a bit as the hummus chills, so don’t go too heavy on the salt. -
Chill for the best flavor
Transfer the hummus to a serving bowl, cover, and refrigerate for at least 30 minutes if you have the time. The garlic mellows, the flavors mingle, and the texture becomes even creamier. You can absolutely eat it right away, but the flavor on day one-after-chilling is fantastic. -
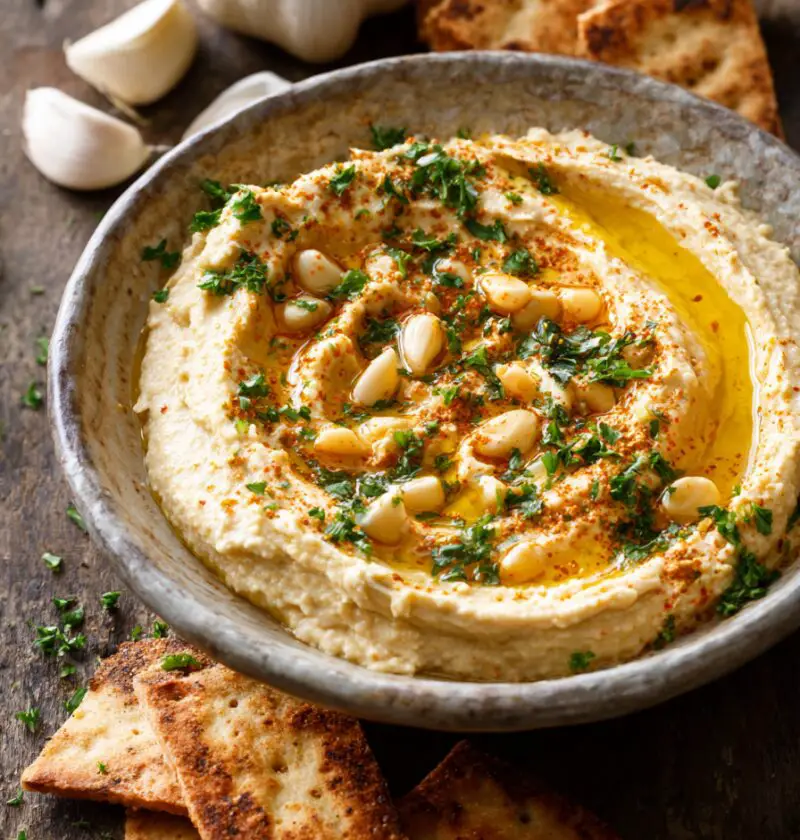
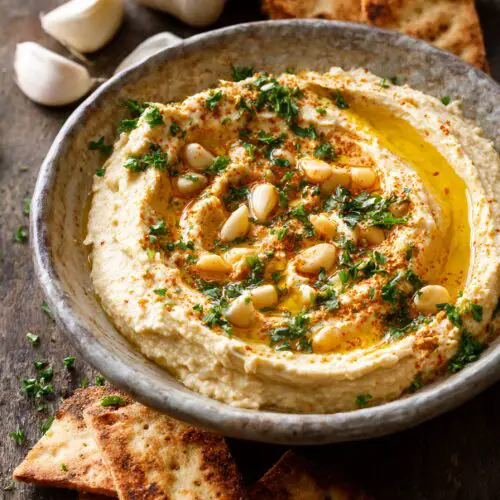
Garnish and serve
When you’re ready to serve, use the back of a spoon to swirl little “rivers” on top of the hummus. Drizzle with a bit of olive oil, sprinkle with paprika, scatter a few whole chickpeas in the center, and add chopped parsley. It instantly looks restaurant‑worthy with almost no effort.
Servings & Timing
- Yield: About 1¾ to 2 cups of hummus (serves 6–8 as an appetizer)
- Prep Time: 15 minutes (add 10 minutes if peeling chickpeas)
- Chill Time (optional but recommended): 30 minutes
- Total Time: 15–25 minutes hands‑on, up to 45–55 minutes including chilling
Easy Variations and Fun Twists
Once you’ve got this basic Garlic Hummus Recipe No Tahini down, it’s like a blank canvas. You know what? This is where you can really play.
- Roasted Garlic Hummus – Swap raw garlic for 1 whole head of roasted garlic for a sweeter, mellow garlic flavor.
- Spicy Harissa Hummus – Stir in 1–2 tablespoons harissa or your favorite chili paste for a smoky, spicy kick.
- Herby Green Hummus – Blend in a packed cup of fresh parsley, cilantro, or a mix of both for a bright green, fresh‑tasting vegan garlic hummus.
- Lemon Pepper Hummus – Add extra lemon zest and a teaspoon of cracked black pepper for a zesty twist.
- Smoky Paprika Hummus – Increase the smoked paprika to 1 teaspoon and top with roasted red peppers.
- Greek Yogurt Swirl (not vegan) – Swirl in a few spoonfuls of plain Greek yogurt for a slightly tangy, ultra‑creamy version (great if you’re not keeping it dairy free).
Storage & Make‑Ahead Tips
One of my favorite things about this tahini free hummus is how well it fits into a busy week.
-
Refrigerator:
- Store in an airtight container in the fridge for 4–5 days.
- Press a piece of parchment directly on the surface if you’re worried about it drying out.
-
Freezer:
- Yes, you can freeze hummus without tahini. Spoon into a freezer‑safe container, leaving a little space at the top, and freeze for up to 3 months.
- Thaw overnight in the fridge, then stir in a spoonful of water or olive oil if it looks a bit thick.
-
Serving again:
- For the best texture, let chilled hummus sit at room temperature for 15–20 minutes, then give it a good stir before serving.
- If it’s too thick, loosen it with a teaspoon or two of cold water or aquafaba.
-
Make‑ahead for parties:
- Make this Mediterranean hummus dip 1–2 days ahead; the flavor actually deepens and improves, especially the garlic and lemon notes.
- Add fresh garnishes (olive oil, parsley, spices) right before serving so everything looks bright and fresh.
Notes from My Kitchen (What I’ve Learned Over the Years)
-
Garlic intensity is personal.
When I first made this, I used 5 cloves of garlic and my husband politely suggested we might glow in the dark. Now I usually stick to 3–4 cloves—strong but not overpowering. If you’re unsure, start with less; you can always add more next time. -
Aquafaba is your secret weapon.
People toss that chickpea liquid all the time, but it’s magic for healthy hummus recipes. It adds body and silkiness without more oil, especially handy if you’re making a lighter, lower‑fat batch. -
Don’t rush the blending.
The difference between “homemade chunky” and “smooth like store‑bought” is usually just a few extra minutes in the food processor. Scrape down the sides a couple of times and keep blending—especially important in a hummus without tahini. -
Temperature matters.
Cold chickpeas blend, but room‑temperature chickpeas blend better and creamier. If I remember, I pull the can out of the pantry 15–20 minutes beforehand. -
Layer your flavors.
Salting only at the end never gives the same depth. Salt the garlic and lemon early, then adjust once everything’s blended. -
Don’t be afraid of garnishes.
A little drizzle of oil, a pinch of paprika, and a few chickpeas on top turn a basic bowl of no tahini hummus into something that feels like a restaurant appetizer board. It’s the same hummus, but it just feels more special.
FAQs: Garlic Hummus Recipe No Tahini
1. Can I make this garlic hummus without a food processor?
Yes. A blender works, though you may need more liquid and more scraping; you can also mash by hand with a potato masher for a chunkier chickpea garlic spread.
2. Is this hummus really good without tahini?
Absolutely—this tahini free hummus is still creamy and flavorful because the garlic, lemon, and aquafaba step in to create richness and body.
3. How can I make this completely oil free?
Skip the olive oil and replace it with extra aquafaba and cold water, adding a tablespoon at a time until you get a smooth, spreadable texture.
4. Can I use dried chickpeas instead of canned?
Yes. Cook ¾ cup dried chickpeas (which yields about 1½ cups cooked), cool them, and use them as you would canned; the flavor is a bit nuttier and often even better.
5. My hummus is too thick—what should I do?
Add 1 tablespoon of cold water or aquafaba at a time, blending after each addition, until it reaches your preferred consistency.
6. My hummus tastes bland. How do I fix it?
First, add a pinch more salt and a splash of lemon juice, then blend again; a pinch of extra cumin or smoked paprika can also wake it right up.
7. Is this recipe good for kids?
Yes, though you might want to cut the garlic down to 1–2 cloves for younger palates and serve it with mild dippers like cucumber slices or pita.
8. What should I serve with this garlic hummus?
It’s wonderful with pita bread, crackers, carrot and celery sticks, bell pepper strips, cherry tomatoes, or as a spread in wraps and sandwiches.
Conclusion: A Simple, Garlicky Staple You’ll Make on Repeat
This Garlic Hummus Recipe No Tahini is one of those quiet little recipes that slips into your weekly rhythm—healthy, budget‑friendly, and endlessly adaptable. It gives you all the cozy comfort of a Mediterranean hummus dip, but with simple ingredients you probably already have on hand.
Give it a try this week, then come back and tell me how you served it—on a snack board, tucked into a veggie wrap, or straight off the spoon (no judgment). And if you enjoy this one, you might like exploring more chickpea‑based recipes and plant‑forward snacks next; your future self, rummaging through the fridge at 3 p.m., will be so glad you did.
Garlic Hummus Recipe No Tahini
Ingredients
- 1 can (15 ounces / about 425 g) chickpeas (garbanzo beans) drained and rinsed; low-sodium if possible
- 3-4 tablespoons aquafaba liquid from the chickpea can, divided
- 3-4 cloves fresh garlic roughly chopped; use 2 cloves for milder flavor
- 3 tablespoons lemon juice freshly squeezed, about 1 large lemon
- 2-3 tablespoons extra virgin olive oil use mild, fruity oil; or omit for oil-free version
- 1 1/2 teaspoons fine sea salt or to taste; start with 1 teaspoon if chickpeas are salted
- 1/2 teaspoon ground cumin
- 1/4 teaspoon smoked paprika plus more for serving, optional
- 2-4 tablespoons cold water as needed, to adjust texture
- extra olive oil optional, for drizzling as garnish
- chopped fresh parsley optional, for garnish
- whole chickpeas optional, for garnish
- paprika or Aleppo pepper flakes optional, for garnish
Instructions
- Drain the can of chickpeas over a bowl, reserving the liquid (aquafaba). Rinse the chickpeas under cool water for 15–20 seconds to remove canned flavor.1 can (15 ounces / about 425 g) chickpeas (garbanzo beans), 3-4 tablespoons aquafaba
- For ultra-smooth hummus, gently pinch each chickpea between your fingers to slip off the skins. This can take 5–10 minutes and is optional but improves texture.1 can (15 ounces / about 425 g) chickpeas (garbanzo beans)
- Add chopped garlic, lemon juice, salt, and cumin to a food processor or high-speed blender. Blend for 20–30 seconds, scraping down the sides as needed, then let the mixture rest for 1–2 minutes to mellow the raw garlic.3-4 cloves fresh garlic, 3 tablespoons lemon juice, 1 1/2 teaspoons fine sea salt, 1/2 teaspoon ground cumin
- Add the drained chickpeas, smoked paprika, and 2 tablespoons of aquafaba to the processor. Blend for about 1 minute, stopping to scrape down the sides. The mixture will look dry and crumbly at this stage.1 can (15 ounces / about 425 g) chickpeas (garbanzo beans), 3-4 tablespoons aquafaba, 1/4 teaspoon smoked paprika
- With the processor running, slowly stream in the olive oil (or more aquafaba for an oil-free version). Blend for another 1–2 minutes until the hummus becomes creamier and paler in color.3-4 tablespoons aquafaba, 2-3 tablespoons extra virgin olive oil
- Add 2 tablespoons of cold water and blend for 30–60 seconds. Check consistency; if you prefer it looser and fluffier, add more cold water 1 tablespoon at a time, blending after each addition, until smooth and spreadable.2-4 tablespoons cold water
- Taste the hummus and adjust with more lemon juice, salt, or garlic as desired. Keep in mind that flavors will develop further as the hummus chills.3-4 cloves fresh garlic, 3 tablespoons lemon juice, 1 1/2 teaspoons fine sea salt
- Transfer the hummus to a serving bowl, cover, and refrigerate for at least 30 minutes, if possible, to allow the flavors to meld and the texture to set.
- Before serving, use the back of a spoon to swirl the top of the hummus. Drizzle with olive oil, sprinkle with paprika, and garnish with whole chickpeas and chopped parsley, if desired. Serve with pita, vegetables, or as a spread.2-3 tablespoons extra virgin olive oil, chopped fresh parsley, whole chickpeas, paprika or Aleppo pepper flakes
Notes
- Roasted Garlic Hummus: Replace raw garlic with 1 whole head of roasted garlic for a sweeter, mellow flavor.
- Spicy Harissa Hummus: Blend in 1–2 tablespoons harissa or chili paste for heat and smokiness.
- Herby Green Hummus: Add about 1 packed cup of fresh parsley, cilantro, or a mix for a bright green, herb-forward hummus.
- Lemon Pepper Hummus: Add extra lemon zest and 1 teaspoon cracked black pepper.
- Smoky Paprika Hummus: Increase smoked paprika to 1 teaspoon and top with roasted red peppers.
- Greek Yogurt Swirl (not vegan): Swirl in a few spoonfuls of plain Greek yogurt for tang and extra creaminess. Storage: Store in an airtight container in the refrigerator for 4–5 days. For longer storage, freeze up to 3 months; thaw overnight in the fridge and stir in a bit of water or olive oil if thick. For serving, let sit at room temperature 15–20 minutes and stir; thin with cold water or aquafaba as needed. Tips: Let chickpeas come to room temperature for creamier blending. Aquafaba helps create a silky texture with less oil. Don’t rush blending—extra time in the food processor makes the hummus smoother.