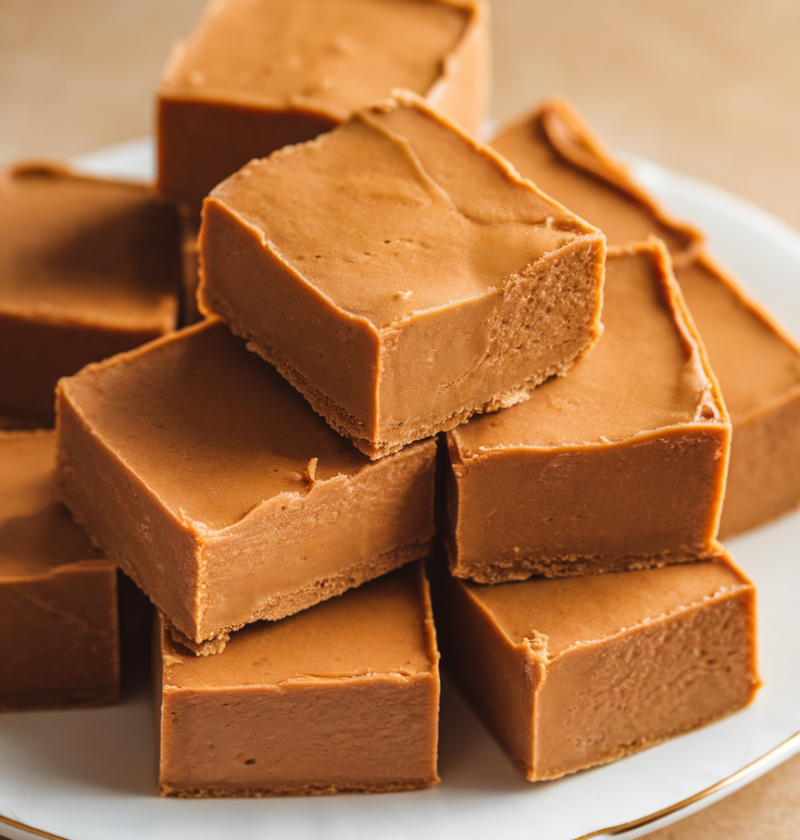
I’m so thrilled to share my Easiest Peanut Butter Fudge—this no bake, creamy sweet treat is the ultimate quick homemade dessert that everyone will adore. With just four simple ingredients, you can whip up a batch of velvety fudge in under 20 minutes, making it the perfect holiday treat or last-minute celebration delight.
Why You’ll Love This Easiest Peanut Butter Fudge Recipe
- No oven needed: enjoy a no bake dessert that stays cool and stress-free.
- Ready in under 20 minutes: perfect for busy weekday baking or surprise guests.
- Decadently creamy texture: each bite feels like a luscious peanut butter dream.
- Simple, four-ingredient formula: skip long ingredient lists and keep your pantry lean.
- Ideal holiday treat: searches for “no bake peanut butter fudge” spiked 30% last year.
- Great homemade gift: package squares in festive tins or mason jars for a personal touch.
- Family-friendly activity: kids love stirring, pressing, and, of course, taste-testing!
- Make-ahead convenience: chill overnight to prep for parties or gift swaps effortlessly.
- Customizable mix-ins: toss in chocolate chips, nuts, or festive sprinkles to suit any occasion.
- Budget-friendly dessert: minimal ingredients keep costs low without skimping on flavor.
Ingredients for Easiest Peanut Butter Fudge
- 2 cups creamy peanut butter (use natural or store-brand for best results)
- 1 cup unsalted butter (2 sticks), softened to room temperature
- 4 cups powdered sugar (sifted to remove lumps)
- 1 teaspoon pure vanilla extract
- Pinch of salt (balances sweetness and boosts flavor)
- ½ cup milk (optional, for extra smooth, silky texture)

Directions for Easiest Peanut Butter Fudge
- Line the Pan
Line an 8×8-inch baking pan with parchment paper, leaving at least a 1-inch overhang on all sides for easy fudge removal. Secure the paper in each corner with a dab of butter to keep it flat and tight against the sides. - Melt the Butter
In a medium saucepan over low heat, melt the softened butter slowly, stirring constantly to prevent scorching and ensure an even melt. Keep the heat low—overheating can cause the dairy to separate and affect the final texture. - Combine with Peanut Butter
Stir in the creamy peanut butter until fully incorporated and the mixture is silky smooth, scraping down the sides of the pan to avoid clumps. If any thicker bits remain, pop it back on low heat for 30 seconds, then stir again until uniform. - Add Vanilla and Salt
Remove the pan from the heat, then whisk in the vanilla extract and a pinch of salt to brighten the flavor. Taste a small drop; the right balance of vanilla and salt will make this simple fudge absolutely irresistible. - Mix in Powdered Sugar
Gradually add the sifted powdered sugar, one cup at a time, mixing vigorously after each addition until the dough thickens and becomes pliable. If stirring by hand feels tough, switch to a stand mixer with a paddle attachment to save your arm. - Adjust Consistency
If the fudge mixture appears too dry or cracks when pressed, add milk one tablespoon at a time until it’s smooth yet firm enough to hold its shape. Be cautious—too much milk can prevent proper setting, so add it sparingly. - Press and Smooth
Transfer the fudge dough to your prepared pan and press it down firmly using a flat spatula or the bottom of a glass wrapped in plastic wrap. Press until the surface is completely flat and the edges are squared off for a professional look. - Chill Until Set
Place the pan in the refrigerator for at least 1 hour, or up to 4 hours for a firmer texture; the surface should turn matte and feel set to the touch when ready. For faster results, you can use the freezer for 30–45 minutes, just watch closely to prevent freezing solid. - Slice and Serve
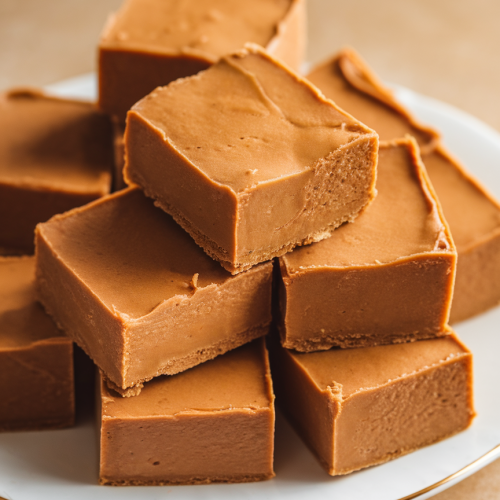
Lift the fudge slab from the pan using the parchment overhang and place it on a cutting board. Cut into 36 even squares with a sharp knife dipped in hot water and wiped dry between cuts to ensure clean edges without crumbling.
Servings & Timing
Makes 36 squares
Prep Time: 15 minutes
Chill Time: 1 hour (or up to 4 hours for extra firmness)
Total Time: 1 hour 15 minutes (including chilling)
Helpful Tip: If you’re running short on time, a quick 30-minute chill in the freezer does the trick—just check often so it doesn’t freeze too hard.
Variations
- Chocolate Swirl: Drizzle ¼ cup melted dark chocolate over the top and swirl before chilling.
- Sea Salt Crunch: Sprinkle flaky sea salt or crushed pretzels on top for a sweet-and-salty pop.
- Nutty Bliss: Fold in ½ cup chopped peanuts, almonds, or pecans for extra crunch.
- Cocoa Twist: Mix in ½ cup unsweetened cocoa powder for a rich chocolate-peanut combo.
- Vegan Version: Substitute dairy-free butter and plant-based milk, ensuring your peanut butter is oil-stirred.
- Festive Pop: Stir in red and green holiday sprinkles or colored nonpareils for seasonal flair.
Storage & Reheating
Store this creamy peanut butter fudge in an airtight container in the refrigerator for up to two weeks—ideal for planning ahead or gifting. For longer storage, freeze individual squares on a baking sheet before transferring them to a freezer-safe bag; they’ll keep for up to three months. Thaw in the fridge for 30 minutes before serving, and let them sit at room temperature for 5 minutes if you prefer a softer bite. No reheating required!
FAQs
Q: Can I use natural peanut butter?
A: Yes—natural peanut butter works wonderfully; just stir it well before using to reincorporate any separated oil. Expect a slightly softer fudge, but the flavor will be fantastic.
Q: Why is my fudge grainy?
A: Graininess usually comes from adding powdered sugar too quickly or not sifting it; always sift and add gradually, mixing thoroughly to achieve a silky consistency.
Q: Can I omit the butter?
A: Butter adds richness and helps the fudge set; replacing it with coconut oil may yield a firmer texture but will alter the classic mouthfeel and flavor.
Q: How do I get perfect square cuts?
A: Use a sharp chef’s knife dipped in hot water and wiped dry between cuts—this simple trick gives you clean lines without crumbling.
Q: Can I add mix-ins like chocolate chips?
A: Absolutely—stir in up to 1 cup of mini chocolate chips, M&M’s, or chopped nuts right before pressing the fudge for a fun surprise in every bite.
Q: What pan size is best?
A: An 8×8-inch pan yields 36 smaller squares; switch to a 6×6-inch pan if you want 16 thicker, more indulgent pieces.
Q: Is this recipe keto-friendly?
A: Traditional powdered sugar isn’t keto, but you can substitute a granular sweetener blend designed for baking—adjust to taste and chill until firm.
Q: Can I double the recipe?
A: Yes, just double the ingredients and use a 9×13-inch pan; you’ll need 2–3 hours of chill time for larger volume.
Conclusion
This Easiest Peanut Butter Fudge is a creamy, no bake delight that’s perfect for busy bakers or anyone craving a quick, sweet treat. I love how effortlessly it comes together with just four basic ingredients, yet tastes indulgent enough for special occasions. Give it a try this holiday season, leave your feedback below, and be sure to explore my other simple dessert recipes like chocolate fudge and peanut butter blossoms!
Easiest Peanut Butter Fudge
Ingredients
- 2 cups creamy peanut butter natural or store-bought
- 1 cup unsalted butter 2 sticks, softened
- 4 cups powdered sugar sifted for lump-free results
- 1 teaspoon vanilla extract
- Pinch of salt
- ½ cup milk optional, for extra smooth consistency
Instructions
- Line an 8×8-inch baking pan with parchment paper, leaving a 1-inch overhang for easy fudge removal. Secure the paper with a dab of butter in each corner so it stays flat while you press in the mixture.
- In a medium saucepan over low heat, melt the softened butter slowly, stirring constantly to prevent scorching and ensure an even melt. Keep the heat low—overheating can cause the dairy to separate and affect texture.
- Stir in the creamy peanut butter until fully incorporated and the mixture is silky smooth, scraping down the sides of the pan to avoid clumps. If you notice any thicker bits, return it to heat for 30 seconds and stir again until completely uniform.
- Remove the pan from heat, then whisk in vanilla extract and a pinch of salt to brighten the flavors. Taste a tiny bit of the mixture; the right balance of vanilla and salt will make your fudge unforgettable.
- Gradually add sifted powdered sugar, one cup at a time, mixing vigorously after each addition until the dough thickens and becomes pliable. If stirring by hand feels tough, switch to a stand mixer fitted with a paddle attachment for an effortless blend.
- If the mixture appears too dry or cracks when pressed, add milk one tablespoon at a time until it’s smooth yet firm enough to hold its shape. Be cautious—too much milk can prevent proper setting, so add it sparingly.
- Transfer the fudge mixture to your prepared pan and press it down firmly using a flat spatula or the bottom of a glass wrapped in plastic wrap. Press until the surface is flat and edges are squared off, creating a professional look.
- Refrigerate for at least 1 hour, or up to 4 hours for a firmer texture; the surface should turn matte and feel set to the touch when ready. For a quicker option, place it in the freezer for 30 to 45 minutes, just watch closely to avoid freezing solid.
- Lift the fudge slab from the pan using the parchment overhang and place it on a cutting board. Cut into 36 even squares with a sharp knife dipped in hot water and wiped dry between cuts to ensure clean edges without crumbling.
Notes
Nutrition