Some days, I swear the kitchen is my happy place—and on rainy Sunday mornings, it’s practically my sanctuary. There’s just something about pouring a cup of strong coffee, sliding on my favorite apron (the one with the polite little stains), and whipping up a dessert that’s equal parts chocolatey and peanut buttery. My friends call it my “therapy cake” because slicing into those swirls always feels like a big, warm hug.
The first time I tried layering creamy peanut butter into a tender chocolate bundt, I practically did a little happy dance right in front of the oven door. This isn’t your grandma’s plain chocolate cake—it’s a cozy mash-up of two classics, and every slice is packed with those craveable peanut butter ribbons. I’ve served it to my book club, hauled it into potlucks, and yes, even my notoriously picky nephew has leaned in for seconds (and maybe thirds!).

Why You’ll Love This Recipe
- Peanut butter ribbons in every bite—hello, salty-sweet magic.
- Moist, tender crumb thanks to a dollop of sour cream (or Greek yogurt).
- No fancy gadgets—just your trusty bundt pan (yes, really!).
- All baked up in about an hour, including prep time.
- Perfectly balanced: rich chocolate meets creamy peanut butter.
- Sturdy enough to slice for brunch, fancy enough for a celebration.
- A thoughtful homemade gift—just pop it in a pretty box and go!
- Totally adaptable: go nuts (pun intended) with mix-ins or glazes.
Ingredient Notes
- Flour: I stick with all-purpose, but pastry flour is fun if you’re feeling fancy—it gives a super-tender crumb.
- Cocoa powder: Aim for unsweetened, medium or Dutch-processed. Valrhona is dreamy if you have it, but your go-to brand works just fine!
- Peanut butter: Creamy Jif or Peter Pan keeps the swirl smooth. If you grab natural peanut butter, just give it a good stir so the oils don’t float on top.
- Sour cream (or Greek yogurt): This little bit of tang and moisture is the secret to a cake that stays soft for days.
- Milk: Whole milk’s the standard, but 2% or even half-and-half will make it extra rich.
- Butter: Melt it and let it cool slightly so it doesn’t cook your eggs—nobody likes scrambled egg cake (been there, done that!).
- Vanilla: Pure extract is worth it for that warm bakery vibe.
- Eggs: Room temperature helps everything blend smoothly—just set them out 30 minutes before you start.
Directions
Ready to get your hands (and your taste buds) happy? Here’s the play-by-play. Don’t skip the swirl—trust me, that’s the best part!
- Preheat & Prep: Heat your oven to 350°F (175°C). Generously grease a 10-cup bundt pan with butter or nonstick spray, then dust with cocoa powder. This helps the cake pop right out (no broken edges—hallelujah!).
- Dry Mix: In a large bowl, whisk together 2 cups all-purpose flour, ¾ cup unsweetened cocoa powder, 1½ tsp baking powder, ½ tsp baking soda, and ¼ tsp fine salt. Sifting won’t hurt—it keeps everything extra light.
- Wet Mix: In another bowl, whisk 1 cup granulated sugar, ½ cup packed light brown sugar, and 3 room-temp eggs until pale and a bit fluffy (about 2 minutes by hand—bonus arm workout!). Stir in 1 cup milk, ½ cup sour cream or Greek yogurt, ½ cup melted & cooled butter, and 1 tsp vanilla extract until silky smooth.
- Combine: Pour the wet ingredients into the dry, then gently fold with a spatula. Mix just until you see no streaks of flour—overmixing equals a denser cake, and we’re all about light, tender crumbs here.
- First Layer: Spoon about two-thirds of the chocolate batter into your prepared pan. Smooth it out so it’s level (I know, I know—this sounds fussy, but it really helps the swirl look its best).
- Peanut Butter Swirl: Drop generous dollops of creamy peanut butter (about ½ cup total) all over the chocolate layer. With a butter knife or skewer, swirl gently—go slow and swirl lightly so you get distinct ribbons (don’t overdo it or you’ll blend back to plain chocolate).
- Top It Off: Pour the remaining batter over your swirled miracle. Give the pan a gentle tap on the counter to coax out air bubbles.
- Bake: Slide it into the oven for 45–50 minutes. You want a toothpick to come out with moist crumbs, not raw batter. If the top is browning too fast, tent a piece of foil over it after the first 30 minutes.
- Cool & Flip: Let the cake rest in the pan for 10 minutes (this little pause prevents a million little cake cracks). Then invert onto a wire rack to cool completely.
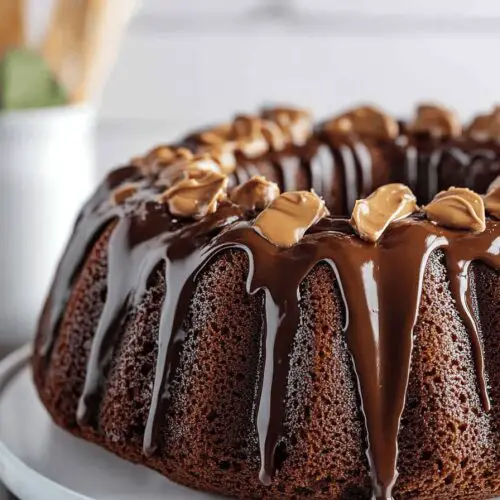
- Garnish & Serve: If you’re feeling fancy, sprinkle flaky sea salt or chopped peanuts on top, or dust with powdered sugar. A drizzle of melted chocolate never hurt anyone, either.
Variations & Flavor Twists
Feeling adventurous? Here are a few easy ways to jazz up this cozy bundt:
- Peanut Butter Cup Surprise: Fold in ½ cup chopped peanut butter cups into the batter for extra pockets of gooey chocolate and PB joy.
- Espresso Mocha: Stir 1 tbsp instant espresso powder into the dry mix for a grown-up coffee kick.
- Nutty Crunch: Mix ¼ cup chopped roasted peanuts into the batter, or sprinkle ’em on top for a little crunch contrast.
- Caramel Drizzle: Warm store-bought or homemade caramel sauce and drizzle over each slice—fleur de sel optional, but highly recommended.
- Orange Zing: Add 1 tsp fresh orange zest to the peanut butter dollops for a bright, citrusy pop.
- Vegan Swap: Go flax eggs, dairy-free yogurt, nondairy milk, and coconut oil instead of butter. Bake the same way—still comforting, still delicious.
Storage & Reheating Tips
Got leftovers? Lucky you—you’ve earned more :). Here’s how to keep that cake vibe alive:
- Room Temp: Store slices in an airtight container or wrapped in plastic wrap for up to 3 days. Let ’em rest a bit before serving so they’re not too squishy.
- Refrigerator: Keep it chilled up to 5 days. Bring slices back to room temp for best texture—nobody likes eating cake straight out of the fridge!
- Freezer: Double-wrap individual slices in plastic, then foil. Freeze up to 2 months. Thaw overnight in the fridge or let sit on the counter for an hour.
- Warm It Up: Microwave for 10–15 seconds for that just-baked feel, or pop in a 300°F oven for 5 minutes—hello, melty peanut butter!
Before You Go…
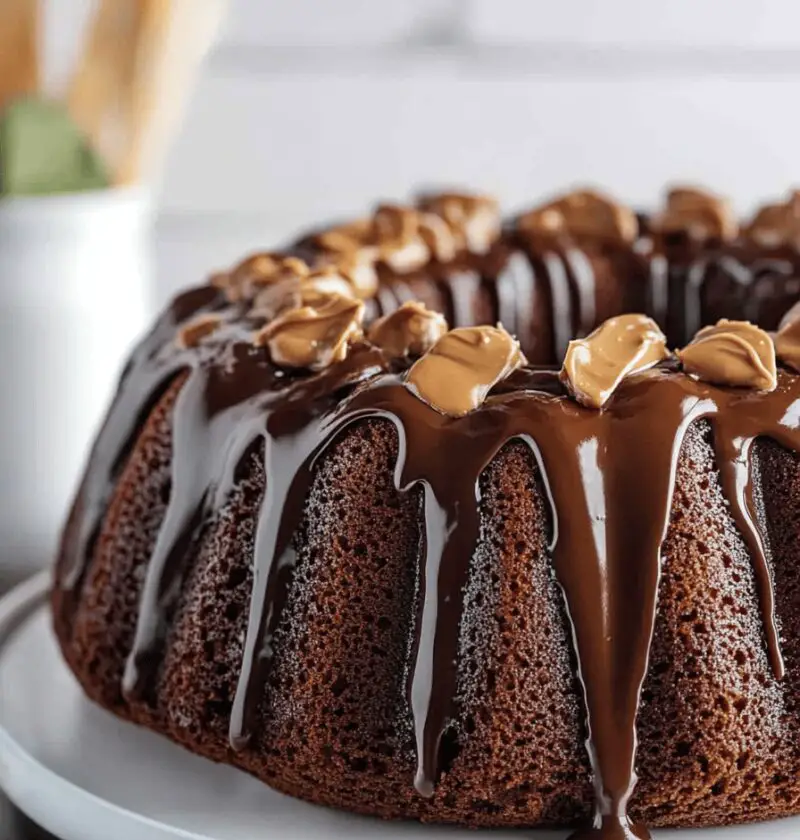
There you have it—a Chocolate Peanut Butter Bundt Cake that’s equal parts cozy and craveable. Whether you’re spoiling your family for brunch, bringing a homemade gift to a friend, or just treating yourself (because, why not?), this recipe’s got your back. Give it a whirl, leave me a comment below if you have questions or quirky tweaks, and don’t be shy about posting a pic of your swirl game. Happy baking, friends!
Chocolate Peanut Butter Bundt Cake
Ingredients
- 2 cups all-purpose flour or pastry flour for extra tenderness
- 3/4 cup unsweetened cocoa powder I like Valrhona for depth
- 1 1/2 teaspoons baking powder
- 1/2 teaspoon baking soda
- 1/4 teaspoon fine salt
- 1 cup granulated sugar
- 1/2 cup light brown sugar packed
- 3 large eggs room temperature (bring them out 30 minutes before baking)
- 1 cup whole milk 2% works too; for richness try half-and-half
- 1/2 cup sour cream or Greek yogurt (for extra moisture)
- 1/2 cup unsalted butter melted and slightly cooled
- 1 teaspoon pure vanilla extract
- 1/2 cup creamy peanut butter I use Jif or Peter Pan for consistency
Instructions
- Preheat your oven to 350°F (175°C) and generously grease a 10-cup bundt pan (I use Baker’s Joy spray or coat with butter and cocoa).
- In a large bowl, whisk together flour, cocoa powder, baking powder, baking soda, and salt until evenly blended.
- In a separate bowl, whisk sugars and eggs until pale and slightly thick. Add milk, sour cream, melted butter, and vanilla; whisk until smooth.
- Pour wet ingredients into dry and stir gently with a spatula, mixing just until you see no streaks of flour.
- Spoon about two-thirds of the chocolate batter into the bundt pan. Drop dollops of peanut butter on top, then swirl gently with a butter knife or skewer.
- Bake for 45-50 minutes, until a toothpick inserted near the center comes out with moist crumbs. Let the cake rest in the pan for 10 minutes, then invert onto a wire rack to cool fully.