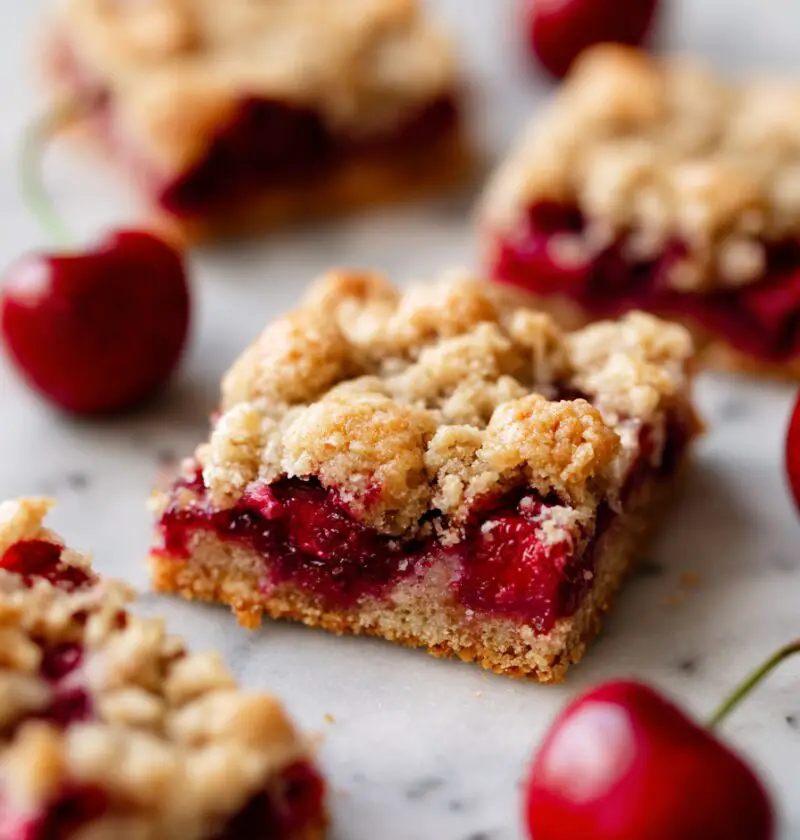
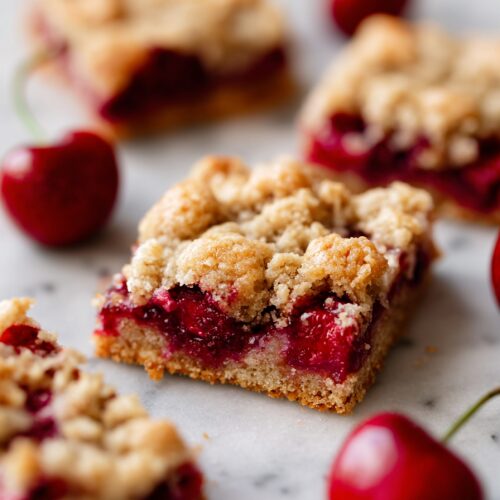
Cherry Pie Bars Recipe
If you love the flavor of classic cherry pie but want something easier to serve to a crowd, this Cherry Pie Bars Recipe is your new go‑to: buttery crust bars, sweet-tart cherry pie filling, and a light glaze on top that makes them feel bakery special with very little fuss.
These easy cherry bars slice up beautifully for potlucks, holidays, or “just because” afternoons, and they taste like you worked a lot harder than you really did.
Full Recipe Introduction
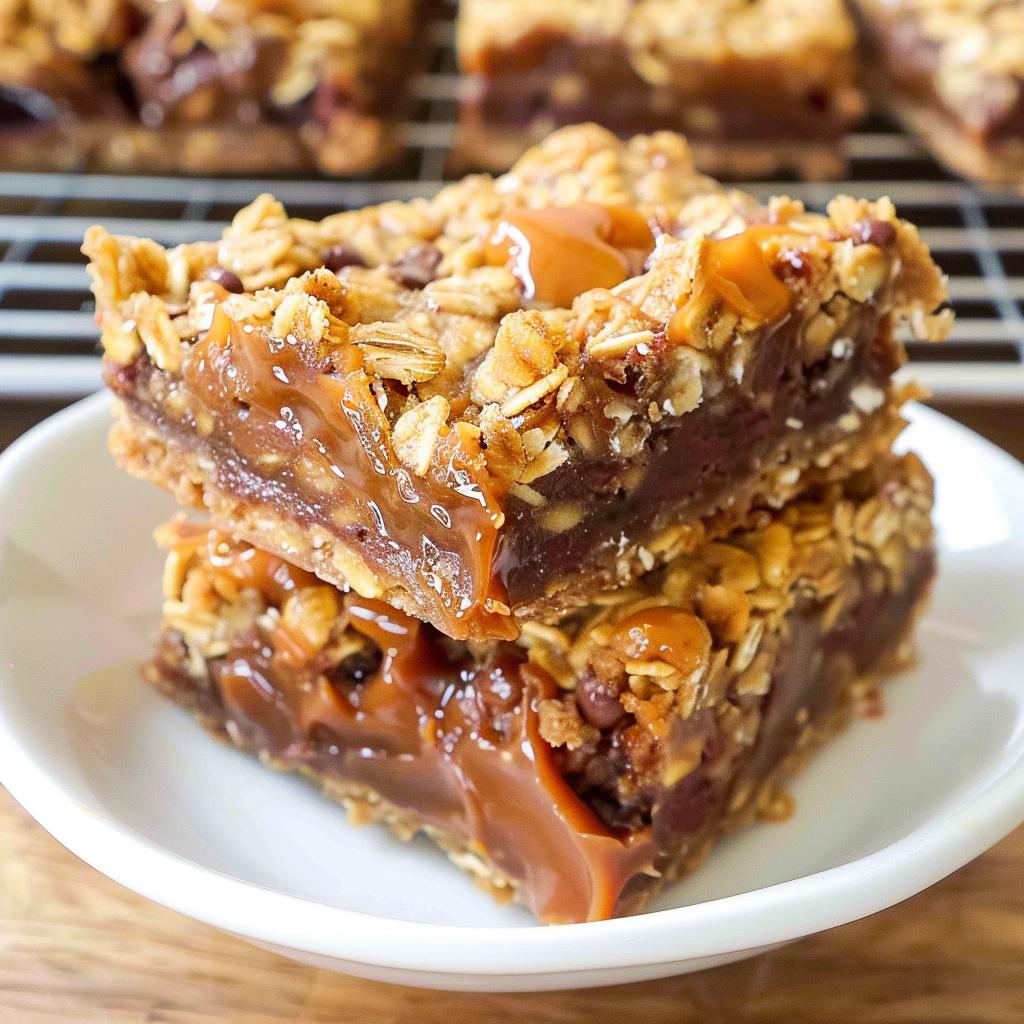
These cherry dessert bars have all the charm of a homemade cherry pie but in a simple, slice-and-serve format. Think soft, buttery cookie crust on the bottom, a generous layer of cherry pie filling in the middle, and a crumbly, golden topping that bakes up like cherry crumb bars.
I started making these cherry bar squares when my kids were in elementary school and I needed something that could survive the PTA table—no forks, no plates, no problem. They’ve since become my go-to potluck dessert bars for church dinners, game nights, and 4th of July cookouts.
What makes this Cherry Pie Bars Recipe special is the balance: the crust is rich but not heavy, the filling is bright and fruity, and the sweetness is just right. You can use canned cherry pie filling for convenience, or dress it up with a squeeze of lemon and a pinch of almond extract for more homemade cherry bars flavor.
They’re also much easier to portion and pack than a traditional pie. If you’ve ever tried cutting a still-warm cherry pastry into neat slices, you know that can be… an adventure. These cherry pastry bars, on the other hand, chill, slice, and stack like champs.
And while I won’t call them health food, using real fruit, controlling the sugar, and skipping heavy frostings helps keep them in that “reasonable treat” category. A small square with a cup of coffee on a Sunday afternoon? That’s my happy place.
Why You’ll Love This Cherry Pie Bars Recipe
- Easy for beginners – If you can stir and press dough into a pan, you can make these easy dessert bars.
- Perfect for crowds – A 9×13 pan makes 20–24 cherry cookie bars, so they’re ideal for potlucks, bake sales, and family gatherings.
- Uses pantry staples – Butter, sugar, flour, eggs, and canned cherry pie filling—nothing fancy or hard to find.
- Flexible and forgiving – Swap in other fruit fillings for a simple fruit bar recipe that works year-round.
- Buttery, soft texture – The crust is like a cross between a sugar cookie and shortbread—tender, rich, and not crumbly-dry.
- Great make-ahead dessert – These cherry bar squares actually taste better the next day once the flavors mingle.
- Easy to transport – Bake, cool, slice, and carry right in the same pan—hello, stress-free party dessert.
- Crowd-pleasing flavor – Classic cherry, buttery crust, and vanilla glaze; it’s familiar, nostalgic, and hard to resist.
Ingredients
Here’s everything you’ll need for these homemade cherry bars. I’m including a few notes so you can adjust to what you have on hand.
For the Buttery Crust & Crumb Topping
- 1 cup (2 sticks / 226 g) unsalted butter, softened
- 1 ½ cups (300 g) granulated sugar
- 3 large eggs, room temperature
- 1 ½ teaspoons vanilla extract (use pure vanilla if you can)
- ½ teaspoon almond extract (optional, but amazing with cherry)
- 3 cups (360 g) all-purpose flour, spooned and leveled
- ½ teaspoon fine sea salt
- 1 teaspoon baking powder
For the Cherry Filling
- 2 cans (21 oz each) cherry pie filling
- Tip: If you prefer less filling, use 1 ½ cans; for extra juicy cherry dessert bars, use the full two.
- 1 teaspoon fresh lemon juice (brightens the flavor)
- ¼ teaspoon almond extract (optional, but highly recommended)
For the Vanilla Glaze (Optional but lovely)
- 1 cup (120 g) powdered sugar, sifted
- 1–2 tablespoons milk or half-and-half (add gradually, you may not need all of it)
- ½ teaspoon vanilla extract
- Pinch of salt (balances the sweetness)
Use whole dairy for the glaze if you can—it gives a richer look and flavor.

Directions
-
Preheat and prepare the pan
Preheat your oven to 350°F (175°C). Line a 9×13-inch baking pan with parchment paper, letting some hang over the sides for easy lifting later, and lightly grease it. This helps the bars release cleanly and keeps the buttery crust from sticking. -
Cream the butter and sugar
In a large mixing bowl (a stand mixer works great, but a hand mixer is fine), beat the softened butter and granulated sugar together on medium speed for 2–3 minutes, until light and fluffy. You’re looking for a pale color and a slightly whipped texture. -
Add eggs and flavorings
Add the eggs one at a time, beating well after each addition and scraping down the sides of the bowl. Mix in the vanilla and almond extracts until smooth. The mixture should look glossy and a little thick. -
Whisk the dry ingredients
In a separate bowl, whisk together the flour, salt, and baking powder. This keeps the leavening and salt from clumping in one spot and helps the crust bake evenly. -
Combine into a soft dough
Add the dry ingredients to the wet ingredients in two additions, mixing on low speed just until combined. The dough will be thick but spreadable—somewhere between cookie dough and cake batter. Don’t overmix; once no streaks of flour remain, you’re good. -
Press the bottom crust
Scoop about 2/3 of the dough into your prepared pan. Use a spatula or your fingers (lightly dampen them if the dough sticks) to press it into an even layer across the bottom. This will be your buttery base for the cherry pastry bars. -
Stir together the cherry filling
In a medium bowl, combine the cherry pie filling, lemon juice, and almond extract. Give it a gentle stir so the flavors blend but the cherries stay mostly whole. Taste a small spoonful; if you like it a little brighter, add another squeeze of lemon. -
Layer the cherry filling
Spread the cherry filling evenly over the bottom crust, making sure to reach the edges. This helps every cherry crumb bar have a good ratio of fruit to crust. -
Add the crumb topping
With the remaining 1/3 of the dough, drop small spoonfuls all over the top of the cherry layer. Don’t worry about covering every spot; you want some cherries peeking through. Those little exposed patches get beautifully bubbly and glossy in the oven. -
Bake until golden and set
Bake for 35–40 minutes, or until the top is lightly golden and the edges are set. The center should no longer look wet, though it may still jiggle slightly; it will firm up as it cools. If your oven runs hot, start checking at 30 minutes. -
Cool completely
Place the pan on a wire rack and cool completely—at least 1–2 hours. This step is key; if you cut too early, the cherry filling may ooze and the squares won’t hold their shape as well. -
Make the glaze
Once the bars are cool, whisk together the powdered sugar, 1 tablespoon of milk, vanilla, and a pinch of salt. If it’s too thick, add more milk a teaspoon at a time until the glaze is smooth and pourable but not watery. -
Glaze and slice
Drizzle the glaze over the cooled cherry cookie bars in a zig-zag pattern. Let it set for about 15 minutes, then lift the bars out using the parchment and slice into 20–24 squares. For extra neat slices, wipe your knife between cuts.
Servings & Timing
- Yield: 20–24 cherry pie bars, depending on how large you slice them
- Prep Time: 20 minutes
- Bake Time: 35–40 minutes
- Cooling Time: 1–2 hours
- Total Time: About 2–3 hours, mostly hands-off cooling
Honestly, most of that time is just waiting for them to cool while your kitchen smells like a bakery.
Variations
You know what? Once you master this base recipe, it becomes your little dessert bar playground.
- Mixed Berry Bars – Use a mixed berry pie filling for a colorful fruit bar recipe that’s perfect for summer gatherings.
- Gluten-Free Cherry Bars – Use a good 1:1 gluten-free flour blend; make sure it includes xanthan gum for structure.
- Almond Crunch Cherry Bars – Sprinkle ½ cup sliced almonds over the top before baking for extra crunch and a stronger cherry-almond vibe.
- Chocolate Drizzle Cherry Bars – Skip the vanilla glaze and drizzle melted dark chocolate over the cooled bars instead.
- Lemon Cherry Bars – Add 1 tablespoon lemon zest to the crust and more lemon juice to the filling for bright, citrusy cherry dessert bars.
- Cherry Cheesecake Bars – Spread a thin layer of sweetened cream cheese (8 oz cream cheese + ¼ cup sugar) over the crust before adding the cherry filling.
Storage & Reheating
These easy cherry bars store very well, which is one reason I lean on them for holidays and busy weekends.
- Room temperature: Keep tightly covered at room temperature for up to 2 days. This works best in cooler kitchens.
- Refrigerator: Store in an airtight container in the fridge for 4–5 days. The crust firms up a bit but stays tender.
- Freezer: Freeze sliced bars on a baking sheet until solid, then transfer to a freezer-safe container or bag. They keep well for up to 2 months.
To serve from frozen, thaw in the fridge overnight or on the counter for about 30–45 minutes. If you like them slightly warm, you can microwave individual bars for about 10–15 seconds—just enough to soften the cherry pie filling a bit, not melt the glaze.
For make-ahead events, I bake these cherry pastry bars the day before, let them cool completely, glaze, then store them (covered) in the fridge. I slice them the next day and bring them to room temp before serving.
Notes
- Soft butter matters: If your butter is too cold, it won’t cream properly and the crust can turn out dense. You want it soft but not greasy—about 30 minutes on the counter for most kitchens.
- Don’t skip the lemon: Even a teaspoon of lemon juice wakes up canned cherry pie filling. It takes your cherry pie bars from “store-bought-ish” to “homemade cherry bars” very quickly.
- Parchment is your friend: Lining the pan makes such a difference. I learned the hard way when I tried to wrestle bars out of an unlined glass pan at 11 p.m. before a bake sale. Never again.
- Cool completely for clean cuts: I know it’s hard to wait, but this is how you get those pretty, bakery-style squares. If you’re impatient (like me), chill the pan in the fridge for 30 minutes before slicing.
- Flavor improves overnight: The crust absorbs a little moisture from the cherry filling, and the flavors meld together. These cherry crumb bars are actually at their best on day two.
If you enjoy this recipe, you might also like trying a similar method with blueberry or apple filling for other fruit bar recipes. I often rotate them through the seasons—cherry for Valentine’s Day and Christmas, blackberry in late summer, apple cinnamon in the fall.
FAQs
Can I use homemade cherry pie filling instead of canned?
Yes, absolutely. Use about 4–5 cups of homemade cherry pie filling. Just make sure it’s thick enough so the bars aren’t runny—if it’s very juicy, cook it down a bit longer.
Can I cut the sugar in the crust?
You can reduce the granulated sugar in the crust to 1 ¼ cups without hurting the texture too much. Any less and the bars may turn out a bit dry and less tender.
What kind of pan works best for these cherry bar squares?
A light-colored metal 9×13 pan gives the most even bake. Dark metal pans can brown the edges faster, so keep an eye on them and check a few minutes early. Glass works, but you may need to add 3–5 minutes to the baking time.
How do I keep the crust from getting soggy?
Make sure the bars bake until the edges are set and the top is lightly golden. Also, don’t cover the pan tightly while it’s still warm—let excess steam escape before sealing.
Can I double this Cherry Pie Bars Recipe?
Yes. You can double the recipe and bake it in two 9×13 pans, or use a large rimmed sheet pan. If using a sheet pan, start checking earlier, around 25–30 minutes, as the bars may be thinner.
Do I have to use the glaze?
No, these cherry cookie bars are still delicious without it. The glaze just adds a little extra sweetness and that pretty “bakery case” look.
Can I use another fruit filling?
Definitely. This recipe works with blueberry, strawberry, apple, or mixed berry pie filling. It’s a very flexible base for all kinds of easy dessert bars.
Why did my bars sink a little in the middle?
A slight dip can happen if the bars were a bit underbaked in the center or if the pan cooled too quickly. The flavor is still great; next time, bake until the center looks set and give them a few more minutes in the oven.
Conclusion
These Cherry Pie Bars are everything I love in a dessert: simple to make, easy to share, and full of cozy, nostalgic flavor. Between the buttery crust, the bright cherry filling, and that sweet little glaze, it’s the kind of dessert bar recipe people ask for again and again.
Give this Cherry Pie Bars Recipe a try the next time you need a crowd-pleasing dessert—then come back and tell me how it went, what twists you tried, and whether they made it to the party before everyone “sampled” a few. And if you enjoy bar desserts, you might also like trying my blueberry crumble bars or lemon cookie bars next.
Cherry Pie Bars
Ingredients
- 1 cup unsalted butter softened; 2 sticks / 226 g
- 1 1/2 cups granulated sugar 300 g
- 3 large eggs room temperature
- 1 1/2 teaspoons vanilla extract use pure vanilla if possible
- 1/2 teaspoon almond extract optional, but delicious with cherry
- 3 cups all-purpose flour 360 g, spooned and leveled
- 1/2 teaspoon fine sea salt
- 1 teaspoon baking powder
- 2 cans cherry pie filling 21 oz (595 g) each; use 1 1/2 cans for less filling if desired
- 1 teaspoon fresh lemon juice brightens the flavor
- 1/4 teaspoon almond extract optional, highly recommended for the filling
- 1 cup powdered sugar 120 g, sifted
- 1-2 tablespoons milk or half-and-half add gradually until glaze consistency is reached
- 1/2 teaspoon vanilla extract for the glaze
- pinch salt for the glaze; balances sweetness
Instructions
- Preheat the oven to 350°F (175°C). Line a 9x13-inch baking pan with parchment paper, leaving overhang on the long sides for easy lifting, and lightly grease the parchment and sides of the pan.
- In a large mixing bowl, beat the softened butter and granulated sugar together with a stand mixer or hand mixer on medium speed for 2–3 minutes, until light and fluffy and slightly pale in color.1 cup unsalted butter, 1 1/2 cups granulated sugar
- Add the eggs one at a time, beating well after each addition and scraping down the bowl as needed. Mix in 1 1/2 teaspoons vanilla extract and 1/2 teaspoon almond extract (if using) until the mixture looks smooth and glossy.3 large eggs, 1 1/2 teaspoons vanilla extract, 1/2 teaspoon almond extract
- In a separate bowl, whisk together the flour, fine sea salt, and baking powder until well combined and no clumps remain.3 cups all-purpose flour, 1/2 teaspoon fine sea salt, 1 teaspoon baking powder
- Add the dry ingredients to the wet mixture in two additions, mixing on low speed just until combined after each addition. The dough will be thick but spreadable, similar to a soft cookie dough. Avoid overmixing once no streaks of flour remain.
- Transfer about two-thirds of the dough into the prepared pan. Use a spatula or lightly dampened fingers to press it evenly over the bottom of the pan, forming a level crust.
- In a medium bowl, combine the cherry pie filling, lemon juice, and 1/4 teaspoon almond extract (if using). Stir gently to blend without breaking up the cherries too much. Taste and add a bit more lemon juice if you prefer a brighter flavor.2 cans cherry pie filling, 1 teaspoon fresh lemon juice, 1/4 teaspoon almond extract
- Spread the cherry filling evenly over the pressed crust, all the way to the edges, so each bar gets a good amount of fruit.
- Using the remaining one-third of the dough, drop small spoonfuls randomly over the cherry layer. Do not cover the cherries completely—leave some spots exposed so the filling can bubble through as it bakes.
- Bake in the preheated oven for 35–40 minutes, until the top is lightly golden and the edges are set. The center should no longer look wet, though it may still jiggle slightly; it will firm up as it cools. If your oven runs hot, start checking around 30 minutes.
- Transfer the pan to a wire rack and let the bars cool completely in the pan, at least 1–2 hours. This helps the filling set and allows for clean slices.
- Once the bars are cool, whisk together the powdered sugar, 1 tablespoon of milk or half-and-half, vanilla extract, and a pinch of salt in a small bowl until smooth. If the glaze is too thick, add more milk a teaspoon at a time until it is pourable but not runny.1 cup powdered sugar, 1-2 tablespoons milk or half-and-half, 1/2 teaspoon vanilla extract, pinch salt
- Drizzle the glaze over the cooled bars in a zig-zag or crosshatch pattern. Let the glaze set for about 15 minutes, then use the parchment overhang to lift the slab out of the pan. Slice into 20–24 squares, wiping the knife between cuts for the neatest edges.