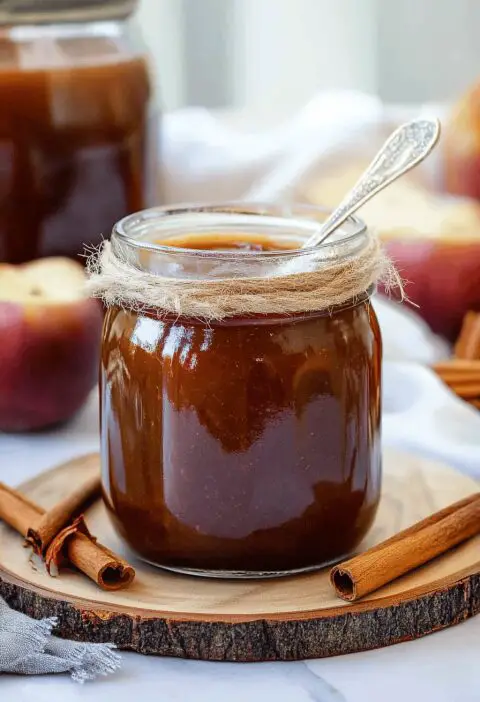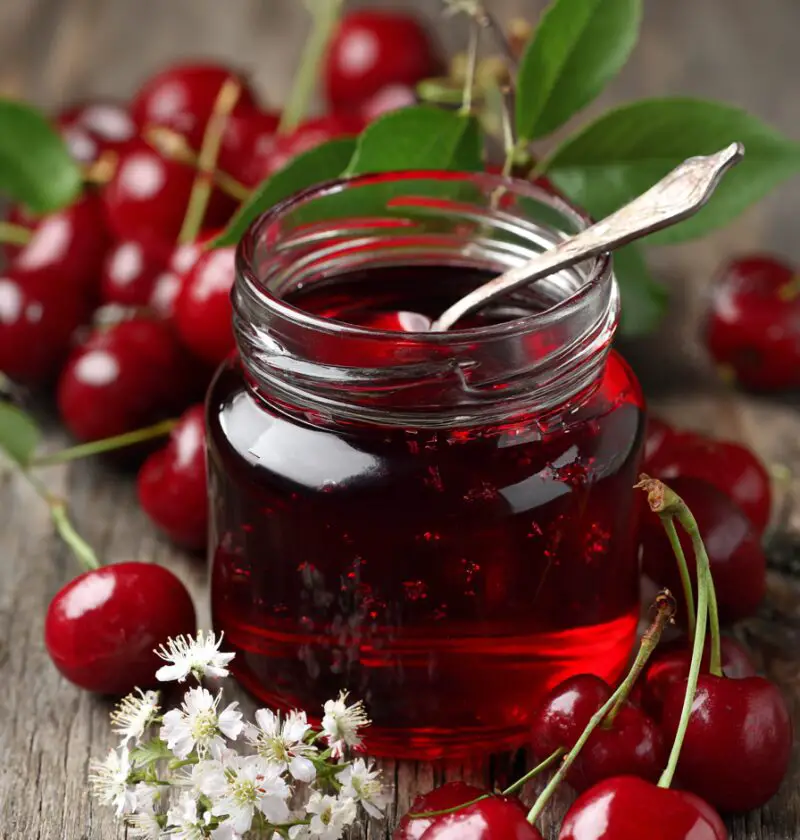
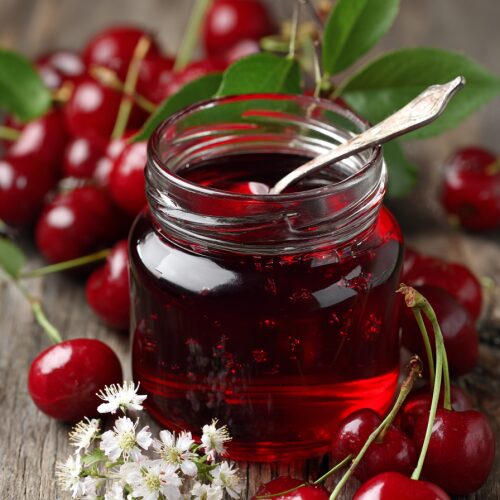
Cherry Jelly Recipe
A glossy, ruby-red Cherry Jelly Recipe that tastes like summer on a spoon—perfect for toast, desserts, or gifting, and surprisingly simple to make at home.
When cherries start piling up at the farmers’ market or go on sale at the grocery store, this homemade cherry jelly recipe is one of the first things I make. It’s a classic fruit jelly recipe: smooth, clear, and beautifully spreadable, with that bright cherry flavor we all grew up loving. Whether you’re canning for the pantry, making a cherry jelly spread for brunch, or looking for a traditional cherry jelly from scratch to give as gifts, this easy cherry jelly fits the bill.
I’m 50 now, my kids are grown, but this cherry preserves recipe still takes me right back to summers in my mom’s kitchen—sticky fingers, stained cutting boards, and a big pot bubbling away on the stove. The good news? You don’t need fancy equipment or a homesteader’s pantry to pull this off. Just fresh cherries, sugar, a little patience, and a good playlist.
Why You’ll Love This Cherry Jelly Recipe
Let me explain why this one has stayed in my recipe box for decades:
- Big cherry flavor, smooth jelly texture – All the rich cherry taste you love, none of the skins or chunks.
- Perfect for beginners – If you’re new to cherry jelly canning, these steps guide you through without overwhelm.
- Flexible: use sweet or tart cherries – Make sweet cherry jelly or tart cherry jelly depending on what you find (or mix them—I often do!).
- Small-batch friendly – You can easily halve or double the recipe for your family size or pantry space.
- Great for toast, biscuits, and desserts – Ideal cherry jelly for toast, swirled into yogurt, or drizzled over cheesecake.
- Long shelf life – Properly processed jars keep for months, so you get cherry flavor long after summer.
- No special tools required – A big pot, a thermometer (helpful, but optional), and basic kitchen gear are plenty.
- Customizable sweetness – You control how sweet or tangy your homemade cherry jelly turns out.
- Gift-worthy – Tuck a jar into holiday baskets or hostess gifts; everyone loves a jar of something homemade.
Ingredients
For this traditional cherry jelly recipe, you’ll need just a handful of pantry staples. This version uses added pectin (for reliability), and I’ll share a cherry jelly without pectin variation below.
- 4 pounds (about 1.8 kg) fresh cherries, stemmed (sweet, tart, or a mix; about 10–12 cups whole)
- 4 cups (960 ml) water
- 5 cups (1 kg) granulated sugar (use regular white sugar; it helps the jelly set and stay clear)
- 1/4 cup (60 ml) bottled lemon juice (for acidity and brightness; bottled ensures consistent acidity)
- 1 box (1.75 oz / 49 g) powdered fruit pectin (classic pectin such as Sure-Jell or Ball)
A few quick ingredient tips:
- Cherries: Use cherries that are ripe, fragrant, and not bruised. They don’t have to be perfect-looking, but avoid any with mold or bad spots.
- Sweet vs. tart: Sweet cherries (like Bing) give a milder, dessert-like jelly; sour or tart cherries give a bold, old-fashioned flavor. A 50/50 mix is my personal favorite.
- Lemon juice: Don’t skip this. It helps the jelly set and keeps the flavor bright. Bottled is recommended for canning, but fresh is fine if you’re refrigerating instead of shelf-storing.
- Pectin: Make sure you’re using powdered pectin for this exact method; liquid pectin behaves a little differently.

Directions
You know what? Jelly sounds fussy, but once you’ve done it once, it feels more like a relaxing little kitchen project. Here’s the step-by-step:
-
Prep the cherries
Wash the cherries thoroughly under cool running water and remove the stems. You don’t need to pit them for this jelly recipe, because we’re extracting juice, not making jam—but if you have a cherry pitter and feel like pitting, that’s fine too. -
Cook the cherries with water
Add the cherries and water to a large, heavy-bottomed pot. Bring to a boil over medium-high heat, then reduce to a simmer. Cook for about 20–25 minutes, gently crushing the cherries with a potato masher as they soften. You want the cherries very soft and the juice richly colored. -
Strain the juice
Set a large bowl under a fine-mesh strainer lined with a double layer of cheesecloth (or a jelly bag, if you have one). Carefully pour in the hot cherry mixture. Let it drain for at least 1–2 hours, or overnight in the fridge for a clearer jelly. Resist the urge to squeeze the cheesecloth too hard; pressing will cloud the jelly. A gentle squeeze at the end is fine. -
Measure the cherry juice
You’ll need 4 cups (960 ml) of cherry juice for this recipe. If you’re a little short, top off with a bit of water or unsweetened cherry juice. If you have extra, you can freeze it for later or make a small additional batch. -
Prepare jars and lids
While the juice drains, wash your jars, lids, and bands in hot, soapy water. Rinse well. Keep the jars hot (in a 200°F / 95°C oven or in simmering water) so they don’t crack when you add hot jelly. Have your canning pot or a deep stockpot with a rack ready, with simmering water. -
Combine juice, pectin, and lemon juice
Pour the 4 cups cherry juice into a large pot—use one bigger than you think you need because the jelly will foam and rise. Stir in the lemon juice and the powdered pectin. Whisk well to avoid lumps. -
Bring to a full rolling boil
Place the pot over high heat and bring the mixture to a full rolling boil, stirring constantly. A full rolling boil is a boil that doesn’t stop bubbling when you stir. This is where a lot of the magic happens, so don’t walk away. -
Add sugar and boil again
Once it’s at a full rolling boil, add all the sugar at once, stirring constantly until dissolved. Return to a full rolling boil and cook 1–2 minutes, stirring. Skim off any foam with a spoon. The jelly will look glossy and slightly thickened, but it will fully set as it cools. -
Check for gel (optional but helpful)
To test, place a small spoonful of hot jelly on a chilled plate. Let it sit for a minute, then push it gently with your finger. If it wrinkles slightly, it’s ready. If it’s still very liquid, boil another minute and test again. A candy thermometer can also help—around 220°F (104°C) at sea level is the typical gelling temperature. -
Fill the jars
Working quickly, ladle the hot cherry jelly into hot jars, leaving 1/4 inch (0.5 cm) headspace at the top. Wipe rims with a clean, damp cloth. Place lids on top and screw bands on just fingertip-tight (snug but not cranked down). -
Process in a boiling water bath
Place jars on the rack in your canning pot, making sure they’re covered by at least 1–2 inches of water. Bring to a full boil, then process for 10 minutes (adjusting for altitude as needed). This step makes your cherry jelly shelf-stable. -
Cool and check seals
Turn off the heat and let jars rest for 5 minutes. Carefully remove them with a jar lifter and place on a towel-lined counter. Don’t tilt or shake. Listen for the gentle “ping” as they seal—that’s the sound of satisfaction. After 12–24 hours, check seals: lids should be concave and not flex when pressed. -
Label and store
Label each jar with the date and “Cherry Jelly.” Store sealed jars in a cool, dark place. Any jars that didn’t seal should go straight into the fridge and be used first.
Servings & Timing
- Yield: About 6–7 half-pint (8 oz / 240 ml) jars
- Prep Time: 25–30 minutes (washing cherries, cooking, straining setup)
- Straining Time: 1–8 hours (mostly hands-off; overnight gives the clearest jelly)
- Cooking & Canning Time: 30–40 minutes
- Total Time: Around 2–9 hours depending on how long you let it strain (only about 1 to 1 1/2 hours of active work)
Variations
Here’s the thing: once you master this base cherry jelly recipe, you’ve got a whole flavor playground.
- Cherry Jelly Without Pectin: Use 4 cups cherry juice, 3–4 cups sugar, and simmer longer until it naturally thickens—expect a softer set but beautifully pure cherry flavor.
- Cherry Vanilla Jelly: Split 1 vanilla bean and simmer it in the juice before adding pectin, or stir in 1–2 teaspoons pure vanilla extract off the heat.
- Cherry-Lime Jelly: Swap half the lemon juice for fresh lime juice and add a little lime zest for a bright, almost cherry-limeade twist.
- Low-Sugar Cherry Jelly: Use a low- or no-sugar pectin and follow the package directions, adjusting sugar down to your taste.
- Cherry Jam and Jelly Duo: Reserve some cooked cherry pulp before straining and turn it into a small batch of cherry jam, so you get both jam and jelly from one pot.
- Spiced Cherry Jelly: Add a small cinnamon stick and 2–3 whole cloves while heating the juice; remove before adding pectin for a cozy, fall-inspired version.
Storage & Reheating
- Room temperature (shelf-stable): Properly processed and sealed jars keep for up to 12 months in a cool, dark place.
- Refrigerator: Once opened, store the jar in the fridge and use within 3–4 weeks for best flavor.
- Freezer (no-canning version): If you skip the boiling water bath, you can refrigerate the jelly for up to 3 weeks or freeze it (in freezer-safe containers with headspace) for up to 6 months.
- Reheating or softening: If your jelly is a bit firmer than you like, simply let it sit at room temperature for 10–15 minutes before serving, or warm a spoonful gently in the microwave for a few seconds.
- Make-ahead tips: Cherry season is short, but jelly isn’t—make a big batch in summer and you’re set for holiday brunches, quick desserts, and last-minute gifts all year.
Notes from My Kitchen
- On clarity vs. yield: If you hang the cherry mixture and let it drip slowly without squeezing, you’ll get the clearest, most traditional cherry jelly—but you might get a tiny bit less juice. I usually let it drip on its own, then give a gentle squeeze at the end.
- Foam control: A small pat of butter (about 1/2 teaspoon) stirred in during the final boil can help reduce foam. It’s optional, but handy if you want very clear jars.
- Sweetness balance: Taste the hot jelly carefully (just a tiny bit on a cooled spoon). If it feels too sweet, remember flavors mellow when cooled; tart cherries especially balance the sugar nicely.
- Altitude adjustments: If you’re above 1,000 feet, you’ll need to adjust processing times slightly—your local extension service or Ball Canning guides are a great reference.
- Use good tools, but don’t stress: A thermometer, jar lifter, and wide-mouth funnel make life easier, but you can still make excellent jelly with basic tools and a little caution.
- Serving ideas: This cherry jelly is gorgeous brushed over fresh fruit tarts, spooned over vanilla ice cream, or used as a glaze on pork or chicken—don’t limit it to breakfast.
FAQs
1. Can I make this cherry jelly recipe without pectin?
Yes; you’ll need to cook the cherry juice and sugar longer so the natural pectin can thicken it, and you’ll likely get a softer, more spoonable set.
2. Why didn’t my cherry jelly set properly?
Usually it’s from not boiling long enough after adding sugar, using less sugar than called for, or not measuring the juice accurately—give it a few days, as jelly sometimes finishes setting in the jar.
3. Can I use frozen cherries instead of fresh?
Absolutely; thaw them first, include any juices, and proceed as written—frozen cherries make a lovely off-season fresh cherry jelly.
4. Is this jelly very sweet?
It’s sweet but balanced, similar to classic store-bought jelly; if you prefer less sweetness, use a low-sugar pectin and reduce the sugar per the pectin package guidelines.
5. How do I fix jelly that’s too runny?
You can pour it back into a pot, add a bit more pectin dissolved in a small amount of juice or water, bring to a hard boil again, and reprocess in clean jars.
6. How do I know if my jars sealed correctly?
Once cool, the lids should be slightly concave and shouldn’t pop up and down when pressed; if a lid flexes, refrigerate that jar and use it first.
7. Can I double this recipe?
It’s safer and more reliable to make two separate batches; very large batches sometimes don’t set as well because they don’t heat evenly.
8. What’s the difference between cherry jam and cherry jelly?
Cherry jam contains the fruit pieces and skins, while cherry jelly is made from strained juice, so it’s perfectly smooth and clear.
Conclusion
This Cherry Jelly Recipe brings together everything I love about home cooking: simple ingredients, a little time, and a result that feels like a gift every time you open a jar. Whether you’re spreading it on warm toast, using it in a cherry jelly dessert, or tucking a jar into a gift basket, it’s a small way to keep summer on your table all year long.
If you make this homemade cherry jelly, I’d love to hear how it turned out—leave a comment, share your tweaks, or tell me if you went sweet, tart, or somewhere in between. And if you’re on a jelly kick now, try branching into other fruit jelly recipes too; once you start, that shelf of colorful jars becomes a little bit addictive in the best way.
Cherry Jelly
Ingredients
- 4 pounds fresh cherries stemmed; sweet, tart, or a mix (about 10–12 cups whole)
- 4 cups water
- 5 cups granulated sugar regular white sugar
- 1/4 cup bottled lemon juice
- 1 box powdered fruit pectin 1.75 oz / 49 g (e.g., Sure-Jell or Ball)
- Butter about 1/2 teaspoon, optional, to reduce foam
Instructions
- Wash the cherries thoroughly under cool running water and remove the stems. You do not need to pit them, since you will be extracting juice, not making jam.
- Add the cherries and 4 cups of water to a large, heavy-bottomed pot. Bring to a boil over medium-high heat, then reduce to a simmer. Cook for about 20–25 minutes, gently crushing the cherries with a potato masher as they soften, until very soft and the juice is richly colored.
- Set a large bowl under a fine-mesh strainer lined with a double layer of cheesecloth (or a jelly bag). Carefully pour in the hot cherry mixture. Let it drain for at least 1–2 hours, or overnight in the refrigerator for a clearer jelly. Do not squeeze the cloth too hard; a gentle squeeze at the end is fine.
- Measure out 4 cups (960 ml) of strained cherry juice. If you are short, top off with a little water or unsweetened cherry juice. If you have extra, reserve or freeze it for another use.
- While the juice drains, wash jars, lids, and bands in hot, soapy water and rinse well. Keep the jars hot in a 200°F (95°C) oven or in simmering water so they do not crack when filled with hot jelly. Prepare a canning pot or deep stockpot with a rack and simmering water.
- Pour the 4 cups of cherry juice into a large pot. Stir in the bottled lemon juice and powdered fruit pectin, whisking well to avoid lumps.
- Place the pot over high heat and bring the mixture to a full rolling boil, stirring constantly. A full rolling boil does not stop bubbling when stirred.
- Add all of the sugar at once, stirring constantly until dissolved. Return to a full rolling boil and cook for 1–2 minutes, stirring. Skim off any foam that forms; you can add a small pat of butter to help reduce foam. The jelly will look glossy and slightly thickened.
- To test the set, place a small spoonful of hot jelly on a chilled plate. Let it sit for a minute, then push it gently with your finger. If it wrinkles slightly, it is ready. If still liquid, boil another minute and test again. The gelling temperature is around 220°F (104°C) at sea level.
- Working quickly, ladle the hot cherry jelly into hot jars, leaving 1/4 inch (0.5 cm) headspace. Wipe the rims with a clean, damp cloth. Place lids on top and screw bands on just fingertip-tight.
- Place the filled jars on the rack in the canning pot, ensuring they are covered by at least 1–2 inches of water. Bring to a full boil, then process for 10 minutes, adjusting time for altitude if necessary.
- Turn off the heat and let the jars rest in the water for 5 minutes. Carefully remove them and place on a towel-lined counter. Do not tilt or shake the jars. Let sit 12–24 hours, then check seals; lids should be concave and not flex when pressed.
- Label each jar with the date and “Cherry Jelly.” Store sealed jars in a cool, dark place. Refrigerate any jars that did not seal and use those first.