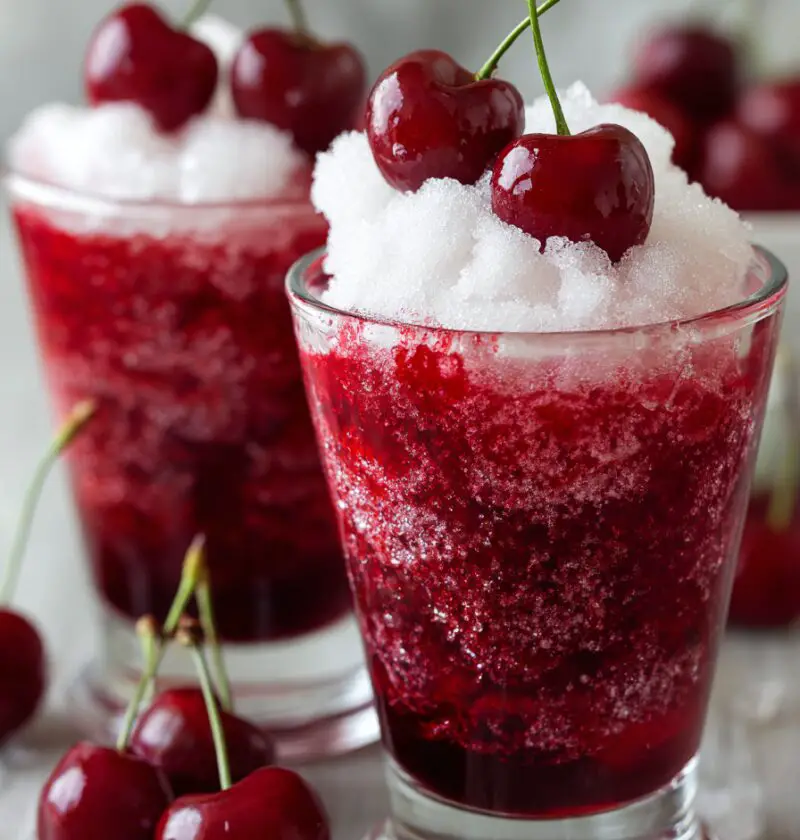
Cherries In The Snow Recipe
If you’re craving a cool, creamy treat that looks like a winter wonderland but tastes like summertime, this Cherries In The Snow Recipe is your new go-to no-bake, crowd-pleasing, layered cherry dessert.
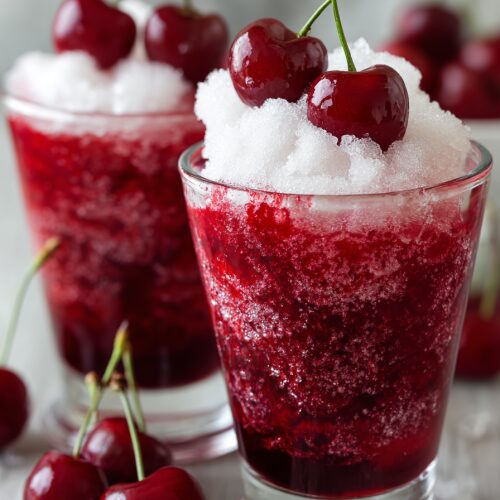
I’ve been making some version of this cherries in the snow dessert since my kids were in grade school, and it still gets that little hush at the table when people take their first bite. It’s a creamy cherry dessert recipe with a graham cracker crust, fluffy cream cheese layer, and a ruby-red cherry pie filling on top—simple, nostalgic, and quietly impressive. Think of it as the relaxed cousin of cheesecake: all the flavor, way less fuss.
What Is Cherries In The Snow (And Why We Love It So Much)
Cherries In The Snow is a classic American church-basement dessert—part cherry cream cheese dessert, part icebox cake—that layers a buttery graham cracker crust, a lightly sweetened cream cheese and whipped topping mixture, and glossy cherry pie filling. It’s served cold, scooped out in squares or spoonfuls.
What makes this cherries in the snow recipe special?
- It’s no bake. No turning on the oven, no worrying about cracking a cheesecake. I live in the Midwest and even I have my “too hot to bake” days.
- It scales beautifully. You can make it in a small dish for a quiet Sunday or double it for a potluck.
- It’s flexible. Want to make a cherry dessert with Cool Whip? Great. Prefer real whipped cream? Also great.
- It looks festive without you spending three hours with a piping bag.
I love serving this cherry and cream cheese layers dessert for:
- Christmas Eve (it really does look like snow and holly berries)
- Fourth of July cookouts (red and white, and if you add a few blueberries…)
- Church potlucks and family reunions
- Random Tuesdays when I need a little something sweet that doesn’t take all day
And while I won’t claim this is health food, you can lighten it up a bit with Greek yogurt and reduced-fat cream cheese if that suits your style. It’s all about that balance, right?
Why You’ll Love This Cherries In The Snow Recipe
1. No oven required – This is a no bake cherry dessert, so your kitchen stays cool and you don’t have to babysit anything.
2. Simple ingredients – Graham crackers, butter, cream cheese, sugar, whipped topping, cherry pie filling—things you probably recognize and can find anywhere.
3. Quick prep, long payoff – About 20 minutes of hands-on time, then the fridge does the rest.
4. Make-ahead friendly – This cherry cream cheese dessert actually tastes better after it chills, which makes your life easier on busy days.
5. Crowd-pleasing classic – It’s nostalgic enough for Grandma and still “TikTok cute” for your teens.
6. Customizable layers – Mix and match crusts, fillings, and toppings to create your own layered cherry dessert signature.
7. Great for beginners – If you’re new to desserts, this is very forgiving; a little uneven layer here or there just looks rustic.
8. Travel-friendly – It sets up nicely in the fridge, so it’s perfect for taking along in a 9×13 pan to parties or potlucks.
Ingredients
Here’s everything you’ll need for this Cherries In The Snow Recipe. I’ll share the classic version and a couple of light tweaks as we go.
For the graham cracker crust:
- 2 cups graham cracker crumbs
(about 14–16 full sheets; you can buy pre-crushed crumbs to save time) - 1/2 cup (1 stick, 113 g) unsalted butter, melted
- 2 tablespoons granulated sugar
- Pinch of fine sea salt (optional but helps balance the sweetness)
For the creamy “snow” layer:
- 16 ounces (2 blocks) cream cheese, softened to room temperature
(you can use 1/3-less-fat cream cheese, but avoid fat-free; it won’t set as nicely) - 3/4 cup powdered sugar, sifted
- 1 teaspoon pure vanilla extract
- 1/4 cup whole milk or half-and-half
(this loosens the mixture slightly for easier spreading; you can use 2% in a pinch) - 8 ounces whipped topping (like Cool Whip), thawed
OR 3 cups heavy whipping cream, whipped to stiff peaks with 3–4 tablespoons powdered sugar
For the cherry layer:
- 2 cans (21 ounces each) cherry pie filling
(look for a brand with lots of whole cherries; I like Lucky Leaf or Comstock)
Optional garnish:
- Additional whipped topping or whipped cream, for swirls on top
- Fresh mint leaves or shaved white chocolate, for a pretty finish
- Crushed graham crackers, for sprinkling over the top
Ingredient tips:
- Graham crackers: If crushing them yourself, use a food processor, or place the crackers in a zip-top bag and roll with a rolling pin until very fine. Larger chunks will make the crust crumbly.
- Cream cheese: Room temperature is your friend here. Let it sit out at least 45–60 minutes; cold cream cheese tends to be lumpy.
- Whipped topping: Thaw in the fridge, not on the counter. It keeps the texture more stable.
- Cherry pie filling: If it looks very gelatinous, give it a gentle stir in a bowl before adding. This helps distribute the fruit more evenly.
Directions
-
Prepare your pan.
Lightly grease a 9×13-inch baking dish with butter or a thin swipe of neutral oil, or line it with parchment for easier lifting and slicing later. -
Make the graham cracker crust.
In a medium bowl, combine graham cracker crumbs, granulated sugar, salt, and melted butter. Stir with a fork until every crumb looks moistened and the mixture resembles damp sand. -
Press and chill the crust.
Pour the crumb mixture into the prepared pan. Use the bottom of a measuring cup or drinking glass to press it firmly and evenly across the bottom. Take your time here; a well-packed crust holds together beautifully. Transfer the pan to the fridge for at least 15 minutes while you prepare the filling. -
Beat the cream cheese.
In a large mixing bowl (a stand mixer or hand mixer both work well), beat the softened cream cheese on medium speed for 2–3 minutes, until completely smooth and fluffy. Scrape down the sides of the bowl once or twice so you don’t get any sneaky lumps. -
Sweeten and flavor the “snow.”
Add the powdered sugar and vanilla to the cream cheese. Mix on low at first (so you don’t decorate your kitchen in sugar), then on medium until well combined. Slowly add the milk or half-and-half, about a tablespoon at a time, just until the mixture is smooth, thick, and spreadable—like a soft cheesecake filling. -
Fold in the whipped topping.
Gently fold the whipped topping (or your homemade whipped cream) into the cream cheese mixture using a spatula. Use slow, broad strokes, turning the bowl as you go, so you don’t knock out too much air. This gives that light, cloud-like “snow” texture we want in this creamy cherry dessert recipe. -
Layer the cream over the crust.
Take the crust out of the fridge. Spoon the cream cheese mixture onto the crust, then spread it evenly with an offset spatula or the back of a spoon. Try not to press too hard so you keep some of that fluffiness. Smooth the top as best you can—it doesn’t need to be perfect. -
Add the cherry layer.
In a separate bowl, gently stir the cherry pie filling to distribute the cherries. Then carefully spoon it over the cream layer in several large dollops. Use a clean spatula to spread it out into an even, ruby-red layer. If you push too hard, you’ll swirl the layers, which honestly still tastes great—just less tidy. -
Chill until set.
Cover the pan tightly with plastic wrap or foil and refrigerate for at least 4 hours, or ideally overnight. This helps the graham cracker crust firm up and allows the cherry and cream cheese layers to set into that soft-but-sliceable texture. -
Garnish and serve.
Just before serving, you can add small dollops of whipped topping, a sprinkle of crushed graham crackers, or a few fresh mint leaves on top. Cut into squares with a sharp knife, wiping the blade with a warm, damp cloth between cuts for the neatest slices. Serve cold.
Servings & Timing
- Yield: About 12 generous servings, or up to 16 smaller pieces
- Prep Time: 20 minutes
- Chill Time: 4–8 hours (overnight is best)
- Total Time: 4 hours 20 minutes to 8 hours 20 minutes
This recipe is a classic “make it now, enjoy it later” situation—20 minutes of real work, then you’re off the hook.
Fun Variations To Try
You know what? Once you make this once, you’ll probably start dreaming up your own spins. Here are a few ideas to get you started:
- Chocolate Cherry In The Snow – Add 2 tablespoons cocoa powder to the graham cracker crust and sprinkle mini chocolate chips over the cream layer before adding the cherries.
- Lighter Greek Yogurt Version – Replace half of the cream cheese with thick vanilla Greek yogurt; it adds a little tang and bumps up the protein.
- Gluten-Free Cherry Snow – Use gluten-free graham crackers or gluten-free shortbread cookies for the crust.
- Black Forest Twist – Use one can cherry pie filling and one can of pitted canned cherries (drained) and drizzle the top with melted dark chocolate.
- Berry Medley Snow – Swap the cherry pie filling for mixed berry pie filling for a colorful, “red, blue, and snow” moment.
- Individual Mason Jar Desserts – Layer the crust, cream, and cherries into small jars for cute, portable party desserts.
Storage & Make-Ahead Tips
This cherries in the snow dessert is a superstar when it comes to planning ahead.
-
Refrigerator:
Store covered in the fridge for 3–4 days. The crust will soften slightly each day but still tastes wonderful. -
Freezer:
You can freeze this dessert tightly wrapped for up to 1 month. For best results, freeze it without the cherry topping; add the cherry layer after thawing so it stays glossy and fresh-looking. -
Thawing:
Thaw overnight in the fridge. If you’re starting from frozen with the cherry layer already on, expect a softer, more spoonable texture—that’s not a flaw, just a bit more like a trifle. -
Make-ahead advice:
If making this for a special event, assemble it the day before, chill overnight, and garnish just before serving. If you’re taking it to a potluck, keep it cold during transport with ice packs in an insulated bag or cooler.
Notes From My Kitchen (Little Things That Make A Big Difference)
-
Let the cream cheese REALLY soften.
This is the number one thing that separates a silky, bakery-style cherry and cream cheese layers dessert from a lumpy one. If you forget, you can soften the wrapped blocks on a plate in the microwave at 50% power in 10-second bursts—but be careful not to melt them. -
Pack that crust.
Use something flat and heavy—a measuring cup, a jar, the bottom of a glass—and really press the graham layer down. It gives you those neat slices that hold together when you lift them out. -
Don’t rush the chill time.
I know, it’s torture. But the cream layer needs time to set. If you cut into it too early, it’ll taste good but look messy and loose. -
Adjust sweetness for your crowd.
If you prefer desserts on the less-sweet side, reduce the powdered sugar in the cream layer to 1/2 cup and use a cherry pie filling labeled “less sugar” or “light.” -
A note on Cool Whip vs. real whipped cream.
Cool Whip gives a very stable, fluffy layer and holds up longer in the fridge—great for potlucks. Real whipped cream tastes a bit richer and more “homemade,” but it can deflate a touch over time. Both work; it’s more about your preference.
FAQs About Cherries In The Snow
1. Can I make this Cherries In The Snow Recipe without Cool Whip?
Yes. Use about 3 cups of heavy cream whipped with 3–4 tablespoons powdered sugar to stiff peaks and fold it into the cream cheese mixture in place of the whipped topping.
2. Can I use homemade cherry pie filling instead of canned?
Absolutely. Just make sure your homemade filling is cooled completely and thick enough to spoon and spread without running.
3. Why is my cream cheese layer lumpy?
Most likely, the cream cheese was too cold or not beaten long enough. Next time, let it soften fully and beat it well before adding sugar or liquid.
4. How far in advance can I make this dessert?
You can make this cherries in the snow dessert up to 24 hours ahead for best texture. It will still be good for up to 3–4 days, but the crust softens over time.
5. Can I use a different crust, like Oreos or vanilla wafers?
Yes, you can substitute finely crushed Oreos (filling included) or vanilla wafers in equal amounts. Just keep the same butter ratio and press firmly.
6. My crust is crumbly when I cut it. What went wrong?
Usually, it means the crust wasn’t packed tightly enough or didn’t have enough butter. Try pressing more firmly next time, and don’t skip the chill time.
7. Can I cut this recipe in half?
You can halve all the ingredients and make it in an 8×8 or 9×9-inch square pan. The layers will be slightly thicker, which a lot of people love.
8. Is this dessert safe to leave out at a party?
Because it’s dairy-based, try to keep it refrigerated as much as possible. It can sit out for about 1–2 hours safely; after that, pop it back in the fridge.
Conclusion
This Cherries In The Snow Recipe is one of those easy cherry dessert recipes that quietly earns a spot in your regular rotation—no bake, creamy, and so pretty on the table. The buttery graham cracker crust, the fluffy cream cheese “snow,” and that jewel-toned cherry topping come together in a way that feels both comforting and just a little bit fancy.
If you make this cherries in the snow dessert, I’d love to hear how it goes—tell me who you shared it with, what pan you used, or which variation you tried. And if you’re in the mood for more no-bake treats, try a layered lemon dessert or a chocolate-peanut-butter icebox cake next; they all play very nicely together on the dessert table.
Cherries In The Snow
Ingredients
- 2 cups graham cracker crumbs about 14–16 full sheets; or use pre-crushed crumbs
- 1/2 cup unsalted butter melted
- 2 tablespoons granulated sugar
- fine sea salt pinch, optional, helps balance sweetness
- 16 ounces cream cheese 2 blocks, softened to room temperature; 1/3-less-fat is OK, avoid fat-free
- 3/4 cup powdered sugar sifted
- 1 teaspoon pure vanilla extract
- 1/4 cup milk or half-and-half whole milk preferred; 2% works in a pinch
- 8 ounces whipped topping such as Cool Whip, thawed; OR substitute 3 cups heavy cream whipped with 3–4 tablespoons powdered sugar
- 2 cans cherry pie filling 21 ounces each; look for a brand with lots of whole cherries
- additional whipped topping or whipped cream optional, for garnish
- fresh mint leaves or shaved white chocolate optional, for garnish
- crushed graham crackers optional, for sprinkling on top
Instructions
- Lightly grease a 9×13-inch baking dish with butter or a thin swipe of neutral oil, or line it with parchment paper for easier lifting and slicing later.
- In a medium bowl, combine the graham cracker crumbs, granulated sugar, salt (if using), and melted butter. Stir with a fork until every crumb looks moistened and the mixture resembles damp sand.
- Pour the crumb mixture into the prepared pan. Use the bottom of a measuring cup or drinking glass to press it firmly and evenly across the bottom. Transfer the pan to the fridge and chill for at least 15 minutes while you prepare the filling.
- In a large mixing bowl, beat the softened cream cheese with a hand mixer or stand mixer on medium speed for 2–3 minutes, until completely smooth and fluffy. Scrape down the sides of the bowl once or twice to avoid lumps.
- Add the powdered sugar and vanilla to the cream cheese. Mix on low at first, then increase to medium until well combined. Slowly add the milk or half-and-half, about a tablespoon at a time, just until the mixture is smooth, thick, and spreadable like a soft cheesecake filling.
- Gently fold the whipped topping (or homemade whipped cream) into the cream cheese mixture using a spatula. Use slow, broad strokes, turning the bowl as you go, to keep the mixture light and fluffy.
- Remove the chilled crust from the fridge. Spoon the cream cheese mixture onto the crust and spread it evenly with an offset spatula or the back of a spoon. Try not to press too hard so you keep the airy texture. Smooth the top.
- In a separate bowl, gently stir the cherry pie filling to distribute the cherries evenly. Spoon the filling over the cream layer in several large dollops, then use a clean spatula to spread it into an even layer over the top.
- Cover the pan tightly with plastic wrap or foil and refrigerate for at least 4 hours, or ideally overnight, until the crust has firmed and the layers are softly set and sliceable.
- Just before serving, garnish with dollops of whipped topping, a sprinkle of crushed graham crackers, or fresh mint leaves or shaved white chocolate, if desired. Cut into squares with a sharp knife, wiping the blade with a warm, damp cloth between cuts for neat slices. Serve cold.