Bubblegum Fudge Recipe is the kind of sweet, no-bake, microwave-friendly treat that makes kids’ eyes light up and adults secretly sneak seconds—creamy, colorful fudge squares with big bubblegum flavor and almost no effort.
What Is Bubblegum Fudge, Anyway?
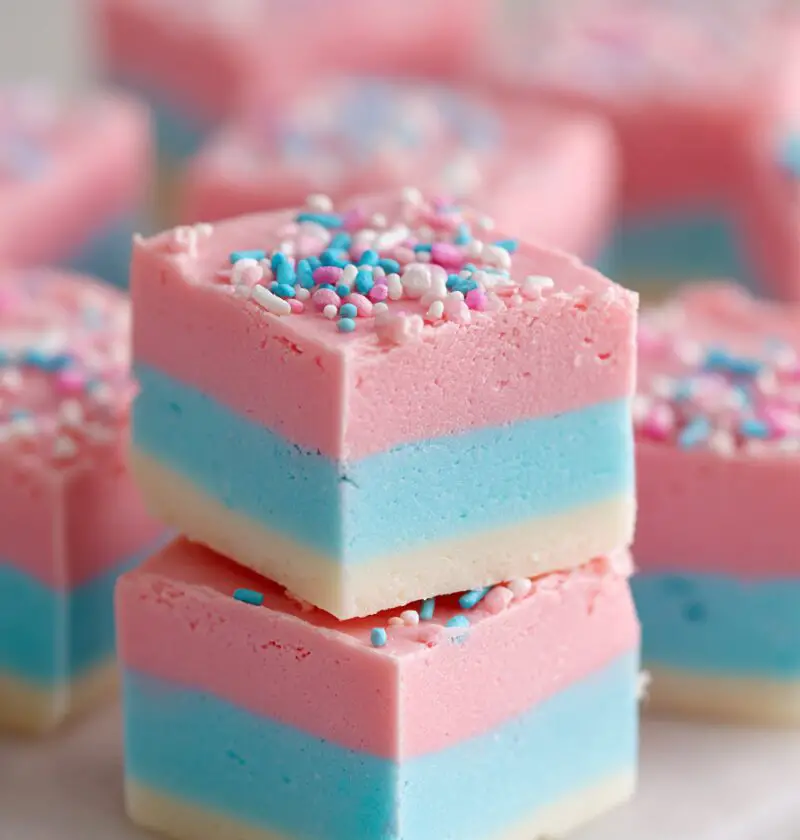
If you grew up in the United States like I did, you probably remember that first piece of bubblegum from the corner store—bright pink, wildly sweet, and a little bit magical. This Bubblegum Fudge Recipe takes that nostalgic candy flavor and turns it into a creamy bubblegum fudge that’s soft, smooth, and perfect for parties.
This is a no bake bubblegum fudge that uses the microwave instead of the stove, so it’s as low-stress as it gets. Melt, stir, pour, chill. That’s the whole story. It’s an easy bubblegum fudge that works for birthday parties, baby showers, Valentine’s Day, or those random Tuesday nights when everyone needs a treat.
I love making this as a kid friendly fudge recipe when my grandchildren visit. They “help” by sprinkling on the decorations and licking the spatula, of course. The bright pink bubblegum fudge always ends up being the first thing gone from a dessert table—people are curious at first, then they come back because it tastes like candy-shop happiness in fudge form.
Now, is this a health food? No. But it is special. It’s a fun dessert recipe that brings joy, and there’s a kind of emotional nutrition in that too. Plus, it’s small-batch friendly, so you’re not stuck with a mountain of leftovers… unless you want that.
Let me explain what makes this homemade bubblegum fudge work so well and how you can customize it for your family and events.
Why You’ll Love This Bubblegum Fudge Recipe
- No stove, no stress – this is a true microwave bubblegum fudge.
- Just a few pantry ingredients and candy flavoring—nothing fussy or hard to find.
- Ready to chill in about 10 minutes of hands-on time—a quick fudge recipe for busy days.
- Perfect kid friendly fudge recipe for sleepovers, classroom treats, and birthday party fudge.
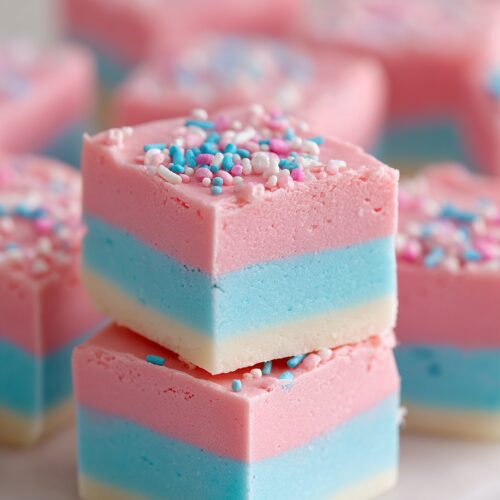
- Gorgeous pastel pink bubblegum fudge that looks stunning on dessert platters.
- Creamy, smooth texture that melts in your mouth and doesn’t turn grainy.
- Easy to customize with sprinkles, fun colors, or even different candy flavored fudge ideas.
- No baking skills required—if you can press buttons on a microwave, you can make this.
- Great make-ahead sweet bubblegum dessert for holidays, parties, or gifting.
- Cuts into neat, colorful fudge squares that pack and travel well.
Ingredients
Here’s what you’ll need for this Bubblegum Fudge Recipe. Measure everything before you start; the process moves quickly once the chocolate is melted.
-
3 cups (about 18 oz / 510 g) white chocolate chips
(Use a good-quality brand like Ghirardelli or Guittard; cheaper chips can be waxy and harder to melt.) -
1 can (14 oz / 396 g) sweetened condensed milk
(Make sure it’s condensed milk, not evaporated milk—they’re very different.) -
2–3 teaspoons bubblegum flavoring oil or extract
(LorAnn Bubble Gum flavor works very well; start with 2 teaspoons and taste, as flavor strength varies.) -
1 teaspoon pure vanilla extract
(This softens the candy flavor and adds a bakery-style warmth.) -
A pinch of fine sea salt
(It sounds odd in candy, but salt brightens sweet flavors and keeps the fudge from tasting flat.) -
2–3 drops pink gel food coloring, plus more as needed
(Gel or paste food coloring gives strong color with very little liquid—avoid liquid drops if you can.) -
1 tablespoon unsalted butter, room temperature (optional but recommended)
(Adds extra creaminess and helps the fudge slice cleanly.) -
¼–½ cup rainbow sprinkles or pink/white jimmies, for topping (optional but fun)
(Use “jimmies” style sprinkles rather than nonpareils; they bleed less into the fudge.) -
Nonstick spray or extra butter, for greasing the pan
You can also add a handful of mini marshmallows or chopped marshmallow bits on top for even more candy-shop vibes, but I usually keep it simple and let the bubblegum flavored fudge shine.

Step-by-Step Directions
-
Prepare the pan.
Line an 8×8-inch (20×20 cm) square baking pan with parchment paper, letting it hang over the sides like a sling. Lightly grease the paper with nonstick spray or a thin swipe of butter. This makes it easy to lift the fudge out later. -
Melt the white chocolate and condensed milk.
In a large microwave-safe bowl, add the white chocolate chips and sweetened condensed milk. Microwave on 50% power for 60 seconds. Stir well, then microwave in 20–30 second bursts, stirring after each, until the chocolate is fully melted and the mixture is smooth and glossy. Don’t rush this—if the chocolate overheats, it can seize. -
Add butter, salt, and vanilla.
While the mixture is still warm, stir in the butter, pinch of salt, and vanilla extract. Stir until the butter melts and everything is fully combined. The mixture should be thick but pourable. -
Add bubblegum flavoring.
Stir in 2 teaspoons of bubblegum flavoring oil or extract. Taste a tiny bit (careful, it may still be warm). If you want a stronger, “chewier” candy flavored fudge taste, add the remaining ½–1 teaspoon. Remember, flavors often bloom more as the fudge sets, so don’t go too wild. -
Tint it that perfect bubblegum pink.
Add 2–3 drops of pink gel food coloring and stir well. If the color is too light, add another drop at a time. For a classic pink bubblegum fudge, I like a soft medium pink, not neon—but if you’re making this for a child’s birthday, you can absolutely go bright. -
Pour and smooth the fudge.
Quickly scrape the creamy bubblegum fudge mixture into your prepared pan. Use a spatula to spread it out evenly and smooth the top. It will start to thicken as it cools, so work fairly fast here. -
Decorate with sprinkles (optional but adorable).
While the fudge is still warm and soft, scatter sprinkles evenly over the top. Gently pat them with clean hands or the back of a spoon so they stick. This makes it look like party-ready birthday party fudge with very little effort. -
Chill until firm.
Place the pan in the refrigerator and chill for at least 2 hours, or until fully set. For cleaner cuts, I like to chill it 3–4 hours or even overnight. If you’re in a hurry, you can place it in the freezer for about 45–60 minutes, though the texture is best when it sets slowly in the fridge. -
Slice into colorful fudge squares.
Lift the fudge out using the parchment paper overhang. Place it on a cutting board and use a large, sharp knife to cut it into 1-inch squares. Wipe the knife with a warm, damp cloth between cuts for tidy edges. -
Serve and enjoy.
Arrange the sweet bubblegum dessert squares on a platter or pack them into treat boxes. Watch them disappear. This batch usually doesn’t last long at my house.
Servings & Timing
- Yield: About 36 small squares (1-inch pieces), or 25 larger squares
- Prep Time: 10–15 minutes
- Chill Time: 2–4 hours (hands-off)
- Total Time: About 2 hours, 15 minutes to 4 hours, 15 minutes, depending on chilling
If you’re planning this for a party, I recommend making it the day before so you’re not rushing, and you get those neat, firm edges.
Fun Variations To Try
You know what? Once you master this basic Bubblegum Fudge Recipe, it becomes a template for all sorts of fun dessert recipe ideas.
- Blue Bubblegum Swirl: Tint half the fudge pink and half light blue, then swirl them together in the pan for a cotton-candy style effect.
- Birthday Confetti Fudge: Fold ¼ cup rainbow sprinkles directly into the fudge, then add more on top for over-the-top birthday party fudge.
- Half-and-Half Candy Fudge: Pour a layer of bubblegum fudge, chill 10 minutes, then add a layer of vanilla or strawberry fudge on top.
- Sugar Cookie Crunch: Gently press chopped sugar cookies or vanilla wafers over the top before chilling for extra texture.
- Dairy-Free Version: Use dairy-free white baking chips and a sweetened condensed coconut milk; chill a bit longer for the fudge to fully set.
- Marshmallow Party Fudge: Stir in 1 cup mini marshmallows right before pouring into the pan for a fluffier, candy shop-style treat.
Storage & Reheating (Or Thawing) Tips
This fudge is a keeper—literally.
- Counter: For serving same day, you can leave the fudge at cool room temperature for up to 4 hours.
- Refrigerator: Store in an airtight container, with layers separated by parchment paper, for up to 7–10 days. The texture stays creamy and pleasant.
- Freezer: For long-term storage, freeze the fudge squares on a baking sheet until firm, then transfer to a freezer-safe bag or container. They’ll keep well for about 2 months.
To serve from frozen, let the fudge sit in the fridge for a few hours or at room temperature for 20–30 minutes. No reheating needed—just thaw and enjoy. If your kitchen is warm in summer, keep the fudge in the fridge and pull out small amounts as needed so it doesn’t get too soft.
For make-ahead holiday trays, I like to freeze a few different flavors—this bubblegum flavored fudge, plus maybe a chocolate-peanut and a peppermint—then build mixed platters the morning of the event.
Notes From My Kitchen
- Flavor strength matters. Bubblegum flavoring oils are stronger than extracts. Always start small, taste, and adjust—too much can become harsh rather than fun.
- Use fresh white chocolate. Old or poor-quality white chocolate can seize or clump. If your chips don’t melt smoothly, stir in a teaspoon of neutral oil (like canola) and microwave gently again.
- Don’t skip the salt. That tiny pinch makes a big difference. Without it, the fudge can taste one-note sweet.
- Let it set fully. I know it’s tempting to cut early, but under-chilled fudge can be sticky and hard to slice. Give it time; your patience is rewarded with neat little squares.
- Cut smaller for kids. For little ones, cut bite-size pieces—about ¾-inch squares. It’s very sweet, so a little goes a long way.
- Dress it up. White platters or simple cake stands make the colorful fudge squares pop, especially at baby showers or gender reveals.
Honestly, the biggest thing I learned testing this recipe is that adults “just trying a piece” are usually the ones sneaking back for seconds. Nostalgia is powerful.
Frequently Asked Questions
Can I make this Bubblegum Fudge Recipe on the stovetop instead of the microwave?
Yes. Gently heat the white chocolate chips and condensed milk in a heavy saucepan over low heat, stirring constantly, until melted and smooth. Then follow the remaining steps as written.
What if I can’t find bubblegum flavoring?
You can order bubblegum flavoring online (LorAnn is widely available), or check baking supply stores. Without it, the fudge will just taste like vanilla white chocolate, which is still delicious but not quite “bubblegum.”
Why did my fudge turn grainy or dry?
This usually happens when the white chocolate overheats. Next time, use 50% power in the microwave, stir often, and stop heating as soon as the chips are mostly melted—stirring will finish the job.
Can I use food coloring drops instead of gel?
You can, but go slowly. Too much liquid food coloring can change the texture. Gel or paste gives stronger color with less liquid, which is why I recommend it for this recipe.
Is this fudge safe for nut-free classrooms?
The recipe itself doesn’t use nuts, but always check your white chocolate and flavoring labels, as some are processed in facilities with nuts. If you’re sending this to school, label it clearly and follow your school’s policies.
Can I make this recipe sugar-free or low-sugar?
This recipe relies on sweetened condensed milk and white chocolate, both very sweet. You can experiment with sugar-free chips and a low-sugar condensed milk alternative, but the texture and flavor will change quite a bit.
How do I prevent the fudge from sticking to the parchment?
Greasing the parchment lightly with butter or nonstick spray before you pour in the fudge will keep it from clinging and make lifting and slicing easier.
Can I double the recipe?
Yes—use a 9×13-inch pan for a double batch. The thickness will be similar; just be sure your bowl is big enough to stir everything well.
Final Thoughts
This Bubblegum Fudge Recipe is everything I love in a treat: simple, playful, and a little nostalgic. It’s the kind of creamy bubblegum fudge that makes kids grin and lets grown-ups feel like kids again for a moment.
If you give this homemade bubblegum fudge a try, let me know how it turns out—share your tweaks, your sprinkle choices, and whether it showed up at a birthday party, baby shower, or just a cozy movie night at home. And if you enjoy candy flavored fudge recipes like this, you might also like pairing it with classic chocolate fudge or a tangy strawberry fudge on your next dessert tray.
Bubblegum Fudge
Ingredients
- 3 cups white chocolate chips about 18 oz / 510 g; use good-quality chips for best melting
- 14 oz can sweetened condensed milk about 396 g; not evaporated milk
- 2–3 teaspoons bubblegum flavoring oil or extract start with 2 teaspoons and adjust to taste; LorAnn Bubble Gum flavor recommended
- 1 teaspoon pure vanilla extract
- 1 pinch fine sea salt
- 2–3 drops pink gel food coloring add more as needed for desired shade
- 1 tablespoon unsalted butter room temperature; optional but recommended for extra creaminess
- 1/4–1/2 cup rainbow sprinkles or pink/white jimmies optional, for topping; jimmies bleed less than nonpareils
- nonstick spray or extra butter for greasing the pan
- mini marshmallows or chopped marshmallow bits optional, for topping or stirring in
Instructions
- Line an 8×8-inch (20×20 cm) square baking pan with parchment paper, leaving an overhang on two sides to create a sling. Lightly grease the parchment with nonstick spray or a thin layer of butter to prevent sticking.1/4–1/2 cup rainbow sprinkles or pink/white jimmies, nonstick spray or extra butter
- In a large microwave-safe bowl, combine the white chocolate chips and sweetened condensed milk. Microwave on 50% power for 60 seconds, then stir well. Continue microwaving in 20–30 second bursts at 50% power, stirring after each, until the chocolate is fully melted and the mixture is smooth and glossy. Do not overheat or the chocolate can seize.3 cups white chocolate chips, 14 oz can sweetened condensed milk
- While the mixture is still warm, stir in the unsalted butter, pinch of fine sea salt, and vanilla extract. Mix until the butter is completely melted and the mixture is thick but pourable.2–3 teaspoons bubblegum flavoring oil or extract, 1 teaspoon pure vanilla extract, 1 pinch fine sea salt, 1 tablespoon unsalted butter
- Stir in 2 teaspoons of bubblegum flavoring oil or extract. Taste a tiny amount carefully (it may still be warm) and add up to 1 additional teaspoon if you want a stronger bubblegum flavor. Keep in mind the flavor will intensify slightly as the fudge sets.2–3 teaspoons bubblegum flavoring oil or extract
- Add 2–3 drops of pink gel food coloring and stir until the color is evenly distributed. Add more gel a drop at a time until you reach your desired bubblegum pink shade.2–3 drops pink gel food coloring
- Quickly scrape the warm bubblegum fudge mixture into the prepared pan. Use a spatula to spread it evenly and smooth the top. The fudge will begin to thicken as it cools, so work efficiently.
- While the fudge is still warm and soft, scatter rainbow sprinkles, jimmies, or mini marshmallows evenly over the top. Gently press them in with clean hands or the back of a spoon so they adhere.1/4–1/2 cup rainbow sprinkles or pink/white jimmies, mini marshmallows or chopped marshmallow bits
- Refrigerate the pan for at least 2 hours, or until the fudge is fully set. For the cleanest cuts, chill 3–4 hours or overnight. If you’re in a hurry, you can chill in the freezer for 45–60 minutes, though the texture is best when set slowly in the refrigerator.
- Use the parchment sling to lift the set fudge out of the pan and place it on a cutting board. With a large, sharp knife, cut into approximately 1-inch squares, wiping the blade with a warm, damp cloth between cuts for neat edges.
- Arrange the bubblegum fudge squares on a serving platter or pack into treat boxes. Store leftovers in an airtight container: at cool room temperature for up to 4 hours for serving, refrigerated for 7–10 days, or frozen for up to 2 months.