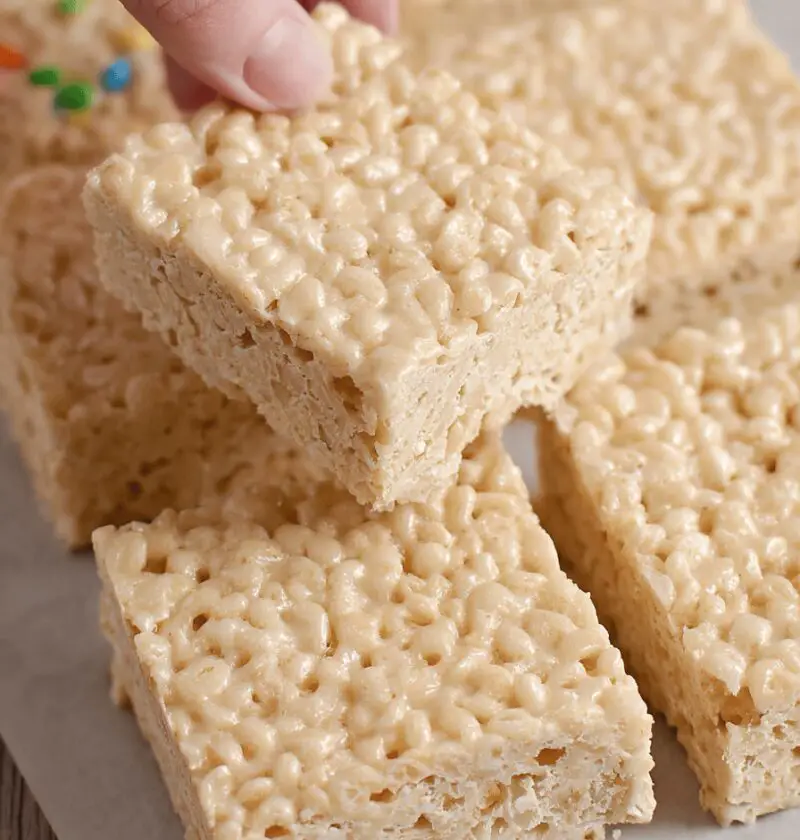
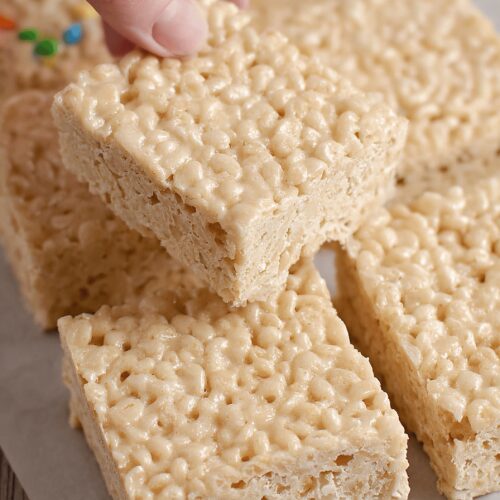
These Browned Butter Krispies Treats are a no-bake, indulgent twist on a classic homemade dessert—crispy, sweet, and impossibly gooey.
Here’s the thing: these Browned Butter Krispies Treats take your childhood favorite and give it an adult-level upgrade. By gently browning unsalted butter until it smells toasty and nutty, you deepen the sweetness of melty marshmallows and pillowy, crispy rice cereal. I first whipped up this easy recipe for my granddaughter’s birthday picnic last summer, and well, let’s just say they vanished faster than ice cream on a hot day. You’ll love them for potlucks, after-school snacks, or whenever you crave that warm, homemade comfort of marshmallows and crispy cereal—with a grown-up flavor twist.
Why You’ll Love This Recipe
- No oven needed—just a sturdy saucepan and a bowl
- Ready in under 45 minutes, including chill time
- Browned butter adds a rich, caramel-like depth
- Crispy, gooey texture that’s endlessly snackable
- Perfect for gift boxes, lunchboxes, or movie night
- Easily customizable with mix-ins like chocolate chips or nuts
- Kid-approved and adult-delighted—everyone’s happy
- Uses pantry staples you likely have on hand
Ingredients
• ½ cup (1 stick) unsalted butter (I like Plugrá or Kerrygold for flavor)
• 10 oz (about 6 cups) mini marshmallows (Jet-Puffed works great)
• 1 tsp pure vanilla extract
• ¼ tsp kosher salt (optional, but heightens sweetness)
• 6 cups crispy rice cereal (Kellogg’s Rice Krispies or a gluten-free brand)
• Optional mix-ins: ½ cup mini chocolate chips, ½ cup chopped toasted nuts, or a sprinkle of sea salt on top
Tip: Use the freshest cereal you can find—stale flakes lose their snap. Measure cereal lightly in the cup, don’t pack it down.

Directions
- Brown the butter
Place butter in a medium, heavy-bottomed saucepan over medium heat. Stir gently as it melts, then keeps bubbling and turning golden brown—about 5–7 minutes. Watch closely; the moment it smells nutty and you see tiny browned bits, remove from heat. - Melt in marshmallows
Lower heat to low and add all the mini marshmallows. Stir continuously with a silicone spatula until melted and glossy—around 2–3 minutes. This helps prevent scorching. - Stir in vanilla and salt
Off the heat, whisk in vanilla extract and salt. It’s a small step that makes a big difference in flavor. - Fold in the cereal
Quickly pour in the crispy rice cereal, folding gently until every flake is coated in that gooey, browned-butter mash. Aim for even coverage without overmixing. - Press into pan
Line a 9×13-inch baking dish with parchment paper, leaving an overhang. Transfer the mixture and press it down firmly with a buttered spatula or oiled hands—just enough to compact without crushing the crispy bits. - Chill and slice
Refrigerate for at least 30 minutes until set. Use a sharp knife (warmed under hot water and wiped dry) to cut into bars or fun shapes.
Servings & Timing
Yield: Makes 12–16 bars
Prep Time: 15 minutes
Chill Time: 30 minutes
Total Time: 45 minutes
Variations
• Peanut Butter Swirl: Melt ¼ cup peanut butter and drizzle on top before chilling.
• Toasted Coconut: Stir in ½ cup shredded coconut with the cereal.
• Chocolate Crunch: Swap half the cereal for cocoa krispies.
• Gluten-Free Delight: Use a certified gluten-free rice cereal.
• Sea Salt Drizzle: Finish with a pinch of flaky sea salt for sweet-salty contrast.
Storage & Reheating
Store in an airtight container at room temperature for up to 3 days, or refrigerate for up to a week. For longer keeping, freeze tightly wrapped for up to 3 months—thaw at room temperature before serving. No reheating needed; they’re best enjoyed cool and crisp.
Notes
• Watch the butter closely—once it bubbles, it browns fast.
• Parchment paper with overhang makes lifting bars out a breeze.
• Press gently: too much force yields dense, less crispy treats.
• If marshmallow mixture starts to seize, lower the heat further.
• Freshly opened cereal really elevates the crunch factor.
FAQs
Q: Can I use salted butter instead?
A: Yes, but omit the kosher salt or reduce to ⅛ teaspoon to avoid oversalting.
Q: Why are my treats chewy instead of crispy?
A: Likely too much pressure when pressing into the pan—lightly press next time.
Q: Can I substitute margarine or oil?
A: Margarine contains water, leading to gummy texture; stick with real butter for best results.
Q: How do I get clean cuts?
A: Warm your knife under hot water, wipe it dry, then slice in a single smooth motion.
Q: Are these freezer-friendly?
A: Absolutely—wrap in plastic and foil, freeze up to 3 months. Thaw on the counter.
Q: Can I add food coloring?
A: You can tint melted marshmallows, but it may alter texture slightly.
Q: What’s the best pan for browning butter?
A: A light-colored, heavy-bottomed skillet helps you see the color change.
Q: Can I make mini bites?
A: Yes—just press into a square pan and cut into bite-sized pieces or use mini muffin tins.
Conclusion
These Browned Butter Krispies Treats turn a simple snack into an indulgent dessert with toasty, buttery depth and that classic crispy-marshmallow pull. Give them a try, then swing back here to let me know how they fared—or tag your photo on Instagram. Happy snacking!
Browned Butter Krispies Treats
Ingredients
- 1/2 cup unsalted butter I like Plugrá or Kerrygold for flavor
- 10 oz mini marshmallows Jet-Puffed works great
- 1 tsp pure vanilla extract
- 1/4 tsp kosher salt optional, but heightens sweetness
- 6 cups crispy rice cereal Kellogg’s Rice Krispies or a gluten-free brand
- Optional mix-ins: 1/2 cup mini chocolate chips, 1/2 cup chopped toasted nuts, or a sprinkle of sea salt on top
Instructions
- Place butter in a medium, heavy-bottomed saucepan over medium heat. Stir gently as it melts, then keeps bubbling and turning golden brown—about 5–7 minutes. Watch closely; the moment it smells nutty and you see tiny browned bits, remove from heat.
- Lower heat to low and add all the mini marshmallows. Stir continuously with a silicone spatula until melted and glossy—around 2–3 minutes. This helps prevent scorching.
- Off the heat, whisk in vanilla extract and salt. It’s a small step that makes a big difference in flavor.
- Quickly pour in the crispy rice cereal, folding gently until every flake is coated in that gooey, browned-butter mash. Aim for even coverage without overmixing.
- Line a 9×13-inch baking dish with parchment paper, leaving an overhang. Transfer the mixture and press it down firmly with a buttered spatula or oiled hands—just enough to compact without crushing the crispy bits.
- Refrigerate for at least 30 minutes until set. Use a sharp knife (warmed under hot water and wiped dry) to cut into bars or fun shapes.