Beer Can Chicken Recipe
If you want a Beer Can Chicken Recipe that gives you juicy meat, crisp skin, and that unmistakable backyard barbecue flavor, this one is a keeper.
A Backyard Classic That Still Deserves the Hype
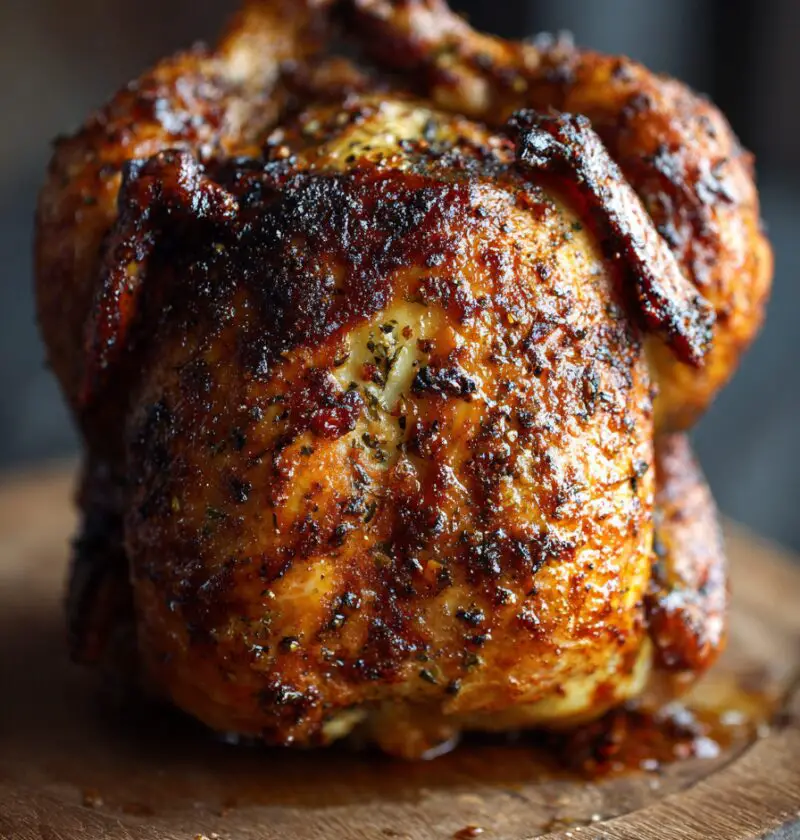
There’s something so satisfying about setting a whole chicken over a can, closing the grill lid, and letting the magic happen. This beer can chicken is one of those recipes that feels a little playful, a little old-school, and absolutely perfect for summer weekends, game days, and family cookouts. The chicken cooks upright while the beer and heat work together to keep the inside moist, while the outside turns deeply golden with beautifully crispy chicken skin.
I’ve been making some version of this for years, especially when the weather warms up and everyone starts wandering out to the patio with iced tea in hand. It’s one of my favorite ways to make a grilled chicken recipe feel special without making life harder. And while this dish is often thought of as pure barbecue fare, it’s also a practical easy chicken dinner when you want to stretch a whole bird and serve a crowd.
What makes this recipe really shine is balance: a savory seasoned chicken rub, steady indirect heat, and just enough time for the fat to render and the skin to crisp. Done right, it tastes like a mash-up of barbecue chicken recipe, whole roasted chicken, and smoked chicken recipe flavors—all in one beautifully bronzed bird.
Why You’ll Love This Recipe
- Delivers tender, juicy chicken with very little fuss
- Creates crisp, flavorful skin that’s hard to resist
- Perfect for a summer cookout or casual weekend dinner
- Uses simple pantry spices for a bold seasoned rub
- Feels impressive, but it’s easy enough for beginners
- Great for grills, pellet cookers, and some smokers
- Makes a wonderful backyard barbecue chicken centerpiece
- Works well with many flavor twists and side dishes
- A smart way to cook a roasted whole chicken outdoors
- Leftovers are fantastic in salads, wraps, and sandwiches
Ingredients
For the chicken:
- 1 whole chicken (4 to 5 pounds), giblets removed
- 1 can beer (12 ounces; lager, pilsner, or pale ale work best)
- 1 tablespoon olive oil
For the seasoned chicken rub:
- 2 teaspoons kosher salt
- 1 teaspoon black pepper
- 2 teaspoons smoked paprika
- 1 teaspoon garlic powder
- 1 teaspoon onion powder
- 1 teaspoon chili powder
- 1 teaspoon brown sugar
- 1/2 teaspoon dried thyme
- 1/2 teaspoon dried oregano
- 1/4 teaspoon cayenne pepper (optional, for heat)
Optional for extra flavor:
- 1 tablespoon Dijon mustard (for helping the rub stick)
- 1 lemon wedge to tuck into the neck cavity
- 2 sprigs fresh rosemary or thyme
Ingredient tips:
- Chicken: A 4- to 5-pound bird cooks more evenly than a very large one. Smaller birds also stand more securely on a can.
- Beer: Use a mild beer. Very bitter IPAs can leave a sharper taste. Honestly, a basic lager does the job beautifully.
- Brown sugar: This helps with browning, but don’t overdo it or the skin may darken too fast over hotter grills.
- Smoked paprika: If you want more of that bbq chicken feel without long smoking time, this is your friend.
- Olive oil: Helps the rub cling and supports even browning. Avocado oil works too.

Directions
-
Preheat your grill for indirect heat.
Set your grill to about 375°F to 400°F. If you’re using a gas grill, light the side burners and leave the center off. If you’re using charcoal, bank the coals to the sides. You want indirect heat, not flames licking the chicken. That’s the difference between beautifully bronzed skin and a scorched mess. -
Pat the chicken very dry.
Use paper towels and really dry the skin well. This little step matters more than people think. Dry skin equals better browning and more reliable crispy chicken skin. -
Mix the rub.
In a small bowl, stir together the salt, pepper, smoked paprika, garlic powder, onion powder, chili powder, brown sugar, thyme, oregano, and cayenne. The mix should smell savory, smoky, and just a touch sweet. -
Season the chicken all over.
Rub the chicken with olive oil, or brush it lightly with Dijon first if you like a stronger crust. Sprinkle the seasoning over every part of the chicken—top, sides, wings, and a little inside the cavity too. Don’t be shy; a whole bird can take a good amount of seasoning. -
Prepare the beer can.
Open the beer and pour out—or drink—about half the can. I mean, why waste good beer? If you’d like, drop in a sprig of rosemary or a pinch of the rub for extra aroma. -
Set the chicken on the can.
Carefully lower the chicken cavity over the can so the bird stands upright. The legs should act like a tripod with the can, helping keep it stable. If your grill grates are uneven or you’re nervous about tipping, use a beer can chicken holder. They’re inexpensive and worth it. -
Place the chicken on the grill.
Put the chicken over indirect heat and close the lid. Try to keep the grill temperature steady around 375°F. A little fluctuation is fine—grilling has personality—but wild swings will affect cooking time. -
Cook until golden and done.
Grill for 1 hour to 1 hour 20 minutes, depending on the size of the bird and your grill. Start checking around the 55-minute mark. The chicken is ready when the thickest part of the thigh reaches 175°F and the breast reaches 160°F to 165°F on an instant-read thermometer. The juices should run clear, and the skin should look deep golden brown. -
Rest before carving.
Using heat-safe gloves or sturdy tongs, carefully remove the chicken from the grill. Let it rest for 10 to 15 minutes before lifting it off the can. Be careful—the can and liquid inside are very hot. Resting lets the juices settle, and that’s part of what makes this such a juicy chicken recipe. -
Carve and serve.
Remove the can, transfer the chicken to a cutting board, and carve into breasts, thighs, drumsticks, and wings. Serve with grilled corn, potato salad, baked beans, or a crisp green salad. This is an outdoor grilling recipe that really doesn’t need much fuss on the side.
Servings & Timing
- Yield: 4 to 6 servings
- Prep Time: 15 minutes
- Cook Time: 1 hour to 1 hour 20 minutes
- Rest Time: 10 to 15 minutes
- Total Time: About 1 hour 30 minutes
For planning purposes, most 4- to 5-pound chickens cooked at 375°F finish in roughly 70 to 80 minutes, but always trust your thermometer over the clock. That’s the real kitchen truth.
Variations
- Spicy BBQ Version: Add 1 extra teaspoon chili powder and brush with barbecue sauce during the last 15 minutes.
- Herb and Lemon Style: Swap the chili powder for extra thyme, rosemary, and lemon zest.
- Smoky Texas Twist: Use a stronger smoked paprika rub and cook on a pellet grill with hickory or mesquite pellets.
- Garlic Butter Finish: Brush melted garlic butter over the chicken right after resting for richer flavor.
- No Beer Option: Use sparkling water, apple cider, or chicken broth if you prefer not to cook with beer.
- Sweet Heat Version: Add a little honey powder or extra brown sugar plus cayenne for that sweet-spicy barbecue edge.
Storage & Reheating
Store leftover chicken in an airtight container in the refrigerator for up to 4 days. If you’d like to freeze it, remove the meat from the bones and freeze in freezer-safe bags or containers for up to 3 months.
To reheat, place the chicken in a baking dish with a splash of broth, cover loosely with foil, and warm at 300°F until heated through. For smaller portions, the microwave works fine, though the skin won’t stay crisp. If you want to revive that texture a bit, pop reheated pieces under the broiler for 1 to 2 minutes.
Make-ahead tip: You can season the chicken up to 24 hours in advance and keep it uncovered in the fridge. That actually helps dry the skin, which can improve browning the next day.
Notes
One thing I learned after testing this recipe more than a few times is that grill temperature matters more than the beer itself. People love to debate whether the beer truly steams the chicken enough to flavor it deeply. Fair question. In my experience, the can helps keep the bird upright and supports even cooking, while the real flavor heroes are the rub, the rendered fat, and the steady heat.
Another helpful note: if your chicken skin turns dark before the inside is done, your grill is running too hot. Lower the heat and loosely tent the top with foil. On the other hand, if the chicken is cooked through but the skin needs more color, move it briefly over slightly higher heat at the end—but keep a close eye on it.
For the best texture, let the chicken sit uncovered in the refrigerator for a few hours after seasoning. It sounds fussy, but it’s not. It’s one of those small steps that pays off in a big way, like ironing a linen shirt before company comes over.
FAQs
Can I make beer can chicken in the oven?
Yes, though it shines most as an outdoor grilling recipe. If baking indoors, place the chicken in a roasting pan and cook at 375°F until it reaches a safe internal temperature.
What kind of beer is best for beer can chicken?
A light lager or pilsner is ideal. They’re mild, not too bitter, and let the chicken and seasoning stay center stage.
Is beer can chicken actually safe?
Yes, as long as the chicken is cooked to a safe internal temperature and handled carefully. Use heatproof gloves and be cautious when removing the hot can.
Do I need a special beer can chicken holder?
No, but it helps with stability. If you grill often, it’s a handy little gadget and tends to make the process less awkward.
Why isn’t my chicken skin crispy?
Usually the skin was too wet at the start, or the grill temp was too low. Pat the chicken dry and cook at a steady medium-high indirect heat.
Can I use a dry rub and sauce together?
Absolutely. Use the dry rub first, then brush on sauce in the final 10 to 15 minutes so it doesn’t burn.
How do I know when the chicken is done?
Use an instant-read thermometer. The breast should be 160°F to 165°F, and the thigh should reach about 175°F for tender dark meat.
Can I make this as a smoked chicken recipe?
Yes, and it’s delicious. Cook it lower and slower on a smoker—around 275°F to 300°F—until the internal temperature is right and the skin is nicely colored.
Conclusion
This Beer Can Chicken Recipe is everything a great cookout meal should be—simple, flavorful, juicy, and a little bit fun. Between the smoky rub, the crackly skin, and that tender roasted whole chicken texture, it’s easy to see why this classic never really goes out of style.
If you give it a try, I’d love to hear how it turned out for you. Leave a comment with your favorite rub twist, and if you’re planning a full cookout, pair this with your favorite slaw, grilled vegetables, or another barbecue chicken recipe from your summer lineup.