Baked Rice Recipe (Oven-Baked, Foolproof & Fluffy Every Time)
If you’ve ever struggled with soggy or scorched rice on the stovetop, this Baked Rice Recipe is about to become your new go-to side dish—fluffy, hands-off, and perfect for weeknights or feeding a hungry crowd.
A good pan of oven baked rice is one of those quiet little kitchen secrets that makes dinner feel almost effortless. This baked rice recipe gives you tender, separate grains, rich flavor from broth, and a beautiful, comforting aroma that fills the whole house.
I’m a 50-year-old mom and grandma in the Midwest, and I can tell you: when the holidays hit or company’s on the way, I don’t have time to babysit a pot. That’s when this easy baked rice, especially as a baked rice casserole-style side, saves me. I can pop it in the oven next to a roast chicken or a pan of meatloaf and know the starch is completely handled.
This baked white rice uses broth for extra flavor, bakes up wonderfully fluffy, and works as a simple baked rice base you can customize a hundred different ways—add veggies, spices, or even a little cheese for a heartier baked rice side dish. It’s also a fantastic baked rice for a crowd: double it, use a bigger pan, and you’re set.
Why You’ll Love This Baked Rice Recipe
1. Completely hands-off cooking
Once you pour in the hot broth and cover the pan, the oven does the work—no stirring, no watching for boil-overs, no crusty burnt spots on the bottom of the pot.
2. Fluffy baked rice every single time
The oven’s gentle, even heat helps the grains cook uniformly, so you end up with tender, separate grains instead of clumps or mush.
3. Perfect baked rice side dish for any meal
This works with everything: roast chicken, grilled pork chops, baked salmon, meatballs, stews, or even as a base for a veggie bowl.
4. Easy baked rice that scales for a crowd
Need baked rice for a crowd? This recipe doubles or triples beautifully in a larger casserole dish—great for potlucks, church suppers, or big family dinners.
5. Pantry-friendly and budget-conscious
You need just rice, broth (or water), a little butter or oil, and salt—nothing fancy, but the results taste like you fussed.
6. Customizable flavor
Use chicken, vegetable, or beef broth; add herbs, garlic, or onion; turn it into a baked rice casserole with vegetables and cheese. You can change the personality of the dish without changing the method.
7. Reliable make-ahead side
This baked rice recipe reheats beautifully, so you can cook it earlier in the day (or even the day before) and warm it when you’re ready to eat.
8. Works for different dietary needs
Gluten-free by nature, and easy to adapt for dairy-free or low-sodium diets—just adjust the broth and fat you use.
Ingredients
For this simple, fluffy oven baked rice, you’ll need:
- 1 1/2 cups long-grain white rice
- (Such as standard long-grain or basmati; avoid instant or quick-cooking rice for this method.)
- 2 1/2 cups low-sodium chicken broth
- (Or vegetable broth for a vegetarian version; low-sodium lets you control the salt better.)
- 2 tablespoons unsalted butter, melted
- (Or olive oil or avocado oil for a dairy-free option.)
- 1/2 teaspoon fine sea salt
- (Use less if your broth is fully salted; taste your broth before adding salt.)
- 1/4 teaspoon black pepper
- (Freshly ground if you can—it makes a difference in a simple dish like this.)
- 1 small bay leaf (optional)
- (Gives a subtle, savory aroma that makes the rice taste a bit more “restaurant-style.”)
- 1 teaspoon garlic powder or 1–2 cloves minced garlic (optional)
- (Garlic powder disperses more evenly, while fresh garlic gives little pockets of flavor.)
- 1 tablespoon finely chopped fresh parsley or 1 teaspoon dried parsley (optional, for serving)
Ingredient Tips:
- Rice: Long-grain white rice is your friend here. It stays nice and fluffy. Short-grain tends to be stickier, which is fine if that’s what you like, but it will be a bit less separate.
- Broth vs. water: Using broth turns a simple baked rice recipe into a more flavorful baked rice with broth, almost like a very simple pilaf. If you only have water, just be a tad more generous with the salt.
- Butter vs. oil: Butter gives richer flavor and a softer texture. Oil makes it a touch lighter and dairy-free—use whatever suits your meal and your pantry.
Directions (Step-by-Step, Friendly & Foolproof)
-
Preheat the oven
Preheat your oven to 375°F (190°C). Place a rack in the center so the rice cooks evenly. While the oven heats, lightly grease an 8×8-inch (or similar) baking dish with butter or oil. -
Rinse the rice (this really matters)
Place the rice in a fine-mesh strainer and rinse under cool water, swishing it gently with your hand, until the water runs mostly clear. This removes excess surface starch and helps your baked rice stay fluffy instead of gummy. Let it drain well for a minute or two. -
Warm the broth
In a small saucepan, heat the chicken broth over medium heat until it’s hot but not boiling—just steaming with a few tiny bubbles around the edges. Warming the broth jump-starts the cooking process and helps the oven baked rice cook more evenly. (If you’re in a real rush, you can microwave the broth in a heatproof measuring cup.) -
Combine rice and seasonings in the baking dish
Spread the rinsed, drained rice evenly in the prepared baking dish. Sprinkle in the salt, pepper, garlic powder (if using), and tuck in the bay leaf. Drizzle the melted butter (or oil) over the top. Give everything a gentle stir so the grains are evenly coated. -
Pour the hot broth over the rice
Carefully pour the hot broth over the rice mixture. Give a very gentle stir—just one or two passes with a spoon—to distribute the seasonings without breaking the grains. -
Cover tightly
Cover the baking dish tightly with heavy-duty aluminum foil, sealing the edges well so the steam doesn’t escape. This is crucial; the trapped steam is what cooks the rice. (If your dish has a tight-fitting lid, you can use that plus foil for extra insurance.) -
Bake until tender and fluffy
Transfer the covered dish to the oven and bake for 25–30 minutes. At 25 minutes, carefully peel back a corner of the foil and check: the liquid should be absorbed, and the rice should be tender when you taste a few grains from the center. If it’s still a bit firm or there’s visible liquid, re-cover and bake for another 5–10 minutes. -
Rest before fluffing
When the rice is cooked, remove the dish from the oven and keep it covered. Let it rest for 10 minutes. This short rest lets the steam finish distributing through the rice, giving you that fluffy baked rice texture we’re after. -
Fluff and serve
Remove the foil, discard the bay leaf, and use a fork to gently fluff the rice, lifting and turning rather than stirring hard. Sprinkle with chopped parsley if you like. Serve hot as a baked rice side dish, or cool it slightly for meal prep containers.
Servings & Timing
- Yield: About 4–6 servings as a side dish
- Prep Time: 10 minutes (including rinsing the rice and warming the broth)
- Bake Time: 25–35 minutes
- Rest Time: 10 minutes
- Total Time: About 45–55 minutes
Most of that time is totally hands-off, which I love. You can be roasting vegetables, tossing a salad, or, if you’re like me, doing a quick kitchen dance to Motown while the rice bakes.
Variations (Make This Baked Rice Recipe Your Own)
You know what? This simple baked rice is like a blank canvas. Here are a few ways I love to change it up:
-
Herb & Lemon Baked Rice
Stir in 1 teaspoon dried Italian seasoning before baking, then finish with 1–2 tablespoons fresh lemon juice and extra parsley when fluffing. -
Vegetable Baked Rice Casserole
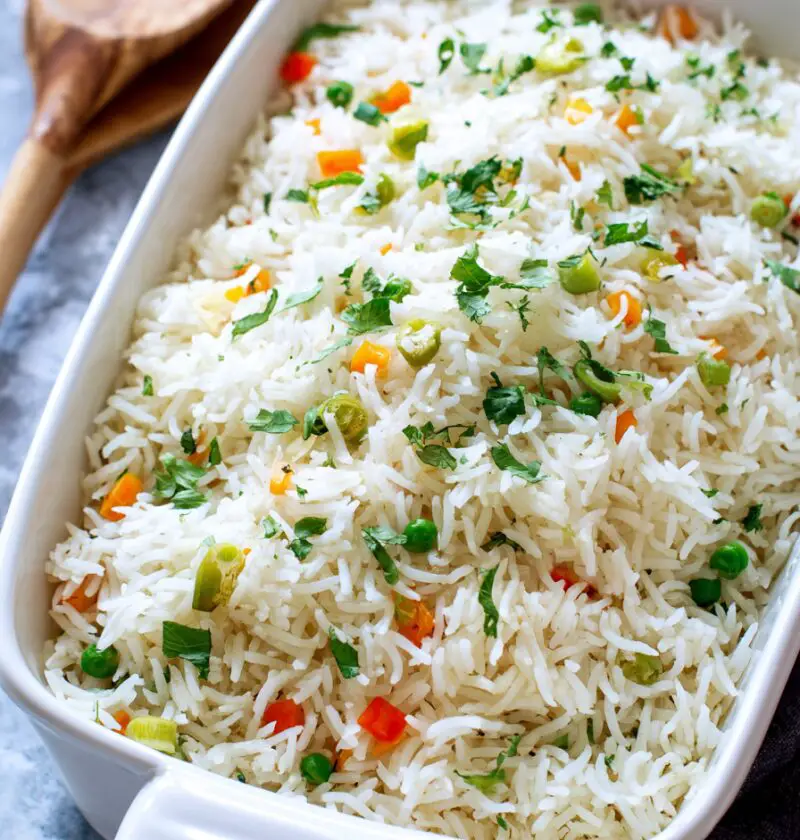
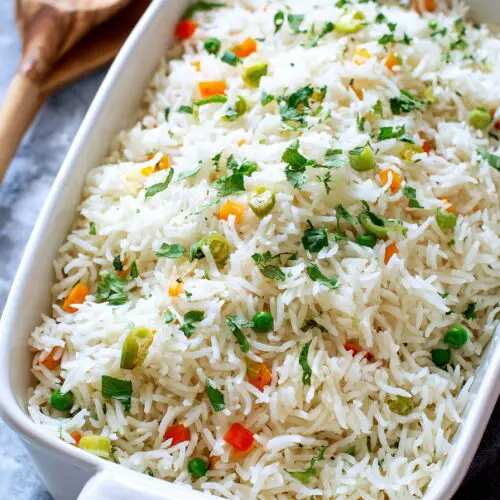
Add 1–1 1/2 cups frozen mixed vegetables (peas, carrots, corn) right on top of the rice before adding broth for a one-pan baked rice casserole side. -
Garlic Butter Baked Rice
Use 3 tablespoons butter and 2–3 minced garlic cloves; sauté the garlic in the butter for 1–2 minutes, then add both to the rice for a rich, cozy flavor. -
Cheesy Baked Rice
After the rice is baked and fluffed, stir in 1/2–1 cup shredded cheddar, Monterey Jack, or Parmesan while it’s still hot for a creamy, kid-approved twist. -
Spiced Baked Rice for Taco Night
Use half chicken broth and half tomato sauce, add 1 teaspoon chili powder and 1/2 teaspoon ground cumin, and finish with lime juice and cilantro. -
Brown Rice Version
Swap in long-grain brown rice, increase the broth to 3 cups, and bake covered for 50–55 minutes, then rest and fluff as directed.
Storage & Reheating Tips
One of the things I love most about this easy baked rice is how well it handles leftovers.
-
Storing in the fridge:
Let the rice cool to room temperature, then transfer it to an airtight container. Store in the refrigerator for up to 4–5 days. -
Freezing baked rice:
Spread leftover rice on a parchment-lined baking sheet to cool completely, then portion it into freezer bags or containers. It freezes well for up to 2 months. Press the bags flat so they thaw quickly. -
Reheating (microwave):
Place rice in a microwave-safe dish, sprinkle with a tablespoon or two of water or broth (this adds back moisture), cover loosely, and microwave in 30–60 second bursts, fluffing in between, until hot. -
Reheating (stovetop):
Add rice to a skillet with a splash of water or broth; cover and warm over low heat, stirring occasionally, until heated through. -
Make-ahead advice:
For holidays or meal prep, you can bake this rice a few hours in advance. Keep it covered and at room temperature for up to 1–2 hours, then reheat gently with a bit of extra broth. For longer make-ahead (like the day before), refrigerate and reheat with extra moisture.
Notes From My Kitchen (Little Lessons Learned)
- Foil really matters: If the foil isn’t sealed tightly, steam sneaks out and the rice cooks unevenly. If your foil is thin, double it.
- Hot broth = even cooking: Starting with hot broth shortens the active baking time and gives more consistent texture from corner to center. I tested this with cold vs. hot broth, and the hot broth batch won every time—especially in glass dishes.
- Pan size affects texture: A deeper dish (like an 8×8 or a small Dutch oven) keeps the rice moister; a very large, shallow pan can dry the edges faster. If you use a 9×13 pan, check the rice a bit earlier and be sure it’s well covered.
- Salt is personal: Broths vary wildly in saltiness. I always recommend tasting your broth first; if it tastes pleasant but not too salty, you’re good. If it’s very salty, cut back on added salt.
- Resting time is not optional: I used to skip the 10-minute rest—then I wondered why my rice felt slightly uneven. That short wait lets the last bit of steam work through the grains, and the texture is noticeably better.
- For a gentle crust (if you like it): If you enjoy a tiny bit of toasty rice on the edges, uncover the dish for the last 5 minutes of baking. You’ll get a touch of golden color without drying out the whole pan.
FAQs About This Baked Rice Recipe
1. Can I use jasmine or basmati rice?
Yes. Jasmine and basmati both work beautifully in this baked rice recipe; use the same ratio of rice to liquid but start checking for doneness at about 22–23 minutes.
2. Can I make this with brown rice?
You can. Use long-grain brown rice, increase the liquid to about 3 cups for 1 1/2 cups rice, and bake for 50–55 minutes, then rest 10 minutes before fluffing.
3. My rice turned out a little crunchy—what went wrong?
Usually that means it needed more liquid or a bit more time. Sprinkle 1/4–1/2 cup hot water or broth over the rice, cover tightly, and bake another 5–10 minutes, then rest and fluff again.
4. Why do I need to rinse the rice first?
Rinsing removes extra surface starch that can make the rice clump and get gummy. It’s a small step that makes a big difference for fluffy baked rice.
5. Can I use water instead of broth?
Absolutely. Just add a bit more salt and maybe a pinch of garlic powder or onion powder to round out the flavor since water doesn’t add any seasoning.
6. Is this baked rice recipe gluten-free?
Yes, rice is naturally gluten-free, and so long as your broth is certified gluten-free, the whole dish will be too.
7. Can I double this recipe?
Yes. Use a 9×13-inch baking dish, double all ingredients, and expect the baking time to land around 30–35 minutes, but start checking at 28 minutes.
8. Can I add raw chicken or meat to the rice while it bakes?
I don’t recommend it with this basic timing; the rice and meat have different cooking needs. Cook your protein separately and serve it over the rice, or follow a specific baked rice casserole recipe that accounts for raw meat.
Conclusion: A Simple, Cozy Staple You’ll Make Again and Again
This Baked Rice Recipe is the kind of quiet hero that doesn’t shout for attention but makes every meal smoother—fluffy, flavorful, and so easy that it practically cooks itself. From busy Tuesday nights to Thanksgiving dinner, it’s a reliable oven baked rice method you can trust and tweak to fit your family’s tastes.
If you try this baked rice side dish, I’d truly love to hear how it turned out—leave a comment, share your favorite variation, or tell me if you made it as baked rice for a crowd. And if you’re in the mood to keep cooking, pair it with a simple sheet pan chicken, slow cooker pot roast, or your favorite roasted veggies for a no-fuss, comforting dinner.
Baked Rice (Oven-Baked, Foolproof & Fluffy Every Time)
Ingredients
- 1 1/2 cups long-grain white rice such as standard long-grain or basmati; do not use instant or quick-cooking rice
- 2 1/2 cups low-sodium chicken broth or vegetable broth for a vegetarian version
- 2 tablespoons unsalted butter melted; or olive oil or avocado oil for dairy-free
- 1/2 teaspoon fine sea salt use less if your broth is fully salted; taste broth first
- 1/4 teaspoon black pepper freshly ground if possible
- 1 small bay leaf optional
- 1 teaspoon garlic powder or 1–2 cloves garlic, minced, optional
- 1 tablespoon fresh parsley finely chopped, or 1 teaspoon dried parsley, optional for serving
Instructions
- Preheat your oven to 375°F (190°C). Place a rack in the center of the oven. Lightly grease an 8x8-inch (or similar) baking dish with butter or oil.
- Place the rice in a fine-mesh strainer and rinse under cool running water, swishing it gently with your hand, until the water runs mostly clear. Let the rice drain well for 1–2 minutes to remove excess water. This helps the rice bake up fluffy instead of gummy.
- In a small saucepan, heat the chicken broth over medium heat until hot but not boiling. It should be steaming with a few small bubbles around the edges. Alternatively, heat the broth in a microwave-safe measuring cup in the microwave until hot.
- Spread the rinsed, drained rice evenly in the prepared baking dish. Sprinkle the salt, black pepper, and garlic powder (if using) over the rice. Tuck the bay leaf into the rice. Drizzle the melted butter or oil evenly over the top and gently stir so the grains are lightly coated and seasonings are distributed.
- Carefully pour the hot broth over the rice mixture in the baking dish. Give the rice a very gentle stir—just one or two passes with a spoon—to distribute the seasonings without breaking the grains.
- Cover the baking dish tightly with heavy-duty aluminum foil, sealing the edges well so steam cannot escape. If your dish has a tight-fitting lid, you can use it along with foil for an extra-tight seal.
- Transfer the covered dish to the preheated oven and bake for 25–30 minutes. After 25 minutes, carefully peel back a corner of the foil and check the rice: the liquid should be absorbed and the grains should be tender when you taste a few from the center. If the rice is still firm or there is visible liquid, re-cover and bake for an additional 5–10 minutes.
- When the rice is tender and the liquid is absorbed, remove the dish from the oven and keep it covered. Let the rice rest, covered, for 10 minutes to allow the steam to finish distributing through the grains.
- Remove the foil, discard the bay leaf, and gently fluff the rice with a fork, lifting and turning the grains rather than stirring vigorously. Sprinkle with chopped parsley, if using, and serve hot as a side dish or cool slightly for meal prep containers.