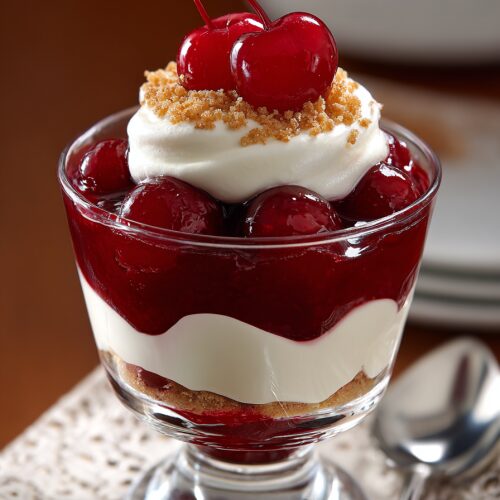
Cherry Delight
Cherry Delight is a classic no-bake layered dessert with a buttery graham cracker crust, a fluffy cream cheese and whipped topping layer, and a glossy cherry pie filling on top. Perfect for potlucks, holidays, and easy make-ahead entertaining.
Ingredients
- 2 1/2 cups graham cracker crumbs about 18 full sheets, finely crushed
- 1/2 cup unsalted butter melted
- 1/4 cup granulated sugar
- 8 oz cream cheese softened to room temperature; full-fat recommended
- 1 cup powdered sugar
- 1 teaspoon pure vanilla extract
- 8 oz frozen whipped topping thawed (such as Cool Whip)
- 2 cans cherry pie filling 21 oz each
- extra graham cracker crumbs optional, for sprinkling on top
- fresh mint leaves optional, for garnish
- fresh cherries optional, for serving
Instructions
- Lightly grease a 9x13-inch baking dish with a thin coat of butter or nonstick spray. Ensure the cream cheese is softened to room temperature; if it is still cold, let it sit at room temperature for 20–30 minutes.
- In a medium bowl, combine the graham cracker crumbs and granulated sugar. Pour in the melted butter and mix until all the crumbs are evenly moistened and the mixture resembles damp sand. If the mixture seems too dry, add an additional tablespoon of melted butter.2 1/2 cups graham cracker crumbs, 1/2 cup unsalted butter, 1/4 cup granulated sugar
- Transfer the crumb mixture to the prepared baking dish. Press it firmly into an even layer using your hands, the back of a spoon, or the bottom of a measuring cup, paying special attention to the corners. Refrigerate the crust for 20–30 minutes to allow it to firm up.
- In a large mixing bowl, beat the softened cream cheese with a hand mixer or stand mixer on medium speed until smooth and fluffy, 1–2 minutes. Add the powdered sugar and vanilla extract and beat again until completely smooth and creamy, scraping down the sides of the bowl as needed.8 oz cream cheese, 1 cup powdered sugar, 1 teaspoon pure vanilla extract
- Gently fold the thawed whipped topping into the cream cheese mixture using a spatula. Continue folding just until no large streaks remain, being careful not to deflate the mixture.8 oz frozen whipped topping
- Remove the chilled crust from the refrigerator. Dollop the cream cheese mixture evenly over the crust, then gently spread it into a smooth, even layer from edge to edge, taking care not to disturb the crust.
- Spoon the cherry pie filling evenly over the cream cheese layer. Use a spatula to gently spread it so that the entire surface, including the corners, is covered with cherries.2 cans cherry pie filling
- Cover the dish tightly with plastic wrap or foil and refrigerate for at least 4 hours, or preferably overnight, until the layers are fully set and the dessert is well chilled.
- Before serving, optionally sprinkle extra graham cracker crumbs on top and garnish with fresh cherries or mint leaves. Cut into squares with a sharp knife, wiping the blade between cuts for the neatest slices. Serve chilled.extra graham cracker crumbs, fresh mint leaves, fresh cherries
Notes
Variations: Substitute blueberry or strawberry pie filling for the cherry topping; add 2 tablespoons cocoa powder to the graham cracker crumbs and sprinkle mini chocolate chips over the cream cheese layer for a chocolate cherry version; use gluten-free graham crackers for a gluten-free crust; or layer the dessert into individual jars or cups for single-serve portions. Storage: Keep covered in the refrigerator for up to 4–5 days. For longer storage, freeze after chilling for up to 1–2 months, wrapped tightly in plastic wrap and foil; thaw in the refrigerator before serving. For the cleanest slices, chill thoroughly and cut with a hot knife wiped clean between cuts.
Love this recipe?Follow us at @thenandnowspace for more